Skip to content


A patch can look almost identical to another patch from the front while requiring a completely different installation method once it is turned over. One embroidered badge may contain heat-activated adhesive, another may have only a plastic stabilizing film, another may be designed for perimeter sewing, and another may use a removable liner over pressure-sensitive adhesive. Hook-and-loop, felt, PVC, rubber, leather-like backs, and industrial heat-seal systems create additional possibilities, so relying on appearance alone can easily lead to a wrong attachment method.
For most people, the important question is not simply, “What patch backing types exist?” The useful question is, “I already have this patch in my hand. What backing does it have, how certain can I be, and what should I safely do next?” A useful answer needs to connect visual inspection with attachment method, fabric compatibility, garment care, heat tolerance, flexibility, laundering, patch thickness, and the amount of movement the finished area will experience during normal use.
A 20+ year adhesive-industry perspective leads to one practical rule that prevents many patch failures: never identify a patch from one visual clue when several independent clues are available. A shiny rear can be structural plastic instead of heat-activated adhesive. A stiff patch may simply contain heavy embroidery or stabilizer. A removable-looking film may be part of the construction instead of a release liner. The safer process is to identify the structure first, confirm the intended attachment method second, evaluate the garment third, and only then choose heat, stitching, pressure-sensitive attachment, hook-and-loop, or a tested textile adhesive.
1. How Can You Identify a Patch Backing in 30 Seconds?
A quick patch inspection should collect information without changing the patch. Turn it over under bright, neutral lighting and examine the entire back before peeling, heating, wetting, scratching, or applying adhesive. Start with features that are difficult to misinterpret, such as a release liner or hook surface, before studying subtler details such as gloss, stiffness, and transparency. In most cases, a careful 30-second inspection can narrow the patch to one or two likely backing families even when the original packaging is missing.
Step 1: Check the Package, Listing, or Order History First
If the patch still has packaging or can be traced to an online order, use that information before trying to interpret the surface yourself. Look for words such as Iron-On, Sew-On, Heat Seal, Peel-and-Stick, Self-Adhesive, Pressure-Sensitive, Hook-and-Loop, Plastic Backing, No Backing, Pin Backing, or Magnetic Backing. A manufacturer statement carries considerably more weight than a guess based on whether the patch is white, shiny, smooth, stiff, or slightly rubbery.
The application instructions are just as important as the backing name. A supplier may specify a household iron, a heat press, a certain pressing time, a required level of pressure, a laundering restriction, or a statement that the backing is structural rather than adhesive. Your uploaded patch-use research makes the same recommendation: identify the backing and check the patch maker’s instructions before assuming all smooth rear surfaces use the same attachment process.
Evidence source — American Patch, Iron-On Patch Installation Guide
Step 2: Look for the Most Diagnostic Physical Feature
Many users immediately ask whether the back looks glossy, but gloss is not the strongest clue. Start with physical features that directly reveal how the patch is intended to attach. A clearly separate paper or film liner strongly suggests pressure-sensitive adhesive. A field of tiny hooks indicates hook-and-loop. Visible textile, embroidery threads, felt, or stabilizer without a separate adhesive layer makes sew-on construction more likely. Smooth continuous films need more caution because adhesive films and structural plastic can sometimes look surprisingly similar.
| What You See or Feel on the Back | Most Likely Backing | What It Usually Means | First Safe Action |
|---|---|---|---|
| Visible fabric, twill, embroidery thread, felt, or stabilizer | Sew-on / non-adhesive | Final attachment usually comes from stitching or a separately chosen adhesive | Inspect patch border and garment |
| Smooth, fairly continuous adhesive-looking film | Possible iron-on / heat-activated | Heat may activate the bonding layer | Find product-specific application instructions |
| Smooth, stiff plastic-like layer with no liner | Plastic structural backing | Layer may add rigidity rather than adhesion | Do not assume it is iron-on |
| Clearly removable paper or film over tacky adhesive | Peel-and-stick | Pressure-sensitive attachment | Keep liner attached until final placement |
| Dense field of tiny hooks | Hook-and-loop | Patch mates with a loop panel | Preserve the hook surface |
| Dense embroidered, felt, or textile rear | Sew-on or specialty construction | Back may support the patch rather than attach it | Confirm intended installation method |
| PVC, rubber, leather-like, or molded surface | Specialty backing | Ordinary textile assumptions may not apply | Follow material-specific instructions |
The important word in several rows is possible rather than definite. A good identification process uses more than one clue. When a patch has a removable liner, tacky pressure-sensitive adhesive below it, and seller information describing it as self-adhesive, identification confidence is high. When the only clue is that the rear looks smooth and shiny, the result should remain provisional until stronger evidence is found.
Step 3: Treat Shine, Smoothness, Stiffness, and Color as Supporting Clues
A glossy rear surface can result from plastic stabilizer, adhesive film, resin, lamination, coating, compressed textile, or another manufacturing layer. Stiffness has the same problem because heavy embroidery, dense felt, plastic film, dried adhesive, and laminated construction can all make a patch feel rigid. Color is weaker still; white, clear, cloudy, cream, gray, black, or slightly yellow backing colors are not universal codes used by every patch manufacturer.
A useful habit is to describe what is physically visible before naming the backing. Instead of immediately writing “iron-on,” record something such as “smooth continuous rear film, no liner visible, patch moderately stiff.” If the original supplier later confirms a heat-activated backing, the visual evidence supports the answer. If the supplier explains that the film is structural plastic, the cautious description has prevented an unnecessary heat test.
Step 4: Use a Static Decision Flow Instead of Guessing from a Photo
For a public resource page, a static identification flowchart is more reliable than an image-upload generator because reflections, focus, exposure, white balance, and camera angle can make different films appear nearly identical. The page should teach the user what to look for rather than create false precision from a photograph. The following flow can be saved, printed, or turned into a one-page visual reference without requiring any user interaction.
- Obvious removable liner? → Likely peel-and-stick or pressure-sensitive adhesive.
- Obvious hook surface? → Hook-and-loop.
- Visible textile, embroidery, twill, or felt with no attachment layer? → Likely sew-on or no-adhesive construction.
- Smooth continuous adhesive-looking film? → Possible iron-on or heat-activated backing.
- Smooth, rigid layer apparently integrated into the patch? → Possible structural plastic.
- PVC, rubber, leather-like, molded, or unfamiliar coated surface? → Specialty construction.
- Still uncertain? → Do not apply permanent heat or glue until stronger evidence is available.
Recommended static download for this section: Create a one-page “Patch Backing Identification Card.pdf” containing the six branches above, large close-up back-view examples, and the reminder “Visual identification narrows the possibilities; manufacturer information confirms the method.” This format follows the uploaded altruistic-URL strategy of giving users reference resources they can take away and apply directly.
2. What Do the Main Patch Backing Types Look and Feel Like?
Identification becomes much easier when you understand what each rear layer is supposed to accomplish. Some backings create the actual attachment, while others support the patch itself. This difference is critical because the same patch can contain more than one layer. An embroidered badge may have stabilizer for shape but still be sew-on; another may contain structural plastic plus an attachment method; another may combine a fusible layer with later perimeter stitching. The visible material on the back and the final installation method are therefore related, but they are not always the same category.
Sew-On or No-Adhesive Backing
A sew-on patch generally does not depend on a consumer-activated adhesive for its final attachment. Its back may show embroidery threads, twill, felt, stabilizer, or a clean reinforcement layer. Some professionally manufactured sew-on patches are surprisingly tidy on the rear, so the absence of loose thread does not prove that adhesive is hidden there. What matters is whether the patch was intended to be mechanically attached with thread.
When installation is by sewing, the outer border usually provides a practical stitching path. This can protect detailed embroidery, lettering, and logos because the needle does not need to pass through the most decorated center. Thick badges can also be easier to sew through at the border, particularly when a thimble and an appropriate needle are used.
Video evidence — Hand Sewing Needles Basics:
This Professor Pincushion video explains different hand-sewing needle styles, sizes, and threading techniques. It helps users understand how needle choice changes when a patch or garment becomes thicker rather than treating all sew-on patches as suitable for one universal needle.
Plastic or Structural Stabilizer Backing
Plastic backing is one of the easiest patch structures to misidentify because it often looks smooth, uniform, glossy, and stiff. Those features resemble what many people expect an iron-on layer to look like. In practice, a plastic backing can serve a different purpose entirely: helping embroidery remain flat, preventing distortion, protecting rear threads, creating consistent shape, or giving the patch enough rigidity to look clean during storage, display, trade, or later installation.
The most important lesson is therefore straightforward: plastic-looking does not automatically mean heat-activated. A patch can have a plastic structural backing and still be intended for sewing. The uploaded patch material also treats plastic stabilizer as a separate backing structure from heat-activated adhesive and advises users not to use the same installation method for every rear surface.
From an adhesive standpoint, plastic backing creates a second issue. A fabric adhesive applied to the rear of the patch may be bonding to plastic rather than textile fibers. The result then depends on the chemistry and surface treatment of that plastic. A product that works well on one manufacturer’s structural film does not automatically work on every smooth polymer backing, so unknown plastic surfaces deserve a small compatibility test before the final garment is touched.
Iron-On or Consumer Heat-Activated Backing
An iron-on patch carries an adhesive layer intended to activate when the correct combination of heat and pressure is applied. The rear often looks relatively smooth and continuous compared with exposed embroidery, but the exact appearance differs by product. Some films appear cloudy or milky, some are nearly transparent, and others are integrated with stabilizing materials beneath the embroidered body.
Once the patch is confirmed as iron-on, the next question should be what conditions this particular product requires, not what a generic internet article recommends. Adhesive chemistry, film thickness, patch thickness, embroidery density, garment construction, pressure, and heat transfer all influence bonding. A thick patch can require more carefully controlled heat transfer than a thin patch, while a heat-sensitive garment may impose a lower limit than the adhesive would otherwise prefer.
Video evidence — Iron-On Patch Application:
This Patches4Less demonstration is useful for understanding the general sequence of placement, protection, pressure, heat application, cooling, and edge inspection. Treat the process as a visual reference; do not transfer another patch maker’s temperature or pressing time to an unknown product.
Industrial or Heat-Press-Oriented Heat-Seal Backing
The words heat seal and iron-on are sometimes used loosely in retail descriptions, but the underlying process may not be identical. Some heat-seal products are designed around a heat press, which can deliver controlled temperature, pressure, and dwell time more consistently than a household iron. Other patch systems may permit either method when their stated application conditions can be reached.
This distinction matters because increasing iron temperature is not a scientifically equivalent substitute for missing pressure. If a heat-seal product is designed around a heat press, excessive temperature can damage embroidery or garment fabric before the correct bonding conditions are reproduced. The user should therefore obtain three pieces of information before proceeding: the temperature or heat level, pressing duration, and pressure or equipment requirement.
Peel-and-Stick or Pressure-Sensitive Backing
Pressure-sensitive patches are usually easier to identify because the adhesive is covered by a clearly separate liner. The liner may be coated paper, plastic film, or another release material. Once removed, the adhesive should feel tacky without deliberate heat. This construction behaves more like a sticker than a fusible iron-on patch, although the strength, permanence, and wash resistance can vary greatly between products.
Do not remove the liner simply to confirm that the adhesive is sticky while you are still planning the project. Exposed adhesive can pick up dust, fibers, lint, oils from fingers, and contamination from the work surface. Repeated repositioning also reduces effective contact. More importantly, the phrase self-adhesive does not automatically mean permanent or machine washable.
Hook-and-Loop Backing
Hook-and-loop is normally the easiest reusable system to recognize. The patch carries a dense field of small hooks, while the garment or equipment carries a softer loop panel. Pressing the two together creates mechanical engagement, and pulling them apart allows the patch to be exchanged. This is useful for names, roles, uniform identifiers, tactical gear, backpacks, workwear, clubs, events, and decorative patch collections.
The most important mistake to avoid is covering the hook field with adhesive. Doing so destroys the functionality the system was designed to provide. If the garment does not already have a loop panel, attach the loop component to the garment using a method appropriate for the fabric. In many textile applications, perimeter sewing is more logical than permanently gluing the visible hook-backed patch itself.
Felt, Thick Embroidery, PVC, Rubber, and Leather-Like Backings
Not every patch fits neatly into a three-category iron-on, sew-on, or self-adhesive system. Felt can absorb liquid adhesive quickly. Thick embroidery can create an irregular bonding surface. PVC and rubber patches may be smooth and nonporous. Leather and synthetic leather can carry coatings that alter adhesion. Some molded patches contain sewing channels, while others use hook-and-loop or supplier-specific adhesive systems.
The practical rule is to identify what is actually touching the garment. A fabric-looking front does not guarantee a fabric rear. The attachment method should be selected for the contact surface, not for the artwork visible on the face of the patch. When the rear is molded, coated, unusually smooth, or unfamiliar, check supplier information before treating it like ordinary embroidered twill.
Video evidence — Understanding Patch Construction Layers:
This embroidery-focused video is useful because it shows how stabilizer, fabric, embroidery, and other layers are built into a patch. Seeing the construction process makes it easier to understand how a smooth back can be structural without necessarily being the attachment adhesive.

3. How Can You Tell Iron-On, Sew-On, and Plastic Backing Apart?
Iron-on, sew-on, and plastic structural backing create the greatest confusion in everyday embroidered patches because all three can look smooth and professionally finished. A reliable comparison needs to focus on function, construction, and intended installation, not just surface appearance. The most useful question is whether the rear layer is supposed to create the bond to the garment, simply support the patch, or provide no adhesive attachment at all. This distinction immediately eliminates many of the most common errors.
| Identification Point | Iron-On / Heat-Activated | Sew-On / No Attachment Adhesive | Structural Plastic |
|---|---|---|---|
| Primary function | Create adhesive bond under specified heat and pressure | Patch is secured mechanically with thread | Add rigidity, shape, or rear protection |
| Typical appearance | Smooth, relatively continuous film | Fabric, twill, thread, felt, or stabilizer may remain visible | Smooth and relatively rigid integrated layer |
| Heat required | Yes | No | Not inherently |
| Release liner | Depends on product | Usually absent | Usually absent |
| Can it often be sewn? | Yes, when construction permits | Yes | Often, when plastic is thin enough |
| Best confirmation | Manufacturer gives heat-application method | Manufacturer identifies sew-on construction | Manufacturer identifies structural plastic |
| Common mistake | Copying heat settings from another patch | Assuming a neat back contains hidden glue | Assuming plastic appearance proves iron-on |
Iron-On vs. Sew-On: Identify How the Final Bond Is Created
A confirmed iron-on patch depends on a heat-responsive adhesive layer creating surface contact with the garment. A sew-on patch can look tidy, rigid, coated, or stabilized, but the final attachment still comes from thread. This functional difference is more useful than trying to decide whether the back looks “finished enough” to contain adhesive.
When packaging is missing, combine several clues rather than relying on one. A smooth continuous film, a product image showing ironing, and seller instructions describing household heat form a strong group of evidence. A smooth surface alone is much weaker. If the patch remains uncertain and the garment is valuable, supplier confirmation is safer than heating the patch simply to see whether it becomes sticky.
Plastic vs. Iron-On: Separate Structure from Attachment
Instead of asking “Does this feel like plastic?”, ask “What is this layer supposed to do?” Structural plastic keeps a patch flat and gives it body. Heat-activated adhesive creates the interface that bonds the patch to another textile. Those are different functions even when both materials look smooth.
This explains why plastic-backed sew-on patch is a perfectly logical description. “Plastic-backed” describes part of the patch construction. “Sew-on” describes the final attachment method. Users who understand this distinction are much less likely to damage an unlabeled patch by assuming every stiff rear film should melt under an iron.
Iron-On vs. Heat Seal: Check the Equipment, Not Just the Name
Retail terminology is inconsistent enough that the words iron-on, fusible, heat-activated, and heat seal should not be used as automatic temperature instructions. One patch may be intended for a household iron, another may work best under a heat press, and another may require conditions the user cannot reliably reproduce on a curved hat, thick jacket, or padded uniform.
Before heating, obtain:
- Recommended temperature or heat level.
- Recommended pressing time.
- Required pressure.
- Whether a household iron is approved.
- Whether a heat press is preferred or required.
- Whether heating should occur from the front, reverse, or both sides.
If one of the essential application conditions is unknown, contact the supplier rather than increasing temperature until something changes.
Never Use Melting or Softening as the Identification Test
A rear layer becoming soft under heat does not prove that it was designed as iron-on adhesive. A structural film can distort. A synthetic garment can become shiny. A coating can bubble. Embroidery can flatten. Adhesive can transfer to the iron. By the time the user observes a dramatic change, the test may already have caused irreversible damage.
The uploaded patch guidance is clear on this point: when the backing type or heat requirements are unknown, the user should check the patch instructions or contact the seller instead of guessing the temperature.
Recommended downloadable resource:
Create an “Iron-On vs Sew-On vs Plastic Backing Comparison Sheet.pdf” with large back-view photographs, the comparison table above, and the highlighted sentence “Plastic-Looking Is a Clue, Not Proof of Iron-On Adhesive.”

4. Which Patch Identification Clues Can You Trust?
Good identification is partly a question of evidence quality. A manufacturer specification deserves more weight than a surface impression, and an obvious hook structure deserves more weight than color. Ranking clues prevents users from becoming overconfident after spotting one feature that resembles an online photograph. The safest system treats documentation as primary evidence, mechanical structures as strong physical evidence, visible films and fibers as supporting evidence, and destructive experiments as something to avoid.
| Evidence Level | Typical Evidence | Reliability | How to Use It |
|---|---|---|---|
| Level 1 | Manufacturer instructions, packaging, specification, original listing | Highest | Primary evidence for backing and installation |
| Level 2 | Release liner, hook field, pin, magnet, other obvious mechanical feature | High | Usually identifies the attachment family |
| Level 3 | Adhesive-looking film, exposed textile, felt, stabilizer, structural plastic | Moderate | Combine with other evidence |
| Level 4 | Shine, color, stiffness, smoothness, water beading alone | Low to moderate | Supporting clue only |
| Level 5 | Increasing heat, random glue, strong solvents, peeling uncertain layers | Destructive | Do not use as an identification method |
Manufacturer Information Should Override Generic Appearance Rules
The supplier knows which backing was ordered and which process was intended. When product documentation says heat press, a general blog calling similar patches “iron-on” should not override it. When the supplier describes plastic stabilizer and recommends stitching, the rear should not be reclassified simply because it looks glossy.
For anyone handling multiple patches, record the installation information rather than relying on memory. A basic spreadsheet is enough to turn future patch work into a repeatable process instead of another identification exercise.
Useful fields include:
- Patch name.
- Supplier.
- Product code.
- Backing type.
- Household iron allowed.
- Heat press required.
- Temperature or heat level.
- Press time.
- Pressure requirement.
- Sewing allowed.
- Washability information.
- Adhesive compatibility.
- Original source link.
- Notes after installation.
Recommended downloadable file:
Patch Supplier Installation Parameters.xlsx
The downloadable resource concept also follows the user-resource strategy in the uploaded planning document: a useful page should give visitors reference material they can save and reuse, rather than only presenting information on-screen.
Mechanical Features Are Stronger Than General Appearance
A release liner tells you that a protected adhesive exists. A hook field tells you that the patch is meant to mate with loop material. A pin, magnet, snap, or other mechanical system similarly reveals the intended attachment family. These clues are strong because they expose the actual mechanism rather than asking the user to infer chemistry from gloss or color.
Combined systems can still exist. A hook-backed embroidered patch also contains textile and stabilizer. An iron-on patch can later be perimeter stitched. A pressure-sensitive patch may contain structural layers below the adhesive. When relevant, record both the backing construction and the final attachment method rather than forcing the patch into only one descriptive category.
Shine, Color, Water Beading, and Stiffness Are Weak Evidence
Water can bead on structural plastic, rubber, coated textile, adhesive film, resin, and many other low-absorbency materials. Stiffness can result from embroidery density, felt, plastic, dried adhesive, or lamination. Shine can come from several polymer films or finishing processes. Color varies freely among manufacturers.
These observations still have value, but they belong at the supporting level. The correct rule is simple: a weak clue may narrow your search, but it should never justify an irreversible action by itself. If the next step involves high heat, permanent adhesive, aggressive solvent, or peeling a layer that may be structural, find stronger evidence first.
Read the Garment Care Label Before Any Heat-Based Attachment
Patch identification and garment safety become linked whenever heat is involved. The U.S. Federal Trade Commission’s care-label guidance explains that clothing care information must address washing, drying, ironing, and warnings required to prevent damage during expected care. A garment marked Do Not Iron does not become heat-safe because the patch itself is described as iron-on.
Authority evidence — U.S. FTC Care Labeling Guide
For international symbol interpretation, GINETEX provides a printable textile care-symbol reference covering washing, bleaching, drying, ironing, and professional textile care. This is useful when the garment uses symbols rather than written instructions.
External downloadable reference — GINETEX Textile Care Symbols PDF
A useful static illustration in this section is an “Evidence Ladder” arranged from Manufacturer Information at the top, Mechanical Structure below it, Visual and Touch Clues below that, and Destructive Heat Testing at the bottom marked Avoid. This simple hierarchy is easier to remember than a long list of backing definitions.
5. What Should You Do After Identifying the Backing?
Identification solves only the first half of the problem. The second half is choosing an installation method that works with the garment, patch location, washing frequency, movement, and intended permanence. A confirmed iron-on patch can still be unsuitable for a technical shell whose label prohibits heat. A sew-on patch can be a poor choice where needle holes could damage a waterproof layer. A self-adhesive patch may be perfectly adequate for an event while being unsuitable for a frequently washed school uniform. The patch and garment need to be treated as one system.
If It Is Iron-On: Confirm Three Conditions Before Heating
Proceed with a heat-activated patch only when three conditions line up: the patch maker approves the equipment you have, the garment permits the required heat, and the location can receive suitable pressure without damaging nearby structures. Thick seams, padded areas, curved hats, waterproof finishes, reflective prints, rubber logos, plastic hardware, and stretch panels can all complicate heat transfer.
Before application:
- Confirm the patch is genuinely heat activated.
- Find the specific heat or temperature requirement.
- Find the pressing time.
- Confirm whether a household iron or heat press is approved.
- Read the garment care label.
- Check nearby print, coating, elastic, plastic trim, reflective film, or other heat-sensitive decoration.
- Position the patch completely before heating.
- Use a press cloth if the product instructions call for one.
- Apply pressure rather than simply sliding the iron continuously.
- Allow the patch to cool before testing its perimeter.
- Inspect the full edge before normal wear.
A common mistake is confusing a patch that feels temporarily attached while warm with a fully stable bond. Cooling and post-application inspection are part of the process, particularly when a thick patch delays heat transfer to the adhesive layer.
If It Is Sew-On: Use the Border Instead of the Main Artwork
Many embroidered patches can be sewn around their outside border instead of piercing the center artwork. This preserves lettering, logos, and decorative embroidery while usually reducing the amount of dense material the needle must penetrate. Matching the thread to the border can make stitches less visible, while intentionally contrasting thread can be used when visible stitching is part of the design.
The uploaded patch guidance also recommends edge-based sewing for embroidered badges and notes the value of combining accurate positioning with perimeter reinforcement for thick or frequently washed patches.
Video evidence — Singer Patch Sewing Demonstration:
This video shows patch positioning and edge sewing with a machine, making it useful for users deciding whether a flat, accessible garment area can be handled more efficiently by machine.
For sleeves, bags, curved garments, lined pieces, or areas difficult to place beneath a machine foot, hand sewing may provide better access and control. Comparing both methods helps the user select a process based on geometry and construction rather than assuming machine sewing is always stronger or hand sewing is always easier.
Video evidence — Hand-Sewn and Machine-Sewn Patch Methods:
This demonstration provides a useful visual comparison between the two approaches, particularly for beginners deciding whether they need a sewing machine for one patch project.
If It Is Peel-and-Stick: Keep the Liner On Until Positioning Is Final
A pressure-sensitive backing should remain protected while the user measures, aligns, and checks orientation. Once the liner is removed, avoid touching the adhesive or letting lint and loose fibers settle onto it. Place the patch once rather than repeatedly pulling it off and replacing it.
The more important question is what service life the supplier promises. Peel-and-stick describes the installation mechanism, not a guaranteed level of laundering durability. A patch designed for a temporary event, costume, promotion, or short-term label should not be presented as permanently washable simply because the first bond feels strong.
If It Is Hook-and-Loop: Preserve Removability
A hook-backed patch should normally remain removable. Do not fill the hooks with adhesive to make the patch “stronger.” If the garment lacks a loop field, attach the correct loop panel to the garment. This provides one permanent base while allowing names, roles, insignia, teams, or decorative patches to be exchanged later.
This can be particularly useful on backpacks, workwear, tactical garments, event vests, clubs, uniforms, and collections where patches need to change repeatedly. The design objective here is not maximum permanent adhesion; it is repeatable mechanical engagement.
If It Is Plain Fabric, Felt, or Compatible Embroidery: Fabric Glue Can Be a No-Sew Option
A fabric adhesive can be practical when the patch rear and garment are compatible, the area is reasonably flat, the location does not carry heavy structural load, and the assembly can remain stable while the adhesive cures. Plain fabric backs, felt, twill, and selected embroidered patches can be reasonable candidates. Smooth unknown plastic, PVC, rubber, hook material, self-adhesive coating, or an old heat-activated layer should not automatically be treated as the same bonding surface.
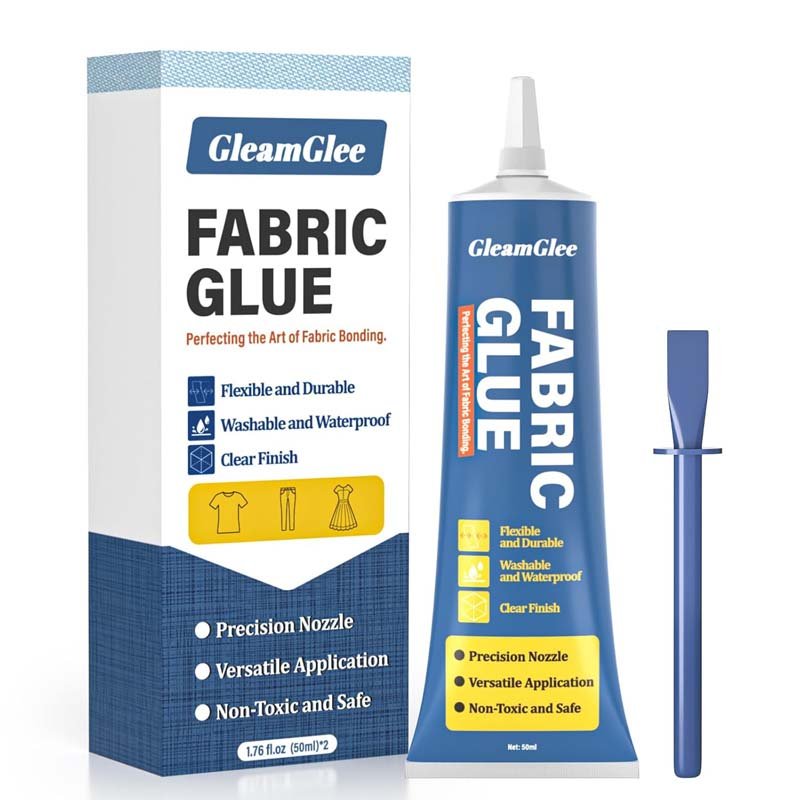
GleamGlee Fabric Glue provides a product-specific example for textile patch work. Its confirmed product information describes a clear-drying, flexible no-sew adhesive suitable for fabric patches and common materials including cotton, denim, polyester, canvas, felt, ribbon, and lace. The documented product reference is approximately 6–10 minutes for initial positioning and about 24 hours for full cure, with washing and normal ironing intended only after full cure and within the garment’s own care restrictions.
For a compatible low-stress patch:
- Read the garment care label.
- Identify the patch rear as far as practical.
- Test a spare or hidden area when compatibility is uncertain.
- Remove lint, dust, and loose fibers.
- Ensure both surfaces are clean and dry.
- Mark the final position before applying adhesive.
- Apply a thin, controlled adhesive layer rather than saturating the patch.
- Give the perimeter adequate coverage without creating thick squeeze-out.
- Place the patch once instead of sliding it repeatedly.
- Press the patch into complete contact.
- Keep the project flat or supported during early setting.
- Wait for the full product-specific curing period.
- Inspect the edges before the first wear or wash.
A 20+ year adhesive-industry perspective strongly favors thin, controlled application over “more glue equals more strength.” Excess adhesive can soak through absorbent fabric, form a visible dark area, slow drying, squeeze onto the patch face, and create a rigid boundary. Your uploaded repair guide makes the same point: thin application, healthy fabric, proper curing, and flexibility matter more than building a thick glue layer.
Video evidence — Fabric Glue Workflow on Clothing:
Although this Aleene’s demonstration focuses on a hem rather than patch identification, it is useful at this exact point because it shows a general fabric-adhesive workflow: measuring, positioning, applying a controlled layer, folding or pressing the textile, using clips, and waiting. Do not copy another brand’s glue quantity or curing time to GleamGlee.
One of the most important technical distinctions is initial set versus full cure. A patch can stop sliding long before the adhesive is ready for repeated bending, laundering, and ironing. For the referenced GleamGlee product, approximately 6–10 minutes is the initial positioning stage, while approximately 24 hours is the full-cure reference. During this interval the garment should remain stable rather than being worn simply because the patch appears to stay in place.
If the user wants to calculate the full-cure point without relying on memory, an external date-and-time calculator is useful because the page does not need an interactive generator of its own.
External tool — Timeanddate Date Calculator
For brands, patch suppliers, costume teams, uniform programs, and private-label projects, adhesive selection should be based on the real system rather than a generic request for “stronger glue.” Relevant variables include patch backing chemistry, garment fiber, coating, flexibility, laundering, cure schedule, nozzle control, packaging format, and target market instructions. GleamGlee’s supplied company information describes internal adhesive formulation, material compatibility research, packaging development, and application testing capabilities, which creates a natural route for custom textile-adhesive projects when a standard consumer configuration is not appropriate.
6. What If the Patch Has No Label or You Still Cannot Tell?
Unlabeled patches are common rather than exceptional. Vintage patches, thrift-store badges, old uniform insignia, collectible pieces, patches removed from another garment, mixed craft bundles, inherited items, and marketplace purchases may arrive without instructions. In these cases, the goal should not be to force a perfect identification from appearance alone. The useful goal is to reduce uncertainty enough to choose a low-risk path while preserving both the patch and garment for future options.
Use a Four-Step Confirmation Process
A disciplined order keeps the investigation non-destructive:
- Search the original source. Check marketplace order history, seller listing, brand page, invoice, packaging photograph, catalog, or saved screenshots.
- Inspect the physical structure. Record liner, hooks, visible textile, film, stiffness, sewing channel, molded material, or unusual coating.
- Ask the seller or manufacturer. Request installation conditions rather than a vague product name.
- Record the result. Save the confirmed backing and method with the patch so the same identification problem does not return later.
This approach may feel slower than applying heat immediately, but the time difference is small compared with removing failed adhesive, replacing a damaged jacket, or trying to restore embroidery after the rear layer has been distorted.
Ask the Seller Questions That Produce an Actionable Answer
Instead of asking only, “Is this an iron-on patch?” use questions that define the full installation system:
- Is the patch intended for a household iron?
- Is a heat press preferred or required?
- What temperature or heat setting is specified?
- How long should pressure be applied?
- What pressure is required?
- Is the rear film an adhesive or only structural stabilizer?
- Can the patch be safely sewn around the edge?
- Is textile adhesive compatible with the backing?
- Is the installed patch machine washable?
- Are any fabrics or coatings excluded?
These questions are especially useful when a seller uses the term heat seal without explaining what equipment it expects. Asking whether a household iron is specifically approved eliminates a large amount of ambiguity.
Test a Spare Sample Rather Than the Finished Garment
When adhesive compatibility is uncertain, use a spare patch, matching textile scrap, hidden seam allowance, or inconspicuous sample. Reproduce the real process closely enough to make the test meaningful. Use the same adhesive quantity, the same intended contact pressure, and the full curing time instead of judging the sample after a few minutes.
After the sample has stabilized, check:
- Color change.
- Adhesive bleed-through.
- Unwanted shine.
- Excessive stiffness.
- Poor surface wetting.
- Edge lifting.
- Cracking during bending.
- Separation under gentle movement.
- Loss of garment flexibility.
The uploaded repair materials recommend essentially the same hidden-test principle and emphasize checking color, seep-through, stiffness, flexibility, and edge behavior after the material has fully stabilized.
Recommended static download:
Patch Backing Compatibility Test Sheet.pdf
The sheet should include the patch type, garment fabric, test position, intended attachment method, waiting time, front appearance, flexibility, edge security, and final decision. A static form is preferable here because the user can print it and compare physical samples directly.
Do Not Perform Heat Trials on Valuable or Technical Garments
Heat testing is more difficult than adhesive testing because a small hidden area may not reproduce the thermal conditions underneath a full patch. Vintage jackets, waterproof shells, leather bags, high-value uniforms, collectible badges, technical membranes, and specialty coatings are poor experimental surfaces.
If the garment manufacturer provides repair instructions, those should take priority over a generic patch tutorial. A visually successful test is not enough when the garment’s function depends on a membrane, coating, seam tape, reflective layer, or other construction that may be affected internally.
Preserve Future Options When Identification Remains Uncertain
Sometimes the technically best decision is to wait. Unknown permanent adhesive can leave residue that complicates later professional restoration. Excess heat can permanently flatten embroidery or damage a synthetic finish. Peeling what appears to be a liner can remove structural backing instead.
Preserving the original patch keeps future options open: sewing, professional installation, collector storage, removable mounting, manufacturer-approved heat treatment, or a later compatibility-tested adhesive. Immediate attachment is rarely worth irreversible damage when either the patch or garment is difficult to replace.
7. How Do Fabric, Washing, Flexing, and Patch Thickness Affect the Method?
Correctly identifying the backing does not automatically guarantee that the normal attachment method is right for the garment. A patch and garment form a combined mechanical system after installation. Fiber, weave or knit, coating, stretch, thickness, care instructions, curvature, wash frequency, and body movement all change the loads around the patch. Many failures attributed to “bad glue” or “weak iron-on adhesive” are actually compatibility failures where the patch, backing, garment, or location was never evaluated as a complete system.
| Garment or Use Situation | Heat-Activated Method | Sewing | Compatible Fabric Adhesive | Main Issue |
|---|---|---|---|---|
| Flat cotton or denim | Often practical when instructions permit | Strong option | Often practical after testing | Follow exact product instructions |
| Polyester | Depends on heat limits and construction | Usually practical with suitable needle | Test first | Polyester fabrics vary widely |
| Nylon / technical shell | Use only with explicit approval | Needle holes may affect performance | Coating compatibility must be confirmed | Protect technical finish |
| Stretch garment | Patch can restrict stretch | Stretch-compatible stitching may be better | Best for compatible low-stress use | Avoid rigid stress concentration |
| Knee, elbow, sleeve bend | Edge lifting risk increases | Perimeter reinforcement useful | May need mechanical reinforcement | Repeated flexing stresses edges |
| Frequently washed uniform | Follow product limits | Durable when correctly sewn | Full cure required | Inspect perimeter after washing |
| Thick embroidered badge | Heat transfer may be uneven | Border sewing often practical | Depends on rear surface | Avoid dense center when sewing |
| Hook-and-loop system | Not normally used for visible patch | Loop panel often sewn | Do not cover hooks | Preserve removability |
Cotton, Denim, and Canvas Are Usually Easier—but Still Need Controlled Application
Stable woven cotton, denim, and canvas are commonly manageable because they can be marked, clipped, sewn, and positioned without the extreme stretch or slipperiness of more specialized textiles. Their absorbency is one important adhesive caution. Heavy glue application can darken light-colored cotton, soak deeply into yarns, and create a stiff region that remains visible after curing.
Denim presents a different mechanical issue: thick fabric and heavy patch embroidery can make sewing difficult. Instead of forcing a light needle, use an appropriate denim or heavy-fabric needle and work through the patch border when possible. When using adhesive, keep the layer controlled so the finished patch does not create a hard island in an otherwise flexible pair of jeans.
Polyester Needs More Information Than the Fiber Name
Polyester can mean a lightweight blouse, woven uniform, fleece, sports jersey, lining, coated bag fabric, or polyester-elastane performance garment. These structures can differ dramatically in stretch, coating, absorbency, and heat sensitivity. A statement such as “polyester can be ironed” is therefore too general to guide patch installation.
Read the care label and examine the actual construction. Glossy, printed, coated, elastic, and laminated polyester fabrics deserve a higher level of caution. For adhesives, test whether the rear surface wets properly and remains flexible after the full curing period rather than deciding from fiber content alone.
Nylon, Waterproof Shells, and Coated Textiles Need the Highest Caution
Outdoor jackets, rainwear, backpacks, and technical garments may contain water-repellent finishes, seam tape, membranes, laminates, reflective elements, or coatings that are not obvious from the visible fabric. Heat can affect these components. Sewing can create holes through water-resistant systems. General fabric adhesive may not bond reliably to some treated surfaces.
Your uploaded repair guide specifically warns that coated and waterproof technical fabrics should be treated conservatively because heat, puncture, solvent, and generic glue can compromise the function carried by the surface treatment.
For these materials, check the garment maker’s repair instructions before attaching a decorative patch. A manufacturer-approved technical tape, specialized patch, sewn external panel, or removable system may protect the original performance better than a conventional iron-on method.
High-Flex Areas Usually Begin Failing at the Edge
Knees, elbows, sleeves, shoulders, pocket edges, backpack corners, and curved hats repeatedly bend the patch and garment through different radii. A patch may stay firmly attached in the center while the perimeter experiences repeated peel force. Thick or rigid patches make this mismatch larger because the patch cannot follow the textile as easily.
When movement is high, perimeter reinforcement can be useful where sewing is appropriate. Adhesive or heat activation can provide broad contact and accurate positioning, while stitches help resist repeated edge movement. The purpose of combining methods is not simply “maximum strength”; it is to manage the type of force occurring at the patch boundary.
Video evidence — Singer Appliqué Workflow:
This demonstration is useful for understanding the broader principle of positioning an appliqué and then adding perimeter stitching, which closely parallels the way some patch projects combine broad attachment with edge reinforcement.
Thick Patches Need the Right Needle Rather Than More Force
When a needle begins bending, slipping, or distorting the patch, stop and change the setup. The densest center embroidery is often the worst place to push a needle. Use the border when the design permits, work slowly, support the garment, and choose a needle suited to the fabric beneath the patch.
SCHMETZ provides an external needle-selection resource covering denim, jersey, stretch, leather, embroidery, and other fabric situations. This is more useful than treating a single “heavy needle” as appropriate for every thick patch.
External tool — SCHMETZ Needle Guide
For users who prefer a printable reference beside the sewing machine or craft bench, SCHMETZ also provides downloadable needle information.
Downloadable external resource — SCHMETZ Needle ABC PDF
Washing Is a New Mechanical Test, Not Just a Care Step
A patch that feels secure on a dry worktable has not yet experienced water, detergent, garment weight, agitation, folding, rubbing, and drying. For adhesive projects, wait until the product reaches its stated washable or full-cure stage. For iron-on systems, follow the patch maker’s laundering instructions. For sewn patches, check border thread, knots, and fraying.
The uploaded fabric-care material recommends using the more restrictive instruction whenever the garment and repair system disagree. It also advises inspecting patch corners and stiffness after the first complete wash rather than assuming a repair is permanent simply because it initially looked secure.
After the first complete wash and dry, inspect:
- Every corner.
- The complete perimeter.
- Puckering around the patch.
- New stiffness or a hard ridge.
- Adhesive bleed-through.
- Frayed stitches.
- Layer separation.
- PVC or coating cracks.
- New tears immediately beside the patch.
- Loss of stretch around the repaired area.
If one corner lifts, diagnose the reason before adding more adhesive. Common causes include contamination, missed edge coverage, incomplete cure, repeated bending, snagging, or an incompatible backing. Repeatedly adding thick glue over the same unsuitable interface can make the area harder and less flexible without solving the actual cause.
Recommended static download:
Patch Project First-Wash Inspection Checklist.pdf
This checklist can be printed and kept with school uniforms, workwear, costumes, patch jackets, backpacks, or craft projects, allowing the user to inspect the result after the first real care cycle without returning to an online tool.

8. Conclusion: Identify the Backing Before Choosing the Attachment Method
Patch backing identification becomes much less confusing when the decision is made in a consistent order. Start with supplier information, then examine physical structure, and use shine, stiffness, color, and texture only as supporting clues. Separate structural layers from attachment layers, because plastic-looking material may simply stabilize the patch rather than activate under heat. Once the backing is reasonably confirmed, evaluate the garment itself—care label, coating, stretch, thickness, wash frequency, movement, and replacement value—before choosing the final installation method.
The most important practical lesson is identify first, attach second. A genuine iron-on patch does not make a Do Not Iron garment heat-safe. A structural plastic backing does not automatically become adhesive under an iron. A self-stick patch does not automatically become machine washable. A hook-and-loop patch should generally remain removable. A sew-on patch may still be compatible with textile adhesive in selected low-stress applications, but the actual rear surface needs to be tested rather than assumed.
For compatible fabric-backed, felt, or embroidered patches on ordinary textile areas, a clear, flexible no-sew adhesive can be a useful option. GleamGlee Fabric Glue is designed around textile applications and has a product-specific reference of approximately 6–10 minutes for initial positioning and around 24 hours for full cure, with the cured bond intended to remain flexible and suitable for washing within the garment’s care limits. Those features are most useful when they support correct repair practice—clean surfaces, controlled application, full curing, compatibility testing, and honest recognition of when stitching or another attachment method is more suitable.
The strongest patch installation is therefore not automatically the one using the highest temperature, the most adhesive, or the greatest number of stitches. The better installation is the one that respects the actual patch backing, preserves the garment’s normal movement and care routine, and uses only the amount of intervention needed for the real service conditions. If backing identification remains uncertain and the patch or garment is valuable, preserving both pieces while you obtain manufacturer information is usually a better decision than converting a simple identification question into permanent material damage.
Frequently Asked Questions About Patch Backing Types
How Can I Tell If a Patch Is Iron-On?
Begin with the original package, product listing, or supplier information. A true iron-on patch should contain a heat-activated adhesive system and normally have instructions involving heat and pressure. The rear may appear smooth, cloudy, glossy, clear, or plastic-like, but none of these features proves an iron-on backing by itself. Structural plastic and other stabilizers can look similar. If manufacturer information is unavailable, combine several physical clues and avoid testing the patch by applying progressively higher iron temperatures to the final garment.
What Does the Back of an Iron-On Patch Look Like?
Many iron-on patches have a relatively smooth and continuous film over much of the rear instead of fully exposed embroidery threads. The film may appear clear, white, cloudy, cream, translucent, or slightly glossy depending on the adhesive and manufacturing process. There is no universal appearance shared by all suppliers. The strongest identification combines the physical film with product information stating that the patch is heat activated and explaining how it should be applied. Gloss, color, or stiffness alone should remain supporting evidence rather than final proof.
Can a Plastic-Backed Patch Still Be Sew-On?
Yes. Plastic backing can serve a structural purpose by helping embroidery remain flat, protecting the rear, and maintaining the patch’s shape. It does not automatically function as a heat-activated adhesive. This means plastic-backed can describe the construction while sew-on describes the installation method. Before sewing, check whether the structural layer is thin enough to be pierced safely and choose a needle appropriate for the combined thickness of the patch and garment rather than forcing a small needle through a hard layer.
Can You Sew an Iron-On Patch?
Often, yes, when the patch border and garment can both be safely stitched. Perimeter sewing can add mechanical reinforcement to a patch that has already been positioned with heat-activated adhesive, which may be useful on frequently washed garments or locations exposed to repeated bending. This should not be generalized to every molded PVC, rubber, leather, or hard-backed patch. Inspect the border and check supplier guidance before piercing specialty materials, and avoid stitching through the central artwork when a suitable outer border is available.
Can You Glue a Sew-On Patch Instead of Sewing It?
Some plain fabric, felt, twill, and compatible embroidered patch backs can be attached with textile adhesive on relatively flat, low-stress areas. The word sew-on does not guarantee adhesive compatibility because the rear can still contain plastic, coating, dense stabilizer, or another material. Test a spare or hidden area when the surface is uncertain, apply a thin adhesive layer, wait for the full cure specified by the adhesive, and choose perimeter stitching instead when the patch is located on a heavily flexed, stretched, or frequently washed area.
Are Peel-and-Stick Patches Machine Washable?
Not automatically. Peel-and-stick identifies the pressure-sensitive attachment mechanism, not a universal level of durability. Some self-adhesive patches are intended for temporary identification, events, short-term costumes, or promotional applications, while other products may have stronger laundering claims. Read the manufacturer’s exact instructions before machine washing. Adding a different glue over the existing sticky layer is not automatically an improvement because the new adhesive may only bond to the old pressure-sensitive coating rather than to a stable fabric or plastic substrate.
What Should I Do If I Still Cannot Identify the Patch Backing?
Stop before using permanent adhesive, high heat, strong solvent, or destructive peeling. Photograph the rear, search the original product record or seller listing, compare the patch with identical examples when available, and ask the supplier whether the backing is structural plastic, heat activated, pressure sensitive, sew-on, hook-and-loop, or heat-press oriented. For valuable jackets, technical outdoor garments, uniforms, leather goods, vintage patches, or collectible badges, preserving the original condition while gathering more information is generally safer than progressively more aggressive trial-and-error testing.