Skip to content

The quickest reliable way to identify a patch backing is to inspect its reverse, distinguish the visible layers, and match those observations to the exact product instructions. Exposed textile suggests a sew-on construction; tiny hooks identify a hook component; a smooth coating or paper liner needs more investigation. Shine does not prove a patch is iron-on, and removable paper does not prove it is a sticker. Your goal is to identify the attachment system without damaging the patch or garment.
A useful identification should answer four practical questions: what stays on the patch, what comes off before application, which attachment method is permitted, and how the finished item can be cared for. This matters whether you are adding a badge to a child’s uniform, arranging patches on denim, or reusing a souvenir from an old bag. A backing name is only the starting point; the contact surface, garment construction, and intended washing routine determine whether your chosen method makes sense.
Start with a Close Inspection of the Patch Backing
Place the patch face down on a clean, dry table before preparing an iron, adhesive, or sewing machine. Keep any packaging and order information beside it, including the backing option selected at checkout. Two patches with the same front design may have different attachment systems. Work from what you can observe directly, then confirm the details which appearance cannot establish, such as heat requirements, sewing restrictions, and whether an adhesive is intended for washable fabric.
Separate the Patch Face the Structural Backing and the Attachment Layer
An embroidered, woven, chenille, printed, leather, or PVC patch describes its visible construction rather than its attachment method. Underneath, a supporting textile or plastic layer may stabilize the design. Another layer may provide adhesion, and a disposable liner may protect that adhesive. Think of these as separate jobs even when the finished patch feels like one piece. Removing a protective liner can be correct; pulling away a supporting layer can weaken the patch itself.
A practical example is an embroidered badge with a stiff reverse and a later-added adhesive sheet. The embroidery supplies the appearance, the stiffener supports its shape, and the added adhesive connects it to the garment. If the added sheet has a liner, only the instructed liner is removed. The stiffener does not become disposable simply because it sits beneath the adhesive. This layer-by-layer view also explains how a patch can have a plastic backing and still be intended for sewing.
Inspect the Center Edge and Any Loose Layer in Order
Use daylight or a lamp positioned from the side so surface texture and layer edges are easier to see. Inspect the center first, then follow the perimeter, and finally examine any obvious liner tab. A phone photograph can help enlarge tiny hooks or textile fibers, but it cannot identify adhesive chemistry. Keep the patch in its current condition during this inspection; heating, scraping, or soaking it changes the evidence before you have understood its construction.
- Read the packet and order record for terms such as sew-on, heat seal, pressure sensitive, hook backing, or hook-and-loop set.
- Photograph the entire reverse and one edge before removing anything.
- Look across the center for visible thread texture, a continuous coating, hooks, loops, or hardware.
- Follow the edge to see whether a separate sheet sits above the original backing.
- Check a designed liner tab without pulling at embroidery or forcing bonded layers apart.
- Write down the observation separately from the conclusion: “smooth coated reverse” is an observation; “iron-on” still needs confirmation.
- Watch the backing overview: Monterey Company patch backing options video introduces iron-on, adhesive, hook-and-loop, and other backing choices. Use it to recognize the categories during the inspection above, then confirm the exact version you own.
Compare Your Observations with the Identification Chart
The chart below is a sorting guide, not a chemical test. Notice how some observations support a clear mechanical identification, while smooth films remain ambiguous. A field of small hooks is strong evidence of a hook component, but a glossy surface could perform several different jobs. Treat these differences honestly rather than assigning the same confidence to every visual clue. The last column gives the next useful action so identification leads toward a workable attachment method.
| Observable feature | Likely construction | What remains uncertain | Next useful action |
|---|---|---|---|
| Cloth weave or embroidery threads with no obvious coating | Plain or sew-on patch | Hidden finish and approved stitching area | Confirm sewing instructions and inspect the border |
| Smooth, stiff, non-tacky reverse | Plastic reinforcement or heat-seal layer | Whether the coating is an attachment adhesive | Find the exact backing option before applying heat |
| Continuous film with matching iron-on instructions | Heat-activated adhesive | Equipment and garment compatibility | Read the complete application recipe |
| Paper or film liner over an adhesive surface | Protected adhesive layer | Pressure-sensitive versus heat-activated system | Identify the product before removing the liner |
| Small firm projections across the reverse | Hook component | Compatible mating panel and panel attachment | Match it with the correct loop surface |
| Soft fuzzy panel | Loop component | How the panel itself attaches to fabric | Check the reverse of the loop panel separately |
| Pin, magnetic part, or hanging loop | Specialty attachment | Missing matching parts and garment suitability | Inspect the complete fastening assembly |
- Compare manufacturer examples: Stadri Emblems backing guide shows several backing constructions. Its examples help explain the chart; supplier-specific durability or application statements should stay attached to the corresponding product.
Use three practical confidence levels when sorting a mixed collection: confirmed, likely, and unknown. A matching packet and product code can confirm the ordered backing, while an old shiny film with no documentation should remain unknown. A mechanical component can be confirmed visually without confirming how its base attaches to clothing. This simple distinction prevents a correct observation about one layer from turning into an unsupported decision about the whole patch.
Distinguish Iron On Adhesive from Plastic Reinforcement
Smooth coatings deserve closer attention because this is where many identification mistakes begin. A coating can stabilize embroidery, provide a heat-activated bond, or remain from a previous installation. Its gloss and stiffness may change with lighting, age, and construction. Identify what the coating is supposed to do before selecting a tool. Melting something with an iron would not establish a suitable application temperature or prove the resulting attachment will tolerate washing.
Look for the Function of the Film Rather Than Its Shine
View the patch from several angles and compare the coated center with the border. A transparent coating may allow thread patterns to remain visible underneath, so seeing embroidery through a film does not mean the reverse is bare cloth. Similarly, a matte surface does not rule out an adhesive layer. Record whether the film is continuous, cracked, lifted, or interrupted, but avoid treating any one of those features as a definitive backing label.
American Patch provides a useful manufacturer distinction: its plastic backing supports patch shape and can be sewn, while its heat-seal option needs controlled heat application. These are different functions even when both backs look smooth. If the order record specifies plastic backing without heat-application instructions, do not promote it to iron-on based on appearance. Keep the structural layer intact and use the attachment method approved for the particular patch construction.
- Evidence for this distinction: American Patch guide to backing types explains its plastic and heat-seal options. Its statement about heat-seal equipment concerns its products, rather than every patch sold under the broad iron-on label.
Recognize a Paper Backed Fusible Adhesive
Paper-backed adhesive can require heat rather than pressure alone. HeatnBond UltraHold, for example, is a heat-activated adhesive sheet with a paper carrier. Its application sequence uses the paper during an initial transfer step, followed by cooling, cutting, liner removal, and final bonding to the project. This provides a concrete reason to avoid the rule “paper backing means sticker.” You need the product identity and sequence before deciding when a liner should come away.
- Confirm product identity and material compatibility before using heat.
- Transfer the adhesive to the material with its paper in place, as directed.
- Cool, cut, and remove the paper in the prescribed sequence.
- Place the adhesive against the project and complete the specified final heating.
- Watch the sequence: Therm O Web HeatnBond UltraHold video is useful for understanding a fusible sheet’s handling sequence. Apply the settings for your exact product and material, rather than copying them to an unidentified factory-backed patch.
Sewability is another detail the film’s appearance cannot establish. UltraHold specifically prohibits sewing through the adhesive, and its manufacturer directs projects requiring stitching toward a different product. This distinction is useful when you want both adhesive placement and a stitched border. Choose a documented sewable system before application; do not assume a more powerful machine or a heavier needle makes every cured adhesive suitable for stitching through.
- Check the written restriction: HeatnBond UltraHold product instructions identify the material as heat activated and state its sewing restriction. Keep the handling sequence and restrictions together when planning the project.
Read a Heat Application Recipe as a Complete Set of Conditions
A successful heat application depends on more than a temperature number. The tool, heating direction, contact time, pressure, protective cover, and preparation steps work together. Thick embroidery, seams, and garment curves can prevent full contact even when the tool feels hot. Inspect the intended location with the patch resting on it: if part of the patch bridges a raised seam or pocket edge, resolve the contact problem before attempting the application.
For a specific documented example, the STAHLS embroidered-patch sheet gives the following settings for its heated upper platen configuration. These values belong to that product and equipment arrangement. They are not a starting recipe for a household iron or an unknown badge. Other configurations in the same document have different instructions, demonstrating how an apparently small equipment change can alter the procedure you need to follow.
| Parameter | STAHLS example for the stated configuration | Practical meaning |
|---|---|---|
| Equipment | Professional heat press with heated upper platen | A household iron is not the specified tool |
| Application temperature | 360°F | Use the temperature required for this product |
| Application time | 21 seconds | Treat time and temperature as a matched instruction |
| Pressure | Medium-firm | Follow the equipment and product guidance |
| Cover | FlexStyle Silicone Pad or 1/8-inch foam pad | Do not assume any pressing cloth is equivalent |
| Preparation | Bottom platen preheated for 60 seconds; fabric preheated for 20 seconds | Include the preparation steps in the process |
- Download the complete specification: STAHLS embroidered patches technical and application PDF. Check its backing option, fabric compatibility, and equipment configuration before using the illustrated parameters.
When instructions and equipment use different temperature units, convert the value before starting. 360°F is approximately 182.2°C, using Celsius equals Fahrenheit minus 32, multiplied by five ninths. Conversion only changes the units; it cannot tell you whether the garment tolerates the setting. If the required application conflicts with the garment’s care instructions, choose a compatible alternative instead of lowering the temperature or shortening the dwell time without supporting product guidance.
- Use beside the equipment instructions: Fahrenheit to Celsius converter converts the manufacturer’s value. It does not calculate a suitable activation temperature for an unidentified backing.
Identify Peel and Stick Adhesives and Check Their Limits
Peel-and-stick describes how an adhesive surface is exposed and placed; it does not tell you whether the finished attachment is temporary, washable, or suitable for clothing. Some pressure-sensitive backings target hard surfaces, while others are intended for textile projects. Establish the receiving surface and care requirements before buying or applying one. The presence of tack is useful evidence of adhesive behavior, but it is not a measurement of long-term holding performance.
Handle the Release Liner Without Contaminating the Adhesive
Once the product is confirmed as pressure sensitive, inspect the designed liner edge and decide on placement before exposing the adhesive. Holding the patch by its border keeps handling away from the bonding surface. Repeated finger checks can transfer contamination, and repeated lifting may reduce the useful contact area. A clean liner coming away from a known adhesive system is a normal preparation step; fibers or structural material coming away with it call for a closer inspection.
- Lay out the garment naturally and check the patch position with its liner attached.
- Identify the intended liner tab or starting edge from the product directions.
- Hold the patch at the border and remove the instructed liner without touching the adhesive face.
- Position the patch once, then apply the pressure and finishing process specified for the product.
- Retain the product instructions so application and care details remain available afterward.
- Watch liner and tape handling: Therm O Web Fabric Fuse PeelnStick Tape video introduces a pressure-applied tape product. Use it to understand handling, while following the directions for the particular tape or sheet you have selected.
Understand What Pressure Actually Does at the Bonding Surface
Pressure-sensitive adhesive needs close contact with the surface beneath it. Manufacturers often call the gradual spreading into contact “wet-out,” even though you are not adding water. A raised seam, trapped lint, or incompatible finish can reduce contact. This explains the practical difference between briefly patting the middle of a badge and applying the prescribed pressure across its intended bonding area. A patch can appear flat while an edge is barely making contact with the garment.
- Technical explanation to download: 3M VHB 5952 technical data sheet explains adhesive contact and bond development. It supports the general mechanism described here; its industrial tape, preparation methods, and timing figures are not recommendations for attaching garment patches.
For a confirmed fabric adhesive system, place the garment on a firm support which lets you reach the entire patch area. Apply the specified pressure method across the center and perimeter, paying attention to places near seams. Do not interpret pressure as permission to use unlimited force on delicate decoration. If the construction prevents proper contact, change the position or attachment method. Pressing harder cannot reliably compensate for an unsupported area or an unsuitable material combination.
- Support the garment beneath the patch instead of working across a hollow sleeve or uneven bag.
- Follow the product’s prescribed pressing or rubbing method across the bonding area.
- Check whether its directions require working from the reverse side as well.
- Complete any specified finishing stage and keep the item undisturbed for the required interval.
- Watch a badge application: Badge Magic official application videos demonstrate its fabric badge adhesive system. Refer to the matching product instructions for preparation and pressure rather than borrowing requirements from another adhesive brand.
Distinguish Washability from an Immediate Hold
A patch staying in place during a fitting only confirms a short-term result under those conditions. Washing introduces moisture, detergent, movement, and a subsequent drying process. Look for instructions covering the whole routine, including any delay before the first wash. Also distinguish an adhesive advertised as permanent from one approved for the care method your garment needs. Permanent does not automatically mean suitable for every washing temperature, dryer setting, or cleaning solvent.
Fabric Fuse adhesive sheets provide a concrete example of these conditions. Their manufacturer specifies 48 hours before machine washing and prohibits sewing and ironing. The application directions also include a 15-minute tumble-drying stage, with the setting depending on the material, followed by further pressure. Those requirements mean the full procedure must fit your garment. A no-iron adhesive is not automatically an entirely heat-free installation, and the 48-hour interval should not be generalized to unrelated sticker patches.
- Read the complete application and care requirements: Fabric Fuse adhesive sheet directions set out preparation, pressure, drying, and washing restrictions. Use the full procedure rather than only the waiting-time claim.
Recognize Sew On Hook and Loop and Specialty Backings
Mechanical attachment provides a different route when a patch and garment are suited to stitching, a removable fastener, or hardware. Examine the entire assembly rather than assuming every non-sticky reverse is sew-on. A stiffened patch may have an intended sewing border, while a hook-backed patch needs a compatible mating panel. The next useful question is where the connection actually occurs and whether the garment can accommodate it without losing an important function.
Find a Suitable Stitching Path Before You Start Sewing
For a confirmed sewable patch, inspect the perimeter for the intended attachment area and check how the layers are joined. A visible border can guide placement, but decorative edging alone does not prove every underlying layer is needle compatible. Look at the inside of the garment as well: sewing through a pocket, lining, or folded sleeve can create a practical problem even when the patch itself is perfectly suitable for stitching.
- Confirm the backing and any added adhesive permit sewing.
- Position the patch on the relaxed garment and check the alignment from the front.
- Separate the garment layers you do not want to join together.
- Secure the position using a garment-safe method and choose the stitch path within the approved area.
- Stitch without forcing the needle through resistance, then inspect both sides for caught fabric or distortion.
- Watch the sewing operation: How to Sew on a Patch by Machine from Sewing Training Academy demonstrates machine attachment. Apply the technique only after checking the particular backing, needle path, and garment layers.
Hand sewing can be a practical option when a machine cannot reach the location comfortably, especially around a lining or narrow area. Work where you can see and control the receiving layer rather than blindly catching everything underneath. The choice between hand and machine sewing does not remove adhesive restrictions. If an existing glue layer is labeled unsuitable for sewing, change the patch construction or attachment approach instead of trying to overcome the restriction with a different needle.
- Follow an illustrated alternative: iFixit guide to hand sewing patches onto a garment provides a step-by-step sewing reference for a compatible patch and garment.
Identify Both Sides of a Hook and Loop Assembly
The hook side has small firm projections, while the loop side provides a softer surface designed to receive them. Ordinary fuzzy fabric is not automatically a suitable loop panel. Inspect both components and check how the patch engages across its full shape. A missing mating panel can make a perfectly good hook-backed badge appear unusable, while mismatched outlines can leave exposed hooks which catch adjacent fabric during wear or storage.
- Identify whether you have the hook-backed patch alone or a complete hook-and-loop set.
- Compare the patch outline with the usable area of the loop panel.
- Bring the matching surfaces together gently and check engagement without pulling at the garment.
- Inspect the reverse of the loop panel separately to establish whether it requires sewing, adhesive, or heat application.
- See the component distinction: American Patch hook-and-loop backing explanation describes the mating surfaces. Remember there are two connections: patch to panel, and panel to garment.
Measurements help when patch and panel listings use different units. One inch equals 25.4 millimeters, so a nominal 2-inch circular patch is 50.8 millimeters across. Compare the actual outline as well as the stated size, especially for shields, lettering, or irregular shapes. This conversion does not establish a sewing allowance or guarantee the mating surfaces are compatible. Check the physical fit before trimming a panel or committing it to a garment.
- Use while checking panel dimensions: Inches to millimeters converter helps compare measurements across product listings. Measure usable fastening area, not only the overall package dimensions.
Check Pins Magnets and Button Loops as Complete Fasteners
Pins, magnets, and button loops should be identified by how their complete fastening assembly works. Check for a clasp, matching magnetic component, or a loop sized for the intended button. A patch may still include textile or plastic support behind its face, but this support is not necessarily the attachment mechanism. Avoid filling a loop or covering hardware with glue merely because the back looks unfinished; the apparent gap may be a functional part of the design.
Consider how the garment will move during use. A pin creates a puncture, a button-hung patch can swing, and a magnetic attachment depends on the matching assembly and the intervening material. These differences matter more than whether the backing feels smooth or soft. For a removable display, choose the fastener around the garment and intended activity. Do not assume a detachable patch also leaves the receiving garment completely unchanged after attachment or removal.
Work Out What Changed on an Unlabeled or Used Patch
Used patches can carry evidence from several installations, so identifying the original backing and assessing its present condition are separate tasks. Needle holes may show earlier stitching, while a tacky area may come from an original or later adhesive layer. Neither observation cancels the other. Preserve the layers while you investigate, especially with a collectible or sentimental badge. The immediate question is which material would touch the garment during the next installation, not simply how the patch was sold years ago.
Distinguish an Added Adhesive Sheet from the Original Backing
An added adhesive layer may follow the patch outline closely or stop short of the border. Look for a second cut edge, differences in thickness, trapped lint, or residue extending beyond an otherwise regular coating. These clues suggest a separate application history but do not identify a chemical formula. A carefully cut aftermarket sheet can look factory installed. Record the visible layers and the previous owner’s information before deciding whether the existing adhesive can be reused.
- Photograph the whole reverse before cleaning or changing it.
- Look along the perimeter for two distinct edges or an overlay above the original coating.
- Compare the center with the border for changes in texture and coverage.
- Note old stitch holes, lint, missing sections, and lifted layers separately.
- Recover the added adhesive’s name and instructions if possible; do not identify it by color alone.
- Watch how an extra layer is added: Badge Magic Cut-to-Fit Any Badge video page demonstrates an adhesive sheet used with a badge. It helps explain the layered construction you may encounter, without establishing the identity of an unknown used adhesive.
Interpret Damage Before Choosing a Reattachment Method
Cracked film, curled edges, missing adhesive, and separation between patch layers change the problem from simple identification to repair assessment. A product label can establish the original backing but cannot confirm an old patch remains in its original condition. If a backing is peeling away from the embroidery, bonding its outer surface firmly to a garment may still leave the damaged internal connection unresolved. Inspect where the weakness sits before selecting an additional adhesive.
Avoid turning inspection into uncontrolled removal. Pulling away an unidentified coating can lift stitches, while solvents or repeated heating may affect materials beyond the layer you intended to remove. If the backing remains uncertain, preserve the patch and obtain a method suited to its actual construction. Sewing may be an option only when the remaining layers and garment are suitable; it is not a universal fallback for every damaged or adhesive-coated badge.
Request Information Which Resolves the Specific Uncertainty
A useful supplier question includes photographs of the front, reverse, and edge, plus the order number or product code when available. Describe the proposed garment and whether it must be washed or remain removable. Asking only whether a patch is “good quality” will not settle its backing type. Ask for the layer’s purpose, the allowed attachment method, and the complete application and care instructions so the answer can support an actual installation decision.
- Does the smooth layer provide reinforcement, heat activation, or both?
- Is the removable sheet a release liner, and at which stage should it be removed?
- Is the adhesive intended for fabric or for hard surfaces?
- Does the patch require a household iron, a professional press, stitching, or a mating panel?
- Can a needle pass through the finished adhesive layer?
- What waiting period and cleaning method apply after attachment?
Until those questions are resolved, use a description such as “coated reverse, attachment method unconfirmed” rather than assigning an iron-on label. For a mixed collection, put each patch beside its own notes and packaging so information does not migrate between similar-looking badges. This record can be simple: backing option, receiving fabric, approved method, and care instructions. The value comes from matching the information to the right item, rather than creating an elaborate tracking system.
Match the Identified Backing to the Garment and Intended Use
An accurately identified backing can still be a poor choice for a particular garment. Consider fiber content, surface finish, stretch, lining, and the way the item will be cleaned. The patch also changes how a small area bends and feels against the body. Check these practical effects before attachment. A method which works on a flat canvas tote may be awkward on a stretchy sleeve or unsuitable for a coated outerwear panel.
Read the Care Label and Inspect the Actual Attachment Area
Read the garment’s ironing, washing, and drying restrictions, then inspect the intended patch location from both sides. Fiber composition alone does not describe every finish, print, lining, or coating in a finished garment. A permitted ironing treatment also does not automatically approve an extended patch application with different pressure and dwell time. Compare the actual application process with the whole garment’s limits, rather than selecting a temperature from a generic fabric chart.
- Check the care symbols here: GINETEX textile care labeling guidance explains the symbols used for ironing, washing, drying, and other care. Use the label on the particular garment alongside the attachment instructions.
Before committing, lay the patch in position with the garment relaxed and move the material as it would move during wear. Bend a sleeve, open a pocket, and fold a bag along its normal crease. This is a fitting check rather than a durability test, but it can reveal a placement problem immediately. If the patch bridges a seam or restricts a useful opening, moving it may solve more than changing adhesive strength.
Compare the Method with the Fabric Construction
Use the following table to identify the practical questions associated with common receiving materials. It does not declare a universal winning adhesive or make every synthetic fabric unsuitable for heat. Product-specific compatibility still matters, including coatings and finishes you cannot identify by touch. Also separate decoration from structural repair: attaching a badge over a worn area does not, by itself, establish the repaired garment or bag can carry its previous load.
| Receiving item | Useful first check | Attachment routes to assess | Detail easily overlooked |
|---|---|---|---|
| Denim jacket or cotton canvas tote | Care label, seams, and access to the reverse | Approved sewing, heat application, or compatible fabric adhesive | A thick seam can interrupt contact under the patch |
| Stretch jersey or sportswear | Stretch during normal movement and any surface finish | A documented method suitable for the fabric and patch construction | A rigid badge can restrict movement even when firmly attached |
| Coated nylon or polyester outerwear | Coating, lining, and manufacturer repair guidance | A method explicitly compatible with the finished fabric | Heat or needle holes may affect a functional layer |
| Felt or heavily textured fabric | Surface stability and available contact area | Suitable sewing or a tested textile adhesive system | Adhesive may grip loose surface fibers rather than a stable base |
| Lined garment or usable pocket | Which layers the attachment would join | Controlled stitching or an approved adhesive method | Accidentally attaching a lining or closing the pocket |
| Existing loop panel | Panel size, condition, and matching hook engagement | Compatible hook-backed patch | The loop panel’s attachment to the garment is a separate connection |
For a repeatedly washed uniform, select the attachment around its actual cleaning routine. A nominally washable adhesive may require conditions the garment cannot follow, and an easy temporary placement method may not meet the intended use. For a removable badge, a compatible fastener can be more practical than planning to dissolve an adhesive later. Decide these requirements first so identification leads directly to a suitable method instead of repeated changes after installation.
Use Fabric Glue Only After Identifying Both Contact Surfaces
Fabric glue is most straightforward when the adhesive is intended for the actual patch reverse and receiving textile. A fabric patch face does not establish this compatibility if the reverse is covered by plastic, old adhesive, or another coating. Think through both connections: glue to patch backing, and glue to garment surface. A sound result requires both to work, as well as the patch’s existing layers remaining securely joined to one another.
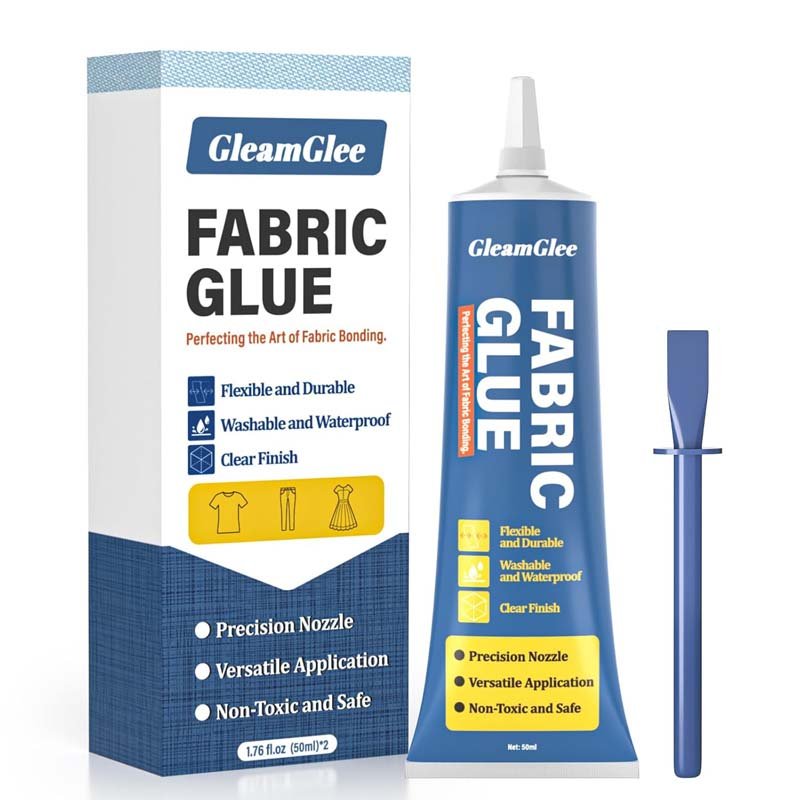
For compatible projects, GleamGlee Fabric Glue offers a clear-drying, flexible no-sew option. Product guidance for its 50 ml format lists approximately 6–10 minutes for initial setting and about 24 hours for full cure before washing, ironing, or frequent use. These are manufacturer guidance figures for the described product, not universal adhesive timings. Follow the current pack instructions, especially if the particular format or application guidance differs, and confirm compatibility with any coated patch reverse.
- Review the product option: GleamGlee Fabric Glue information provides the brand’s product overview. Choose the product around the actual backing, fabric, and care requirements rather than relying on the word fabric alone.
On an approved combination, apply the prescribed thin, even layer and keep the patch supported in position while it sets. Excess adhesive can spread past the edge, change the feel, or become visible through some fabrics even if the dried film is transparent. Use a representative sample to assess appearance as well as attachment. If the glue does not suit the exposed backing, adding a thicker layer is not a reliable solution to the compatibility problem.
- Clean and dry both surfaces using methods permitted for the materials and adhesive.
- Protect adjacent fabric and confirm alignment before dispensing.
- Apply the amount and coverage described by the product instructions.
- Position the patch and hold it without squeezing adhesive beyond the border.
- Leave it supported for the required setting and curing periods before testing normal use.
For repeat patch kits or a customized adhesive project, retain an actual patch and fabric sample for evaluation. Describe the exposed backing, desired flexibility, application time, appearance, and expected cleaning method. Those details make a product or customization discussion with GleamGlee more useful than asking for maximum strength alone. Start with the material combination and practical use requirements, then assess whether an existing formulation or a tailored product is appropriate.
Test the Attachment and Diagnose Problems Before Repeating the Job
A trial should reproduce the material combination and application method you plan to use, rather than merely show two pieces can stick together. Use a spare patch and matching fabric when available, complete the prescribed waiting period, and assess the finished appearance and behavior. If the patch is irreplaceable, a destructive experiment is a poor substitute for identifying its construction. Preserve the original while seeking a compatible method supported by its materials and intended use.
Check Appearance Contact and Flexibility on a Representative Sample
Prepare the sample as you would the final garment, including any approved cleaning and drying steps. Apply the patch with the specified equipment, coverage, pressure, and waiting time. Then inspect both sides under ordinary light. A bond can seem secure while leaving an unacceptable outline, stiff area, or distorted fabric. Assessing these features early is especially useful on pale, thin, or stretchy textiles where the visual and handling effects may matter as much as retention.
- Photograph the sample before application so color and surface changes are easier to compare.
- Record the patch backing, adhesive product if added, and receiving fabric.
- Follow the complete application process and note when the final stage finishes.
- After the required wait, inspect the perimeter and look for marks on both sides.
- Gently flex the sample as it would move in ordinary use without deliberately peeling the patch off.
- Perform the first permitted wash and drying routine, then inspect the same areas again.
Treat these observations as project-specific evidence. A successful trial on one fabric finish does not automatically cover another color, coating, or backing option. Similarly, one completed wash cannot establish a guaranteed number of future wash cycles. For repeated projects, keep the material and instruction records with the sample. If an order changes its backing option, repeat the relevant compatibility assessment instead of assuming the unchanged front design means the construction is identical.
Keep Initial Setting Full Cure and Washing Readiness Separate
Different attachment systems reach usable strength in different ways. Heat-applied materials have application and cooling requirements, pressure-sensitive products have contact and bond-development requirements, and liquid adhesives have setting and curing instructions. Calling every stage drying hides useful distinctions. A patch remaining in position while you move the garment is not proof it is ready for detergent or repeated bending. Use the specific milestone required for the next activity rather than judging readiness from surface feel alone.
For scheduling, write the earliest permitted next step beside the completion time. A product requiring 24 hours before washing, with application completed at 6 p.m. Monday, reaches that interval at 6 p.m. Tuesday; a 48-hour requirement reaches 6 p.m. Wednesday. These are elapsed-time examples, not general patch instructions. Include any required finishing stage before starting the appropriate wait, and follow additional conditions stated for the product and materials.
Read the Failure Location Before Adding More Glue or Heat
If a patch lifts, first look for where the separation occurred. Adhesive staying on the patch with relatively clean fabric beneath suggests investigating the garment-side connection. Adhesive staying on the garment points toward the patch-side connection. A backing layer separating from the embroidery identifies a different problem inside the patch. These observations guide investigation; they do not independently prove the adhesive chemistry, the exact cause, or which repair product will work.
| Observation after the required waiting period | Connection or condition to investigate | Practical response |
|---|---|---|
| One corner lifts near a seam | Uneven support or incomplete local contact | Compare the location with the application setup and supplier’s repair instructions |
| Adhesive remains on the patch but releases from the garment | Garment finish, contamination, contact, or compatibility | Recheck the actual receiving surface before choosing a repair method |
| Adhesive remains on the garment but separates from the patch | Patch-side coating or another weak layer | Identify the exposed reverse and any old adhesive underneath |
| Embroidery separates from its own backing | Internal patch damage or delamination | Address the patch construction rather than only its garment attachment |
| Fabric puckers or marks appear outside the border | Placement, heat effects, adhesive spread, or fabric response | Review the sample and process before treating additional garments |
Compare the failed sample with the recorded procedure before changing anything. If several variables changed together, such as adhesive, preparation, temperature, and pressure, you cannot confidently assign the result to one of them. Correct a documented application error within the manufacturer’s permitted process, or select a different compatible method when the materials are unsuitable. Reheating and adding glue repeatedly can obscure the original problem and make the remaining construction harder to assess.
Finish with a Backing Identification You Can Actually Use
A reliable patch decision connects the visible construction to a complete attachment and care method. Identify the layer which provides support, the surface which makes the bond, and any component intended for removal. Then match the approved process to the garment and check a representative sample where possible. Keep the instructions with the project so the next wash or replacement patch is handled consistently. This approach gives you a practical route from an unfamiliar backing to a neat, usable result without sacrificing a favorite garment to guesswork.

Frequently Asked Questions About Patch Backing Types
These questions address the decisions people commonly face after examining a patch: whether to iron or sew it, whether a layer should be removed, and what to do when the original instructions are missing. Read each answer alongside the construction details above. A general backing category can narrow the options, but exact product information remains necessary when heat, adhesive compatibility, or laundering requirements determine whether an attachment will suit your garment.
How Can I Tell If a Patch Is Iron On or Sew On
Inspect the reverse for visible textile, a continuous coating, and any product labeling, then match it to the exact backing option in the order or packaging. Cloth and exposed threads may suggest a sew-on construction, while a film may suggest heat application, but the appearance is not conclusive. Structural plastic can also be smooth and sewable. Confirm both the attachment method and required equipment before heating; a trial melt is not a reliable identification procedure.
Does a Shiny Plastic Backing Mean a Patch Can Be Ironed On
No. A shiny layer may reinforce the patch without functioning as a heat-activated adhesive, and different coatings can look similar under bright light. Do not remove the layer or apply an iron based only on its gloss. Find the manufacturer’s backing description and application instructions. If the construction is confirmed as sewable plastic reinforcement, keep it intact and follow the approved sewing method rather than treating the coating as an adhesive film.
Should I Peel the Backing Off a Patch Before Attaching It
Peel away only a layer identified as a removable liner in the product instructions, and do so at the specified stage. A supporting layer, permanent adhesive film, or hook-and-loop component normally stays with the patch. Some fusible products use paper during an initial transfer before the paper is removed, while pressure-sensitive products follow their own sequence. Stop if peeling lifts embroidery, stretches the border, or separates bonded layers; those signs do not match a clean liner-removal step.
Are Peel and Stick Patches Permanent and Washable
Those are separate questions, and neither answer follows from the phrase peel-and-stick alone. Confirm whether the adhesive targets temporary display, washable textile attachment, or hard surfaces. Then follow its complete application and care instructions, including any finishing process and waiting period before washing. An adhesive can hold immediately without being ready for laundering. Check the garment’s limits as well, because a patch system is unsuitable when its required process conflicts with the receiving item’s care instructions.
Can I Sew Through an Adhesive Backed Patch
Only if the backing and any added adhesive are suitable for sewing. Some adhesive products are intended for stitched projects, while others specifically prohibit a needle passing through the adhesive layer. A stronger needle does not change the product’s restriction. Before starting, also check the stitching path and the garment layers below it so you do not close a pocket or catch a lining. Choose the documented construction around the stitching you need to perform.
Can Fabric Glue Be Used on an Iron On Patch
Possibly, but the extra glue would be bonding to the existing iron-on film rather than directly to the textile face of the patch. Confirm compatibility with that film and the receiving garment, then assess a representative sample. Additional adhesive cannot automatically repair a damaged layer beneath it. If the old backing is lifting away from the embroidery, resolve the patch’s internal condition first instead of simply creating a stronger connection between the loose layer and the garment.
What Is the Safest Next Step When the Backing Is Unknown
Keep the patch unaltered, photograph its reverse and edge, and recover the packet, order details, or supplier information. Describe the observable features without assigning an unsupported backing name. Ask which layers remain, which attachment process is permitted, and how the finished item can be cleaned. For a sentimental patch, preserve its condition while obtaining material-specific guidance. Avoid heating, scraping, forced peeling, or solvent experiments merely to produce a quick answer from an uncertain construction.