Skip to content

Lace and ribbon look simple until adhesive touches them. Open lace can let liquid glue pass directly through its holes, satin ribbon may show a darker wet-looking patch, organza can reveal almost every uneven spot, and long ribbon can become wavy if it is stretched or glued in one continuous run. A successful project therefore depends less on using the largest possible amount of adhesive and more on matching the glue, material, application pattern, pressure, and curing time to the actual job.
For most decorative, low-stress projects, a clear-drying and flexible fabric adhesive can be an excellent no-sew choice. It can help attach lace trim to garments, secure ribbon to fabric bags, finish wedding crafts, make bows and accessories, or add decorative bands to curtains and home textiles. The method is not universal, however. A strong structural seam, a highly stretched sports garment, an expensive heirloom lace piece, or a dry-clean-only formal garment may be better sewn or handled by a professional rather than bonded permanently at home.
This guide is designed to help you make those decisions before glue reaches the final fabric. It covers material-specific testing, thin application methods, realistic curing expectations, first-wash precautions, troubleshooting, useful measurement formulas, and clear situations where sewing is the safer choice. Product examples are used only where they add practical context. For readers considering GleamGlee Fabric Glue, the confirmed product profile includes a precision applicator, clear drying, flexible curing, suitability for lace and ribbon, an initial set of roughly 6-10 minutes, and about 24 hours for full cure before washing, ironing, or heavy use.
Can You Use Fabric Glue for Lace and Ribbon?
Yes. Fabric glue can work very well for lace and ribbon when the project is decorative, low-stress, and compatible with the chosen adhesive. The safest approach is to use a clear-drying, flexible fabric adhesive in a very small amount, test the exact material combination first, and allow a full cure before wearing or washing. Structural seams, highly stretched areas, and valuable delicate garments should usually be sewn or professionally repaired instead.
When Fabric Glue Is a Good Choice
Fabric glue is especially useful when the trim is primarily decorative and does not carry the weight or tension of the garment. Typical examples include lace along a neckline that is not stretched during dressing, ribbon on a fabric gift bag, decorative trim on a table runner, bows on headbands, lace panels on craft projects, or ribbon accents on costumes. These jobs benefit from a flat bond, limited visible stitching, and the ability to work with shapes that are awkward to sew by machine.
Good candidates usually share three physical traits: the pieces lie against each other naturally, the bonded area can remain still during curing, and the finished joint will flex without being repeatedly pulled apart. A short section of decorative lace on cotton is very different from a shoulder seam or a backpack strap. Treating both as the same adhesive problem is one of the fastest ways to create a repair that looks fine at first but fails during normal use. Common projects where fabric glue is often practical include:
- Lace trim on dresses, shirts, aprons, jeans, and fabric accessories
- Ribbon bands on clothing, bags, table linens, and fabric gifts
- Wedding crafts, bows, chair decorations, and non-structural bridal details
- Costume embellishments that sit on low-stress panels
- Curtain trim, cushion decoration, and table-runner accents
- Felt, cotton, denim, polyester, and canvas crafts with attached decorative trim
- Positioning small decorative pieces before later sewing, when a temporary adhesive is used
- Evidence and reference:Aleene’s demonstrates a no-sew lace application on fabric projects and describes clear, flexible, washable fabric glue for everyday textile use.
When Glue Is Not the Best Choice
The most important limitation is load. Adhesive applied to the surface of a textile is not a universal substitute for a seam engineered to carry repeated tension. Crotch seams, shoulder seams, armholes, zippers, waistbands, bag straps, safety equipment, and tight stretch garments can experience forces that repeatedly peel or shear the bond. In these locations, sewing spreads the load through thread paths and seam construction in a way a narrow surface bond may not reproduce reliably.
Material value matters as much as mechanical load. Vintage lace, silk, heirloom garments, expensive wedding dresses, coated performance fabrics, and professional dry-clean-only garments deserve conservative treatment because staining, stiffening, coating damage, or a misplaced permanent bond can be difficult or impossible to reverse. If the project is expensive enough that a failed test piece would be unacceptable, the correct next step is usually a tailor, costume technician, conservator, or textile specialist rather than a more aggressive adhesive. Situations where sewing or professional repair is usually safer include:
- Crotch, shoulder, underarm, zipper, waistband, or other structural seams
- Highly elastic activewear and frequently stretched knit areas
- Load-bearing bag straps and equipment attachments
- Protective clothing or safety-related textiles
- Antique, collectible, or heirloom lace
- Valuable silk, specialty-coated fabric, or complex lined garments
- Items whose care label requires specialist cleaning or prohibits the heat needed by another bonding method
What Type of Fabric Glue Works Best for Lace and Ribbon?
The best fabric glue for lace and ribbon is usually one that dries clear, remains flexible after curing, can be applied in a controlled thin line or tiny dots, and matches the project’s permanence and washing requirements. No single formula is automatically best for every trim. Sheer lace, satin ribbon, grosgrain, velvet, cotton tape, and organza all present different absorption, visibility, texture, and flexing challenges, so the label and a scrap test matter more than a broad “strongest glue” claim.
Look Beyond the Words “Dries Clear”
Clear drying is useful because a white or opaque adhesive line would be obvious through many decorative textiles, but clear chemistry alone does not guarantee an invisible result. A thick clear layer can still produce a glossy border, change how light reflects from satin, create a visible ridge under organza, or stiffen soft lace. The practical goal is therefore a clear adhesive plus a thin bond line, controlled placement, and enough flexibility to move with the fabric after curing.
A useful way to think about appearance is to separate adhesive color from material response. The glue may become transparent while the fabric itself darkens from wetting, becomes shiny from surface contamination, or changes hand because too much adhesive penetrates the fibers. This is especially relevant on pale lace, sheer ribbon, satin, and lightweight polyester. If appearance is important, judge the cured sample under daylight from normal viewing distance rather than deciding only by looking at the wet glue close up.
Flexibility Is Often More Important Than Maximum Hardness
Lace and ribbon are usually chosen because they drape, bend, fold, or move with the object beneath them. A bond that cures into a rigid plate may hold strongly yet still create a poor finished result. For wearable pieces, the adhesive layer should ideally follow normal fabric movement without producing a hard edge against the skin or causing the trim to stand away from the base fabric. This is why flexible fabric-specific products generally make more sense than general-purpose rigid craft adhesives for clothing and soft accessories.
The amount applied still influences flexibility. A product designed to stay soft can become noticeably stiffer if it is deposited as a thick pool, especially on absorbent lace or cotton ribbon. In workshop practice, the best first adjustment for a stiff finished bond is often to reduce adhesive thickness and bonding area rather than immediately switching to a weaker product. Use enough to create continuous contact where needed, but avoid saturating every fiber simply because more adhesive seems safer.
Permanent or Temporary: Decide Before You Start
A useful decision question is simple: are you gluing instead of sewing, or gluing before sewing? If the adhesive will be the final attachment on clothing, crafts, or home textiles, choose a permanent fabric adhesive rated for the intended care conditions. If the glue is only holding ribbon or lace in position while you sew, a temporary or washable positioning adhesive may be more appropriate because it reduces the risk of creating stiff zones or permanent marks where a needle must later pass.
This distinction is particularly useful for long trim. Sewing several feet of ribbon while keeping it straight can be frustrating, so a temporary adhesive or small controlled positioning dots can reduce shifting. Permanent glue used as a sewing aid should be kept away from the actual needle path unless the machine manufacturer and adhesive instructions permit it. Glue transferred to a sewing needle can create skipped stitches, residue, or machine maintenance problems, so positioning and stitching should be planned as separate operations.
Precision Application Matters More on Open and Sheer Materials
A precision tip or narrow applicator is valuable because lace often offers only thin threads and small solid areas for adhesive placement. On ribbon, the same control helps keep the adhesive slightly inside the visible edge so pressure does not force it outward. A broad craft nozzle may work for large felt pieces, but it makes it much harder to create a narrow, repeatable line on 6 mm ribbon or to place micro-dots on lace without filling the decorative openings.
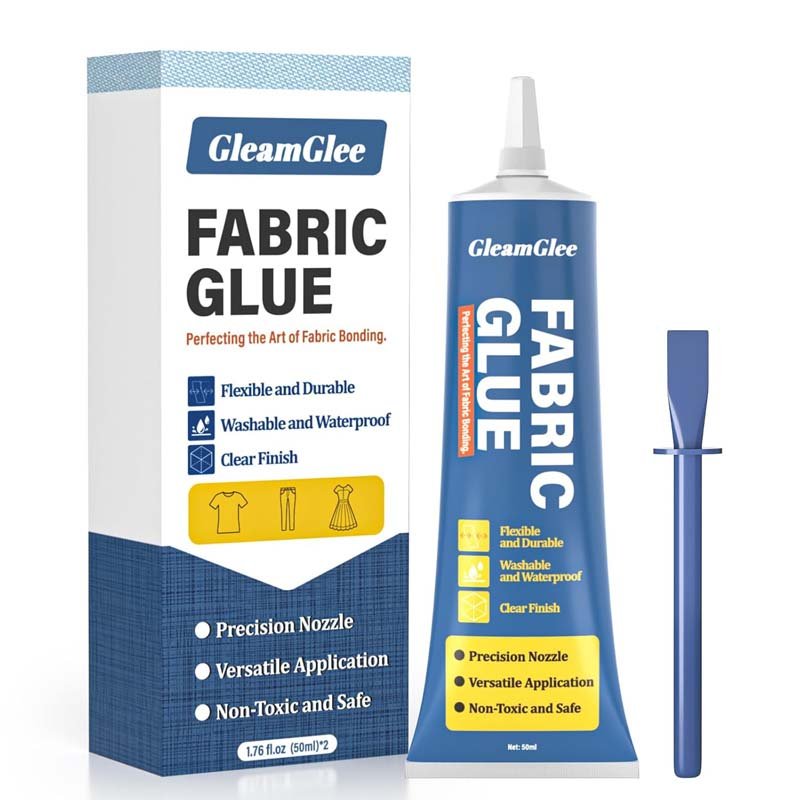
GleamGlee Fabric Glue is relevant in this context because its confirmed product profile includes a precision applicator, clear drying, a flexible cured layer, suitability for common textile materials including lace and ribbon, and wash-safe performance after full cure. The available 50 ml format is a practical size for small clothing, trim, and craft projects, while a two-bottle option is more useful for repeated projects. Those characteristics are meaningful only when the user still follows material testing, thin application, accurate positioning, and curing instructions.
| Feature to Check | Why It Matters for Lace and Ribbon | Practical Sign to Look For |
|---|---|---|
| Clear drying | Helps reduce visible residue on pale or decorative trim | Cured sample has no milky line |
| Flexible cure | Allows fabric and trim to bend naturally | Sample folds without a hard hinge |
| Precision applicator | Controls glue around lace holes and ribbon edges | Thin line or tiny dots are easy to place |
| Washability | Important for clothing and home textiles | Manufacturer gives laundering guidance |
| Permanent or temporary hold | Must match whether sewing follows | Label clearly states final or temporary use |
| Low soak-through behavior | Important for satin, organza, and sheer lace | Scrap sample shows no dark wet-looking patch |
| Fabric compatibility | Reduces adhesion failure and staining risk | Exact material pair passes a cured test |
- Evidence and product-specific benchmark:Gorilla Fabric Glue lists ribbon among its intended surfaces, states that the cured bond remains flexible, recommends scrap testing, gives a minimum 24-hour full cure, and instructs users to wait at least three days before washing or ironing. It also publishes a product-specific coverage reference of one pea-size drop per square inch. Those numbers apply to Gorilla’s formula, not to every fabric glue.
How Different Lace and Ribbon Materials React to Fabric Glue
Material names matter because appearance and bond behavior are strongly influenced by openness, thickness, weave, absorbency, surface finish, and stretch. A heavy cotton lace can tolerate a different application pattern from sheer Chantilly-style lace, while ribbed grosgrain behaves differently from glossy satin or translucent organza. Instead of asking whether a glue “works on ribbon” in general, treat each project as a specific pair: base fabric plus exact lace or ribbon, then test the pair together.
Sheer and Open Lace
Open lace creates a unique problem: much of the visible surface is empty space. If adhesive is applied as a broad film, pressure can push it through the holes onto the work surface or the front face, where it may dry as shiny dots between the threads. The safest pattern is usually a series of tiny dots or short interrupted lines placed on the more substantial lace threads, scallops, or border areas rather than across every opening.
Pressure should also be gentler than with a thick patch. The aim is to bring the solid threads into contact with the base fabric, not to squeeze liquid through the lace like a screen. Place release paper or another non-stick protective sheet beneath the work whenever the adhesive manufacturer permits it, then inspect the front immediately after pressing. If the lace is almost transparent, a full cured scrap test is essential because a bond may look acceptable when wet and become glossy after drying.
Cotton, Crochet, and Heavier Lace
Cotton and crochet-style lace usually provide more fiber mass and larger solid yarn areas, making them easier to bond than extremely sheer synthetic lace. Their greater absorbency can still consume adhesive quickly, however. A line that seems small on the nozzle may wick into the yarn, creating a stiff stripe if too much is applied. A controlled test should therefore check not only whether the lace sticks, but also whether the border remains soft enough to drape after curing.
Heavier lace can also hide small adhesive variations better than satin, but weight changes the mechanical problem. A broad crochet trim hanging from the edge of a curtain or costume may create more peel force than a narrow decorative strip. When the trim is wide, heavy, or located on an edge that moves repeatedly, consider combining adhesive positioning with discreet stitches at stress points. The final attachment method should reflect the weight and movement of the trim, not just its visual delicacy.
Satin Ribbon
Satin deserves separate treatment because its smooth reflective surface can make small appearance changes obvious. Wet adhesive may darken the ribbon temporarily, and some products can leave a longer-lasting change depending on chemistry, dye, and how deeply the liquid penetrates. Aleene’s current fabric-glue FAQ specifically warns that satin has a higher potential for wet soak and notes that some water-based fabric glues may darken lightweight delicate materials such as polyester satin ribbon.
For satin, start with the smallest practical amount and place it on the back face, slightly inside the edges. Do not press so hard that the line spreads to the visible border. Test under the same lighting in which the finished item will be viewed, because satin can look clean straight on but reveal a dull or dark stripe at an angle. If the project is bridal, formal, pale-colored, or highly visible, a failed scrap test is a reason to change the method rather than add more glue.
- Evidence:Aleene’s FAQ discusses satin wet-soak risk, possible darkening of lightweight delicate fabrics, and the need for inconspicuous testing before applying fabric glue to the project.
Grosgrain Ribbon
Grosgrain ribbon has pronounced ribs, so the back surface does not contact the base fabric as uniformly as a smooth tape. A very thin continuous line usually works better than widely spaced dots when the objective is to keep a long edge flat, but the line still should not be so thick that it bridges the ribs and creates a visible raised track. Apply the adhesive in short lengths, lay the ribbon without stretching it, and press along the center before checking the edges.
Long grosgrain runs can become wavy when the ribbon is pulled tight during placement and then relaxes after the adhesive begins to set. This is common on hems, table linens, and bags where users instinctively tension the ribbon to keep it straight. A better method is to mark a reference line, lay the ribbon in its natural relaxed state, and work along the line section by section. Straightness should come from measurement and reference marks, not from stretching the trim.
Organza Ribbon
Organza is one of the least forgiving ribbon types because it is thin, translucent, and easily distorted. A thick bead is often visible from the front, and even a clear adhesive may create a darker or glossier zone where it changes the way the fibers transmit light. Tiny dots or an extremely fine interrupted line are usually safer than a continuous wet stripe, especially on pale organza used in wedding and decorative projects.
Because organza is light, users sometimes assume it needs almost no holding force and press quickly. The bigger risk is actually visual damage. Work on a flat surface, avoid pulling the ribbon, and allow a small test piece to cure fully before judging. If the sample remains visibly spotted from normal viewing distance, consider stitching with fine thread, using a temporary positioning method followed by sewing, or redesigning the attachment so the adhesive sits under an opaque decorative element.
Velvet Ribbon
Velvet ribbon introduces two problems at once: a relatively thick base and a pile surface that can be crushed by pressure or contaminated by adhesive. Whenever possible, apply glue only to the back and keep the front pile away from the work surface. Clips with hard narrow jaws can leave marks, so use broad gentle support, protective paper, or a flat covered weight only if the velvet construction tolerates it and the adhesive instructions allow pressure during setting.
The back of velvet ribbon may also differ between brands, with woven, coated, or synthetic constructions responding differently to adhesive. Do not assume a product that worked on one velvet ribbon will behave identically on another. Test for both bond and appearance, then flex the cured sample because the thickness can create peel stress at the edge. If the ribbon is being attached to a curved cuff, shoe, hat, or other tight radius, stitching may be more reliable than a flat adhesive method.
| Material | Main Risk | Better Application Pattern | What to Check After Cure |
|---|---|---|---|
| Sheer/open lace | Glue passes through holes | Micro-dots or interrupted fine lines on solid threads | Shine, bleed-through, stiffness |
| Cotton/crochet lace | High absorption | Thin line on thicker yarn areas | Hand, edge lift, wicking |
| Satin ribbon | Dark wet marks and altered sheen | Very thin back-side line, inside edges | Color and gloss at several angles |
| Grosgrain ribbon | Waviness and uneven rib contact | Fine continuous line in short sections | Straightness and edge contact |
| Organza ribbon | Adhesive easily visible | Minimal dots or very fine interrupted line | Transparency and spotting |
| Velvet ribbon | Crushed pile and thick edges | Back-side bonding with gentle pressure | Pile condition and edge peel |
| Cotton ribbon | Absorption and stiffness | Thin even layer | Flexibility and soak-through |
- Video reference 1 – Lace and fabric glue:This demonstration shows three no-sew fabric upcycling projects using lace trim and also includes ribbon in the project materials. It is useful for understanding placement, proportion, and how decorative trim can be added without building a structural seam.
- Video reference 2 – Long trim placement:This no-sew fringe tutorial is not limited to lace, but it is useful because fringe behaves like long decorative trim. The video shows measuring, cutting, positioning, and using clothespins, which helps users understand how to keep long ribbon or lace from moving while a bond develops.
How to Test Lace or Ribbon Before Gluing
A good test is not simply a drop of glue on one material. The real question is whether the exact material pair, adhesive amount, pressure, and curing conditions produce an acceptable finished bond. Test the actual base fabric with the actual lace or ribbon, using the same application pattern planned for the project. This catches failures caused by dyes, coatings, absorption, openness, and surface texture before they appear on the visible item.
Make the Test Piece Represent the Real Project
Use a scrap from the same ribbon roll or lace batch when possible, because color treatment and backing finishes can vary. Pair it with the same base fabric, not a random piece of cotton. If the final trim will cross a hem, curve, or seam allowance, include a similar feature in the sample. A test on a perfectly flat single layer may not reveal edge lifting that appears later when the same trim is bent around a cuff or corner.
Keep the test big enough to evaluate visually and mechanically. For many craft projects, a sample around 5-10 cm long is practical because it gives enough space to compare a glued area with an unglued control while using little material. This is a workshop rule of thumb rather than an industry standard. Expensive or narrow specialty trim may require a smaller sample, but the piece still needs enough bonded length for a meaningful bend and edge check.
Check More Than Whether It Sticks
A bond can feel strong and still be unacceptable for clothing or decorative work. After the sample has fully cured according to the product instructions, compare it with an unglued piece under normal lighting. Look at the front, back, and edge. Then flex it slowly and feel the transition from bonded to unbonded material. If the trim will be washed, the most useful test includes a laundering cycle consistent with the care instructions of both the garment and the adhesive. Record these checks so the result is repeatable:
- Bleed-through: Did adhesive reach the visible face?
- Color change: Is the ribbon or lace darker or lighter?
- Shine: Does the cured area reflect light differently?
- Stiffness: Is there a hard stripe or board-like patch?
- Wrinkling: Did the trim shrink, wave, or distort?
- Edge adhesion: Can a fingernail easily lift the edge?
- Flexibility: Does the sample bend without cracking or peeling?
- Wash performance: If washable, did the bond survive the allowed care cycle?
Do Not Judge a Wet Sample as a Finished Result
Wet adhesive temporarily changes the refractive appearance of many textiles, especially satin and sheer synthetics, so an immediate dark area is not always the final color. The reverse mistake is equally common: a surface may look dry while the adhesive beneath the fibers has not reached full cure. Moving, stretching, washing, or ironing too early can create a failure that users later blame on the formula even though the bond was disturbed during its curing stage.
For a controlled comparison, label the sample with the start time and leave it flat or fixed for the full period stated by the adhesive manufacturer. GleamGlee Fabric Glue, for example, is specified to begin initial setting in roughly 6-10 minutes and to reach full cure at about 24 hours. Other formulas publish different laundering delays, so one brand’s timing should never be copied onto another product without checking its own label or technical instructions. A useful static record sheet for a craft room, sewing studio, school, or small production team can include:
- Base fabric name and color
- Lace or ribbon name, width, color, and supplier
- Adhesive name and batch/date if relevant
- Application pattern: dots, interrupted line, or continuous line
- Approximate glue amount or nozzle pressure setting
- Initial set time and full-cure time
- Appearance score after cure
- Flexibility and edge-lift result
- Washing result, if required
- Final decision: approved, reduce amount, change adhesive, or sew instead
How to Glue Lace and Ribbon to Fabric Step by Step
The cleanest results come from doing most of the thinking before opening the glue. Prepare the surface, measure the actual path, dry-position the complete trim, decide where joins and corners will fall, and test the material pair first. During bonding, work in short sections, use less adhesive than your instinct may suggest, press without stretching, and keep the piece stable until the specified cure is complete.
Step 1: Clean, Dry, and Read the Care Information
Dust, lint, finishing residues, body oils, fabric softener, and workshop debris can reduce contact between the adhesive and fibers. If the project is washable and the fabric manufacturer permits prewashing, clean and dry the item before bonding. Follow the adhesive maker’s surface-preparation instructions rather than applying one universal cleaning rule to every textile. Do not use aggressive solvents on delicate ribbon or lace unless the material and adhesive manufacturer specifically approve them.
For garments, read the care label before deciding whether a washable or iron-safe adhesive will actually make the finished item washable or ironable. The garment remains a system made of base fabric, trim, thread, dyes, coatings, lining, buttons, and other components. An adhesive may tolerate a warm iron, for example, while satin ribbon or the garment’s print does not. The most restrictive relevant care requirement should guide the finished piece.
Step 2: Measure the Real Path and Add a Small Planning Allowance
Measure the line the trim will actually follow, including curves, corners, overlaps, and end finishes. For a straight piece, a tape measure is usually enough. Around a neckline, curved bag edge, or circular decoration, use a flexible tape or temporarily lay a non-stretch cord along the path and then measure the cord. Avoid calculating trim length from a straight-line distance when the ribbon will follow a curved path.
A practical purchase allowance for straightforward craft trim is often around 5 percent beyond the measured path, with more reserved when motifs must match, corners require folding, ends need overlapping, or the material may be damaged during testing. This is a planning allowance rather than a fixed industry rule. For expensive lace, calculate the actual repeats and joins before buying; for inexpensive ribbon used in repetitive crafts, a larger spare amount can reduce interruptions caused by one miscut. Useful manual formulas include:
- Trim purchase estimate = measured path length x 1.05 for a simple 5 percent reserve
- Usable layout span = total span – left margin – right margin
- Equal clear gap = (span – 2 x end margin – number of items x item width) / (number of items – 1)
- Material for repeated pieces = piece length x quantity, adjusted for fabric width, motif repeat, cutting direction, and waste
- External calculation tool – equal spacing:SawWise can calculate equal gaps and center positions from total span, number of items, item width, and end margin. It is useful for evenly spaced bows, ribbon tabs, lace motifs, or repeated fabric decorations even though the tool was originally built for workshop layouts.
- External calculation tool – fabric yardage:Fabric Yardage Calculator estimates yardage from dimensions, quantity, usable fabric width, seam allowance, pattern repeat, and optional waste allowance. It is more useful for batch craft planning than for measuring one narrow ribbon path.
Step 3: Dry-Position the Entire Trim Before Applying Adhesive
Lay the full lace or ribbon in place without glue and decide where every visible feature will sit. Check pattern direction, motif alignment, corners, overlaps, and where the end joint will be least noticeable. On clothing, try the garment on with the trim temporarily held using appropriate pins or clips if doing so will not damage the fabric. A design that looks centered on a flat table can shift visually when a curved body, sleeve, neckline, or bag is filled.
Take a quick reference photo once the dry layout looks correct. For repeated decoration, measure from a fixed seam or edge instead of repeatedly measuring from the previous piece, because small errors accumulate. When designing a more complex arrangement, a simple digital layout can help you visualize relative size before handling the real materials, but the final positioning still needs to be checked on the physical fabric because stretch, curvature, and drape are difficult to reproduce perfectly on screen.
- External layout tool:Cricut’s Design Space templates can be used as visual guides for planning repeated decoration, shapes, and placement before cutting or bonding. The template itself is a guide and does not replace physical measurement on the final garment or textile.
Step 4: Apply Adhesive Differently to Lace and Ribbon
For open lace, place tiny dots or short interrupted lines on solid threads, scallops, embroidered borders, or other areas with enough fiber to carry the adhesive. Avoid filling the holes. For ribbon, use a very narrow line on the back, generally slightly inside the visible edges so pressure does not force glue outward. On satin and organza, reduce the amount further and rely on the scrap test to confirm whether the line is still visible after curing.
Do not assume the same nozzle pressure works across every material. Thick cotton lace may absorb a fine line rapidly, while polyester ribbon may hold liquid on the surface. Practice squeezing the applicator on scrap first so you can create a repeatable line without sudden blobs. With a precision-tip product such as GleamGlee Fabric Glue, the practical advantage is control at edges and open patterns; the tool cannot compensate for a user applying a continuous heavy bead across a delicate trim.
Step 5: Work in Short Sections Without Stretching the Trim
Long decorative strips are easier to keep straight when bonded progressively. A practical section length for many hand-applied projects is roughly 10-20 cm at a time, shortened further around curves and corners. This range is a working suggestion, not a chemistry specification. The correct section is the length you can position accurately before the adhesive becomes difficult to adjust. Very fast-setting products may require smaller sections, while slower products allow more working time.
Open only the next section, apply the planned glue pattern, place the trim in its relaxed state, press, and verify the alignment before moving forward. Do not pull ribbon tight to make it look straight. Stretching creates stored tension, and the ribbon may shrink back after release or after washing, causing ripples in the base fabric. Marking a reference line and following it with relaxed trim creates a more stable result than using tension as a straightening tool.
- Video reference 3 – Measuring and section-by-section fabric bonding:This fabric-glue hemming demonstration is not a lace-specific project, but it clearly shows measuring, marking, positioning, and bonding a long fabric edge. Those workflow habits transfer well to long ribbon or lace trim.
Step 6: Press From the Center Toward the Edges
When joining a wider ribbon or lace border, first make contact through the center or main solid band, then press outward gently. This reduces the chance of trapping a local pool of adhesive and squeezing it directly through the edge. On open lace, use light fingertip pressure through protective paper or another clean barrier compatible with the adhesive instructions. The objective is consistent fiber contact, not maximum compression.
Check the front immediately after each section. If the trim has shifted, correct it within the product’s working-time limits rather than repeatedly sliding it across wet adhesive. Sliding spreads the liquid over a larger visible area and can create a glossy haze. If fresh squeeze-out appears, follow the adhesive manufacturer’s cleanup method. Do not automatically rub the spot with water, alcohol, acetone, or another solvent because the chemical may damage dye, finish, or the base textile.
Step 7: Hold the Work Stable During Initial Setting
Pins, fabric clips, clothespins, flat covered weights, or a clean pressing plate can help maintain contact, but the right method depends on the material. A pin may leave a visible hole in fine satin, while a hard clip may crush velvet pile. Use the least damaging support that keeps the piece from moving. Whenever pressure is applied, protect the visible surface so glue cannot transfer from one section to another or bond accidentally to the work table.
Initial setting should not be confused with full cure. GleamGlee Fabric Glue is specified to form initial fixation in roughly 6-10 minutes, which is useful for keeping a small trim from shifting, but the product guidance calls for about 24 hours before full cure. A piece that can be handled gently after several minutes is not automatically ready for stretching, machine washing, ironing, or repeated wear. Keep the project in a stable position until the full specified cure period has passed.
Step 8: Inspect Before Wearing, Washing, or Packing the Item
After full cure, look at every edge under normal light, flex the bonded area gently, and compare the feel with nearby unbonded fabric. If the project will be worn, perform ordinary low-stress movements before more demanding use. A neckline should still fold naturally, a bag trim should not lift when the fabric bends, and a table runner should lie flat without hard ripples. Fixing a small local edge at this stage is easier than discovering widespread lift after a wash cycle.
For batch crafts, wedding décor, costumes, or school projects, do not stack finished pieces while hidden adhesive may still be curing. Use a simple time label showing application date and the earliest handling or use time. Separating active work time from cure time also improves project scheduling: a trim may take only several minutes to place, yet the item may still need a full day or more before packaging, laundering, or strenuous use depending on the exact adhesive.
How to Prevent Glue Marks, Stiffness, Wrinkles, and Edge Lifting
Most visible problems in lace and ribbon projects come from four controllable variables: adhesive quantity, placement, pressure, and movement during curing. A clear adhesive can still show as a glossy patch if too much reaches the face, while a flexible formula can still create stiffness if the fabric is saturated. Troubleshooting is easier when you identify the physical failure first instead of responding to every problem by adding another layer of glue.
Glue Showing Through Lace
When adhesive appears in lace openings, the usual causes are too much liquid, a continuous film across open areas, or excessive pressing. The correction is to reduce the amount and move the adhesive onto the solid threads and borders that actually contact the base fabric. For a repair of a previously glued piece, do not pour more adhesive into the visible gap. Lift only the loose area that can be opened safely, clean according to the product instructions, and reapply a narrow controlled line.
A protective work surface is essential because lace can bond through its own openings to the table. Release paper, silicone craft material, or another barrier may help when compatible with the adhesive, but always confirm it will not react with or transfer texture to the project. After pressing, inspect from the front before the section advances. Catching one squeeze-out point while fresh is easier than removing a cured transparent web from multiple lace holes later.
Satin Ribbon Developing Dark or Dull Patches
Darkening on satin usually signals wet soak, dye interaction, or a local change in surface reflection. Reducing the amount is the first practical test. Apply adhesive to the back only, keep it inside the edges, and avoid wiping liquid across the face. If the dried sample remains visibly darker, changing to another compatible adhesive or switching to fine stitching is more sensible than trying to hide the mark with additional layers or decorative coatings.
Light angle matters because satin is reflective. Evaluate the sample from the front, side, and the angle at which the finished piece will be photographed or viewed. Wedding ribbon and formal wear deserve especially strict visual standards. A bond that is technically strong but creates a visible rectangular shadow is not a successful result. The goal is not merely attachment; it is attachment that preserves the reason satin was chosen in the first place: smooth color and controlled sheen.
Ribbon Becoming Wavy
Waviness usually comes from tension mismatch, uneven wetting, or trying to handle too much length at once. If ribbon is stretched during application, it can contract after release. If one side receives much more adhesive, local stiffness can pull the ribbon into a slight curve. If the base fabric is soft and the ribbon is rigid, pressing a long wet strip can also distort the base before the glue begins to set.
The solution is procedural: mark the intended line, let both materials lie naturally, work in shorter sections, and use consistent adhesive placement. Around curves, reduce the section length instead of forcing the ribbon into shape under tension. When a ribbon must follow a tight inside curve, small easing folds, bias-cut trim, or sewing may be more appropriate than trying to make a straight woven ribbon behave like elastic material.
Lace or Ribbon Becoming Stiff
Stiffness is often caused by a thick bond line, over-saturation of absorbent fibers, or multiple coats added before earlier adhesive has cured. Start by comparing the glued area with an unglued control. If the entire trim feels board-like, the bond area is probably too broad or too wet. The next sample should use a narrower line, more spacing between dots, or adhesive only at the border and key support points rather than full-surface coverage.
There is no universal milliliter-per-meter number for lace and ribbon because nozzle size, viscosity, fiber absorption, trim width, and open area vary widely. Manufacturer-specific coverage data can be helpful as a reference, but it must remain product-specific. The Gorilla example earlier publishes a pea-size drop per square inch for its own formula; this should not be converted into a claim about GleamGlee or another product without direct testing. Scrap testing remains the safer way to establish a usable application amount.
Edge Lifting After Drying
Edge lift can come from contamination, insufficient contact near the edge, incompatible coatings, early movement, or repeated flexing. Check whether the edge is clean and whether the trim naturally lies flat. If a thick ribbon is trying to spring away from a curve, more glue may not solve the mechanical mismatch. A few discreet stitches, a different ribbon construction, or a redesigned path may provide better long-term stability than repeatedly re-bonding the same stressed edge.
When only a short section has lifted and both surfaces remain intact, open the loose area carefully, remove loose debris without damaging the textile, and follow the adhesive’s instructions for reapplication. Keep the new glue line inside the visible edge and extend slightly into the still-bonded region if the product allows it, so the repair does not end at the exact previous failure point. Hold the area stable for the complete cure, not merely until it feels tack-free.
| Problem | Likely Cause | Better Next Step |
|---|---|---|
| Glue visible through lace | Too much adhesive or glue over open holes | Use micro-dots on solid threads and lighter pressure |
| Satin looks darker | Wet soak or dye/surface interaction | Reduce amount, test another formula, or sew |
| Ribbon turns wavy | Stretching, long sections, uneven wetting | Work relaxed in short measured sections |
| Trim feels stiff | Thick layer or fiber saturation | Narrow the glue line and reduce bonded area |
| Glossy edge appears | Adhesive too close to visible edge | Move line slightly inward and reduce pressure |
| Edge lifts | Contamination, poor contact, or repeated peel force | Clean, rebond locally, or add discreet stitching |
| Trim shifts during curing | Inadequate positioning support | Use appropriate pins, clips, or protected weight |
Washing, Wearing, and When Sewing Is the Better Choice
A glued trim should be judged as a complete textile system, not as an adhesive specimen. The glue, base fabric, lace or ribbon, dyes, coatings, thread, and garment construction all have their own limits. Follow the most restrictive care requirement. A fabric glue described as washable does not authorize hotter water, a harsher dryer cycle, or higher ironing temperature than the garment and trim can tolerate.
Dry Time, Full Cure, and Laundering Time Are Different
Manufacturers use terms such as working time, set time, dry time, full cure, and laundering wait time for different stages. These stages should not be collapsed into one number. A bond can resist light movement before its full mechanical properties have developed, and a fully cured adhesive may still require a longer wait before laundering according to the specific product instructions. Read the label for the exact formula rather than relying on a generic “wait 24 hours” rule found online.
GleamGlee Fabric Glue is specified for roughly 6-10 minutes of initial fixation and about 24 hours for full cure before washing, ironing, or high-frequency use. Aleene’s FAQ, by comparison, recommends a minimum 72-hour wait before laundering its fabric glues, while Gorilla specifies a 24-hour full cure but a three-day wait before washing or ironing. The different published instructions are useful evidence of one principle: curing and care timing are formula-specific, so never transfer another brand’s timetable to your bottle.
Follow the Garment Care Label After Adding Trim
The U.S. Federal Trade Commission’s Care Labeling Rule requires care information to address washing or dry cleaning and, where relevant, drying, ironing, bleaching, and warnings. Its business guidance also emphasizes that care instructions must consider garment components such as linings, trim, buttons, and zippers. This matters after a DIY modification because a new ribbon or lace addition can become the most heat-sensitive or abrasion-sensitive component in the finished garment.
For the first wash after bonding, a conservative approach is to confirm full cure, inspect every edge, follow the garment and trim care instructions, and reduce unnecessary abrasion where the labels permit. Turning a garment inside out and using a gentle cycle can protect exposed decoration in many cases, but these are risk-reduction practices rather than replacements for care labels. If the ribbon or lace supplier says hand wash only, the adhesive’s machine-wash capability does not override that restriction.
- Evidence – U.S. garment care requirements:The FTC rule and guidance explain washing, drying, ironing, bleaching, warnings, and the need to consider components of a garment.
- Downloadable care-symbol reference:GINETEX publishes a care-labeling symbol reference covering washing, bleaching, drying, ironing, and professional textile care. Check national labeling requirements before reproducing protected symbols commercially.
Fabric Glue vs Sewing
Fabric glue is most attractive when the area is decorative, relatively flat, low-stress, and difficult to sew neatly without visible stitches. Sewing is generally stronger for structural attachment because stitches pass through the textile and can distribute loads along a seam. A fine hand stitch can also be less visible than expected when thread color and stitch placement are chosen well. The best method is therefore not decided by whether a user owns a sewing machine, but by load, material, appearance, washing frequency, and reversibility.
A combined method is often useful for long trims and frequently washed clothing. Adhesive or temporary positioning material can keep lace or ribbon aligned while several discreet stitches secure stress points or the perimeter. This is especially helpful for costumes, children’s clothing, uniform decoration, or wide trim that repeatedly bends. When glue is used before machine stitching, keep it outside the needle path unless the machine and adhesive instructions specifically permit sewing through the bonded area.
- Evidence and technique reference:Brother’s appliqué instructions explicitly allow basting or gluing an appliqué to hold it in place, then warn users not to apply glue in areas that will be sewn because adhesive on the needle or bobbin case may damage the machine.
- Downloadable sewing reference:Utah State University Extension’s machine appliqué guide explains fusible and temporary positioning approaches followed by edge stitching, with practical notes on stitch placement and machine technique.
Fabric Glue vs Hot Glue
Hot glue is fast and useful for rigid or semi-rigid craft decoration, but it can produce a thick bead, a noticeable bump, and a comparatively hard bond line on thin textiles. It may also transfer heat to sensitive ribbon or synthetic fabric. Fabric adhesive is generally a better first option when the finished piece needs to remain soft, wearable, washable according to product guidance, and visually flat. The choice should still be tested because not every fabric adhesive is appropriate for every synthetic finish.
For a display-only wreath, rigid bow center, or craft prop, hot glue may be entirely reasonable. For satin ribbon on a blouse, open lace on a dress, or trim on a cushion cover that will bend and be laundered, a flexible textile adhesive or sewing method is usually easier to integrate into the fabric’s behavior. The useful question is not which glue is universally stronger; it is which attachment method leaves the finished object looking, moving, and being cared for as intended.
Temporary Adhesive and Glue-Plus-Sewing Methods
Temporary fabric adhesive is useful when accurate positioning is the main challenge and the final strength will come from stitches. Long lace borders, ribbon around curved necklines, appliqué, and repeating motifs can all move during sewing. A temporary hold reduces the need for excessive pinning and helps the user maintain spacing. Confirm that the temporary product is compatible with the fabric and that its removal or laundering behavior matches the project before using it on pale or valuable materials.
When a permanent fabric glue is used as part of a combined method, treat it as a positioning or supplementary bond rather than assuming it replaces every stitch. Keep the amount small, avoid the future needle path, and let the positioning stage stabilize before sewing. If the trim is thick, sits on a curve, or will experience repeated washing, a few strategically placed stitches can prevent peel at the edges while the adhesive keeps the surface flat and reduces visible thread across the center.
| Method | Best For | Main Advantage | Main Limitation |
|---|---|---|---|
| Flexible fabric glue | Low-stress trim, crafts, no-sew clothing decoration | Flat, clean, no visible stitches | Requires material testing and curing time |
| Hand sewing | Delicate trim, stress points, valuable garments | Strong, repairable, little or no adhesive | Slower and requires basic skill |
| Machine sewing | Long, repeated, or structural attachment | Fast and durable for suitable fabrics | Can be difficult on small curves or finished garments |
| Hot glue | Rigid craft decoration and quick non-washable projects | Very fast grab | Thick, hot, and often stiff on thin textiles |
| Temporary fabric adhesive | Positioning before sewing | Reduces shifting | Not intended as final permanent strength |
| Glue plus stitching | Frequently handled or washed decorative trim | Combines flat positioning with edge security | Requires planning to keep glue away from needle path |
- Video reference 4 – Hand sewing needles:This Professor Pincushion video explains common hand-sewing needle types, sizes, and threading. It is useful when a lace or ribbon project falls outside the safe range for glue and the user needs to select a less damaging needle for the fabric.
- Video reference 5 – Invisible blind hem:This tutorial demonstrates a hand blind-hem method with minimal visible stitching. It is useful as an alternative when a user wants an unobtrusive finish but the trim or garment is not a good candidate for permanent adhesive.
- Video reference 6 – Five garment hand stitches:This Professor Pincushion tutorial covers running stitch, backstitch, slip stitch, blind hem, and catch stitch. It gives beginners a practical set of sewing alternatives when glue is unsuitable for structural or high-stress areas.

Conclusion
Fabric glue can be an excellent way to attach lace and ribbon, but the professional-looking result comes from controlling the process rather than chasing maximum adhesive strength. Identify whether the project is decorative or structural, test the exact material pair, choose a clear and flexible adhesive, use the smallest reliable application pattern, work in short relaxed sections, and respect the full cure and garment care requirements. Those steps prevent most of the dark marks, shiny edges, stiffness, waves, and premature lifting seen in no-sew trim projects.
For users who prefer a ready-made no-sew option, GleamGlee Fabric Glue is designed for common textile applications including lace and ribbon and combines a precision applicator with clear drying, flexible curing, wash-safe use after full cure, and a roughly 24-hour full-cure target. The same principles in this guide still apply: test first, apply thinly, allow the bond to develop fully, and choose sewing when the trim carries meaningful load. For brands or craft businesses considering custom fabric-adhesive projects, material-pair testing and application design should be specified alongside formula development rather than treating “fabric glue” as a single universal performance category.
Frequently Asked Questions About Fabric Glue for Lace and Ribbon
Can fabric glue be used on lace?
Yes, fabric glue can be used on many lace types, especially for decorative, low-stress attachment to clothing, crafts, bags, and home textiles. Open lace needs a different application pattern from solid fabric: place tiny dots or short fine lines on the stronger threads and borders instead of coating the holes. Test the exact lace and base fabric first, then judge bleed-through, shine, stiffness, flexibility, and edge adhesion only after the sample has fully cured.
What glue is best for satin ribbon?
A clear-drying, flexible fabric adhesive with controlled application is usually the best starting point for satin ribbon, but the specific formula must be tested because satin can show wet soak, darkening, and changes in sheen. Apply a very thin line to the back, keep it slightly inside the edges, and avoid heavy pressure. If the cured test remains visibly darker from normal viewing angles, switch adhesive or use fine stitching instead of adding more glue.
How do you glue lace without the glue showing?
Use less adhesive than you would on a solid patch and place it only where solid lace threads can contact the base fabric. Micro-dots and interrupted fine lines usually reduce squeeze-through better than a broad continuous film. Work on a protected flat surface, press gently, and inspect the front after every short section. A clear adhesive helps, but an invisible result still depends on limiting bond-line thickness, preventing contamination, and allowing the sample to cure before judging gloss or color.
Will fabric glue make ribbon stiff?
It can if the adhesive layer is too thick, the ribbon absorbs a large amount of liquid, or multiple coats are added before the earlier layer has cured. A fabric adhesive formulated to remain flexible reduces the risk but does not eliminate the effect of over-application. Test a short sample, use the narrowest line that still gives reliable contact, and flex the cured ribbon. If the bonded section feels like a hard hinge, reduce the amount or bonding area on the next sample.
Can glued lace or ribbon be machine washed?
Machine washing depends on all components, not just the adhesive. The fabric glue must be rated for laundering after its specified cure, the garment care label must allow the selected wash method, and the lace or ribbon itself must also tolerate the cycle. Wait for the exact product’s laundering interval rather than relying on a universal number, inspect the edges before washing, and use the gentlest care method permitted by the finished item’s instructions when decorative trim is exposed to abrasion.
Is fabric glue better than hot glue for ribbon?
For wearable, flexible, or washable textile projects, fabric glue is usually the more suitable starting point because it can create a flatter and more flexible bond than a typical hot-glue bead. Hot glue remains useful for rigid craft decoration, display pieces, and quick assembly where thickness and heat are acceptable. Satin, organza, and other delicate ribbons should be tested especially carefully because both liquid soak from fabric adhesive and heat from hot glue can alter appearance.
Should I glue or sew lace onto clothing?
Use fabric glue when the lace is decorative, the area is low-stress, the materials pass a compatibility test, and you want a clean no-sew appearance. Choose sewing when the lace crosses a structural seam, the garment stretches heavily, the trim is expensive or heirloom quality, the piece will be washed frequently under demanding conditions, or the bond must remain repairable. For many long decorative trims, a combined method – light positioning adhesive plus discreet edge stitches – offers an effective balance of alignment, appearance, and durability.