Skip to content

Felt letters are easy to cut, but getting them to stay flat, look evenly spaced, and remain clean around the edges takes more thought than many first-time projects suggest. Felt is fibrous and three-dimensional, and the base underneath may be cotton, canvas, polyester, fleece, denim, more felt, or a heat-sensitive garment. A successful project therefore depends on four linked decisions: choosing an adhesive appropriate for the final use, testing the exact material pair, planning the layout before any glue is opened, and allowing the bond to cure under stable conditions. This guide follows those decisions in the same order a careful maker would use at the worktable.
The practical goal is not to find the strongest glue in isolation. A letter on a nursery wall banner experiences very little flexing, while a letter on a tote bag may fold hundreds of times and a letter on a sweatshirt may be washed repeatedly. From an adhesive-development perspective, those are different service conditions. The article therefore separates decorative, washable, heat-bonded, and sewn solutions instead of presenting one method as universally superior. Where product-specific timing is mentioned, it is labeled clearly, because initial set, full cure, and wash-ready time vary by formulation and should never be borrowed from another adhesive simply because both products are sold as fabric glue.
What Is the Best Fabric Glue for Felt Letters?
For most felt-letter projects, the best starting point is a fabric-specific adhesive that dries clear, stays flexible after curing, and can be dispensed accurately enough to reach narrow strokes without flooding the cut edge. A permanent washable formula is more appropriate for garments, stockings, bags, and costume pieces that will be cleaned or flexed, while a thicker craft adhesive may be perfectly suitable for a wall banner or classroom display that will never enter a washing machine. The correct choice therefore begins with the finished project’s expected movement, cleaning method, and service life rather than with a single strength claim on the front of a bottle.
Choose the Glue Based on Whether the Project Will Be Washed
A decorative name banner usually needs reliable initial grab, tidy edges, and long-term room-temperature holding power. A sweatshirt or tote bag adds repeated bending, abrasion, and laundering, so flexibility and wash resistance move higher on the priority list. A classroom alphabet board may need the opposite approach: if letters are meant to be moved and rearranged, permanent adhesive is the wrong system altogether. This project-first logic prevents a common mistake in craft writing, where a glue is labeled ‘best for felt’ without asking what the felt is expected to do after the project is finished.
- Evidence: Aleene’s felt-crafting guide distinguishes non-washable tacky-style felt adhesives from permanent fabric adhesives and specifically lists felt type, flexibility, washability, strength, and applicator style as selection factors.
- Video: Aleene’s Fabric Fusion Glue Guide gives a clear visual overview of choosing a permanent, flexible fabric adhesive for repairs and decorative fabric details; use it as category-level guidance rather than as timing instructions for another brand.
Look for Clear Drying, Flexibility, Controlled Application, and Good Felt Contact
Four properties deserve attention on the technical data or package directions. First, clear drying helps on visible crafts, although a clear adhesive can still leave a shiny ridge if too much squeezes out. Second, cured flexibility matters when the base bends or drapes. Third, application control matters more with letters than with large rectangles because narrow legs, counters, curves, and sharp tips offer little room for error. Fourth, the adhesive has to make enough useful contact with a textured felt surface. The right layer is the one recommended for the actual formulation; increasing volume blindly can slow drying, increase stiffness, and push adhesive into visible areas.
- Downloadable evidence: JOANN’s Fabric Adhesives Guide is a printable PDF showing how fabric glues, fusible webs, temporary tapes, and related products are matched to different end uses; it is useful for explaining why adhesive category and final use should be considered together.
Acrylic, Polyester, Wool, and Wool-Blend Felt Can Behave Differently
The word felt covers a broad group of materials rather than one perfectly standardized bonding surface. Synthetic craft felt may be made from acrylic or polyester fibers, while higher-end decorative felt may contain wool or wool blends. Density, thickness, surface finish, dye system, recycled content, and manufacturing pressure can change how quickly a liquid wets the surface and how much adhesive remains near the bond line. For this reason, an inconspicuous or scrap test is not an optional ritual; it is the simplest way to learn how the exact felt in your hand behaves before you commit a finished name, monogram, or classroom title.
- Check for front-side darkening or a wet-looking patch after the sample cures.
- Bend the sample and compare the bonded area with an unbonded piece of the same felt.
- Inspect the cut edge for shine, hardened squeeze-out, or a visible adhesive outline.
- Test a narrow corner as well as a broad area, because small letter tips fail sooner than wide letter bodies.
- If the project will be washed, test the sample after the full manufacturer-specified cure and follow the textile care limits.
| Project type | Main performance need | Good starting method | Main caution |
|---|---|---|---|
| Wall banner or nursery sign | Clean edge, stable hold | Fabric glue or suitable tacky felt/craft glue | Do not overapply simply because washing is not required |
| Christmas stocking | Flexibility, neat appearance, storage durability | Permanent flexible fabric glue | Confirm stocking fabric and felt both tolerate the planned care method |
| Tote bag | Flexing, abrasion, possible washing | Permanent washable fabric glue | Large letters may need extra edge attention |
| Sweatshirt or costume | Flexibility and wear resistance | Washable fabric glue; sew if stress is high | Felt itself may stretch less than the garment |
| Classroom display | Fast, tidy assembly | Fabric or tacky craft adhesive | Choose age-appropriate materials and supervise tools |
| Reusable alphabet board | Repositionability | Hook-and-loop or removable system | Permanent glue defeats the learning function |
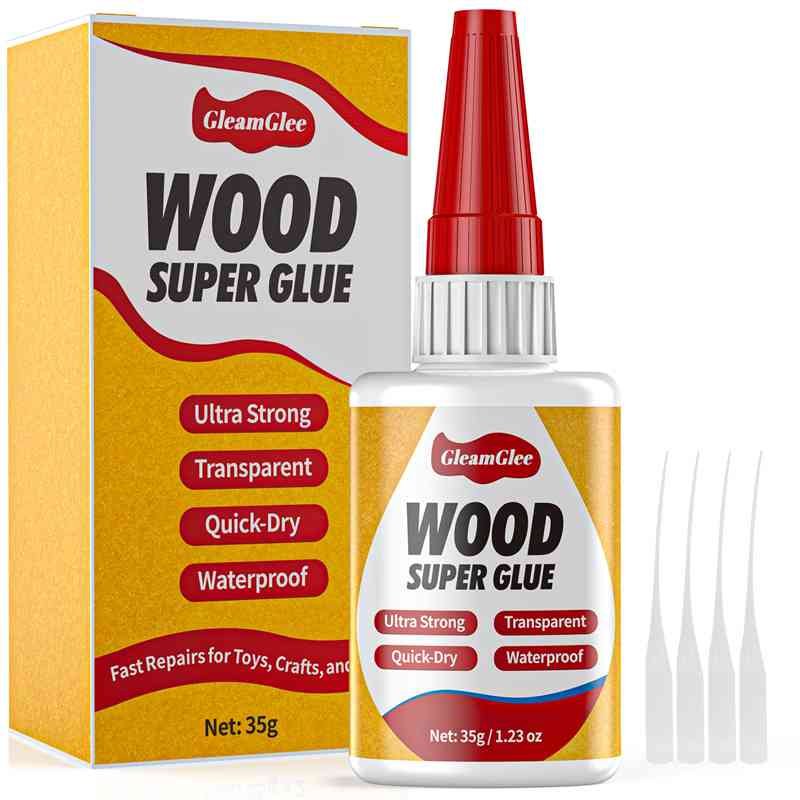
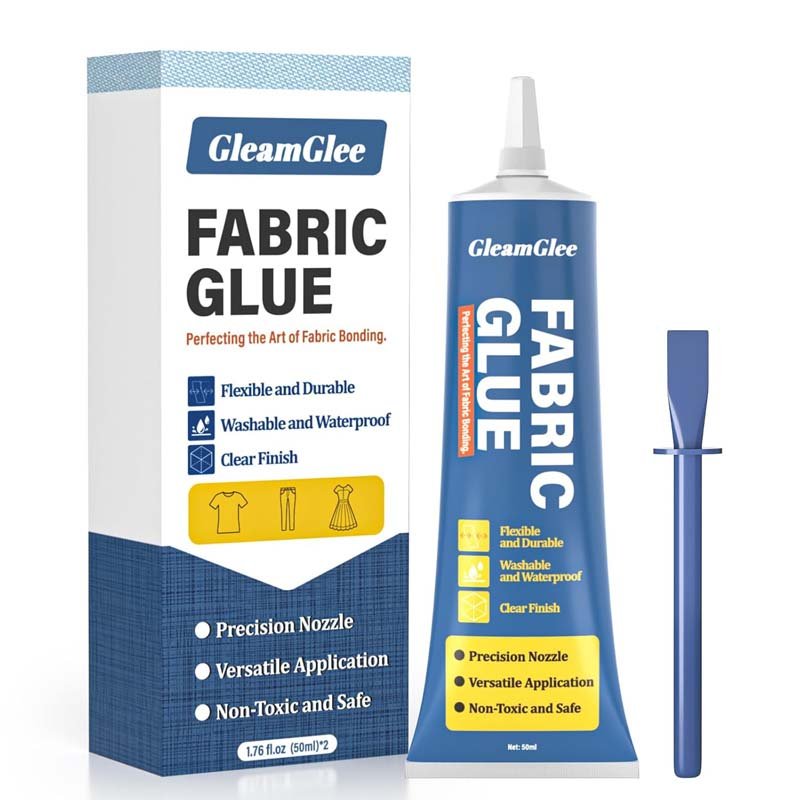
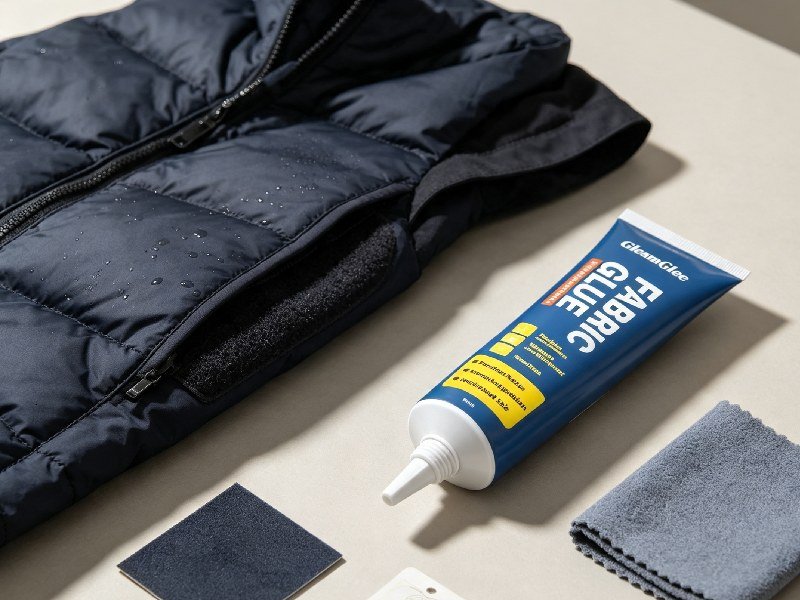
GleamGlee Fabric Glue is one example of a fabric-specific route for permanent felt-letter projects. The current product specification provided for this article describes a 50 mL adhesive intended to dry clear, remain soft and flexible after full cure, and work on common textiles including felt, cotton, denim, canvas, and polyester. It also uses a precision applicator, which is particularly useful around letter tips and narrow strokes. Its guidance calls for a thin, even application, approximately 6-10 minutes for initial setting, and about 24 hours for full cure; those figures should be treated as product-specific instructions rather than universal fabric-glue timing.
What Can You Glue Felt Letters Onto?
Felt letters can be attached to many textile bases, but compatibility is a two-surface problem. Testing only the felt tells you nothing about whether a pale cotton backing will show a wet-looking spot or whether a slick polyester weave will provide enough surface contact. The most reliable test reproduces the final stack exactly: the same felt, the same base fabric, the same glue amount, the same pressure, and the same cure time. If the finished object will bend, wash, or be stored folded, the test sample should also be bent, cleaned, or folded in a comparable way after full cure.
Felt Letters on Felt
Felt-to-felt projects are common in banners, ornaments, quiet books, educational boards, seasonal garlands, and layered craft signs. Both surfaces are fibrous, so the letter should be supported across its broad body and its small edge features rather than attached with one heavy center blob. A thick letter may appear flat when first pressed but spring upward later if only the middle is bonded. Before gluing, brush away loose fibers, lay the project on a rigid flat surface, and make sure curled or distorted letters can naturally return to the planned shape without being forced.
Felt Letters on Cotton, Canvas, Denim, Polyester, and Fleece
Cotton can absorb low-viscosity liquids quickly, especially when the weave is light and the color is pale. Canvas and denim are thicker and generally hide small variations better, but they may require careful pressure so the entire letter makes contact with the textured weave. Polyester varies widely: a tightly woven costume fabric can feel relatively slick, while brushed polyester or fleece is soft and uneven. The same felt letter can therefore behave differently on three polyester fabrics. Cleanliness, weave, surface finish, and movement are often as important as the fiber name printed on the label.
When the Base Surface Needs Extra Caution
Use a more conservative approach on very thin fabrics, highly elastic garments, waterproof or coated textiles, glossy synthetic surfaces, delicate woolens, heirloom pieces, and expensive clothing. On stretch garments, a non-stretch felt letter can create a stiff island even when the glue itself remains flexible, so the geometry of the appliqué may become the limiting factor. On coated textiles, both glue and needle holes can affect the original surface treatment. When a project is valuable or the material identity is uncertain, a small test is better than a confident guess, and professional sewing or repair can be the lower-risk choice.
| Base material | Typical use | What to test first | Practical handling note |
|---|---|---|---|
| Felt | Banners, signs, ornaments | Fiber shedding and edge contact | Press broad areas and narrow tips separately |
| Cotton | Stockings, clothing, craft panels | Front-side darkening or soak-through | Use controlled application and inspect the face immediately |
| Canvas | Totes, banners, storage bins | Full contact on coarse weave | Use an even flat support while curing |
| Denim | Jackets, bags, décor | Thickness and fold behavior | Avoid creating a bulky glue ridge under narrow strokes |
| Polyester | Costumes, apparel, décor | Surface slickness and color change | Test the exact weave rather than relying on fiber name alone |
| Fleece | Blankets, apparel, soft crafts | Pile compression and limited contact | Do not bury the bond in loose surface fibers |
How to Plan Felt Letter Size, Spacing, and Placement
A felt-letter project can be perfectly bonded and still look wrong if the spacing is uneven, the word is off-center, or one letter sits lower than the rest. Layout mistakes are especially noticeable in short names because there are fewer elements to distract the eye. Treat planning as a separate stage from gluing. Build or print the lettering, cut every piece, lay the full word on the finished base, establish a centerline and baseline, and photograph the approved arrangement before any adhesive is dispensed. Once wet glue is involved, every correction becomes harder and more likely to leave a visible mark.
Make or Print a Letter Template Before Cutting Felt
Templates solve several problems at once: they keep letter height consistent, preserve the chosen font, and make it easier to compare the finished word with the available banner or garment area. For letters such as B, O, P, A, and R, mark the interior openings clearly before cutting so the counter shape remains centered. If you are tracing letters onto the back of felt, remember that asymmetrical letters may need to be mirrored depending on the tracing method. Make one test letter first and place it on the base to confirm the scale before cutting the entire name or phrase.
- Video: How to Make Letter Template for Felt Name Banner shows a practical template workflow using common design and printing tools, making it especially useful for beginners who want consistent letter shapes before cutting felt.
Dry-Layout Every Letter Before Applying Glue
Place every finished letter on the project with no adhesive and examine the composition from both close range and normal viewing distance. Check spelling, orientation, the relationship to seams or banner edges, and whether rounded letters visually appear lower than flat-bottom letters. A removable baseline is useful for most words, while a vertical centerline helps prevent the entire phrase from drifting left or right. If the project is a garment, pin or temporarily position paper templates first and view the item in its worn shape, because body curves can change how a flat-table layout looks.
- Video: DIY Name Banner for Babies provides a complete felt-name-banner example and helps users see how individual letters relate to the full composition rather than treating each letter as an isolated piece.
Use a Simple Spacing Formula, Then Make a Visual Adjustment
For letters of different widths, equal center-to-center spacing can look awkward. A better starting point is to measure the actual width of every cut letter and calculate the leftover space. If a 30-inch banner has 20 inches of total letter width and 2-inch margins on both ends, 6 inches remain for the five interior gaps between six letters. Dividing 6 by 5 gives a starting gap of 1.2 inches. This is a mathematical baseline, not an optical law: round letters, diagonals, and very narrow letters such as I or L may need a small visual adjustment so the word looks balanced from normal viewing distance.
- Interior-gap formula: Gap = (usable span – total letter width – left margin – right margin) / (number of letters – 1).
- Equal end-and-interior gaps: Gap = (usable span – total letter width) / (number of letters + 1).
- Measure the real cut letters rather than relying only on font point size, because felt cutting and font geometry change finished width.
- After calculation, photograph the dry layout and judge the spacing from the distance at which the finished banner or sign will normally be seen.
- External calculator: SawWise Equal Spacing Calculator can be repurposed for craft layouts by entering the available span, item count, item width, and end margin. The calculator is built for physical layout work, so its gap and center-mark outputs translate well to repeated felt elements.
Use Digital Layout Tools Only as a Preview, Not as a Substitute for Real Measurement
Digital tools are useful for font choice, approximate proportions, and alignment, but they do not know the exact width of a hand-cut felt letter or the way a soft banner curves when hung. Build a digital mock-up first, then verify the physical letters on the actual base. This two-stage method is more reliable than either digital planning or table-top eyeballing alone. It also provides a practical record for batch projects: if you are making several classroom labels or multiple personalized banners, save the measured letter heights, margins, and gap decisions so future pieces can be reproduced without starting from zero.
- External tool: Cricut’s official Design Space template guide explains how layout guides can be used to visualize final proportions without sending the guide itself to the cutting machine, which makes the tool useful for planning banner and garment placement.
- External design reference: Canva’s alignment guide explains how alignment creates order and visual hierarchy; the principle is directly useful when checking baselines, centers, and repeated spacing in felt-letter layouts.
How to Glue Felt Letters Neatly Step by Step
Once the layout has been approved, the gluing stage should become predictable rather than experimental. Work on a flat protected surface, keep the reference photo nearby, and glue one manageable letter or small group at a time. The process is simple but each action has a purpose: cleaning removes contaminants, testing reveals color and stiffness risk, controlled application limits squeeze-out, one-time placement avoids smearing, directional pressure improves edge contact, and full cure allows the adhesive system to develop the performance promised by its own instructions. Skipping any one of those steps increases the chance of a project that looks good for ten minutes but poorly after handling.
Step 1 – Prepare the Surface and Run a Real Compatibility Test
Remove lint, pet hair, thread ends, chalk dust, loose felt fibers, and visible soil from both bonding surfaces. If the base is washable and has never been cleaned, consider whether finishing agents, fabric softener, or surface treatments might affect adhesion; follow the textile maker’s care guidance rather than improvising a wash. On a scrap piece, reproduce the planned glue line and pressure, then allow the sample to reach full cure. Judge the sample for front-side staining, edge visibility, flexibility, and adhesion. A five-minute wet test tells you only how the materials look while the adhesive is still changing.
Step 2 – Apply a Controlled Layer to the Back of the Letter
Place the letter face-down on a clean protective sheet and dispense the adhesive in the pattern recommended by its manufacturer. With a precision-tip liquid adhesive, work slightly inside the cut perimeter and make sure small tips and narrow strokes receive useful coverage without creating a bead right on the visible edge. Large letters do not necessarily need a thick pool in the center; a thin, consistent bond line often preserves flexibility better. If your sample showed rapid absorption, reduce the first application rather than repeatedly adding wet adhesive until the felt looks saturated. The objective is continuous contact, not maximum liquid volume.
Step 3 – Place the Letter Once and Press from the Center Outward
Bring the letter above its marked position and align one reliable reference point before allowing the rest to touch. On a straight banner this may be the baseline; on a circular sign it may be a center mark or radial guide. Once contact starts, lower the remaining letter rather than sliding it sideways through wet adhesive. Press the broad center first, then move toward the edges to push the felt into even contact. If the letter shifts by a noticeable amount, lift it only if the adhesive instructions and your test sample show repositioning is still safe; repeated dragging is one of the fastest ways to create visible glue halos.
- Video: How to Attach Applique Using Fabric Glue is placed here because it visually demonstrates the same placement-and-press sequence users need when adapting an applique workflow to felt letters.
Step 4 – Give Extra Attention to Tips, Curves, and Narrow Strokes
Letter geometry creates predictable weak points. The tips of A, M, N, V, and W have small bonded areas; the diagonal legs of K and R can lift if the center receives all the pressure; and the curves of C, G, and S may spring upward if the felt was cut from a rolled or distorted sheet. After pressing the center, trace the entire perimeter with a clean fingertip or a smooth protective tool and check every small feature. This is also the right moment to remove a tiny fresh squeeze-out using the cleanup method allowed by the adhesive maker, rather than rubbing it outward over the face of the fabric.
Step 5 – Stabilize the Project Without Flattening the Felt Texture
The project must remain aligned while the adhesive develops initial hold, but stabilization should not crush the felt or transfer glue to a weight, board, or clamp. For flat banners, a clean release sheet and a smooth lightweight board can distribute pressure if the adhesive instructions permit it. For curved items such as stockings or soft bags, support the inside so the bonding area lies flat without stretching the fabric. Avoid heavy clamps on delicate felt because they can leave dents. If several letters are being glued at once, confirm all of them are level before adding any weight, since pressure can make later repositioning impossible.
Step 6 – Respect Initial Set and Full Cure as Different Stages
A surface may stop feeling wet long before the bond is ready for bending, wearing, or laundering. Dry-to-touch, initial set, handling strength, and full cure describe different stages of adhesive development. For the GleamGlee product specification used in this article, initial setting is approximately 6-10 minutes and full cure is about 24 hours. During that 24-hour window, the project should remain stable and should not be washed, ironed, or repeatedly flexed. Other fabric glues may specify substantially different intervals, so a user switching brands should switch timing instructions too rather than carrying a familiar number from one bottle to another.
- Tool: Timeanddate’s Date and Time Calculator is useful when an adhesive specifies a fixed cure interval. Enter the exact gluing finish time and add the stated hours to produce a clear ‘ready after’ time instead of relying on a vague next-day estimate.
| Problem after application | Likely cause | What to do next | What not to do |
|---|---|---|---|
| Glue visible around the edge | Too much adhesive or glue placed on the perimeter | Remove fresh excess using the approved cleanup method; reduce amount on the next sample | Do not smear wet glue over a larger visible area |
| Letter slides during set | Too much liquid, weak initial grab, or unstable support | Reposition promptly only if allowed, then stabilize the area | Do not keep nudging the letter every few minutes |
| Letter feels stiff | Heavy glue layer or deep soak-through | Reduce application thickness on a scrap test and localize the bond area | Do not assume a flexible formula can offset unlimited glue volume |
| Corners lift after cure | Thin tip lacked contact or was bent during cure | Lift only the loose tip, clean lint, add a small internal amount, and re-press | Do not coat the outside edge with a large bead |
| Dark patch shows on the front | Absorption or color interaction | Stop and test a smaller amount or a different method on scrap material | Do not continue across the full word hoping it will disappear |
| Bond fails after washing | Incomplete cure, incompatible wash conditions, or wrong adhesive category | Review glue, felt, and garment care limits as a complete system | Do not increase wash temperature to “test” the repair |
How to Prevent Glue Marks, Stiffness, Sliding, and Lifting Edges
Most disappointing felt-letter projects are not caused by a mysterious adhesive failure. They are process failures that can be diagnosed: too much adhesive creates squeeze-out and stiffness, poor layout leads to dragging and smearing, inadequate edge pressure leaves narrow tips unsupported, and early handling interrupts curing. Thinking in terms of process variables makes troubleshooting much easier because the correction is specific. Instead of adding more glue to every problem, ask whether the issue is amount, placement, contact, material compatibility, movement, or care. A tiny local lift and a whole letter peeling after washing are different problems and should not receive the same repair.
Prevent Visible Glue Marks Before They Happen
Clear adhesive is not automatically invisible. A thick transparent ridge can catch light, a water-based system can temporarily or permanently darken some textiles, and squeeze-out can mat felt fibers so the texture changes even after the liquid becomes colorless. The best control method is to work slightly inside the cut edge, use the smallest amount that produced good contact in the sample, and press vertically rather than sliding the piece. Pale felt, thin cotton, satin-like polyester, and high-contrast combinations deserve the most conservative test because visual change is easier to see on them.
- Evidence: Aleene’s FAQ notes that fabric-glue soak-through and color change can vary by material, recommends inconspicuous testing, and states that some water-based glues may darken lightweight delicate fabrics while some solvent-based formulas can cause color bleeding.
Keep the Finished Letter Flexible by Controlling the Bond Line
Flexibility is a system result, not just a formula claim. Even a flexible adhesive can create a noticeably rigid patch when too much is applied or when a large area becomes saturated. After full cure, compare a bonded sample with an unbonded piece using three simple movements: a gentle 30-degree bend, a 90-degree bend, and a natural roll around a finger. The objective is not to destroy the sample but to see whether the bonded area creates a sharp hinge, crack, or stiff plate. On wearables, also compare the movement of the felt with the movement of the base fabric, because the less-stretchy component can control comfort.
Repair a Lifting Corner with a Local, Clean Rebond
If one tip lifts after cure and the rest of the letter is stable, treat it as a local repair. Gently lift only the loose area, remove lint or debris without tearing attached fibers, place a very small amount of compatible adhesive underneath, and press the tip back into the original plane. Use release material if pressure will be applied from above. If multiple corners lift or the whole letter releases, stop repeating local repairs and investigate the root cause: a contaminated surface, incompatible base fabric, insufficient cure, heavy flexing, or a washable project assembled with a non-washable adhesive may require a different attachment method.
Prevent Sliding by Separating Layout Work from Adhesive Work
Sliding often begins because the maker is still deciding where the letter belongs after it has already touched wet glue. Eliminate this problem by completing the entire dry layout, making small removable reference marks, photographing the approved arrangement, and preparing all tools before opening the adhesive. When the letter is ready to place, approach the surface vertically and use one or two reliable alignment points. For batch projects, work in short zones rather than coating six letters at once. This keeps the open work area manageable and reduces the temptation to reach across wet pieces, which can shift letters that initially looked perfectly aligned.
Fabric Glue vs Hot Glue, Fusible Web, and Sewing for Felt Letters
Fabric glue is a useful no-sew method, but an expert answer should also identify situations where another method is better. Hot glue offers fast grab for non-washable display crafts, fusible web can create a broad flat bond when both materials tolerate heat, and sewing provides mechanical attachment that is often more conservative for high-flex or frequently washed items. Glue plus sewing can combine precise positioning with edge reinforcement. The right method is therefore selected by movement, heat tolerance, wash frequency, letter size, and whether the project needs to remain soft. Treating these methods as competing products misses the more useful point: each is a tool for a different service condition.
Fabric Glue vs Hot Glue
Hot glue is fast and convenient for ornaments, props, wall décor, and thick craft assemblies where a raised bond line is acceptable. Its disadvantages become more noticeable on fine letters and soft wearables: the bead cools quickly, can create a thicker hard spot, and may be difficult to hide around very narrow strokes. Fabric glue typically gives more time for precise placement and can preserve a more textile-like feel when the formulation and amount are appropriate. The decision is not simply ‘which is stronger’; it is whether speed, edge neatness, flexibility, washability, and user safety match the final project.
Fabric Glue vs Fusible Web
Fusible web is especially attractive for flat appliqué because it distributes adhesive over a broad area and can help keep edges flat before stitching. The limitation is heat. The felt, the base fabric, prints, coatings, and any surrounding decoration all have to tolerate the fusing temperature and pressure. If one component is labeled against ironing, a heat-bonded method should not be forced onto the project. Fusible products also have their own instructions for prewashing, steam, press cloths, and dwell time, so users should follow the exact product sheet rather than applying a generic iron setting to every felt letter.
- Downloadable technical sheet: Pellon Tack-N-Fuse is a printable fusible-web instruction sheet that explicitly recommends pre-testing fabric compatibility and provides step-by-step appliqué directions; it is useful evidence for explaining why heat-bonded methods require their own process controls.
Fabric Glue vs Sewing – and When a Hybrid Method Makes Sense
Sewing is often the safer long-term option for a large felt letter on a garment that bends strongly, washes frequently, or carries mechanical stress near a seam. The stitches create discrete mechanical anchors and are easier to inspect over time. Glue can still be valuable as a positioning aid, especially on multi-letter layouts where exact alignment matters, but it should be kept away from the needle path when the sewing-machine manufacturer warns against adhesive on areas being stitched. A hybrid method is particularly practical for uniforms, costumes, tote bags, and large appliqué letters: use a small amount of compatible adhesive to hold position, then reinforce the perimeter with an appropriate stitch.
- Evidence + embedded video: Brother’s official appliqué instructions state that an appliqué can be basted or glued to the base fabric before edge stitching and warn not to place glue in areas the machine needle will penetrate. The page includes a video demonstration.
- Video: Brother’s appliqué machine-sewing tutorial shows how fabric pieces are secured around the edge with zigzag, blanket, or satin-style stitching and is useful when a felt-letter project needs mechanical reinforcement rather than adhesive alone.
- Video: How Do I Make Applique Even Easier? demonstrates felt appliqué with fusible and sewing techniques, making it a helpful visual comparison for users considering a heat-and-stitch route instead of liquid glue.
| Method | Best fit | Main advantage | Main limitation |
|---|---|---|---|
| Fabric glue | No-sew banners, stockings, bags, crafts, many wearables | Precise application; can dry clear and flexible | Requires cure time and exact material compatibility |
| Hot glue | Fast non-washable décor and thicker crafts | Very fast grab | Can create bulky or stiff areas; less ideal for fine washable work |
| Fusible web | Flat appliqué on heat-safe fabrics | Broad, even bond area | Requires compatible heat and pressure |
| Sewing | Frequent washing, bending, larger high-stress letters | Mechanical reinforcement and inspectable edge | More time, skill, and visible stitch decisions |
| Glue + sewing | Precise placement plus durable edge reinforcement | Combines layout control with mechanical security | Glue must not interfere with the needle path |

FAQs About Fabric Glue for Felt Letters
Does fabric glue work well on felt letters?
Yes, fabric glue can work very well on felt letters when the adhesive is compatible with both the felt and the base material. The best results come from testing the actual material combination, using a controlled amount, pressing narrow tips and curves carefully, and allowing the adhesive to reach full cure before handling. For wall décor, a non-washable felt craft adhesive may be enough, while clothing, bags, costumes, and stockings usually benefit from a permanent flexible adhesive whose laundering instructions fit the finished textile project.
How much fabric glue should I use on felt letters?
There is no reliable universal answer in drops or milliliters because viscosity, felt density, letter size, and applicator design vary. Use the amount recommended for the specific adhesive and confirm it on a scrap test. As a practical visual target, the back of the letter should have enough coverage to make continuous contact without becoming saturated or producing a wet bead at the cut edge. If pressing the letter immediately forces glue beyond the perimeter, the application was probably heavier than needed for a clean craft finish.
How do I stop fabric glue from showing through felt?
Begin with the exact felt and backing material on a sample, because pale colors and thin textiles reveal wetting differences most clearly. Keep the adhesive slightly inside the letter perimeter, avoid flooding the center, and lower the letter into position without sliding it across the base. Inspect the front immediately after pressing. If the sample shows permanent darkening, sheen, or a visible adhesive pattern after full cure, reduce the amount or choose another attachment method rather than assuming the effect will disappear on the finished project.
How long should felt letters dry before I move the project?
Follow the adhesive maker’s distinction between initial set, handling time, full cure, and wash-ready time. Those stages are not interchangeable. The GleamGlee product guidance used in this article lists approximately 6-10 minutes for initial setting and about 24 hours for full cure, so a project should remain stable during that period. Other brands can require shorter or longer times, and some specify a separate wait before laundering. If you change adhesive, change the timing plan with it rather than keeping the same schedule out of habit.
Is fabric glue or hot glue better for felt letters?
Fabric glue is usually the better starting point when you want a low-profile, textile-like finish, precise work around narrow strokes, flexibility, or washability supported by the formula. Hot glue can be excellent for fast non-washable décor, thick ornaments, and projects where a raised bond line is not a problem. Neither method is automatically superior. Choose based on the felt thickness, base fabric, expected bending, cleaning method, desired appearance, and whether children or inexperienced users will be working near a hot-glue tool.
Can I wash clothes with glued felt letters?
Only when the entire assembled system is compatible with the planned wash method. The adhesive must permit laundering after its specified cure, the felt must tolerate the selected water and drying conditions, and the original garment care label must allow the same or gentler process. Inspect the letter edges before the first wash and again after the item dries. If the garment is highly elastic, frequently washed, or subjected to heavy abrasion, perimeter stitching may provide a more conservative long-term solution than relying on adhesive alone.
Can I glue felt letters onto stockings, tote bags, banners, and costumes?
Yes, all are common felt-letter applications, but they emphasize different performance needs. A wall banner mainly needs accurate spacing and clean long-term hold. A stocking benefits from flexibility and careful seasonal storage. A tote bag experiences repeated folding and abrasion, while a costume may combine thin synthetic fabrics with frequent body movement. Use the same core process for each project – dry layout, material test, controlled application, edge pressure, and full cure – then adjust the attachment method to the actual movement and cleaning conditions of the finished item.