 Skip to content
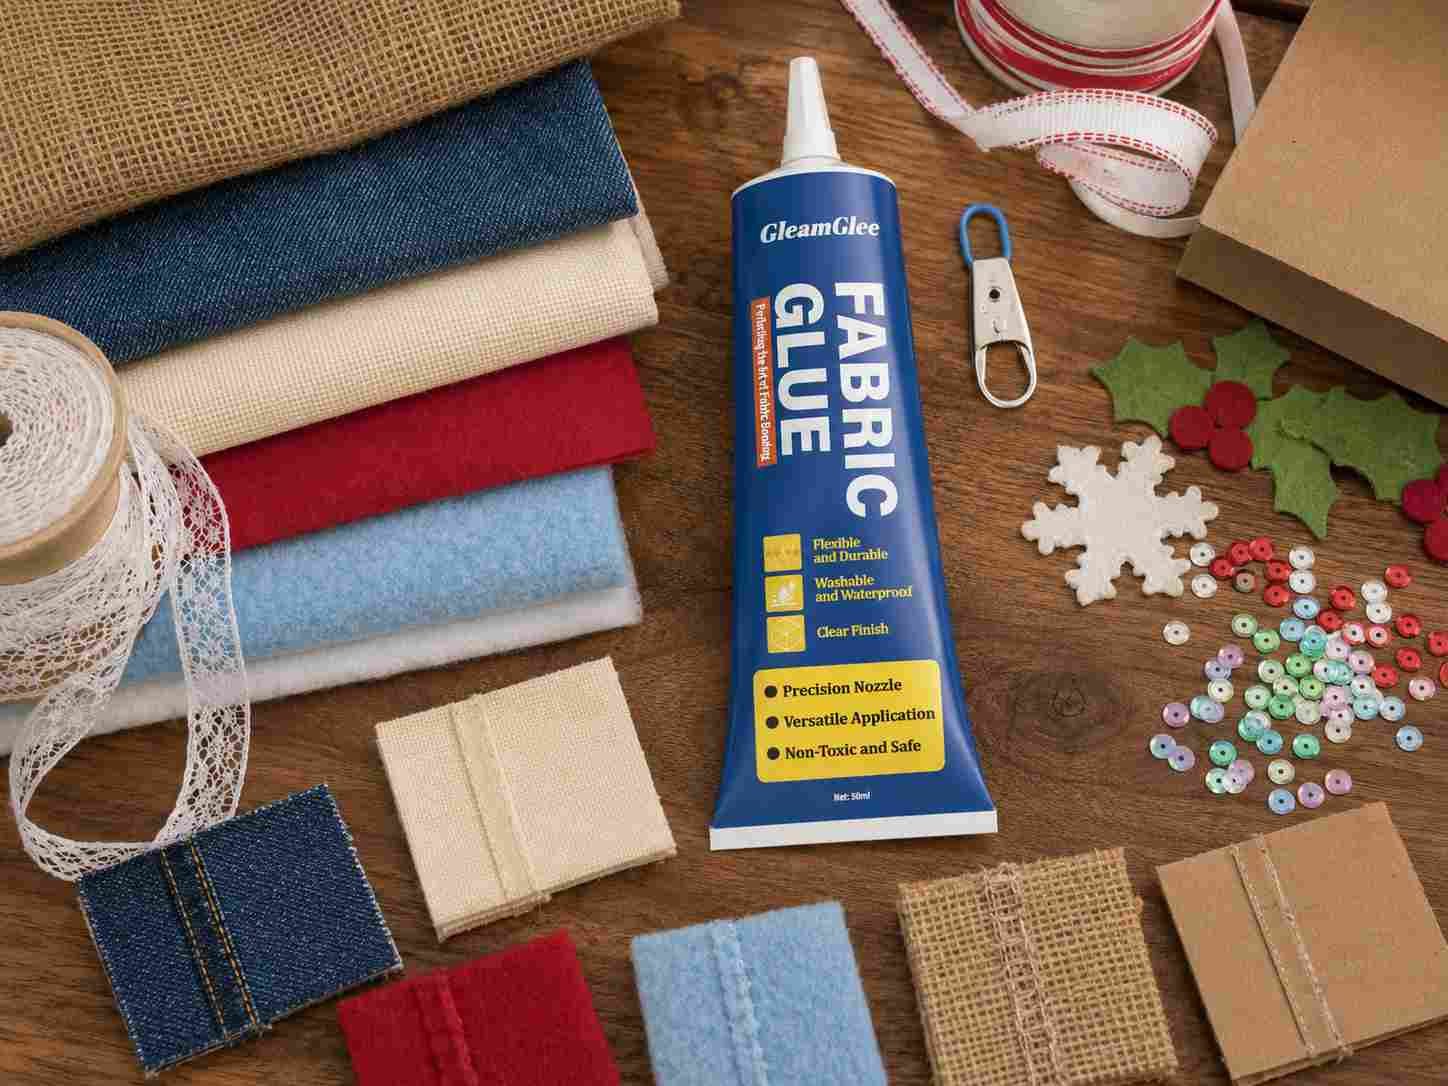
Attaching one patch is usually straightforward. Attaching ten patches is a different job. The moment several embroidered badges, name labels, decorative patches, or repair patches share one garment, the biggest time losses come from repeated measuring, moving pieces, changing tools, correcting spacing, and discovering too late that different backings require different methods. The fastest reliable approach is therefore not a single glue, iron, or stitch. It is a batch workflow that separates planning from bonding and matches each patch to the garment, backing, stress level, and care requirements.
For most home projects, the practical rule is simple: batch everything that can safely be batched, including sorting, layout, numbering, measuring, surface preparation, and final inspection. Bond several patches together only when the selected method can give every patch the required conditions. Heat-seal patches may be processed quickly with a suitable heat press when time, temperature, pressure, and platen contact are consistent. Plain fabric-backed patches may be faster with a flexible textile adhesive, while frequent-wash uniforms or high-motion locations often justify machine or edge stitching even when adhesive is used for positioning.
The fastest reliable way to attach multiple patches is to batch the decisions before you batch the attachment. Sort every patch by backing, plan the complete layout, number the pieces, mark stable reference points, and prepare the garment by zone. Then use heat, flexible fabric adhesive, machine sewing, hand sewing, or hook-and-loop according to the actual backing and fabric. This avoids repeating setup work while reducing placement and durability failures.
A good multi-patch project also separates hands-on time from ready-to-use time. Sewing is mechanically complete when the last secure stitch is finished, while an adhesive may need a defined cure period before normal wear or washing. Heat-activated systems may require cooling before adhesion is judged. This guide shows how to make those tradeoffs without turning a fast project into a second repair job a week later.
A useful way to think about speed is to count repeated motions. If ten patches each require a separate round of measuring, repositioning, cleaning, and tool setup, the user performs the same preparation cycle ten times. If the layout and preparation are completed once, the repeated portion is reduced mainly to the attachment step. In real projects, this often saves more time than shaving a few seconds from a press cycle or trying to spread adhesive faster. Good workflow design is therefore the first speed tool, not an optional organizational extra.
1. What Is the Fastest Way to Attach Multiple Patches?
The fastest method depends first on the patch backing and then on the garment. Heat pressing is often the quickest route for repeated compatible heat-seal patches because one controlled cycle can replace a long sequence of hand stitches. A household iron can be efficient for a few iron-on patches. Fabric adhesive reduces active labor when ordinary fabric-backed patches are compatible and the garment can remain undisturbed during curing. Machine sewing becomes highly efficient when several sew-on patches need permanent mechanical attachment, especially on flat jacket or uniform panels.
The most important time-saving idea is not “use more heat” or “use more glue.” It is batch the preparation first. If you have twelve patches, do not complete the measuring, cleaning, positioning, bonding, and inspection for patch one before you even decide where patch twelve belongs. Finish the whole layout, establish reference lines, number every patch, prepare the surfaces, then work through the garment by method and by zone. This reduces repeated setup and lowers the chance of crooked spacing or an unusable final gap.
| Method | Hands-On Speed | Waiting Before Normal Use | Best Use Case | Main Limitation |
|---|---|---|---|---|
| Heat press | Very fast for repeated work | Usually short cooling or maker-specified interval | Compatible heat-seal patches on flat heat-safe garments | Requires correct temperature, pressure, time, and full contact |
| Household iron | Fast for small batches | Follow patch maker instructions | A few iron-on patches at home | Pressure and temperature are less repeatable than a press |
| Fabric adhesive | Very fast application | Product-specific cure required | Compatible plain fabric patches, no-sew or no-heat projects | Not an immediate-use method and not ideal for every high-stress area |
| Machine sewing | Fast once set up | No adhesive cure | Several permanent sew-on patches with accessible edges | Requires machine access, correct needle, and garment access |
| Hand sewing | Slowest active method | No adhesive cure | Curves, sleeves, pockets, isolated difficult patches | Labor increases quickly as patch count rises |
| Hook-and-loop | Fast after base is installed | Immediate | Removable names, roles, teams, or rotating designs | Requires compatible hook-and-loop base system |
Fastest to Attach Is Not Always Fastest to Wear
A fabric adhesive can take less than a minute to spread on a small patch, yet the project is not finished merely because the patch no longer slides. The adhesive film still has to develop its final properties. GleamGlee Fabric Glue, for example, is specified for approximately 6-10 minutes of initial setting and about 24 hours for full cure before washing, ironing, or high-frequency use. Those figures belong to this product and should not be copied to unrelated textile adhesives, iron-on films, or industrial heat-seal systems.
Heat-seal systems illustrate the opposite problem. A press cycle can be measured in seconds, but adhesion should not always be tested while the patch is still hot. HPI Emblem, for one embroidered heat-seal product, lists a top-heat press example of 340°F for 55-60 seconds with medium/firm pressure and separately advises waiting at least 10 minutes before testing adhesion. Those figures are useful because they prove how specific a heat-seal recipe can be; they are not universal patch settings. Reference content source
Video reference – standard heat press patch application: This video belongs directly with the heat-press method because it shows the relationship between patch placement, platen contact, and pressing sequence. The visual workflow is useful; the exact temperature and dwell shown should never replace the patch supplier’s own instructions.
Use a 30-Second Method Decision Before You Start
Before any patch is permanently attached, classify the job with a very short decision. This prevents the common mistake of committing the whole project to a method that only suits part of the garment. The following decision points are intentionally simple enough to use at a kitchen table, costume workshop, school uniform station, or small apparel workbench without specialized testing equipment.
- Heat-activated backing + heat-safe garment + repeated flat work: consider a heat press.
- Iron-on backing + only a few patches + garment allows ironing: consider a household iron.
- Plain textile backing + no sewing desired + compatible low-to-moderate stress area: consider flexible fabric adhesive.
- Several sew-on patches + accessible flat panel: consider machine sewing.
- Thick, curved, hard-to-reach, or isolated patch: consider hand sewing or a hybrid method.
- Patch must be removed later: consider hook-and-loop instead of permanent glue.
2. What Should You Check Before Attaching Several Patches?
A fast installation begins with five checks: backing type, garment care label, surface condition, stress or flex at the location, and expected laundering. Skipping any one of them can turn speed into rework. A shiny patch back is not enough evidence to assume “iron-on.” Some shiny layers stabilize embroidery, some are peel-and-stick adhesives, and some heat-seal systems are designed for controlled commercial equipment rather than a household iron. When the backing cannot be identified from packaging or supplier instructions, treat it as unknown instead of increasing heat experimentally.
Garment care matters just as much as patch instructions. A patch may be designed for ironing while the jacket beneath it contains a coating, print, synthetic fiber, lining, trim, elastic, or “Do Not Iron” instruction. The Federal Trade Commission explains that care information must cover regular care and provide warnings when an expected procedure could harm the garment. In practical terms, the repaired garment remains limited by its most sensitive permanent component; a new patch or washable adhesive does not erase an existing care restriction. Reference content source – FTC Care Labeling guidance
Downloadable evidence – GINETEX care symbols: If the label uses symbols instead of words, the GINETEX care-symbol table is a useful printable reference for washing, bleaching, drying, ironing, and professional care. It should be used to interpret the garment label, not to invent a new care process for the patch.
Identify the Patch Backing Before Choosing Heat, Glue, or Stitching
Sort every patch on the table before you plan the final attachment. This is especially important when patches came from different sellers, events, clubs, or years, because visually similar embroidered faces can hide very different backings. If you have ten patches and three require heat, four are plain sew-on embroidery, two are self-adhesive, and one uses hook-and-loop, treating them as a single category only creates confusion later. Label the back of a paper template or the project worksheet rather than marking the patch itself.
A quick backing check should include touch, appearance, and documentation. A heat-activated film often feels smooth or slightly plastic, but that appearance alone is not proof of iron-on compatibility. Peel-and-stick patches normally arrive with a release liner. Hook-and-loop patches have a clearly textured hook field. Thick embroidered badges may contain a stabilizing plastic layer that is neither a domestic iron-on adhesive nor a good glue surface. If the original packaging, seller page, or patch manufacturer cannot identify the backing, move the patch into an “unknown” group and use a reversible positioning test before any irreversible heat or adhesive step.
| Backing or Patch Structure | What It Usually Means | Fast Practical Direction | Stop-and-Check Condition |
|---|---|---|---|
| Plain fabric or embroidered backing | No active adhesive layer confirmed | Fabric adhesive, hand sew, or machine sew | Test adhesive on backing if glue is planned |
| Iron-on backing | Heat-activated layer intended for domestic application | Iron or compatible press | Garment care label must allow the required heat |
| Industrial heat-seal backing | Controlled heat and pressure may be required | Heat press following supplier data | Do not assume household-iron settings are sufficient |
| Peel-and-stick backing | Pressure-sensitive temporary or convenience layer | Use as directed; reinforce if maker permits | Long-term wash performance may differ from permanent systems |
| Hook-and-loop | Removable patch system | Install matching loop/base panel | Base attachment must be secure |
| Thick plastic, PVC, rubber, leather-like, or unknown backing | Surface may not behave like textile | Supplier instructions, sewing, or specialist method | Do not improvise with high heat or untested glue |
American Patch lists iron-on, hook-and-loop, and sew-on as distinct backing choices and emphasizes choosing the backing according to how the patch will be used or removed. The useful lesson is not to copy one seller’s product claims to every patch; it is to recognize backing as a method-defining variable. Reference content source – patch backing overview
Check Heat, Stress, Flex, and Washing Frequency
Next, look at the location rather than the patch alone. A patch centered on a flat denim jacket back experiences a very different load from one wrapped around an elbow, placed beside a pocket opening, or installed on a backpack corner. Repeated flexing creates peel forces at patch edges even when the middle looks firmly attached. Frequent laundering adds wetting, detergent exposure, tumbling, abrasion, and drying cycles. For school uniforms, workwear, children’s clothing, knees, elbows, and bag corners, plan edge security before the first wash rather than waiting for a lifted corner.
A good rule is to classify the location as flat/low-motion, moderate-motion, or high-motion/structural. Adhesive-only installation is most comfortable in the first group when surfaces are compatible and broad contact can remain stable during cure. Moderate-motion areas may benefit from adhesive positioning plus perimeter stitches. High-motion or load-bearing structures – straps, zipper tapes, structural seams, tight athletic zones – should not be treated as ordinary decorative patch surfaces merely because a patch covers the area.
Read the Care Symbols Instead of Guessing
GINETEX’s textile-care system organizes washing, bleaching, drying, ironing, and professional care into standardized symbols and describes them as maximum permitted treatments. For a patch project, the value of the chart is practical: it gives the user a quick way to confirm whether the garment can be machine washed, tumble dried, ironed, or requires a gentler process before any new material is applied. The downloadable GINETEX reference is placed directly above in the care-label section so the same external URL is not repeated.
3. How Do You Plan and Position Multiple Patches Before Attaching Them?
Multiple-patch layouts fail more often from poor sequencing than from lack of artistic taste. If you attach the first attractive patch immediately, every later patch has to fit around a decision that can no longer move. A better process is to treat the garment like a layout board before treating it like a bonding surface. Establish a centerline, identify seams, pockets, zippers, folds, and curves, then arrange all patches at once. Only after the whole composition works should you remove pieces for gluing, pressing, or sewing.
This planning stage is where ten careful minutes can save an hour of rework. A jacket lying flat can make a patch appear centered even though shoulder curvature or the wearer’s body shifts the visible balance. Pin or temporarily position paper templates, try the garment on, and look from normal viewing distance. Check whether patches disappear under an arm, bend across a pocket edge, collide when a sleeve flexes, or crowd each other once the garment is worn rather than displayed on a table.
Build the Layout With Paper Templates First
Trace each patch onto ordinary paper and label the template A1, A2, A3, and so on. Record the patch width, height, approximate rotation, centerline distance, and neighboring spacing on the paper or a worksheet. Paper is faster to move, safer to pin, and less likely to collect lint or adhesive residue than repeatedly handling a final patch. For symmetrical designs, measure from a stable garment reference such as the back center seam, collar center, placket, pocket edge, sleeve seam, or backpack panel edge.
A simple numbering system also prevents mistakes after patches leave the garment for adhesive application or heat preparation. Photograph the completed layout from straight on, then take closer photos of complicated zones. If a left sleeve contains A4, A5, and A6, those identifiers should stay with the layout photo and project notes. The goal is not to create a design bureaucracy; it is to make sure no one has to recreate the arrangement from memory once the bonding process begins.
Check the Layout While the Garment Is Worn
American Patch’s jacket guide advises pinning or positioning a patch, trying the jacket on, and evaluating placement before completing the attachment. This becomes even more valuable when several patches share one garment. A back panel may curve over the shoulders, a sleeve patch may rotate inward when the arm hangs naturally, and a chest patch may sit closer to a zipper than it appeared on a table. Evidence source – jacket placement and attachment guide
For visual experiments before working on the real garment, a general image-collage tool can help test rough arrangements. It should never replace physical fitting because screen scale and garment curvature are different, but it can help compare “dense cluster,” “grid,” “center anchor,” and “distributed” layouts before paper templates are cut. External layout tool – Adobe Express collage maker
Use Spacing Rules You Can Repeat
There is no universal “correct” gap between decorative patches because size, theme, border shape, and garment scale vary. What matters is consistency within the chosen design. If you want an orderly grid, choose a repeatable gap and measure from visible patch edges. If you want an organic cluster, establish a visual anchor and keep enough clear fabric around high-detail patches so shapes remain readable. When three or more patches form a row, measure the total group width before permanently attaching the center piece.
A useful layout record does not need dozens of fields, but it should preserve enough information to rebuild the arrangement without guessing. Record measurements only after the garment has been checked flat and, when appropriate, while worn. For a dense multi-patch project, the following fields give enough structure to compare spacing, restore positions after patches are removed for preparation, and explain the layout to another person helping with the installation:
- Patch ID and orientation.
- Patch width and height.
- Distance from garment centerline.
- Distance from a stable seam or pocket edge.
- Nearest-neighbor gap.
- Rotation angle when a patch is intentionally tilted.
- Garment zone: back, left sleeve, right sleeve, chest, pocket, bag panel, or hat panel.
- Attachment method planned for each patch.
Download resource idea for the page: Publish a simple “Multi-Patch Layout & Numbering Sheet.xlsx” beside this section, with columns for Patch ID, width, height, garment zone, centerline distance, neighbor gap, rotation angle, backing type, and attachment method. A spreadsheet is preferable to an interactive generator here because users can print it, save it with the garment project, or hand it to another person helping with installation.
- **Video reference – hand and machine patch placement:**This demonstration compares sewing approaches and is useful for seeing how edge access and position affect the method. Use it after the layout is decided rather than allowing the sewing process itself to dictate placement.
4. What Is the Fastest Batch Workflow for Multiple Patches?
The fastest dependable workflow has seven stages: sort, plan, prepare, divide into zones, install from anchors outward, separate active time from waiting time, and inspect once as a complete project. This is faster than treating every patch as a separate mini-project because tools stay grouped and decisions are made once. The workflow also makes it easier to mix methods intelligently. A denim jacket can contain heat-seal patches on the flat back, glued textile patches on low-stress decorative zones, and stitched reinforcement on high-wear edges without any contradiction.
The most common mistake during “batch gluing” is to spread adhesive on too many patches before they can be positioned accurately. Batch preparation does not mean flooding ten backs with wet adhesive at once. It means preparing ten patches for an efficient sequence, then applying adhesive to a manageable number that can be placed before the product begins setting. The same logic applies to heat: line up and prepare many patches, but only press as many as can receive correct and uniform conditions during the chosen cycle.
Stage 1: Sort Patches by Method and Backing
Create separate work groups before any adhesive is opened or heat press is warmed. Put heat-activated patches together, plain textile-backed patches together, self-adhesive pieces together, sew-on pieces together, and unknown or specialty patches in a “stop and verify” group. This reduces tool switching and makes supplier instructions easier to follow. If a patch requires an unusual process, complete its verification before it reaches the active work queue rather than interrupting the entire installation midway.
Stage 2: Finish Every Layout Decision
Complete the full garment arrangement, numbering, photos, reference marks, and sequence before bonding begins. The biggest or most visually important patch usually works well as the anchor. After the anchor position is locked, document the distances to secondary patches. For symmetrical layouts, verify both sides independently instead of assuming the garment itself is perfectly symmetrical; pockets, seams, and manufacturing tolerances can create small differences even when the overall design looks balanced.
Stage 3: Prepare Compatible Surfaces Together
Remove lint, dust, and obvious loose fibers from the working zones. If the garment has been recently washed, confirm it is completely dry. Avoid adding unverified solvents or surface treatments simply to “improve adhesion,” because cleaners can affect dyes, coatings, or adhesive chemistry. For adhesive projects, perform a hidden compatibility test on a seam allowance, spare matching cloth, or inconspicuous area whenever the fabric is delicate, light-colored, coated, highly absorbent, highly elastic, or valuable.
Video reference – flexible fabric glue patch project: Place this video directly beside the compatibility-and-positioning discussion. It helps users see how patches are handled on wearable fabric without sewing, while the article can separately remind them not to copy another brand’s cure time or glue quantity.
Stage 4: Work by Garment Zone, Not Only by Patch Count
A flat jacket back can often be prepared and checked as one zone because it can lie naturally on the work surface. Sleeves, hats, backpack corners, pockets, and curved panels behave differently and may need separate support or attachment methods. Group patches by where the garment can remain stable. A practical sequence might be back panel first, left sleeve second, right sleeve third, front chest last. This keeps unfinished wet adhesive away from areas being folded or turned during later steps.
Stage 5: Install From the Visual Anchor Outward
Start with the largest, central, or most important patch, then move to patches whose spacing depends on it. This reduces cumulative error. If a five-patch row is centered on a jacket back, attach the middle patch first only after the whole row has been measured and marked; then work outward according to the recorded gaps. For glue, place each patch once and press from the center toward the edge without sliding. For sewing, keep the patch temporarily stabilized so the edge does not drift while the first stitches are formed.
Video reference – textile glue for patches: This demonstration is useful immediately after the positioning step because it shows the practical sequence of applying textile adhesive, placing a patch, and pressing it down. Use it for motion and handling reference only; cure times and compatibility must come from the adhesive actually being used.
Stage 6: Separate Active Work Time From Cure or Cooling Time
A realistic project estimate should count layout, preparation, attachment, reinforcement, and final inspection as active work. Cure time for an adhesive or cooling time for heat-seal work is different because the user does not spend every minute actively working. A useful planning formula is Estimated Active Time = Layout + Preparation + (Average Attachment Time x Patch Count) + Reinforcement + Final Inspection. If multiple methods are used, estimate each method group separately rather than applying one average to the entire project.
For example, imagine a jacket with 12 patches. If layout takes 20 minutes, surface preparation takes 10 minutes, average attachment takes 2 minutes per patch, edge reinforcement takes 15 minutes, and final inspection takes 8 minutes, the estimated active workload is 77 minutes. If a fabric adhesive then requires a 24-hour full cure, the project still contains only about 77 minutes of active labor; the remaining interval is passive waiting. This distinction helps users compare a no-sew process fairly with machine stitching instead of calling one method “slower” simply because chemistry needs time to finish.
For people coordinating a weekend costume build, scout uniform update, theater wardrobe change, or team garment project, an external duration calculator can help record the interval between application and a maker-specified safe-use time without adding an interactive generator to the article itself. This is especially useful when different adhesive groups or heat-seal systems have different waiting periods and the organizer wants one simple schedule. The calculator should be treated only as a clock tool; the actual required interval still comes from the relevant patch or adhesive instructions. External time tool
Stage 7: Inspect the Whole Garment Once Before Use
The final inspection should look at the project as a system, not as isolated patches. Check alignment from normal viewing distance, then move closer to inspect edges, corners, stitch starts and stops, glue squeeze-out, puckering, and areas that did not receive full pressure. Gently flex only locations that have completed the required cure or cooling period. Do not pull hard on a fresh bond simply to “prove” strength, because destructive testing on a finished garment can create the failure you are trying to avoid.
- Compare final positions with the saved layout photo.
- Check all patch corners and narrow tips.
- Confirm curved borders are fully supported.
- Look for puckering around sewn edges.
- Check for visible glue ridges or seep-through.
- Confirm no clips, pins, release papers, cardboard separators, or temporary tapes remain.
- Record the installation date when the garment will be washed frequently.

5. Which Attachment Method Is Fastest for Your Patch Type?
Method choice should be driven by the actual interface between patch and garment. Stitches mechanically connect materials and are excellent when edge reinforcement matters. Heat-activated systems depend on compatible temperature, pressure, time, and backing chemistry. Fabric adhesive forms a bonded layer and works best where clean compatible surfaces can remain in contact without excessive peeling or structural load. Hook-and-loop is valuable when the fastest long-term workflow means replacing patches repeatedly rather than permanently reattaching them every time.
For a multi-patch project, efficiency often comes from using two methods rather than forcing one method everywhere. Adhesive can hold a patch precisely while selected perimeter stitches handle repeated edge stress. A heat-seal backing can provide quick placement while sewing adds long-term security when the patch maker and garment allow it. The correct hybrid is not automatically “stronger” in every case, but it can divide tasks sensibly: one system controls placement and broad contact while another resists edge peeling or mechanical movement.
When a Heat Press Is Fastest
A heat press is most attractive when patches share known application parameters, garments are flat and heat-safe, and the work repeats across several pieces. Compared with a household iron, a press provides more consistent platen contact and pressure, which is useful when the same patch is applied to several uniforms, jackets, or bags. However, professional heat-seal instructions often vary by patch construction, and some manufacturers explicitly list unsuitable substrates. HPI’s embroidered example, for instance, lists cotton, cotton/poly blends, polyester, fleece, and wool as compatible while not recommending leather, nylon, and certain coated athletic mesh or safety garments.
The practical lesson is to work from supplier data, not internet folklore. If one patch maker specifies a particular cycle, it does not become a universal patch recipe. Even on a heat-safe garment, seams, pockets, zippers, thick layers, or curved construction can prevent uniform pressure. When several patches are positioned under one platen, each patch must receive the full conditions required by the manufacturer. A larger batch is only faster when it still produces a controlled, repeatable result.
When a Household Iron Is Fastest
A household iron makes sense for a small batch of true iron-on patches when the user does not own a press and the garment label permits the required heat. It requires less setup than a heat press, so for two or three patches the total project can be faster despite lower process repeatability. Use a stable heat-safe surface and a pressing cloth when the patch maker recommends one. Do not guess with maximum heat simply because one denim-jacket tutorial uses a hot setting; patch instructions and garment limits must control the process.
For multiple iron-on patches, prepare every placement and mark first, then work through one patch at a time unless the patch supplier explicitly supports a multi-patch cycle. After each application, preserve the layout references for the remaining patches. If the garment needs to be flipped to heat from the reverse side, make sure previously attached patches are not crushed, overheated, or dragged across the board while the next patch is being prepared.
When Fabric Glue Is Faster
Fabric adhesive can be the fastest active-work method when patches have plain textile backs, the garment should not be heated, sewing access is poor, or the user wants a clean no-stitch look. A good textile adhesive should be applied as a controlled thin layer rather than a thick bead. Broad contact is usually more useful than a hard ridge. Edge coverage deserves attention because many patch failures begin at a corner or narrow point where washing, rubbing, or bending starts a peel action.
GleamGlee Fabric Glue is one product-specific example suited to this workflow. Its confirmed specification describes a clear-drying, flexible no-sew textile adhesive intended for common materials including cotton, denim, polyester, canvas, felt, and fabric patches. It is designed for thin controlled application, gives approximately 6-10 minutes for initial setting, and is specified for about 24 hours to full cure before washing or ironing. Those properties are useful for suitable patch projects, but they do not turn adhesive into a replacement for structural stitching on load-bearing or highly stretched locations.
For organizations, craft brands, schools, uniform programs, or retailers evaluating repeated patch-bonding work, it is better to request samples and test the actual patch, fabric, wash process, and application method than to scale a household result blindly. GleamGlee’s manufacturer also supports product development and customization projects, so substrate-specific requirements, applicator style, pack size, and performance targets can be discussed for repeat-use programs. This kind of technical evaluation is more meaningful than choosing a formula solely because it feels tacky in the first few minutes.
When Machine Sewing Is Faster
Machine sewing becomes increasingly attractive as patch count rises, especially when patches have regular borders and the garment panel can move freely under the presser foot. Once thread, needle, tension, and stitch setup are correct, the machine produces repeated mechanical attachment with little waiting afterward. Utah State University Extension’s machine appliqué guidance also illustrates a useful hybrid concept: shapes can be positioned with fusible or temporary methods and then finished with machine or hand stitching around the edge. Reference content source – machine appliqué techniques
Downloadable needle reference: When patch thickness or garment material requires a machine-needle change, SCHMETZ’s Needle ABC PDF gives a practical reference for needle families and fabric applications. It is useful beside this section because selecting the wrong needle can erase any speed advantage through skipped stitches, fabric damage, or breakage.
On a dense denim jacket or thick embroidered patch, slow machine control is often more valuable than raw speed. Corners, tight curves, thick edge embroidery, and multiple garment layers can break needles or distort stitches when rushed. Use an appropriate needle, reduce speed around curves, and pivot with the needle controlled in the fabric when necessary. For lined garments, check what sits underneath the patch area before sewing; accidental stitching through an unwanted lining or pocket layer can turn a fast job into a repair.
When Hand Sewing Is Still the Better Choice
Hand sewing is not the fastest method by patch count, yet it can be the fastest method for a difficult location because it needs almost no machine setup and gives excellent access control. A sleeve, pocket, curved hat panel, or patch near a bulky seam may take longer to position under a machine than to stitch carefully by hand. iFixit’s patch guide recommends placing a cardboard separator between garment layers so the user does not accidentally stitch both sides together, a simple technique that is particularly useful for shirts, tanks, jackets, and pockets. Reference content source – iFixit hand-sewn patch guide
If hand sewing is used mainly as edge reinforcement after adhesive positioning, the patch does not have to be stitched through the middle of the artwork. Use a thread color close to the border and place stitches through the outer embroidered edge or another mechanically suitable perimeter zone. This keeps the graphic clean and reduces the visual impact of reinforcement. Thick patches may require a stronger needle and thimble; forcing a bending needle with bare fingers is neither efficient nor safe.
6. How Should the Fast Method Change by Fabric, Garment Area, and Use?
Patch advice becomes unreliable when it treats “fabric” as one material. Cotton denim, lightweight polyester, stretch knit, nylon shell, coated backpack fabric, felt, leather-like material, and fleece do not react to heat, needles, pressure, or adhesive in the same way. The user does not need a laboratory to make a better decision, but should observe thickness, stretch, absorbency, coating, surface texture, and expected movement. When one of those features is unusual, a small hidden test is faster than correcting a visible stain, melted area, or stiff patch later.
The garment area matters just as much as fiber content. A denim back panel is stable and broad, while a knee folds through a large angle many times during use. A backpack corner rubs against walls and floors. A hat panel curves in two directions. A sleeve rotates. High-motion locations concentrate stress at patch edges, which makes flexible attachment, stitch reinforcement, or a smaller/thinner patch more valuable than simply increasing adhesive quantity.
| Fabric or Area | Practical Fast Method | What to Watch | Better Reinforcement When Needed |
|---|---|---|---|
| Cotton / denim flat panel | Heat if backing allows, adhesive, or machine sewing | Confirm care label and patch backing | Perimeter stitching for frequent wear |
| Canvas bag panel | Adhesive or stitching; heat only when verified | Coatings, thickness, hidden layers | Stitch edges on high-abrasion areas |
| Polyester woven | Heat only within garment and patch limits; tested adhesive or sewing | Shine, distortion, surface finish | Stitching when heat margin is uncertain |
| Stretch knit | Small tested flexible method or stretch-compatible sewing | Patch can restrict garment stretch | Elastic or zigzag-type mechanical attachment where structural |
| Nylon / coated shell | Supplier-specific system or sewing where appropriate | Heat and coating damage | Professional or manufacturer guidance for technical garments |
| Jacket back | Efficient flat-zone workflow | Centerline, shoulder curvature | Sew or hybrid if frequently washed |
| Sleeve / elbow / knee | Hand sew, machine sew if accessible, or tested hybrid | Repeated bending and edge peel | Perimeter stitches often valuable |
| Backpack corner / strap zone | Mechanical reinforcement first | Abrasion and load | Do not rely on decorative surface bonding for structural straps |
Cotton, Denim, and Canvas Are Usually Easier – but Still Need Checking
Stable woven fabrics give patch users several practical options because they do not stretch dramatically during ordinary handling. Denim is especially convenient for jackets because it tolerates pinning and often lies flat enough for heat, glue, or sewing. Even so, thick seams can create pressure shadows under a heat press, washed denim can vary in surface finish, and canvas bags may contain coatings or hidden stiffeners. Treat the material name as a starting point, then inspect the actual garment construction.
When a textile adhesive is used on an absorbent woven fabric, a thin controlled film is preferable to saturating the fibers. More adhesive does not automatically create more security; excess material can squeeze onto the visible face, create a stiff perimeter, and extend the time required for the interior film to stabilize. A hidden sample should be checked for darkening, seep-through, stiffness, and edge behavior before a large decorative patch is committed.
Polyester and Other Synthetics Need a Temperature Margin
Synthetic garments vary enormously. Some polyester uniforms are robust enough for a validated heat-seal process, while lightweight or finished polyester may develop shine, distortion, dye migration, or surface change if overheated. Do not treat “polyester” as permission for one standard iron temperature. The patch maker’s requirement and garment care label have to overlap. If the patch needs more heat than the garment safely accepts, the correct answer is another attachment method rather than a hotter test.
This is one reason heat-press data should be presented as product-specific evidence instead of generalized advice. A manufacturer may publish a successful setting for its own backing, yet another patch can use different adhesive chemistry and thickness. For mixed patch collections, keep each patch’s instructions with its project ID so the operator does not accidentally apply the previous patch’s cycle to the next piece.
Nylon, Waterproof, Coated, Leather-Like, and Technical Materials Need Restraint
Technical fabrics deserve a conservative approach because the surface treatment may be part of the garment’s function. Heat can affect coatings, membranes, prints, or laminations; needle holes can affect waterproof construction; and adhesive can interact unpredictably with low-energy or treated surfaces. HPI’s embroidered heat-seal example specifically lists leather, nylon, and certain coated athletic mesh or safety garments as not recommended substrates for that system, which is a useful reminder to verify instead of improvising.
If the garment is valuable outdoor equipment, protective clothing, a waterproof shell, or a structure carrying meaningful load, manufacturer repair guidance or professional service is often the genuinely fast route because failed experimentation can be difficult to reverse. A decorative patch is not worth compromising a membrane, seam tape, or safety function. For ordinary canvas or casual bags without technical coatings, home methods can still be reasonable after a careful hidden test and structural inspection.
Download resource idea for the page: Add a printable “Hidden Fabric Test Record.pdf” beside this paragraph. The sheet should let a user record fabric type, coating, stretch, test location, visible darkening, seep-through, stiffness after cure, flex result, and whether the patch edge remains flat. This gives the user a repeatable test without requiring an on-page interactive tool.
Stretch Fabrics and High-Motion Areas Need Movement-Compatible Decisions
A flexible cured adhesive is helpful, but the patch itself can still be much less stretchy than the garment. Placing a rigid embroidered badge across a high-stretch knee, compression panel, or athletic seam can create a new boundary where movement concentrates. In those situations, the best solution may be a smaller, softer patch, a different location, or stretch-compatible mechanical stitching rather than simply searching for “stronger glue.” The attachment system has to move as a whole, not just remain stuck while the surrounding fabric strains.
For moderate-motion decorative areas, a hybrid approach often works well: use adhesive for accurate positioning and flat contact, then add selected perimeter stitches after the adhesive has completed its full cure if the materials and product instructions allow. This separates layout accuracy from long-term edge restraint and is especially useful for frequently washed uniforms, children’s jackets, or patches with stiff embroidered borders.
7. How Do You Keep Multiple Patches Secure After Wear and Washing?
The quickest patch job is the one you do once. Long-term performance depends on preparation, complete attachment around critical edges, enough stabilization time, and care within the garment’s original limits. Washing introduces water, detergent, agitation, abrasion, and drying stress, so a bond that looks perfect five minutes after application has not yet demonstrated wash durability. For sewn patches, inspect the stitch path and knots. For heat-seal patches, confirm the backing has fully cooled and set according to the maker. For fabric adhesive, wait for the product-specific full cure before judging final flexibility or laundering.
The American Cleaning Institute recommends sorting laundry by color, fabric type, and washing instructions, then choosing the appropriate washer and dryer settings. For patch garments, this reinforces a simple rule: the repair method does not give permission to exceed the original care label. A washable adhesive on a garment marked for gentle care still belongs in a gentle-care workflow. Reference content source – ACI Laundry Basics
Practical evidence note: ACI treats wash and dry settings as care decisions tied to the garment, not to a single attached component. For a patched garment, the safest household rule is therefore to follow the most restrictive applicable instruction among the garment, patch, adhesive, thread, print, coating, and trim rather than assuming one “washable” component controls the whole item.
Inspect Every Edge Before the First Wear or Wash
Patch centers rarely experience the same peeling stress as edges. Check corners, narrow tips, scalloped borders, thick embroidered edges, and zones crossing a body curve. A patch may feel secure when pressed in the center yet have a barely attached corner that catches on a bag strap or washer load. Inspect in good light, then move the garment gently through normal motion only after the attachment system has reached its required stabilization point.
For glued patches, avoid trying to “strength test” the bond by peeling the edge upward. Peel tests deliberately concentrate force at the weakest geometry and can damage a fresh or fully cured installation. Instead, examine whether the edge lies flat during gentle flexing. If one corner lifts, diagnose contamination, missing adhesive coverage, surface incompatibility, stiffness, or repeated bending before automatically adding a thick new bead on top of the old material.
Add Reinforcement Where the Project Actually Needs It
Frequent-wash uniforms, workwear, children’s clothing, knees, elbows, and backpack edges justify more conservative attachment than a decorative patch on the back of a jacket worn occasionally. In these applications, the fastest long-term method may be adhesive or heat for precise positioning followed by perimeter stitching where compatible. The extra minutes can prevent repeated edge repair later. Reinforcement should be targeted; stitching every square millimeter or flooding the entire patch with glue adds work without automatically improving performance.
If you use GleamGlee Fabric Glue as the positioning or permanent adhesive on a compatible project, keep the application thin and give the product its full approximately 24-hour cure period before normal washing or ironing. The formulation is specified to dry clear, remain flexible after curing, and support washing after full cure, but the garment itself must still remain within its own care limits. Light-colored, delicate, coated, or highly elastic materials deserve a hidden test before a visible project.
Make the First Wash Conservative
The first wash is a good time to reduce unnecessary abrasion while you confirm how the finished system behaves. Turn the garment inside out when the design and care label allow it, close zippers or hardware that could snag patch edges, and avoid mixing the item with rough or sharp accessories. Use a wash and dry process no harsher than the garment label allows. After the item is completely dry, inspect all patch edges before deciding the installation has passed its first real service cycle.
Do not assume “machine washable” automatically means high-heat tumble drying, aggressive stain treatment, chlorine bleach, or high-temperature ironing. Washing, drying, and ironing are separate care conditions. The repaired item must satisfy the limits of the garment, patch, thread, adhesive, print, coating, and any other permanent component. When instructions conflict, the more restrictive condition is the safer working rule.
Fix the Cause of Edge Lifting Instead of Adding More Material
A lifted edge is a symptom, not a diagnosis. If one corner lifts while the rest stays flat, the cause may be missing edge coverage, contamination, local flexing, snagging, or uneven pressure. If the entire patch shifts, suspect the backing choice, incompatible surface, insufficient cure, or a method that cannot follow the garment’s movement. If the repaired area becomes hard, excess adhesive may be part of the problem. Correct the cause before adding more glue, stitches, or heat.
| What You See | Likely Cause to Check First | Better Next Step |
|---|---|---|
| One corner lifts | Missed edge contact, dirt, snagging, local flex | Clean the loose zone and reattach only if materials remain compatible |
| Whole patch shifts or peels | Wrong backing method, poor prep, insufficient cure, incompatible movement | Reconsider attachment system rather than repeating the same process |
| Glue ridge or hard perimeter | Excess adhesive or repeated over-application | Stop adding glue; remove only loose residue safely and use a thinner method next time |
| Sewn edge puckers | Thread tension too high or stitch spacing inappropriate | Release tension where possible and resew with controlled stitches |
| Heat-seal patch scorches or discolors | Heat, dwell, pressure, or barrier mismatch | Stop; verify supplier settings and garment heat limit before another attempt |
| Patch holds center but edges fatigue after washing | Edge peel and abrasion | Consider perimeter reinforcement on suitable garments |
Keep a Simple Project Record for Repeated Patch Work
If you attach patches for uniforms, clubs, theater costumes, craft production, or a family with several garments, record the method once so later projects do not restart from zero. Keep the patch supplier, backing type, garment material, attachment method, active time, cure/cooling requirement, first-wash result, and any edge reinforcement in a simple spreadsheet or notebook. This turns practical experience into a reusable process and helps identify which combinations are genuinely fast because they survive normal service.
For repeated work, keep the record deliberately practical rather than turning it into a technical report. The goal is to remember which combination survived normal use and which details caused delay, not to create paperwork for its own sake. A one-page spreadsheet or notebook entry with the fields below is usually enough to compare methods, estimate future labor, and prevent someone from repeating a failed heat setting, backing assumption, or wash routine on the next garment:
Download resource idea for the page: Place a “Batch Patch Project Record.xlsx” link immediately here. The spreadsheet can include the fields below plus a simple active-time formula, so users who repeat school, club, costume, or uniform projects can reuse a proven process without any website interaction.
- Garment and fabric type.
- Patch supplier and patch ID.
- Backing type.
- Installation method.
- Heat setting or adhesive name when applicable.
- Active attachment time per patch.
- Cure or cooling interval.
- First-wash date and care cycle.
- Edge condition after washing.
- Notes for the next project.
The Real Speed Metric Is “Finished Once”
A patch project should not be judged only by how quickly the last patch reaches the garment. A method that finishes 15 minutes sooner but produces three lifting corners after the first wash is not actually faster. A better metric is first-pass completion: how much active labor is needed before the garment can enter normal use without a correction cycle. This is also why small preventive steps – backing identification, a hidden test, full-layout photography, edge inspection, and respecting cure time – belong in a speed guide rather than in a separate “quality” article. They reduce rework, which is often the largest hidden time cost in a multi-patch project.
Conclusion
A fast multi-patch project succeeds when speed is built into the workflow rather than forced into the bonding step. Sort all patch backings, plan the entire layout, number the pieces, check the garment while worn, prepare surfaces together, and divide the garment into stable working zones. Then select heat, textile adhesive, machine sewing, hand sewing, or a removable system according to the real backing and use conditions. This approach removes repeated setup while preserving the material checks that prevent expensive mistakes.
For casual DIY work, there is no prize for using the same method on every patch. A denim back panel may welcome a validated heat-seal process, a plain textile patch may be easier with a flexible no-sew adhesive, and a frequently washed badge may deserve edge stitching. In every case, distinguish application speed from service readiness. Product-specific cooling and cure times matter, and the garment’s original care label remains the controlling limit for washing, drying, and ironing.
GleamGlee Fabric Glue fits naturally into this system as a no-sew option for compatible textile-backed patches and other low-to-moderate stress fabric projects where a clear, flexible bond and controlled application are useful. It should complement good patch planning rather than replace material judgment, structural sewing, or manufacturer guidance. If a project involves repeated production, unusual substrates, or branded/private-label textile adhesive requirements, sample testing and application-specific product development are more reliable than scaling a one-off household method without validation.
8. Frequently Asked Questions About Attaching Multiple Patches Quickly
What is the fastest way to attach 10 or more patches?
For ten or more patches, the biggest saving usually comes from batch organization rather than one miraculous attachment method. Sort patches by backing, complete the entire layout, number each piece, mark reference positions, prepare surfaces together, and then work by garment zone. Use a heat press for compatible repeated heat-seal work, machine sewing for several accessible sew-on patches, and a tested flexible textile adhesive for compatible no-sew projects. Keep cure or cooling time separate from active labor when comparing methods.
Can I attach several patches at the same time with a heat press?
Sometimes, but only when every patch under the platen can receive the required temperature, pressure, time, and contact specified for its backing and the garment can tolerate the process. Patches with different backing chemistry, thickness, location, or heat requirements should not be combined merely to save a few seconds. Seams, zippers, pockets, and curved panels can also create uneven pressure. Batch the layout and preparation freely; batch the actual press cycle only when the equipment and supplier instructions support it.
Is fabric glue faster than sewing multiple patches?
Fabric glue can be much faster in active application because it avoids threading, repeated needle passes, and edge-by-edge stitching, especially on compatible plain textile-backed patches. The tradeoff is cure time. A sewn patch is mechanically complete when the secure stitching is finished, while an adhesive may need many hours before normal wear or washing. GleamGlee Fabric Glue, for example, specifies approximately 6-10 minutes of initial setting and about 24 hours for full cure, so compare total readiness as well as hands-on minutes.
How do I keep multiple patches straight and evenly spaced?
Do not install patches one at a time while inventing the layout as you go. Find a stable garment centerline or seam reference, trace paper templates, number every patch, measure the key gaps, and photograph the final arrangement before permanent attachment. Try the garment on with templates temporarily positioned because shoulders, sleeves, pockets, and body curvature can change how “centered” looks. For rows or symmetrical layouts, record distances from a fixed reference rather than measuring only from the previously attached patch.
Can I mix iron-on, sew-on, and glue-on patches on the same jacket?
Yes, and a mixed-method jacket can be more sensible than forcing every patch into one process. A true iron-on patch can use its specified heat method on a compatible heat-safe panel, a plain embroidered patch can be sewn or bonded with a tested textile adhesive, and a high-wear patch can receive perimeter stitches even if another method helps position it. Keep a simple patch ID list so the installation instructions for one backing are not accidentally applied to a different patch.
How long should I wait before wearing or washing glued patches?
Use the adhesive manufacturer’s own full-cure and laundering instructions rather than a universal internet rule. A patch that no longer slides may still be developing its final bond. For the GleamGlee product discussed in this guide, the confirmed specification gives approximately 6-10 minutes for initial setting and about 24 hours for full cure before washing, ironing, or high-frequency use. Other textile adhesives may specify different intervals, so record the product name and application time when several patch projects are being handled together.
What should I do if patch corners lift after the first wash?
Let the garment dry completely before deciding on a repair. Inspect whether only one corner lifted or the entire patch shifted, and look for lint, old adhesive residue, missed edge coverage, local bending, or an incompatible backing. Do not immediately smear a thick bead around the visible border, because a hard ridge can create another stress point. If the materials remain compatible, clean and reattach the loose zone carefully; if lifting repeats on a high-motion or frequently washed area, consider perimeter stitching or a different attachment method.





















