 Skip to content
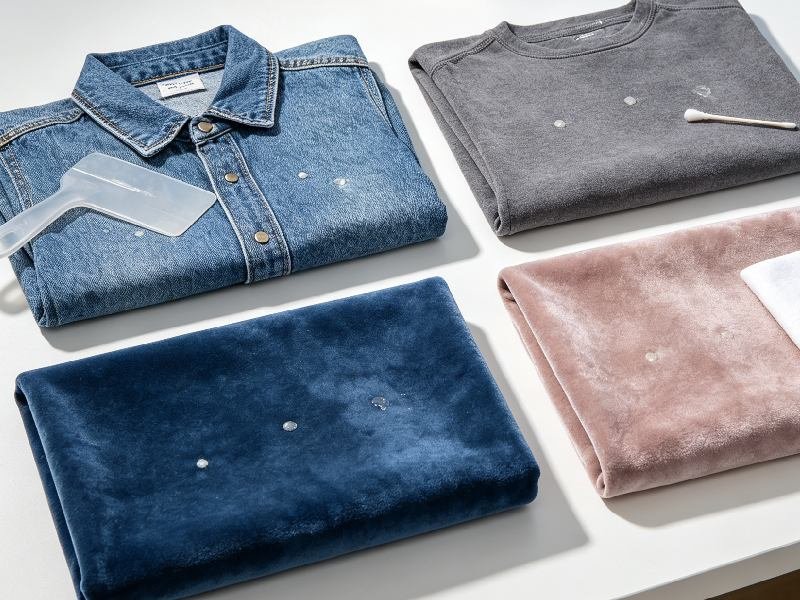
A small line of excess fabric glue can turn an otherwise successful repair into a frustrating cleanup job. The problem is rarely the glue alone. Timing, fabric type, adhesive chemistry, dye stability, surface finish, and the amount of pressure used during removal all influence the final result. A method that works well on heavy cotton may fade printed polyester, flatten velvet, stretch knitwear, or push wet adhesive deeper into upholstery.
The safest way to remove excess fabric glue is to identify whether the adhesive is wet, partly set, or fully cured, check the fabric care instructions, test the selected cleaning method in a hidden area, and remove the residue gradually. Wet glue should usually be lifted and blotted, while dried glue often requires gentle scraping, controlled softening, and repeated spot treatment.
The goal is not simply to make the glue disappear. It is to remove as much residue as possible without leaving a larger stain, weakening the fibers, creating a stiff patch, or changing the color. Imagine finishing a decorative patch on a favorite denim jacket, only to notice a shiny glue border around it. The next few minutes may determine whether that border disappears cleanly or becomes a permanent part of the repair.
What Should You Check Before Removing Fabric Glue?
Before removing fabric glue, check whether the adhesive is wet or cured, identify the fabric and glue type, read the care label, and test the cleaning method on a hidden area. These checks help prevent color loss, fiber damage, spreading, stiffness, and permanent marks.
Check the Glue Condition
The condition of the glue determines almost every step that follows. Fresh glue behaves like a liquid stain: it spreads easily, transfers under pressure, and can sink farther into the weave when rubbed. Partly set glue may look dry on top but remain soft beneath the surface. Fully cured glue may feel rubbery, brittle, glossy, or stiff, depending on the formula.
Do not assume that clear glue is harmless. Transparent adhesive can still leave a shiny border, darkened patch, or stiffened area that becomes more visible under angled light. On dark clothing, the glue may appear almost invisible indoors but show clearly in daylight.
A quick visual and touch inspection is usually enough:
| Glue condition | Common signs | Safest first action | Main risk |
|---|---|---|---|
| Wet | Glossy, sticky, and transfers easily | Lift and blot | Spreading |
| Partly set | Tacky, stringy, or soft underneath | Remove only raised excess | Pulling fibers |
| Fully cured | Firm, rubbery, brittle, or shiny | Scrape gently, then soften | Surface damage |
| Unknown | Old stain or unidentified product | Test the mildest method first | Using the wrong cleaner |
When glue has already cured, ordinary washing may not remove it. Washable fabric adhesive is designed to resist laundering after full cure, so cleanup often requires a combination of careful mechanical removal and controlled spot treatment.
Identify the Fabric
Fiber type matters, but fabric construction is equally important. Heavy cotton and denim usually tolerate more handling than silk, velvet, lace, or lightweight stretch fabric. A thick material can still be delicate when it has a coating, printed finish, laminated backing, or unstable dye.
Check the care label for the fiber composition, maximum wash temperature, dry-cleaning instructions, ironing limits, tumble-drying restrictions, and any special coating information.
Dark denim, black cotton, and brightly dyed fabrics may release color during treatment. Stretch garments containing elastane can lose shape if pulled while the adhesive is being removed. Velvet and brushed fabrics may develop permanent pressure marks even when the cleaner causes no chemical damage.
Upholstery requires additional caution because the visible textile may sit over foam, wood, batting, or adhesive backing. A liquid that appears safe on the surface can soak inward, create a large water ring, or weaken the internal structure.
Do not judge safety only by fabric thickness. A thick decorative textile may contain a fragile finish, while a thin plain cotton fabric may tolerate careful washing. The complete textile construction should guide the removal method.
Identify the Adhesive
Fabric glue is not one universal chemical formula. Products sold for textile repair may be water-based, solvent-based, pressure-sensitive, heat-activated, or designed to create a flexible waterproof film. Hot glue, cyanoacrylate, spray adhesive, epoxy, and general-purpose craft glue should not be treated in the same way.
Check the original packaging or product instructions for:
- Cleanup directions before curing
- Initial setting time
- Full curing time
- Water resistance
- Heat resistance
- Recommended fabric types
- Solvent warnings
The words washable and waterproof normally describe adhesive performance after curing. They do not necessarily mean fresh glue should be washed immediately. Washing too early can spread uncured adhesive through a larger section of fabric.
A transparent finish can also remain visible when too much glue is used. Even clear adhesive may create a glossy patch or darkened area if it penetrates deeply into the fibers.
When the original glue cannot be identified, begin with the least aggressive method. Lift raised material, blot gently, use limited moisture, and avoid strong solvents until the fabric has passed a hidden-area test.
Test Before Treatment
A hidden-area test is one of the most valuable steps in fabric glue removal. Test the complete method, not only the cleaning liquid. A cleaner may be chemically compatible with the fiber but still cause damage when rubbed, brushed, heated, or left in contact for too long.
Choose an inside hem, seam allowance, underside, removable cushion edge, or another area made from the same material. Apply a very small amount with a cotton swab. Blot with a clean white cloth and check for color transfer. Allow the area to dry completely before deciding whether the method is safe.
Stop if you notice:
- Dye transferring to the white cloth
- Fading, whitening, or discoloration
- A glossy ring around the test area
- Loss of stretch or shape
- Roughness or stiffness
- Softening of a coating
- Damage to printed graphics or decoration
Wet fabric often looks darker, which can hide damage until the area dries. For valuable clothing, vintage textiles, wedding garments, uniforms, branded fashion items, or expensive furniture, a failed test should end the home treatment. Professional cleaning is usually less costly than permanent color or fiber damage.
How Do You Remove Wet Fabric Glue?
Remove wet fabric glue by lifting the thickest excess first, blotting from the outside toward the center, and using mild soap and water only when the formula and fabric allow it. Avoid rubbing, flooding the area, or using heat because these actions can spread the adhesive and push it deeper into the fibers.
Lift Before Cleaning
The first goal is to reduce the amount of glue sitting on the surface. Do not immediately reach for a wet cloth. Adding liquid to a thick deposit can spread the adhesive across a much larger area before it has been lifted.
Use a spoon edge, plastic scraper, wooden craft stick, or clean applicator. Hold the tool almost parallel to the fabric and lift from the outer edge toward the center. Wipe the tool clean after every pass so the removed glue is not transferred back onto the textile.
For thin garments, place a folded white towel or absorbent cloth beneath the affected area. This helps prevent the glue from soaking through and allows you to see whether adhesive is moving to the reverse side.
Remove as much of the thick surface deposit as possible without pressing downward. Reducing the volume before introducing water or cleaner makes the remaining treatment safer and more controlled.
The objective is not to produce a perfect result in one step. It is to remove the bulk of the adhesive without increasing the affected area. Trying to dissolve a thick pool of glue all at once normally requires more liquid, more pressure, and more risk.
Blot From the Outside In
Blotting removes adhesive vertically. Rubbing moves it sideways and forces it farther between the yarns. This difference is especially important on cotton, fleece, knitwear, velvet, and upholstery.
Use a clean white lint-free cloth or plain paper towel. Press lightly for one or two seconds, lift straight up, and move to a clean section. Repeat until little or no glue transfers. Do not drag the cloth across the surface.
Always work from the perimeter toward the center. This limits the size of the affected area. If the glue is close to a bonded patch, hem, or appliqué, direct the cleaning movement away from the intended repair so the adhesive beneath the repair is not weakened.
A practical sequence is:
- Lift the thick surface layer.
- Blot the remaining film.
- Check the reverse side.
- Apply a small amount of compatible cleaning solution.
- Blot again with a clean cloth.
- Air-dry and inspect the fabric.
Several light passes are usually safer than one forceful attempt. When the glue stops transferring, increasing pressure is unlikely to help and may begin damaging the fibers.
Use Soap and Water Carefully
Mild detergent and cool or lukewarm water may help remove many uncured water-based fabric glues. Mix only a small amount of detergent into water and apply it with a cotton swab, small sponge, or folded corner of a cloth. Avoid soaking the entire garment.
Where possible, treat the fabric from the reverse side. This encourages the adhesive to move outward rather than deeper into the weave. Blot the front of the fabric with a clean towel as the glue loosens.
After treatment, use a second cloth lightly dampened with clean water to reduce detergent residue. Too much soap can leave its own visible ring, especially on dark clothing, curtains, or upholstery.
Soap and water may not be suitable for:
- Dry-clean-only garments
- Silk and wool
- Velvet and suede-like textiles
- Structured jackets
- Upholstery with foam beneath the surface
- Printed or coated fabrics
- Fully cured waterproof adhesive
If the glue remains unchanged after careful treatment, stop adding water. More moisture may create a wider stain without improving removal.
Know When to Pause
Some adhesives smear repeatedly while wet but become easier to roll or peel after forming a stable surface film. In these cases, allowing the glue to set naturally at room temperature may be safer than continuing to wipe it.
Consider pausing when the adhesive:
- Stretches into strings
- Smears whenever it is touched
- Sits mainly on a smooth surface
- Is described as peelable in the product instructions
- Has not soaked deeply into the textile
Do not accelerate drying with an iron, tumble dryer, heater, radiator, or hair dryer. Heat can set the adhesive, distort synthetic fibers, spread the glue, or create a glossy hard spot.
Allow the material to rest flat at room temperature. Once the surface has stabilized, gently flex the fabric. If the glue begins to roll or lift without pulling fibers, continue slowly. If threads start rising with the adhesive, stop and move to a controlled softening method.
How Do You Remove Dried Fabric Glue?
Remove dried fabric glue in stages. First reduce raised residue with a blunt tool, then soften the remaining film with the mildest compatible treatment. Work in small areas, inspect the fabric after each cycle, and air-dry before repeating. Strong solvent should be a last resort rather than the starting point.
Remove Raised Residue
Inspect the glue under bright light before applying any cleaner. Gently bend the fabric and observe how the dried layer reacts. A thick flexible deposit may lift at the edges. A brittle glue may crack. A thin layer absorbed into the fibers may not move at all.
Use a fingernail, rounded spoon, plastic card, silicone scraper, or another blunt tool. Keep the edge low and nearly parallel to the fabric. Work from one side and avoid digging downward into the weave.
Stop immediately if:
- Threads move with the adhesive
- The surface begins to pill
- The fabric stretches out of shape
- Printing starts to lift
- The repaired seam begins separating
- A coating becomes dull or rough
Mechanical removal is useful only for glue sitting above the surface. It should not be forced when the adhesive has penetrated deeply between the yarns.
Even partial removal is worthwhile. Reducing the thickness of a cured deposit means that less cleaner is required and the fabric is exposed to moisture or solvent for a shorter period.
Soften in Short Cycles
Once the raised layer has been reduced, soften the remaining residue gradually. For a known water-based adhesive on a washable fabric, start with mild detergent and warm—not hot—water.
Apply a small amount with a cotton swab. Allow a short contact period, then check whether the glue rolls, softens, or transfers. Short cycles are generally safer than soaking. The adhesive and cleaner labels should always take priority over general timing guidance.
A sensible escalation process is:
| Step | Method | Best suited to | Stop when |
|---|---|---|---|
| 1 | Dry mechanical lifting | Raised cured glue | Fibers begin moving |
| 2 | Mild detergent solution | Water-based residue | Color or texture changes |
| 3 | Manufacturer-recommended cleaner | Identified adhesive formula | Label limit is reached |
| 4 | Tested fabric-safe remover | Stubborn remaining film | Dye transfers |
| 5 | Professional cleaning | Valuable or delicate textiles | Home treatment becomes risky |
White vinegar or rubbing alcohol may help with certain glue and textile combinations, but neither is universally safe. Vinegar is acidic, while alcohol can affect dyes, printed finishes, and some synthetic materials.
Apply any treatment with a swab instead of pouring it directly onto the textile. Several controlled treatments are safer than one heavily saturated application.
Use Solvents With Caution
Acetone can dissolve or soften some adhesives, but it can also remove color, damage surface finishes, and weaken certain synthetic fibers. It should never be treated as the standard answer for every dried glue stain.
Avoid acetone on acetate and triacetate. Use extreme caution on modacrylic fibers, printed fabric, coated materials, stretch blends, imitation leather, and unknown synthetic textiles.
Before using any solvent:
- Read the garment care label
- Work in a well-ventilated area
- Keep the product away from heat and flame
- Wear suitable protective gloves
- Test a hidden area and let it dry
- Apply with a cotton swab
- Blot dissolved adhesive immediately
- Never mix the solvent with other cleaners
Removing the adhesive is not enough if the treatment leaves a faded or weakened patch. On many garments, discoloration caused by solvent is more visible than the original glue.
For wedding dresses, uniforms, vintage textiles, designer clothing, decorative curtains, or upholstery with an unknown finish, professional cleaning is usually the better decision.
Clean the Final Film
After most of the dried glue has been removed, a thin shiny or stiff film may remain. Treat this stage like stain removal rather than continued scraping.
If the textile is washable, apply a small amount of mild detergent and work gently from the reverse side. Place the front of the fabric against a clean white towel and blot from behind. This encourages remaining residue to move outward.
Rinse only as permitted by the care label. Allow the item to air-dry completely before inspecting it. Check the fabric in daylight, indoor light, and from an angle. Transparent adhesive may appear invisible when viewed directly but become obvious when light reflects across the surface.
If residue remains, repeat the mild treatment. Do not automatically increase the chemical strength. Two or three careful cycles are often safer than one aggressive application.
Some cured glue cannot be removed completely without affecting the fibers. In that situation, adding a patch, appliqué, decorative trim, or carefully planned stitch may create a better result than continuing chemical treatment.

Which Method Suits Each Fabric?
The best removal method depends on fiber strength, weave, dye stability, stretch, surface texture, and backing. Cotton and denim generally tolerate gentle scraping and washing better than polyester blends, silk, wool, lace, velvet, or fixed upholstery. The care label and hidden-area test should always override general advice.
Cotton and Denim
Cotton and denim are often the easiest fabrics to treat at home because they usually tolerate mild detergent, limited water, and gentle mechanical removal. They are commonly used in patch repairs, hems, children’s clothing, workwear, jeans, tote bags, and craft projects.
For fresh water-based glue, lift the excess and work from the reverse side using diluted detergent. For dried glue, remove the raised material with a rounded plastic tool before softening the remaining film.
Dark denim requires special attention. Indigo and garment dyes can transfer during cleaning even when the fabric itself is strong. Always use a white cloth so color movement can be seen immediately.
Avoid flooding the edge of a bonded patch. Cleaner can travel underneath it and weaken the intended repair. Work outward from the patch rather than toward its center.
Once the area appears clean, allow it to dry fully before washing the garment. Washing too soon may spread loosened adhesive into the surrounding fibers. Do not use a tumble dryer until the treated area has been inspected after air-drying.
Polyester and Stretch Fabrics
Polyester is relatively resistant to water, but it is not automatically safe from heat, solvent, or mechanical damage. Activewear, leggings, swimwear, fitted garments, and performance textiles frequently contain elastane or spandex. Pulling and heat can damage these materials even when the glue is removed.
Support the garment on a flat surface. Use minimal liquid and very low pressure. Avoid stiff brushes and abrasive pads because they can produce shine, fuzzing, or visible changes in texture.
Do not stretch the garment while scraping. A glue mark that looks small when the material is relaxed may expand and disturb the knit structure under tension.
After treatment, inspect the area while the fabric is both relaxed and gently stretched. Look for:
- Pale stress lines
- Reduced elasticity
- Glossy patches
- Rippling
- Stiffness
- Damage to printed graphics
Air-drying is essential. A hot dryer or iron can set the residue and distort synthetic fibers. If the fabric includes reflective printing, waterproof coating, compression treatment, or laminated layers, stop when the hidden test shows any change.
Delicate Fabrics
Silk, wool, lace, velvet, and embellished garments require the least aggressive approach. These materials can be damaged by moisture, rubbing, pressure, heat, or solvent long before the glue is fully removed.
Silk may develop water marks or color loss. Wool may felt or distort. Lace can tear when glue is pulled through open spaces. Velvet can retain permanent marks if the pile is flattened.
At home, remove only loose surface adhesive. Use a rounded tool with very little pressure. Do not twist, soak, brush, or scrape across the material.
Professional cleaning is advisable when:
- The garment is valuable or irreplaceable
- The glue is on a visible front panel
- The textile is dry-clean-only
- Several different materials are present
- Dye transfers during testing
- The texture changes under light pressure
Garments with beadwork, sequins, embroidery, metallic thread, interlining, or structured areas are especially risky. Cleaning liquid may travel beneath decorations or dissolve adhesive already holding them in place.
Complete glue removal is not successful if the original fabric texture, color, or shape is lost.
Upholstery and Home Textiles
Upholstery, curtains, bedding, cushions, and table linens require treatment based on construction rather than only the visible fabric. Sofa fabric may sit over foam or wood. Curtains may contain blackout coatings. Cushion covers may shrink even when the outer material appears washable.
| Item | Preferred first step | Main risk | Practical limit |
|---|---|---|---|
| Removable cushion cover | Treat from both sides | Shrinkage | Avoid complete soaking |
| Fixed sofa fabric | Blot with minimal moisture | Water rings | Keep cleaner on the surface |
| Curtain | Support flat during treatment | Dye bleeding | Test both face and lining |
| Bedding | Spot-treat before washing | Spreading in the wash | Inspect before machine drying |
| Car headliner | Begin with dry lifting | Backing separation | Use very little liquid |
Apply cleaner to a cloth or cotton swab rather than directly onto fixed upholstery. Avoid saturating the padding beneath the fabric.
Large stains, unknown materials, expensive furniture, or items with structural backing are better handled by a professional upholstery cleaner who can identify the textile and safely extract excess moisture.
What Fabric Glue Removal Mistakes Should You Avoid?
Avoid rubbing wet glue, using sharp blades, applying heat too early, saturating the fabric, and mixing cleaners. These actions can spread adhesive, cut fibers, set stains, remove dye, damage coatings, or create unsafe chemical reactions. A slow process using one tested method at a time is more reliable than force.
Do Not Rub Wet Glue
Rubbing makes wet glue appear to move, but it usually spreads the adhesive and pushes it deeper. A small spot can quickly become a broad, thin film that is much harder to remove.
The physical damage can be as serious as the stain. Aggressive rubbing may:
- Cause pilling on cotton
- Flatten velvet
- Create shine on polyester
- Pull loops from knitwear
- Fade dark fabric
- Distort stretch material
Use vertical blotting instead. Press, lift, inspect, and move to a clean section of cloth. When the glue stops transferring, do not automatically increase pressure. Reassess whether the adhesive needs time to stabilize or a different treatment.
The same principle applies during the original application. A thin, controlled adhesive line is easier to manage than a thick bead squeezed directly onto a visible edge. Preventing excess glue is always safer than removing adhesive that has already entered the fibers.
Do Not Apply Heat Too Soon
Heat is unpredictable because different adhesives respond in different ways. It may soften glue, but it can also drive it deeper, accelerate curing, spread it, or make the stain permanent.
Avoid using:
- Tumble dryers
- Hot irons
- Hair dryers
- Radiators
- Heat guns
Synthetic fabric may melt, shine, or distort. Glue may transfer onto the iron plate. Printed decoration can crack or lift. Stretch fibers may lose their recovery.
Air-dry the textile after every treatment stage. Inspect the fabric only when it is completely dry. Return to normal washing and ironing only after the stain is stable, cleaning residue has been removed, and the care label permits heat.
Heat should be included in a removal process only when the adhesive manufacturer provides a verified method for that specific product and textile combination.
Do Not Use Sharp Tools
Razor blades, craft knives, needles, and sharp metal scrapers can cut yarns before the damage becomes obvious. The garment may appear intact while lying flat and later split during washing, stretching, or normal wear.
Use a plastic card, rounded spoon, silicone scraper, or dull edge instead. Keep the tool almost flat and slide it beneath raised glue rather than pushing downward into the fabric.
Sharp tools are especially risky on:
- Knitwear
- Lining fabric
- Lace
- Stretch garments
- Lightweight polyester
- Tensioned upholstery
If the glue is close to a patch or seam, remove only the visible excess outside the intended bond. Do not slide a tool beneath the repair itself.
Good nozzle design and controlled adhesive viscosity reduce the likelihood that customers will feel they need to trim hardened overflow with a blade.
Do Not Mix Cleaners
Mixing household chemicals does not create a reliable high-strength remover. It can create harmful fumes, heat, fabric damage, or residues that are difficult to rinse.
Use one product at a time. If it does not work, remove or rinse it according to its label and allow the area to dry before testing another method.
Basic precautions include:
- Work in a ventilated space
- Keep cleaners away from heat and flame
- Wear gloves when required
- Keep products away from children and pets
- Use a separate applicator for each cleaner
- Follow disposal instructions
- Stop if strong fumes or irritation occur
Never mix bleach with ammonia, acids, alcohol-based products, or unknown cleaning solutions. Adhesive remover should not be combined with acetone, disinfectant, or another solvent-based cleaner.
A gradual process using one tested treatment at a time makes it easier to identify what is helping and what may be damaging the textile.

How Can You Prevent Excess Fabric Glue?
Prevent excess fabric glue by applying a thin, even layer, keeping adhesive away from visible edges, using a fine nozzle, aligning the materials before bonding, and allowing the full cure time. Better application control reduces visible borders, soak-through, stiffness, long drying times, and later cleanup.
Control the Amount
More glue does not always create a stronger bond. A layer that is too thick can prevent the two fabric surfaces from making close contact. It can also soak through, extend beyond the repair, cure unevenly, or leave a stiff patch.
Apply a thin continuous layer unless the product instructions state otherwise. Highly absorbent textiles may require slightly more adhesive, but this should be confirmed using a fabric scrap before working on a visible item.
For patches and appliqués, leave a narrow margin inside the outer edge. Pressure will move the glue outward. Applying adhesive directly to the edge leaves no room for that movement and makes overflow more likely.
| Project | Preferred application | Common mistake | Better control |
|---|---|---|---|
| Hem | Thin, continuous line | Applying a thick bead | Keep the line close to the fold |
| Patch | Even layer inside the edge | Coating to the outer border | Leave a narrow margin |
| Sequins | Small controlled dots | Covering the full back | Use a fine applicator tip |
| Ribbon | Narrow, steady line | Applying uneven blobs | Move the nozzle continuously |
| Upholstery repair | Controlled thin layer | Oversaturating the textile | Test fabric absorbency first |
Test both the amount and the pressing pressure on scrap fabric. This is especially useful when working with thin, pale, open-weave, or highly absorbent materials.
Use a Precision Nozzle
A fine-point nozzle helps place adhesive accurately on hems, ribbons, patches, sequins, appliqués, costumes, plush toys, and narrow seams. It also reduces product waste and makes it easier to keep glue away from visible edges.
Hold the tip close to the surface. Do not squeeze adhesive from several centimeters above the material. Reduce hand pressure as the nozzle approaches corners, edges, or open-weave areas.
After use:
- Wipe the nozzle
- Clean glue from the external threads
- Replace the cap promptly
- Store the tube as instructed
- Do not enlarge the opening with scissors
A cap with a built-in pin helps reduce blockage. This matters because a clogged nozzle often leads users to squeeze harder, followed by a sudden uncontrolled burst of adhesive.
For very small decorations, place a small amount of glue on a disposable surface and transfer it with a fine applicator instead of squeezing directly onto the textile.
Packaging is an important part of adhesive performance. A strong formula can still produce a poor user experience when the tube leaks, the nozzle blocks, or the opening releases too much product.
Press With Control
Align the repair before applying adhesive. Repeated repositioning after glue has been added spreads the product and increases the chance of a visible border.
Bring the surfaces together and press from the center outward. This moves trapped air and excess adhesive toward the edge gradually. If a small amount appears, lift it immediately with a clean tool. Do not wipe it across the textile.
Use even pressure. Heavy force in one area can push glue through the fabric. Clips, flat weights, or temporary supports may help, but they should not leave marks or become bonded to the project.
A practical application sequence is:
- Clean and dry both surfaces.
- Position the materials before applying glue.
- Apply a thin, even layer.
- Press from the center toward the edges.
- Remove visible overflow immediately.
- Keep the repair flat during the initial set.
- Avoid washing, stretching, or ironing before full cure.
For GleamGlee Fabric Glue, the materials should be pressed together and kept stable during an initial setting period of approximately 6–10 minutes. Full curing requires up to 24 hours.
Allow the Full Cure
Initial set and full cure are not the same. A repair may feel secure after several minutes while moisture or solvent remains within the adhesive film. Moving or washing it too early can weaken the bond and squeeze uncured glue beyond the edges.
Follow the curing time stated on the product. For an adhesive requiring up to 24 hours, keep the item undisturbed for the complete period.
During curing:
- Keep the project flat
- Avoid unnecessary repositioning
- Do not wash the item
- Do not iron the repaired area
- Do not stretch or wear the fabric
- Avoid excessive heat or humidity unless instructed
Once properly cured, a quality fabric adhesive should remain flexible enough for normal movement. GleamGlee Fabric Glue is designed to dry transparent and non-yellowing while remaining soft and flexible rather than stiff or brittle.
It is available in a 50 g single-tube option and a 50 g two-tube pack. The fine-point nozzle supports accurate application, while the pin inside the cap helps reduce clogging. The cured repair is designed to withstand washing and ironing when the adhesive has been applied correctly and allowed to cure fully.
Suitable applications include clothing alterations, denim repairs, patches, curtains, ribbons, embroidery, sequins, appliqués, costumes, upholstery, home textiles, tote bags, plush toys, school crafts, and other flexible fabric projects.
Conclusion
Removing excess fabric glue successfully is less about finding one powerful chemical and more about making the correct decisions in the right order. Identify whether the glue is wet or cured, confirm the adhesive and textile type, test the treatment, reduce the residue gradually, and allow the fabric to air-dry before using heat.
Wet glue should normally be lifted and blotted. Dried glue should be reduced mechanically, softened carefully, and treated in controlled stages. Delicate, valuable, coated, or structurally complex textiles may require professional cleaning rather than aggressive home treatment.
The cleaner solution is prevention. A thin and even adhesive layer, precise nozzle control, correct pressing technique, and a complete 24-hour cure help reduce overflow, stiffness, visible borders, and failed repairs.
GleamGlee is a Guangdong-based adhesive and cleaner brand and manufacturer supporting consumer products, wholesale supply, OEM, ODM, and private-label projects. Its manufacturing capabilities include formula development, packaging production, label printing, raw-material support, quality testing, and international fulfillment.
The company’s technical team includes more than 25 chemists, materials specialists, and process engineers. Four specialized factories support adhesive and cleaner manufacturing, packaging production, label printing, and raw-material processing, with automated production capacity exceeding 12 million units annually.
Fabric glue buyers can request:
- Existing or customized adhesive formulas
- 50 g single-tube and two-tube formats
- Custom tube capacities and applicators
- Fine precision nozzle options
- Custom logos and private-label packaging
- English and multilingual instructions
- Market-specific label and packaging designs
- SDS, TDS, CLP, REACH, GHS, and related compliance support
- Amazon FBA-ready packaging
- Sample development and bulk production support
Customization can begin from approximately 200 units, depending on the formula, packaging, and project requirements. Design drafts may be completed in as little as two working days. Samples generally require 7–14 days, while standard bulk production usually takes approximately 20 days. Expedited production may be available for qualified projects.
Retailers, distributors, Amazon sellers, Shopify brands, craft suppliers, garment repair businesses, DIY product companies, and established consumer brands can contact GleamGlee to request pricing, samples, formula comparisons, packaging options, compliance documents, or private-label development.
A cleaner fabric repair begins with accurate application. A reliable product line begins with a manufacturer that understands adhesive chemistry, packaging performance, regulatory requirements, and the way customers actually use fabric glue.





















