 Skip to content
A heavy-duty repair does not always need drilling, screws, dust, noise, or a full replacement job. In many homes, the real problem is much smaller: one loose bathroom tile, one moving garden stone, one lifted backsplash corner, one weak stair riser, one cracked piece of trim, or one stone panel that no longer sits flat. These repairs look annoying because they sit in visible areas and often get worse with water, foot traffic, heat, or daily use. The good news is that many of them can be fixed with construction glue when the material is still stable and the repair is handled with care.
Construction glue is used by cleaning the surface, removing loose dust or old adhesive, applying a controlled bead, pressing the materials firmly together, and holding the repair still until the glue cures. For heavy-duty repairs, the strongest results come from clean contact, enough adhesive coverage, firm pressure, temporary support, and patient curing before water, weight, or movement touches the repair again.
That last point is where many repairs fail. People often blame the glue, but the real cause is usually dust, moisture, weak surface layers, early movement, or not enough pressure. A stone path repaired before rain, a bathroom tile pressed without support, or a panel loaded too soon may not last. This guide explains how to use construction glue in a more practical way, the way real homeowners, DIY users, contractors, and repair teams actually need it.
What Is Construction Glue?
Construction glue is a heavy-duty adhesive used to bond building and repair materials such as tile, stone, wood, concrete, brick, drywall, stucco, and decorative panels. It is designed for jobs where ordinary glue is too weak and where screws, nails, or drilling may leave visible damage. In home repairs, it is often used to reset loose tiles, secure trim, bond stone pieces, fix backsplash areas, hold wood panels, and repair outdoor surfaces.
A good construction glue does more than “stick two things together.” It needs to grip hard surfaces, stay stable on rough or vertical areas, fill small surface gaps, and cure into a firm bond that can handle daily use. In wet rooms, it may need to resist moisture after curing. Outdoors, it may face rain, heat, cold, dust, and temperature changes. For heavy-duty repairs, the glue must work together with surface cleaning, proper bead size, firm pressure, and enough curing time.
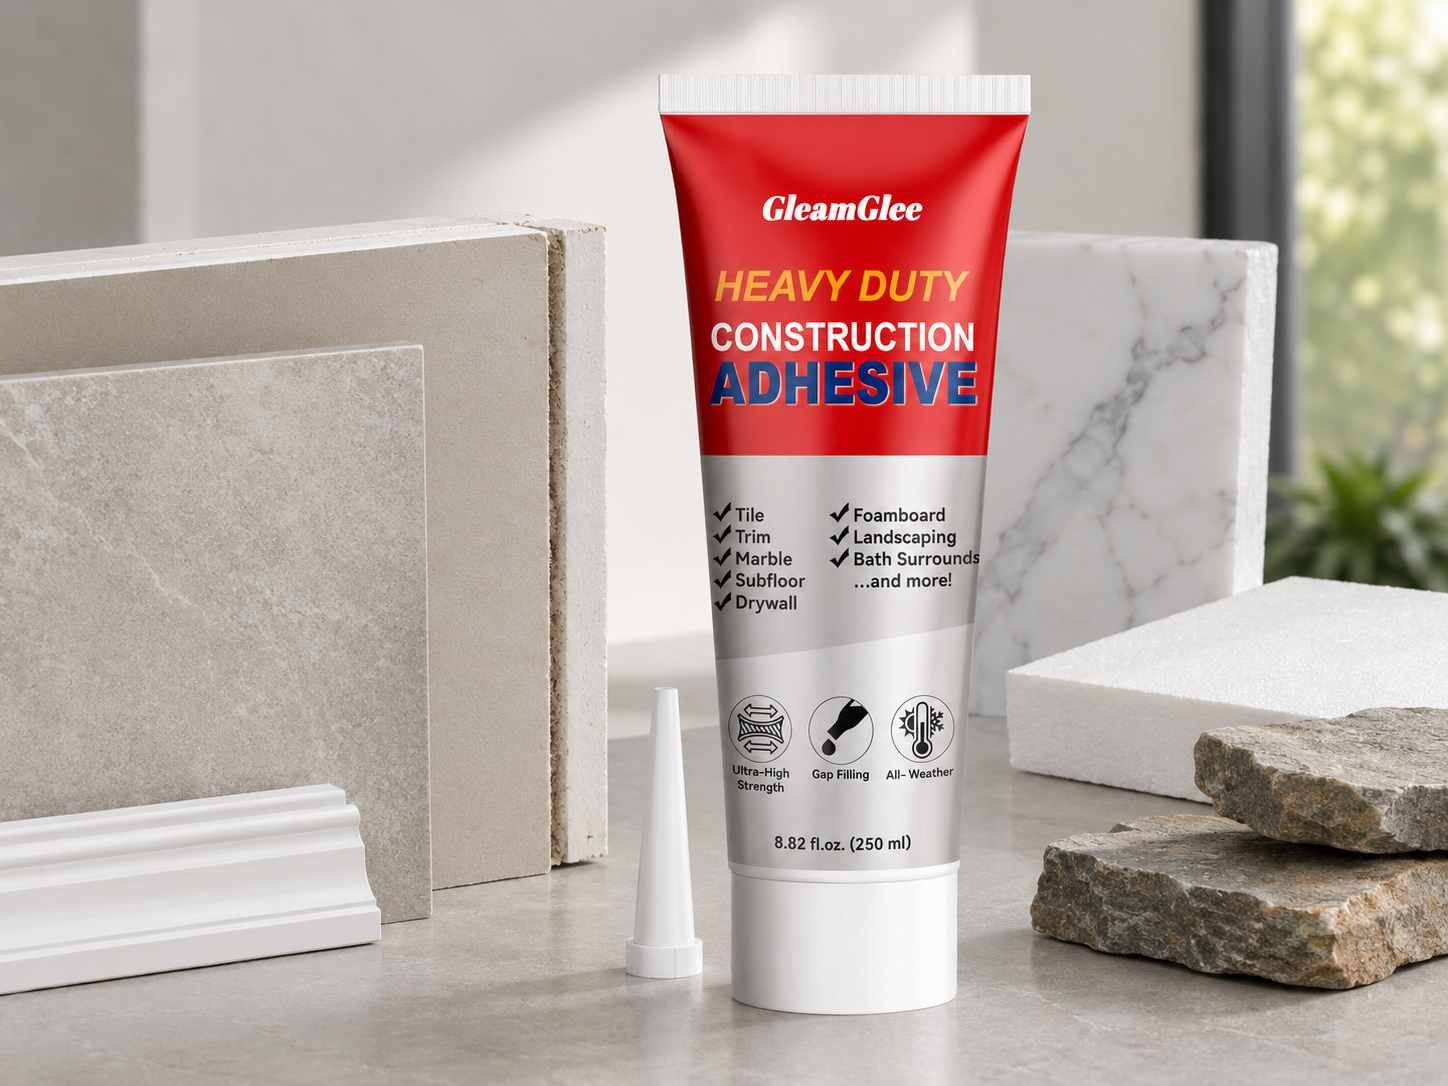
GleamGlee Construction Glue is made for practical home and repair use. It bonds concrete, tile, stone, wood, drywall, stucco, brick, rough surfaces, uneven materials, and vertical repair areas. The 8.8 oz tube provides up to 30 ft of coverage depending on bead thickness and repair style. Its medium-consistency formula is easy to squeeze by hand, the precision-tip cap helps control the glue line, and the included fixing tape helps hold materials in place while the adhesive cures.
What Is Construction Glue Used For?
Construction glue is used for repairs and installations where strength, surface contact, and clean appearance matter. It is especially useful when the repair area is visible, uneven, hard to drill, or made from mixed materials. Around the home, it can help repair a loose bathroom wall tile, secure a kitchen backsplash edge, attach wood trim, bond decorative stone, fix a moving patio tile, or hold brick and concrete pieces in place. It is not only for large construction work. Many of its best uses are small repairs that prevent bigger replacement costs later. The key is to use it on stable materials that still have enough surface area for bonding.
- Bathroom repairs: loose wall tiles, vanity backsplashes, bathtub surrounds, shower-adjacent tiles, and wet-room floor transitions after the surface is dry and stable.
- Kitchen repairs: backsplash tiles, stone wall accents, island base tiles, countertop tile sections, and small visible repairs where a clean finish matters.
- Outdoor repairs: patio tiles, balcony surfaces, garden stepping stones, outdoor kitchen tiles, poolside tile edges, and stone or concrete decorative pieces.
- Interior finishing: wood trim, drywall parts, stair riser tiles, decorative panels, brick edges, stone cladding, and non-structural wall accents.
| Repair Area | Common Use | Main Benefit |
|---|---|---|
| Bathroom | Resetting loose tile | Moisture-area bonding after full cure |
| Kitchen | Backsplash repair | Cleaner look without screws |
| Patio | Securing tile or stone | Outdoor durability after curing |
| Living area | Stone or wood accents | Hidden bond line |
| Basement | Tile, panel, or masonry repair | Strong grip on hard surfaces |
| Garden | Stepping stone repair | Helps reduce movement on stable bases |
Is Construction Glue Strong?
Construction glue can be very strong, but its real strength depends on the full repair process, not the glue alone. A strong adhesive may still fail if it is applied over dust, grease, wet concrete, loose grout, peeling paint, or crumbling material. The bond becomes stronger when the surface is clean, dry, stable, and pressed firmly into place. Heavy materials also need support during curing because the adhesive is not at full strength immediately after application. A stone piece, large tile, stair riser, or outdoor slab may look secure at first, but it can shift if it is not taped, weighted, clamped, or braced while curing.
- Surface condition matters: glue bonds best to solid material, not dust, loose paint, old weak glue, powdery concrete, or oily residue.
- Contact area matters: larger bonding areas usually hold better than tiny edges because the force spreads across more surface.
- Pressure matters: firm pressing helps the adhesive spread into small surface textures and improves contact between both materials.
- Curing matters: heavy-duty repairs should stay still until fully cured before water, weight, vibration, or foot traffic touches the repair.
| Strength Factor | Good Repair Condition | Weak Repair Condition |
|---|---|---|
| Surface | Clean, dry, firm | Dusty, wet, greasy, loose |
| Glue amount | Controlled bead with full contact | Too little glue or thick messy blobs |
| Pressure | Even, firm pressing | Light touch or uneven contact |
| Support | Tape, clamp, brace, or weight | Heavy item left unsupported |
| Curing | Protected until fully cured | Walked on, washed, or moved too early |
GleamGlee Construction Glue is designed for heavy-duty bonding on concrete blocks, tile, stone, wood panels, drywall, stucco, brick, rough surfaces, and vertical areas. For best results, it should be used as part of a complete repair method: clean first, dry fully, apply the right bead, press firmly, support the material, and allow full curing time.
How Does Construction Glue Work?
Construction glue works by creating a bonding layer between two surfaces. When applied in a bead and pressed into place, the adhesive spreads into small pores, scratches, gaps, and surface textures. As it cures, the soft adhesive layer hardens or sets into a stronger bond that helps resist pulling, sliding, and daily movement. The repair becomes stronger when both surfaces make good contact with the glue. If the glue only touches one side, sits in a thick lump, or is applied to weak surface material, the repair may not last. This is why bead control, pressure, and stillness during curing are so important.
- On smooth surfaces: use a controlled bead and firm pressure so the glue spreads evenly without excessive squeeze-out.
- On rough surfaces: use enough adhesive to reach into shallow texture, but avoid thick piles that stop the material from sitting flat.
- On vertical surfaces: support the material with fixing tape, spacers, braces, or clamps so gravity does not move the piece during curing.
- On visible repairs: keep the bead slightly inside the edge and wipe excess before it cures to maintain a clean finish.
| Surface Type | How Construction Glue Bonds | Application Tip |
|---|---|---|
| Tile | Grips the back surface and base wall or floor | Keep glue away from visible edges |
| Stone | Fills shallow texture and creates broad contact | Press firmly and support heavy pieces |
| Wood | Bonds into grain and surface pores | Remove dust after sanding |
| Concrete | Grips rough surface texture | Brush away loose powder first |
| Brick | Bonds to porous masonry texture | Remove grit and crumbling material |
| Drywall | Bonds to a stable paper or prepared surface | Avoid loose paper and wet areas |
GleamGlee’s medium-consistency texture helps the glue stay where it is placed instead of running too quickly. The precision-tip cap makes it easier to create a neat bead for tile edges, trim, stone pieces, and backsplash repairs. For heavier or vertical materials, the included fixing tape can help reduce movement while the adhesive cures.
Which Construction Glue Repairs Fit?
Construction glue fits repairs where two stable building materials need a strong, hidden bond. It is commonly used on tile, stone, wood, concrete, brick, drywall, stucco, panels, and decorative surfaces. The repair should have enough contact area for the glue to grip, and the base material should not be rotten, crumbling, soaked, or loose.
The best repair jobs are usually small to medium areas: a loose bathroom wall tile, a lifted backsplash corner, a wood trim strip, a moving patio tile, a garden stepping stone, a stair riser tile, or a decorative stone piece. These repairs often look serious, but they do not always need replacement. When the part is still intact and the surface behind it is firm, construction glue can restore a clean, strong hold.
Heavy, vertical, outdoor, wet-area, or high-traffic repairs need more care. A heavy stone panel may need bracing. A bathroom tile should be fully dry before bonding. A patio repair should be protected from rain and foot traffic during curing. Construction glue works best when the job is matched with cleaning, pressure, support, and enough time to cure.
Which Construction Glue Repairs Are Indoors?
Indoor construction glue repairs usually fit bathrooms, kitchens, basements, living areas, hallways, stair areas, and utility rooms. These repairs often need a neat finish because the bonded area is visible. Construction glue is useful when nails or screws would leave holes, crack tile, damage thin trim, or look unattractive. Common indoor repairs include resetting a bathroom wall tile, securing a vanity backsplash, fixing a kitchen tile edge, attaching wood trim, repairing stair riser tiles, bonding decorative stone, and holding small drywall or panel sections. Before applying glue indoors, check for dust, grease, soap film, old adhesive, loose grout, and dampness. A repair near a sink, bathtub, stove, or basement wall should be clean and dry before bonding.
- Bathroom tile: useful for loose wall tiles, bathtub surrounds, vanity backsplashes, and shower-adjacent areas after the base has dried.
- Kitchen areas: suitable for backsplash tiles, island base tiles, countertop tile accents, and stove-side decorative wall sections.
- Living spaces: works for wood trim, feature wall panels, stair riser tiles, decorative brick, and stone accent pieces.
- Basement repairs: helpful for stable tile, masonry, panel, and trim repairs where moisture has been checked first.
| Indoor Area | Suitable Repair | What to Check First | Practical Tip |
|---|---|---|---|
| Bathroom | Loose wall tile | Hidden moisture and soap residue | Let the area dry before bonding |
| Kitchen | Backsplash edge | Grease and cleaner residue | Wipe clean and keep bead inside the edge |
| Stair area | Riser tile or trim | Impact and vibration | Tape well and avoid kicking during cure |
| Living room | Stone or wood accent | Weight and alignment | Use spacers or light bracing |
| Basement | Tile or panel repair | Dampness and loose dust | Check if moisture returns after wiping |
Which Construction Glue Repairs Are Outdoors?
Outdoor construction glue repairs fit patios, balconies, terraces, garden paths, outdoor kitchens, poolside areas, stone borders, brick edges, and concrete surfaces. Outdoor repairs face more stress than indoor repairs because rain, heat, cold, sunlight, soil, and foot traffic can affect the bond. A good outdoor repair starts with a stable base. Glue can help secure a tile, stone, or masonry piece, but it should not be expected to fix sinking soil, badly cracked concrete, or a loose foundation layer. Clean away sand, moss, mud, old adhesive, and powdery surface material before applying glue. Choose a dry repair window so the adhesive can cure before rain, irrigation, frost, or heavy use.
- Patio and terrace tiles: suitable when the tile is loose but the base is still firm and level.
- Garden stepping stones: suitable when the stone sits on a stable base and does not rock badly before gluing.
- Balcony repairs: useful for tile edges and decorative surfaces after dust and moisture are removed.
- Outdoor kitchen areas: suitable for tile accents and stone pieces away from direct flame or extreme heat zones.
| Outdoor Repair | Suitable Condition | Risk Condition | Better Method |
|---|---|---|---|
| Patio tile | Tile sits flat on a firm base | Base is cracked or sinking | Repair the base first |
| Garden stone | Stone has broad contact area | Soil moves under the stone | Stabilize and level the ground |
| Poolside tile | Area can stay dry while curing | Water splashes before cure | Block water until fully cured |
| Balcony tile | Surface is dry and solid | Frost, dampness, or loose grit | Clean and wait for dry weather |
| Brick edge | Brick piece is intact | Brick is crumbling | Remove weak material first |
Which Construction Glue Repairs Need Support?
Construction glue repairs need support when the material is heavy, vertical, smooth, slippery, uneven, or likely to move before curing. Initial grip is not the same as full strength. A piece may feel secure after pressing, but gravity, vibration, weight, or foot traffic can shift it while the adhesive is still curing. Wall tiles, stone strips, stair risers, wood panels, outdoor slabs, and large decorative pieces should often be held in place with fixing tape, clamps, braces, weights, spacers, or temporary support boards. Support is especially important in bathrooms, stair areas, patios, and vertical walls because movement during curing can create weak spots or crooked alignment.
- Vertical repairs: use fixing tape, spacers, wedges, or braces to stop sliding before the adhesive cures.
- Heavy stone or tile: use a support board, clamp, or brace instead of relying only on tape.
- Floor repairs: use a flat weight when needed and keep people away until the bond is fully cured.
- Outdoor pieces: protect from pets, rain, wind, and foot traffic during the curing period.
| Repair Type | Support Needed | Why It Helps | Common Mistake |
|---|---|---|---|
| Bathroom wall tile | Fixing tape or spacers | Keeps grout line straight | Removing tape too early |
| Heavy stone piece | Brace or support board | Prevents downward pull | Using only light tape |
| Stair riser tile | Tape and spacer | Stops vibration movement | Walking nearby too soon |
| Floor tile | Flat weight | Prevents rocking | Stepping on it before cure |
| Wood panel | Clamps or braces | Holds even pressure | Pressing only the center |
| Garden stone | Weight or barrier | Stops shifting | Letting pets or people step on it |
Which Construction Glue Repairs Should Be Avoided?
Construction glue should be avoided as the only repair method when the job is structural, safety-critical, constantly wet, directly exposed to flame, badly cracked, rotten, or too weak to hold a bond. It should not be used alone for load-bearing beams, unstable walls, overhead heavy stone, loose railings, broken steps with safety risk, soaked shower bases, crumbling concrete, rotten wood, or surfaces where the base material breaks apart by hand. In these cases, the problem is deeper than adhesion. The damaged base may need rebuilding, fastening, sealing, waterproofing, or professional repair before any adhesive is used. Construction glue is strongest when it bonds solid materials, not when it is asked to replace missing strength in failed materials.
- Avoid structural repairs: beams, supports, railings, load-bearing steps, and overhead heavy items need proper fastening or professional assessment.
- Avoid weak surfaces: rotten wood, peeling paint, crumbling plaster, powdery concrete, and broken drywall need surface repair first.
- Avoid trapped water: wet walls, soaked tile bases, and active leaks should be dried and fixed before gluing.
- Avoid direct flame: fireplace interiors, grill fire zones, and pizza oven flame areas need heat-rated materials instead.
| Avoid This Repair | Main Problem | Safer Direction |
|---|---|---|
| Rotten wood trim | Wood fibers are weak | Replace damaged wood first |
| Crumbling concrete | Surface breaks under stress | Repair or stabilize concrete |
| Heavy overhead stone | Falling risk | Use mechanical fastening |
| Active shower leak | Water keeps entering | Fix leak and dry area first |
| Load-bearing part | Safety risk | Use proper structural method |
| Direct flame area | Heat damage risk | Use heat-rated products |

How to Prepare Construction Glue Repairs?
Preparing construction glue repairs means making the bonding area clean, dry, solid, and ready before any adhesive is applied. Most failed repairs are not caused by weak glue. They happen because dust, grease, moisture, old adhesive, loose grout, peeling paint, or unstable material sits between the glue and the real surface. Construction glue needs direct contact with firm material to build a lasting bond.
For heavy-duty repairs, preparation should take longer than application. A loose bathroom tile, patio stone, wood trim strip, brick edge, or stair riser tile may only need a few minutes of gluing, but the cleaning and checking stage decides whether the repair stays secure. Before opening the tube, remove weak material, dry the surface, test the fit, and prepare fixing tape, clamps, weights, spacers, or braces if the part may move.
GleamGlee Construction Glue works on tile, stone, wood, concrete, brick, drywall, stucco, rough surfaces, uneven materials, and vertical repair areas. For best results, the surface should not be dusty, oily, wet, frozen, rotten, or crumbling. The repair piece should sit in place without major rocking, and heavy materials should be supported while curing.
| Preparation Point | What to Check | Why It Matters | Good Practice |
|---|---|---|---|
| Surface strength | Crumbling, peeling, loose layers | Glue bonds to the top layer only | Remove weak material first |
| Cleanliness | Dust, grease, oil, old glue | Dirt blocks real adhesion | Scrape, brush, wipe, and dry |
| Moisture | Water, dampness, frost | Moisture can weaken contact | Let the area dry fully |
| Fit | Gaps, rocking, sliding | Poor fit reduces bond area | Test before applying glue |
| Support | Weight, gravity, vibration | Movement breaks early bond | Prepare tape, clamps, or weights |
How to Clean Before Construction Glue?
Cleaning before construction glue means removing anything that can sit between the adhesive and the actual repair surface. A surface may look clean but still have dust, grease, powdery concrete, old caulk, loose grout, soap film, paint flakes, sawdust, mud, or sanding residue. These layers are often thin, but they can stop the glue from gripping properly. For example, a bathroom tile with soap residue may feel smooth, but the adhesive may bond to the residue instead of the tile. A patio stone may look solid, but loose sand underneath can weaken the repair. Cleaning should make the surface bond-ready, not just visually cleaner.
- Remove loose material first: scrape away weak old adhesive, broken grout, peeling paint, loose mortar, powdery concrete, or crumbling brick edges.
- Brush rough surfaces well: concrete, stone, brick, and stucco often hold dust in texture, so a stiff brush is useful before wiping.
- Degrease kitchen areas: backsplashes, stove-side tiles, and countertop edges may hold cooking oil that needs more than a dry cloth.
- Clean both sides: wipe the base surface and the back of the tile, stone, wood, or trim piece before applying glue.
| Surface | Common Dirt Problem | Cleaning Method | Avoid |
|---|---|---|---|
| Tile | Soap film, grout dust, old adhesive | Scrape and wipe clean | Gluing over loose grout |
| Concrete | Powder, sand, loose particles | Stiff brush and dry wipe | Leaving dusty powder behind |
| Wood | Sawdust, wax, peeling paint | Light sanding and dust removal | Gluing over loose finish |
| Brick | Grit, mortar crumbs, dirt | Brush until firm | Bonding to crumbling edges |
| Kitchen wall | Grease and cleaner residue | Degrease, wipe, dry | Applying glue over oil film |
| Stone | Soil, flakes, old glue | Brush and clean both sides | Ignoring the underside |
How to Dry Before Construction Glue?
Drying before construction glue is important because moisture can weaken surface contact, slow curing, or trap dampness inside the repair. This matters most for bathrooms, basements, outdoor stone, patios, balconies, and porous materials such as concrete, brick, grout, unfinished wood, and natural stone. A surface can look dry on top while still holding moisture inside small pores. If a loose bathroom tile came from a wet wall, or a garden stone was lifted from damp soil, wiping once may not be enough. The repair should be allowed to air dry until the surface feels stable, not cool, wet, muddy, or powdery.
- Check hidden moisture: loose bathroom tiles, basement floors, and outdoor stones may hold moisture behind or underneath the visible surface.
- Avoid wet dust: damp grout powder, wet concrete dust, or muddy stone can turn into a weak layer under the glue.
- Wait after cleaning: if water or cleaner was used, allow the surface to dry before applying construction glue.
- Watch outdoor timing: avoid applying glue before rain, frost, irrigation, heavy dew, or sudden temperature drops.
| Repair Area | Moisture Risk | Drying Advice | Better Timing |
|---|---|---|---|
| Bathroom tile | Water behind tile | Let the wall and tile back dry | After the area has stayed dry |
| Kitchen backsplash | Cleaning moisture | Wipe dry and wait | After cooking and cleaning |
| Basement floor | Damp slab or condensation | Check if dampness returns | During a dry, ventilated period |
| Patio tile | Rain or ground moisture | Dry the base and tile bottom | Before several dry hours |
| Garden stone | Wet soil underneath | Clean and dry underside | After soil surface has dried |
| Wood trim | Absorbed moisture | Let wood dry naturally | Before painting or sealing |
How to Test Before Construction Glue?
Testing before construction glue means placing the repair piece into position without adhesive to check fit, alignment, contact area, and movement. This step prevents messy corrections after the glue is already applied. A tile may sit too high because old adhesive remains behind it. A patio stone may rock because the base is uneven. A wood trim strip may pull away because it is slightly bent. A stone panel may be too heavy for simple tape. These problems are easier to solve before the adhesive is squeezed out. Testing also helps decide where the glue bead should go and how much support the repair will need.
- Check flatness: the piece should sit as close to the base as possible without rocking or standing too proud.
- Check alignment: grout lines, trim edges, tile corners, and panel seams should line up before glue is applied.
- Check movement: if the piece slides, leans, springs back, or rocks, prepare stronger support before bonding.
- Check gap size: construction glue can fill small surface texture, but large empty gaps may need leveling or rebuilding first.
| Test Result | What It Means | What to Do Before Gluing |
|---|---|---|
| Tile sits too high | Old adhesive or debris remains | Scrape the back or base surface |
| Stone rocks | Uneven contact or unstable base | Level the base or adjust support |
| Trim springs back | Wood is under tension | Use clamps or replace warped trim |
| Wall piece slides | Gravity will move it during cure | Prepare tape, spacers, or brace |
| Large gap remains | Poor bonding contact | Fill, level, or rebuild the base |
| Edges look uneven | Alignment issue | Mark position before applying glue |
How to Protect Before Construction Glue?
Protecting before construction glue means preparing the repair area so the adhesive stays where it should and does not stain, smear, or cure on visible surfaces. This is especially important for kitchen backsplashes, bathroom tiles, stone walls, stair risers, wood trim, and decorative panels. Heavy-duty glue can be difficult to remove after curing, so the cleanest repair starts before application. Masking visible edges, keeping a cloth nearby, planning the bead position, and setting support materials in advance can prevent most mess. Good protection also includes keeping children, pets, foot traffic, and water away from the repair while the adhesive cures.
- Mask visible edges: use tape near tile, trim, stone, or backsplash edges where squeeze-out would be hard to clean.
- Keep cleanup ready: prepare a cloth or suitable cleaning method before applying glue, not after it squeezes out.
- Protect the floor: place paper, cardboard, or cloth below vertical repairs to catch accidental drips.
- Control access: block the area so people, pets, or tools do not disturb the repair during curing.
| Repair Type | Protection Needed | Practical Detail |
|---|---|---|
| Backsplash tile | Edge masking | Keep bead slightly inside the tile edge |
| Bathroom tile | Dry area protection | Avoid shower use until cured |
| Stair riser | Traffic control | Prevent kicks and vibration |
| Patio stone | Area barrier | Stop walking or pet movement |
| Wood trim | Wall and floor protection | Catch squeeze-out before it cures |
| Stone wall | Brace and drop protection | Support weight and protect lower surfaces |
How to Use Construction Glue?
Using construction glue correctly means applying the right amount, pressing the parts with enough contact, and keeping the repair still until the adhesive has cured. The process looks simple, but heavy-duty repairs need more control than small craft repairs. A loose tile, stone piece, wood trim, patio slab, brick edge, or stair riser can shift if the glue is applied too thick, pressed unevenly, or left unsupported.
The best method is to prepare everything before opening the tube. The surface should already be clean, dry, and test-fitted. Fixing tape, clamps, weights, spacers, or braces should be close by if the repair is vertical, heavy, or exposed to movement. GleamGlee Construction Glue has a medium-consistency formula that can be squeezed by hand, so it is easier to place a controlled bead without flooding the repair area.
After applying construction glue, press the parts together firmly and check alignment immediately. Wipe visible excess before it cures, then leave the repair untouched. Heavy-duty repairs should not be walked on, washed, pulled, grouted, caulked, loaded, or exposed to heavy water too soon. A repair that stays still during curing usually has a much better chance of staying strong during daily use.
How Much Construction Glue to Apply?
The right amount of construction glue depends on the repair size, material weight, surface texture, and how much contact area is available. A thin straight bead may be enough for trim, tile edges, or narrow strips. A zigzag bead works better for larger tiles, panels, or flat wood pieces because it spreads adhesive across a wider area. Rough stone, brick, concrete, and uneven surfaces may need a slightly thicker bead so the adhesive can reach into shallow texture. Too little glue leaves weak dry spots. Too much glue can make the piece slide, sit unevenly, cure slowly, or squeeze out around visible edges. GleamGlee’s 8.8 oz tube can cover up to 30 ft depending on bead thickness, but heavy or rough repairs may use more adhesive per foot.
- Use a straight bead for trim, narrow tile strips, small masonry edges, and clean visible repair lines.
- Use a zigzag bead for backsplash tiles, panels, wood boards, stair riser tiles, and larger contact areas.
- Use a slightly thicker bead for rough stone, concrete, brick, stucco, and uneven outdoor surfaces.
- Keep the bead slightly inside visible edges to reduce squeeze-out and make the finished repair cleaner.
| Repair Type | Better Bead Style | Glue Amount | Main Reason |
|---|---|---|---|
| Small wall tile | Short lines or light zigzag | Light to medium | Holds the tile without filling the grout line |
| Kitchen backsplash | Thin controlled bead | Light to medium | Keeps the visible edge clean |
| Wood trim | Straight bead | Light to medium | Bonds the full length without bulging |
| Wood panel | Zigzag bead | Medium | Spreads contact across the back |
| Natural stone | Thicker bead | Medium to heavy | Reaches uneven surface texture |
| Concrete block edge | Continuous bead | Medium | Creates a strong contact line |
| Patio tile | Zigzag or contact-point beads | Medium | Reduces rocking after pressing |
| Stair riser tile | Zigzag bead with edge control | Medium | Holds vertical pressure better |
How to Press Construction Glue Repairs?
Pressing construction glue repairs is not only about pushing the parts together. The goal is to spread the adhesive into both surfaces and remove weak air gaps without squeezing out all the glue. Press with steady, even pressure rather than sharp impact. A small tile can be pressed by hand. A wood strip should be pressed along its full length, not only in the center. A stone piece may need stronger pressure because the back surface is often uneven. If the piece is placed on a vertical wall, press first, adjust alignment, then hold it with tape, spacers, or a brace. If the piece is on the floor, press it flat and check that it does not rock. Once aligned, avoid repeated movement because shifting can break the early bond layer.
- Press from the center outward when working with flat tiles, panels, or boards to help spread glue evenly.
- Check the edge line immediately after pressing, especially on backsplash tiles, stair risers, and wall panels.
- Use a small sliding motion only when suitable, then stop moving the piece once the position is correct.
- Support the repair after pressing if gravity, weight, vibration, or foot traffic could move it before curing.
| Material | Pressing Method | What to Watch |
|---|---|---|
| Ceramic tile | Firm hand pressure across the tile face | Tile should not sit higher than nearby tiles |
| Porcelain tile | Even pressure with edge checking | Dense surface may need good bead contact |
| Stone piece | Strong steady pressure | Heavy pieces may slide without support |
| Wood trim | Press along the full strip | Ends may spring away if not taped |
| Wood panel | Press center, edges, and corners | Avoid hollow areas behind the panel |
| Brick piece | Press into the contact line | Loose grit can weaken the bond |
| Floor tile | Press flat and test for rocking | Keep people off during curing |
| Patio stone | Downward pressure on stable base | Base must not sink or shift |
How to Hold Construction Glue Repairs?
Holding construction glue repairs is necessary when the material may move before the adhesive has fully cured. Initial grip is not the same as final strength. A wall tile may slide a few millimeters after it looks straight. A stone strip may lean forward slowly. A stair riser tile may shift from vibration. A patio tile may rock if someone steps on it too early. GleamGlee Construction Glue includes fixing tape, which is useful for many lighter vertical repairs, but heavier materials may need stronger support. Tape works well for small wall tiles or trim. Clamps work well for wood pieces. Braces work well for heavy stone or wall panels. Weights work well for floor tiles and outdoor stones.
- Use fixing tape for lighter wall tiles, trim pieces, backsplash repairs, and small decorative parts.
- Use clamps for wood trim, wood panels, and repairs where steady pressure is needed along the edge.
- Use braces or support boards for heavy vertical stone, large tiles, and wall-mounted decorative panels.
- Use weights and traffic barriers for floor tiles, patio repairs, garden stones, and stair-area repairs.
| Repair Situation | Holding Method | Practical Detail |
|---|---|---|
| Bathroom wall tile | Fixing tape or spacers | Keeps the grout line straight while curing |
| Backsplash tile | Tape plus edge masking | Prevents slipping and keeps edges clean |
| Heavy stone wall piece | Brace or support board | Tape alone may not hold enough weight |
| Wood trim | Tape or clamps | Press the ends firmly so they do not lift |
| Floor tile | Flat weight | Stops rocking during early cure |
| Patio stone | Weight and area barrier | Keeps people and pets away |
| Stair riser tile | Tape and spacer | Reduces shifting from vibration |
| Vertical panel | Brace or clamp | Holds even pressure across a larger area |
How Long Does Construction Glue Cure?
Construction glue curing time depends on bead thickness, surface type, temperature, humidity, airflow, repair weight, and how much pressure the repair will face later. A small indoor tile with a thin bead may become stable faster than a thick bead behind dense stone or outdoor concrete. Heavy-duty repairs should be treated carefully even if they feel secure at first. The outer edge of the adhesive may set earlier, while the inner layer may still need more time. During curing, avoid walking on floor repairs, pulling on trim, washing the area, exposing the repair to rain, adding grout or caulk too early, or loading heavy items on the repaired part. Waiting longer is usually safer than testing too soon.
- Keep wall repairs taped, braced, or supported until the part no longer shifts under light touch.
- Keep floor repairs free from foot traffic, furniture movement, vibration, and heavy cleaning during curing.
- Keep outdoor repairs protected from rain, irrigation, frost, pets, and early walking whenever possible.
- Add grout, caulk, sealant, paint, or finishing work only after the adhesive has reached a stable cure.
| Repair Area | Avoid During Cure | Why It Matters |
|---|---|---|
| Bathroom tile | Shower use, water spray, early caulking | Moisture can disturb the bond line |
| Kitchen backsplash | Scrubbing, wiping, stove heat | Movement can weaken early adhesion |
| Floor tile | Walking, dragging furniture | Pressure can break the soft adhesive layer |
| Stone wall | Removing support too soon | Weight may pull the piece down |
| Wood trim | Pulling or bumping | Ends may separate before full cure |
| Patio stone | Rain, pets, foot traffic | Outdoor movement can weaken contact |
| Stair riser | Kicks and vibration | The tile may shift before fully set |
How to Clean Excess Construction Glue?
Excess construction glue should be cleaned before it cures, especially on visible surfaces such as tile faces, stone edges, wood trim, backsplashes, stair risers, and decorative panels. The easiest way to avoid messy cleanup is to apply a controlled bead and keep it slightly inside the edge. If glue squeezes out after pressing, do not smear it across the surface. Lift it carefully with a cloth, scraper edge, or suitable cleaning method according to the product instructions. For highly visible repairs, masking tape can protect both sides of the joint. Remove the tape before the adhesive hardens too much so the edge stays neat. Once construction glue cures, removal can be more difficult and may damage delicate finishes.
- Mask visible repair lines before applying glue, especially around kitchen backsplashes and bathroom tiles.
- Wipe squeeze-out early instead of waiting until the adhesive becomes rubbery or hard.
- Avoid spreading glue across porous stone, unfinished wood, grout, or textured brick.
- Keep a cloth, scraper, and waste paper nearby before opening the tube.
| Surface | Cleanup Risk | Better Practice |
|---|---|---|
| Glossy tile | Smearing on the face | Wipe early with controlled pressure |
| Natural stone | Adhesive entering pores | Mask edges before bonding |
| Wood trim | Glue staining finish | Keep bead away from front edge |
| Brick | Glue catching in texture | Apply only where contact is needed |
| Backsplash | Visible edge marks | Use tape and remove before full hardening |
| Floor tile | Dried glue on walking surface | Clean squeeze-out before cure |

Is Construction Glue Good for Heavy-Duty Repairs?
Construction glue is good for heavy-duty repairs when the job involves stable surfaces, enough bonding area, and materials that can stay still while the adhesive cures. It works well on tile, stone, wood, concrete, brick, drywall, stucco, panels, and many indoor or outdoor repair areas. It is especially useful when screws, nails, or drilling would damage the surface or create an unattractive finish.
The strongest results come from matching the repair to the right conditions. Construction glue can secure loose wall tiles, patio stones, backsplash edges, wood trim, decorative panels, brick pieces, and stone accents, but it should not be treated as a cure for rotten wood, crumbling concrete, soaked walls, unstable foundations, or safety-critical structural parts. A strong adhesive needs a strong surface behind it.
GleamGlee Construction Glue is designed for real repair situations where strength, clean application, and surface versatility matter. It bonds rough, uneven, and vertical surfaces, works indoors and outdoors, and performs well after curing in areas exposed to rain, heat, and cold. The 8.8 oz tube offers up to 30 ft of coverage depending on bead size, making it practical for several repair jobs around the home.
Is Construction Glue Safe Indoors?
Construction glue can be safe for indoor repairs when it is low-odor, applied in a ventilated area, and used according to the label instructions. Indoor repairs often happen in kitchens, bathrooms, basements, laundry rooms, hallways, stair areas, and living spaces, so smell, mess, and ease of control matter as much as strength. A strong adhesive that runs everywhere or smells harsh can make a small repair feel difficult. GleamGlee Construction Glue is formulated to be low-odor and non-toxic, making it more comfortable for common indoor jobs such as bathroom tile repair, kitchen backsplash bonding, wood trim attachment, stair riser tile repair, and decorative wall panel installation. The precision-tip cap helps place the glue behind the material, reducing visible squeeze-out and cleanup time.
- Use in ventilated rooms, especially bathrooms, basements, and small enclosed spaces.
- Keep the glue away from children, pets, food surfaces, eyes, and skin during use and curing.
- Avoid applying construction glue over soap film, grease, damp grout, loose paint, or old weak adhesive.
- Let wet-area repairs fully cure before shower use, cleaning, grouting, caulking, or heavy moisture exposure.
| Indoor Area | Suitable Repair | Main Concern | Good Practice |
|---|---|---|---|
| Bathroom | Loose wall tile, vanity backsplash | Moisture and soap residue | Dry fully and clean before bonding |
| Kitchen | Backsplash tile, island tile edge | Grease and visible glue marks | Degrease and keep bead inside the edge |
| Stair area | Riser tile, trim strip | Kicks and vibration | Tape well and avoid impact during cure |
| Basement | Tile, panel, masonry repair | Dampness and dust | Check moisture before application |
| Living room | Stone accent, wood panel | Appearance and alignment | Use tape, spacers, or light bracing |
Is Construction Glue Weatherproof?
Construction glue can be weather-resistant after curing when the formula is made for outdoor use and the repair area is prepared correctly. Outdoor repairs are harder than indoor repairs because the adhesive may face rain, heat, cold, sunlight, dust, soil movement, and foot traffic. A patio tile, balcony edge, garden stepping stone, outdoor kitchen tile, poolside piece, or brick border needs more than glue alone. The base must be stable, the surface must be dry, and the repair must stay protected while curing. GleamGlee Construction Glue is suitable for indoor and outdoor use and is built to hold through rain, high temperature, and freezing cold after full cure. It works best when applied during a dry period and kept away from heavy water or pressure until the bond is ready.
- Choose a dry weather window before repairing patios, balconies, garden stones, or outdoor tiles.
- Remove sand, moss, mud, loose concrete powder, and old weak adhesive before applying glue.
- Keep outdoor repairs away from rain, irrigation, pets, and foot traffic during curing.
- Seal exposed joints after curing when the repair is in a wet or splash-prone area.
| Outdoor Repair | Good Condition | Risk Condition | Better Practice |
|---|---|---|---|
| Patio tile | Firm, dry base | Cracked or sinking base | Stabilize the base first |
| Garden stone | Broad contact area | Loose soil underneath | Level and compact the base |
| Balcony tile | Clean and dry surface | Frost, dampness, loose grit | Wait for dry weather |
| Poolside tile | Can stay dry during cure | Early splash exposure | Block water until fully cured |
| Outdoor kitchen | Away from direct flame | High heat or flame contact | Use only in non-flame areas |
| Brick edge | Solid brick surface | Crumbling brick or mortar | Remove weak material first |
Are Construction Glue Repairs Durable?
Construction glue repairs can be durable when the surface is strong, the glue bead has enough contact, the material is pressed firmly, and the repair stays still until fully cured. Durability is not only about how strong the glue feels on the first day. A repair may need to handle cleaning, moisture, vibration, walking, weather changes, or repeated small impacts. A bathroom tile must deal with humidity and splashes. A kitchen backsplash must handle wiping and heat nearby. A patio stone must face rain, dust, and steps. A stair riser tile must handle kicks and vibration. GleamGlee Construction Glue supports long-lasting repairs by bonding multiple hard materials and staying practical for rough, uneven, vertical, indoor, and outdoor surfaces.
- Full curing matters more than early touch strength; avoid testing the repair too soon.
- Larger bonding areas usually last longer than tiny edge-only repairs.
- Heavy parts need support because sliding during cure can weaken the final bond.
- Wet-area repairs should be sealed properly after curing if joints or edges remain exposed.
| Durability Factor | Strong Repair Practice | Weak Repair Practice |
|---|---|---|
| Surface prep | Clean, dry, firm material | Dust, grease, moisture, loose layers |
| Glue coverage | Controlled bead with good contact | Too little glue or messy thick piles |
| Pressure | Firm, even pressing | Light touch or uneven contact |
| Support | Tape, clamp, brace, or weight | Heavy item left unsupported |
| Cure time | Protected until fully cured | Used, washed, walked on, or loaded early |
| Repair setting | Stable base and protected edge | Moving base or open water path |
When Is Construction Glue Not Enough?
Construction glue is not enough when the repair involves structural support, safety risk, heavy overhead weight, active water leakage, rotten material, crumbling surfaces, or direct flame exposure. It is made to bond stable materials, not rebuild failed material from the inside. If concrete breaks apart when brushed, wood is soft or rotten, drywall is wet and damaged, or brick crumbles under light pressure, the surface must be repaired or replaced before adhesive can work properly. Large overhead stone, loose railings, load-bearing steps, cracked beams, and unstable wall sections need mechanical fastening, rebuilding, or professional repair methods. Construction glue can be part of some repair systems, but it should not be the only support where failure could cause injury or serious damage.
- Do not use construction glue alone for load-bearing beams, railings, stairs, or structural supports.
- Do not glue over rotten wood, soaked drywall, crumbling concrete, or loose plaster.
- Do not use it in direct flame areas such as grill interiors, fireplace interiors, or pizza oven fire zones.
- Do not repair active leaks until the water source is fixed and the surface is fully dry.
| Avoid This Situation | Main Problem | Better Direction |
|---|---|---|
| Rotten wood | Weak fibers cannot hold a bond | Replace damaged wood |
| Crumbling concrete | Surface layer breaks away | Repair or stabilize concrete first |
| Heavy overhead stone | Falling hazard | Use mechanical fastening |
| Active shower leak | Moisture keeps entering | Fix leak and dry the wall |
| Load-bearing step | Safety-critical repair | Use structural repair methods |
| Direct flame area | Adhesive may fail under extreme heat | Use heat-rated materials |
Why Choose GleamGlee Construction Glue?
GleamGlee Construction Glue is made for practical heavy-duty repairs on concrete, tile, stone, wood, drywall, stucco, brick, rough surfaces, uneven areas, and vertical repair zones. It is suitable for indoor and outdoor use, including bathrooms, kitchens, basements, patios, balconies, garden paths, workshops, and daily home repair areas.
The product focuses on the problems people usually face during repair: weak old glue, loose tile edges, rough concrete, heavy stone pieces, visible squeeze-out, strong odor, uneven application, and parts sliding before cure. Its medium-consistency formula is easy to squeeze by hand, while the precision-tip cap helps place the adhesive in a cleaner line. The included fixing tape helps hold materials while the glue cures.
Each 8.8 oz tube, about 247 ml, provides up to 30 ft of coverage depending on bead thickness and surface texture. A thin bead on trim or backsplash areas covers more distance, while rough stone, brick, concrete, or outdoor repairs may need a thicker bead. The formula is low-odor, non-toxic, weather-resistant after curing, and designed for strong bonding in rain, heat, and cold conditions.
What Makes GleamGlee Construction Glue Practical?
GleamGlee Construction Glue is practical because it solves several repair problems with one tube. Many homes have more than one material needing repair: a loose bathroom tile, a lifted backsplash corner, a wood trim strip, a moving patio stone, or a brick edge that has started to separate. Instead of using a different adhesive for every surface, this glue can bond tile, stone, wood, concrete, brick, drywall, stucco, and panels. It is also easier to manage during application because the texture is not too watery and not too stiff. That matters when working on vertical surfaces, visible edges, or rough materials where glue control affects both strength and appearance.
- Multi-surface use: suitable for tile, stone, wood, concrete, drywall, stucco, brick, and decorative panels.
- Better hand control: medium consistency makes it easier to squeeze and place without messy over-application.
- Cleaner repair line: the precision-tip cap helps apply glue behind tiles, trim, stone edges, and panels.
- Useful coverage: one 8.8 oz tube can reach up to 30 ft depending on bead size and repair conditions.
| Product Detail | What It Helps With | Real Repair Value |
|---|---|---|
| 8.8 oz / 247 ml tube | Multiple small repairs | Useful for more than one job |
| Up to 30 ft coverage | Longer bead distance | Better value for trim, tile, and panel work |
| Medium consistency | Easier control | Less dripping on vertical surfaces |
| Precision-tip cap | Cleaner placement | Reduces visible glue squeeze-out |
| Fixing tape included | Holding during cure | Helps stop sliding and shifting |
| Low odor formula | Indoor comfort | Better for bathrooms, kitchens, and basements |
Which Repairs Fit GleamGlee Construction Glue?
GleamGlee Construction Glue fits repairs where the surface is solid, the material still has enough contact area, and the repaired part can stay still while curing. It is a good choice for loose wall tiles, vanity backsplashes, kitchen backsplash edges, wood trim, stair riser tiles, decorative stone pieces, patio tiles, garden stepping stones, brick edges, and basement repair areas. It is especially useful when a repair needs a hidden bond rather than visible screws or nails. The glue should be applied only after dust, grease, loose grout, old weak adhesive, moisture, and crumbling material are removed. Heavy or vertical pieces should be taped, weighted, clamped, or braced while the adhesive cures.
- Bathroom repairs: wall tiles, bathtub surrounds, vanity backsplashes, and shower-adjacent areas after drying.
- Kitchen repairs: backsplash tiles, island base tiles, countertop tile accents, and decorative wall sections.
- Outdoor repairs: patio tiles, balcony tiles, stepping stones, outdoor kitchen tiles, brick edges, and stone borders.
- Interior repairs: wood trim, stair riser tiles, drywall sections, stone panels, decorative brick, and wall accents.
| Repair Area | Suitable Use | Extra Tip |
|---|---|---|
| Bathroom | Loose tile or vanity backsplash | Let the surface dry before bonding |
| Kitchen | Backsplash or tile edge | Remove grease before applying glue |
| Patio | Outdoor tile or stone | Keep away from rain during cure |
| Garden | Stepping stone repair | Make sure the base is stable |
| Stair area | Riser tile or trim | Tape and avoid vibration |
| Living room | Stone or wood accent | Use spacers for neat alignment |
| Basement | Tile, masonry, or panel repair | Check moisture before repair |
How Does GleamGlee Construction Glue Apply?
GleamGlee Construction Glue is designed for controlled hand application. The tube can be squeezed manually, so small repairs do not require complicated tools. The precision-tip cap helps create a direct bead instead of a wide messy spread, which is helpful when repairing visible surfaces such as tiles, trim, stair risers, backsplashes, and decorative stone. The glue can be applied as a straight bead, zigzag bead, dot pattern, or slightly thicker line depending on the surface. Smooth surfaces usually need a thinner controlled bead, while rough stone, brick, stucco, or concrete may need more adhesive to reach into the texture. After pressing, the included fixing tape can help keep lighter pieces from shifting during curing.
- Straight bead: useful for wood trim, narrow tile strips, brick edges, and clean repair lines.
- Zigzag bead: useful for backsplash tiles, panels, stair riser tiles, and larger contact areas.
- Thicker bead: useful for rough stone, concrete, brick, stucco, and uneven outdoor surfaces.
- Fixing support: use tape, clamps, braces, or weights when the part is heavy, vertical, or likely to move.
| Surface Type | Suggested Application | Main Detail |
|---|---|---|
| Smooth tile | Thin controlled bead | Keep glue away from visible edges |
| Wood trim | Straight bead | Press along the full length |
| Wood panel | Zigzag bead | Check corners and edges |
| Natural stone | Medium to thicker bead | Support heavy pieces |
| Concrete | Continuous or contact-point beads | Brush away powder first |
| Brick | Bead on firm contact areas | Remove loose grit |
| Vertical tile | Zigzag bead plus tape | Stop sliding during cure |
How Durable Is GleamGlee Construction Glue?
GleamGlee Construction Glue is built for durability after full cure, including indoor and outdoor repairs exposed to daily use, moisture, rain, heat, and cold. A durable repair depends on both the adhesive and the repair method. The surface should be clean, dry, and firm. The bead should make enough contact with both materials. The part should be pressed evenly and held still until curing is complete. When these steps are followed, the adhesive can support many common heavy-duty repairs such as loose tiles, stone pieces, wood trim, brick edges, patio tiles, and decorative panels. Repairs in wet areas should still be sealed at exposed joints after curing if water can enter behind the material.
- Weather resistance: suitable for outdoor surfaces after full cure, including patios, balconies, and garden areas.
- Indoor durability: useful for kitchens, bathrooms, basements, stair areas, utility rooms, and visible wall repairs.
- Stronger bond conditions: clean surface, enough glue contact, firm pressure, proper support, and full cure.
- Longer repair life: avoid water, foot traffic, vibration, cleaning, or loading before the adhesive has cured.
| Durability Factor | Better Result | Weak Result |
|---|---|---|
| Surface prep | Clean, dry, stable base | Dusty, wet, loose, greasy surface |
| Glue coverage | Bead reaches both surfaces | Dry gaps or uneven blobs |
| Pressure | Firm and even pressing | Light contact only |
| Support | Tape, weight, clamp, or brace | Part slides during cure |
| Cure time | Left untouched until ready | Used or washed too soon |
| Wet areas | Edges sealed after cure | Water enters behind the repair |
How to Buy GleamGlee Construction Glue?
GleamGlee Construction Glue is suitable for direct home repairs, online retail orders, wholesale supply, and customized product projects. The standard product is a practical 8.8 oz construction adhesive for tile, stone, wood, concrete, drywall, stucco, brick, indoor repairs, outdoor repairs, rough surfaces, uneven areas, and vertical bonding. It is a good fit for repair kits, home improvement product lines, hardware stores, online shops, and multi-surface adhesive categories. Product customization can include label design, packaging format, tube style, instruction language, logo, carton setup, accessory kits, and formula direction. Samples, artwork, and bulk production can be arranged based on project details and quantity.
- Standard product: GleamGlee branded construction glue for home repair and heavy-duty adhesive use.
- Custom packaging: private label, logo, tube design, box design, multilingual instructions, and retail-ready layout.
- Flexible project support: MOQ can start from 200 units for suitable customization orders.
- Fast development: printable design can be prepared quickly, with sample and bulk production support available.
| Order Need | Available Support |
|---|---|
| Branded construction glue | GleamGlee standard product supply |
| Private label | Custom logo, label, and package design |
| Small test order | MOQ from 200 units when suitable |
| Product sample | Sample preparation for checking formula and packaging |
| Market-ready packaging | Multilingual labels and instruction design |
| Online sales | Amazon-style packaging and FBA-ready support |
| Larger orders | Bulk production and carton packing |
| Product inquiry | Formula, packaging, price, and delivery discussion |
Conclusion
Construction glue is a smart choice for heavy-duty repairs when the surface is clean, dry, stable, and properly supported during curing. It can help repair loose tiles, stone pieces, wood trim, brick edges, patio surfaces, backsplashes, stair risers, and other common indoor or outdoor repair areas without drilling or leaving visible fasteners. The strongest results come from simple but careful steps: remove dust and old weak material, test the fit, apply a controlled bead, press firmly, hold the part in place, and allow enough curing time before water, weight, vibration, or foot traffic touches the repair.
GleamGlee Construction Glue is designed for practical repair work on tile, stone, wood, concrete, brick, drywall, stucco, rough surfaces, uneven areas, and vertical bonding zones. Its medium-consistency formula, precision-tip cap, fixing tape, low-odor design, weather-resistant performance, and 8.8 oz coverage make it useful for everyday home repairs and product supply needs. For branded product orders, wholesale pricing, sample requests, or customized construction adhesive projects, GleamGlee can support formula selection, packaging design, private label development, sample preparation, and bulk production based on the project requirements.





















