 Skip to content
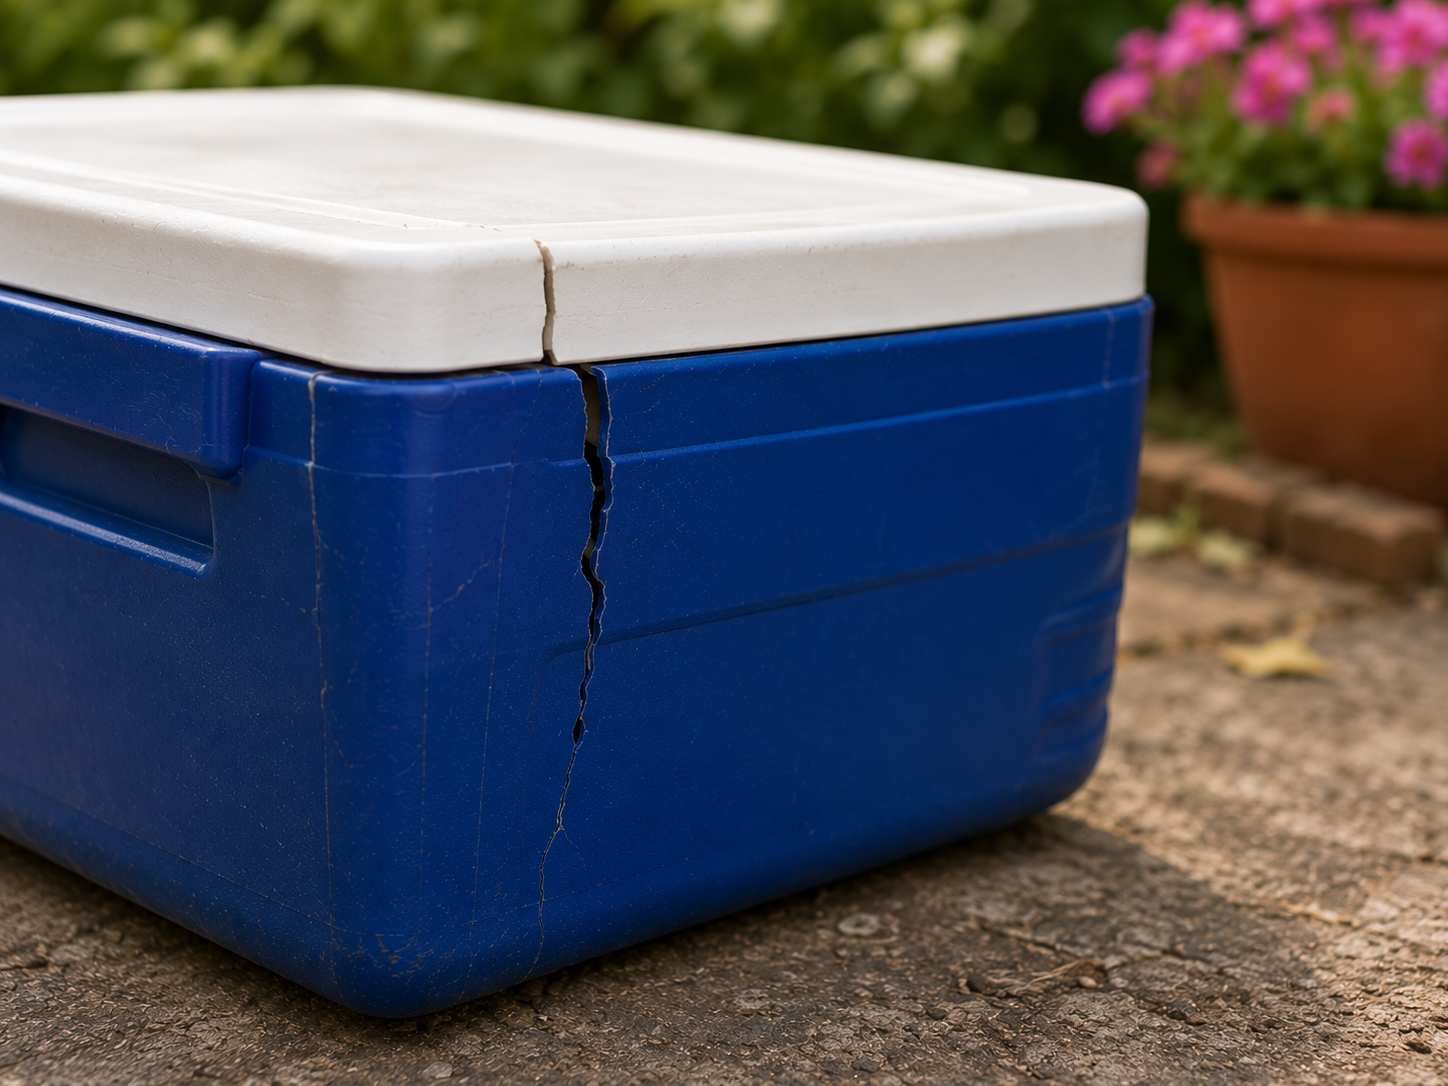
Plastic outdoor gear gets abused more than most people realize. It sits in hot sheds, gets dropped on hard patios, rides in car trunks, rubs against rocks, gets wet during camping trips, and stays exposed to sun, dirt, and temperature swings. A small crack in a cooler corner may not look serious at first, but after one weekend of lifting, dragging, and packing, that crack can spread across the lid. A broken latch on a storage box can let rainwater in. A cracked plastic clip on a lantern can make it hard to hang. A damaged tackle box hinge can turn a fishing trip into a mess of loose hooks and tools.
The best way to repair plastic outdoor gear is to clean and dry the damaged area, identify whether the plastic is rigid enough for gluing, test-fit the broken parts, apply a thin line of clear plastic glue, press the joint firmly, and let the repair rest before outdoor use. PVC, ABS, acrylic, and many hard plastics are good repair targets.
Most outdoor gear does not fail all at once. It usually gives a small warning first: a hairline crack, a loose hinge, a chipped corner, a weak handle, or a plastic tab that no longer locks tightly. Repairing that damage early can save the item before it becomes useless. Think of a camper who finds a small crack in a cooler before a family trip. Ten minutes of careful repair at home can prevent warm drinks, leaking ice water, and a ruined weekend meal.
What Plastic Outdoor Gear Breaks?
Plastic outdoor gear usually breaks first at the parts that get pulled, dropped, bent, opened, closed, or exposed to sunlight every week. The most common weak spots are corners, hinges, handles, clips, lids, screw holes, thin edges, and clear covers. These areas look small, but they decide whether a cooler closes, a storage box stays dry, a lantern hangs safely, or a tackle box keeps tools in place.
A good repair starts by checking how the broken part is used. A crack on the side of a planter is usually easier to fix than a crack on a chair leg. A chipped lantern cover is safer to repair than a split handle carrying a full cooler. If the damaged part only covers, closes, decorates, or protects, plastic glue can often help. If it carries body weight, holds heavy load, or affects safety, repair should be handled more carefully.
Most plastic outdoor gear does not become useless overnight. It often starts with a hairline crack, a loose latch, a weak corner, or a small split that grows after repeated use. Repairing early gives the glue cleaner edges and a tighter fit. Once dirt, water, mud, or missing plastic gets into the break, the repair becomes harder and less predictable.
| Outdoor Gear Part | Common Break | Repair Chance | What To Check First |
|---|---|---|---|
| Cooler corner | Crack, chip, split edge | High | Does the lid still close? |
| Storage box lid | Corner crack, hinge split | Medium to high | Does the lid flex heavily? |
| Garden planter | Side crack, bottom split | High | Will wet soil push the crack open? |
| Tackle box latch | Broken tab, loose snap | Medium | Does the latch bend during use? |
| Lantern cover | Clear crack, chipped edge | High | Is the crack visible? |
| Bike reflector holder | Snapped bracket | Medium to high | Will vibration affect it? |
| Watering can handle | Handle split | Medium | How much water weight does it carry? |
| Garden chair leg | Deep crack | Low | Does it support body weight? |
Plastic Outdoor Gear Cracks
Cracks are the most common damage found on plastic outdoor gear because outdoor items face impact, pressure, sunlight, and temperature changes. A cooler may crack when dragged over concrete. A planter may split when wet soil expands after rain. A storage bin lid may crack when heavy tools are stacked on top. A clear lantern cover may split after one fall onto a patio floor. The earlier the crack is repaired, the better the chance of a clean bond, because the two plastic edges are still close together and have not warped. A thin crack is often easier to repair than a large open break, especially when a precision nozzle can place glue directly inside the split.
- Best repair targets: hairline cracks, clean corner splits, clear cover cracks, planter side cracks
- Harder repair targets: cracks with missing plastic, dirty cracks, cracks that open under pressure
- Repair tip: press the crack closed before gluing to check whether the edges meet tightly
- Avoid: covering the crack with a thick glue layer only on the outside surface
| Crack Type | Example | Repair Method |
|---|---|---|
| Hairline crack | Lantern cover, acrylic panel | Thin glue line into the crack |
| Corner crack | Cooler, storage box | Glue plus tape support while curing |
| Long side split | Planter, plastic bin | Glue plus inside backing if possible |
| Load crack | Chair leg, heavy handle | Replacement or reinforcement recommended |
Plastic Outdoor Gear Clips
Clips, tabs, snaps, and latches often break because they are small parts doing repeated work. Every time a storage box closes, a tackle box snaps shut, a lantern hangs from a hook, or a camping case locks into place, the clip bends slightly. Over time, that bending can create a weak white stress mark before the part finally snaps. These pieces are frustrating because the main item may still be in good condition, but one small broken clip makes it harder to use. Plastic glue works best when the broken clip still has both pieces, the edges fit together cleanly, and the clip does not need to bend too much after repair.
- Best repair targets: snapped tabs, small clips, latch corners, plastic hooks
- Harder repair targets: flexible clips that must bend sharply every use
- Repair tip: glue the clip in its natural resting shape, not while stretched open
- Avoid: using the clip too soon after repair or snapping it hard on the first test
| Clip Part | Common Problem | Repair Note |
|---|---|---|
| Tackle box latch | Tab snaps off | Let cure fully before closing |
| Storage box clip | Locking edge cracks | Check lid alignment first |
| Lantern hook | Hanging tab breaks | Repair only for light-duty use |
| Camping case snap | Small hinge crack | Keep glue away from moving area |
Plastic Outdoor Gear Covers
Covers are often good repair targets because they usually protect the item rather than carry the full load. Outdoor covers include cooler lids, lantern shells, acrylic panels, equipment housings, garden tool covers, storage lids, trimmer guards, and plastic cases. Damage often appears as chipped corners, split edges, loose seams, or cracks near screws. A cover repair needs clean alignment because even a small raised edge can stop a lid from closing, make a case rattle, or let dust and water enter. For visible covers, appearance also matters. A clear glue line is much better than a cloudy patch, especially on acrylic, transparent plastic, or outdoor décor.
- Best repair targets: clear covers, plastic shells, lid corners, equipment housings
- Harder repair targets: covers that bend strongly or protect moving blades
- Repair tip: test whether the lid or cover still closes before applying glue
- Avoid: letting glue block hinges, screw holes, seals, or sliding grooves
| Cover Type | Common Break | What Matters Most |
|---|---|---|
| Lantern cover | Clear crack | Transparent finish |
| Cooler lid | Corner split | Lid alignment |
| Storage lid | Hinge-side crack | Flex resistance |
| Tool housing | Screw-hole crack | Careful pressure around screws |
Plastic Outdoor Gear Handles
Handles need more caution than most outdoor gear parts because they carry weight. A watering can handle may carry several liters of water. A cooler handle may carry ice, drinks, and food. A tool case handle may carry metal tools. Even if the repair looks neat at first, the joint may face pulling force every time the item is lifted. Plastic glue can help with light-duty handle splits, small cracks near the surface, or handles that still have wide contact area. However, if the crack is deep, close to the main load point, or already bending under weight, glue alone may not be enough. Safety and load should always come before appearance.
- Best repair targets: small handle splits, light-duty case handles, surface cracks
- Harder repair targets: cooler handles, chair arms, heavy tool case handles
- Repair tip: after repair, reduce load and lift gently with both hands when possible
- Avoid: trusting a repaired handle immediately with full weight
| Handle Item | Load Level | Repair Advice |
|---|---|---|
| Small storage case | Low | Glue repair can work well |
| Watering can | Medium | Test with small water amount first |
| Cooler handle | Medium to high | Reinforce or replace if heavily cracked |
| Garden chair arm/leg | High | Do not rely on glue alone |
Plastic Outdoor Gear Hinges
Plastic hinges fail because they move in the same direction again and again. Storage bins, tackle boxes, outdoor cases, folding gear, and some garden accessories use thin molded hinges that gradually whiten, crack, and split. Once a hinge starts to break, the stress usually stays in that exact same line, so a simple glue repair may not last unless the movement is reduced or supported. A hinge repair is most likely to work when the hinge is only cracked at one edge and still opens smoothly. If the hinge has torn across the full width, a backing strip, flexible support, or replacement may be needed.
- Best repair targets: small hinge-edge cracks, loose hinge corners, early stress marks
- Harder repair targets: full-width hinge tears or highly flexible living hinges
- Repair tip: keep the hinge open at a natural angle while curing, not forced flat
- Avoid: opening and closing the hinge repeatedly right after repair
| Hinge Damage | Repair Chance | Better Action |
|---|---|---|
| Small edge crack | Medium to high | Glue and cure without movement |
| White stress line | Medium | Reinforce before it splits |
| Full hinge tear | Low to medium | Add backing or replace |
| Flexible living hinge failure | Low | Replacement is often better |
Which Plastic Outdoor Gear Glue Works?
The best glue for plastic outdoor gear is a clear plastic glue that matches the material, reaches into small cracks, dries cleanly, and holds well on hard plastics such as PVC, ABS, and acrylic. For small cracks, tabs, covers, and corners, a fast-drying glue with a precision nozzle is usually easier to control than a thick general adhesive.
Plastic outdoor gear is not made from one single material. A cooler shell, acrylic lantern cover, garden planter, tackle box latch, storage lid, and bike reflector bracket may all look like “plastic,” but they do not always bond the same way. Hard plastics usually repair better than soft, waxy, or flexible plastics. Before applying glue, check whether the part is rigid, whether the broken edges meet tightly, and whether the repair area will stay still during use.
Glue choice should also depend on where the item will be used. Outdoor gear may face sunlight, rain, vibration, dirt, heat, cold, and repeated handling. A repair that only looks neat on the table may fail if the plastic bends every day or carries heavy weight. For most home repairs, use a small amount of glue, keep the joint tight, and let the item rest before taking it back outside.
| Plastic Gear Material | Common Outdoor Items | Glue Match | Repair Difficulty | Best Use Case |
|---|---|---|---|---|
| PVC | Planters, outdoor fittings, garden parts | Strong | Easy to medium | Cracks, edges, rigid parts |
| ABS | Tool cases, clips, covers, gear housings | Strong | Easy to medium | Latches, casings, hard tabs |
| Acrylic | Clear covers, lantern shells, panels | Strong | Medium | Visible clear repairs |
| Polystyrene | Light covers, models, craft parts | Medium | Medium | Light-duty repairs |
| Polypropylene | Storage bins, flexible lids | Weak to medium | Hard | Test first |
| Polyethylene | Buckets, soft containers, some bins | Weak | Hard | Often difficult |
| Mixed plastic | Hose parts, appliance covers, outdoor tools | Uncertain | Medium to hard | Hidden-area test first |
Plastic Outdoor Gear PVC
PVC is one of the better materials for plastic outdoor gear repair because it is usually rigid enough for glue to grip well. Many garden items, outdoor fittings, planter parts, plastic covers, and utility accessories may include PVC or similar hard plastic. When the surface is clean and dry, a clear plastic glue can often create a strong repair on small cracks, split edges, and chipped corners. The main problem with outdoor PVC is dirt. Garden gear often carries soil, fertilizer residue, water marks, algae, or dust inside the crack. If these are not removed, the glue may stick to the residue instead of the plastic.
- Best for: planters, rigid garden parts, outdoor fittings, plastic covers
- Works well on: hairline cracks, small corner chips, clean split edges
- Clean first: soil, fertilizer, dust, water marks, plant sap
- Repair tip: press the PVC crack closed before applying glue
- Avoid: gluing wet PVC or filling a dirty crack with thick adhesive
| PVC Repair Area | Good Repair Chance | Extra Note |
|---|---|---|
| Planter side crack | High | Keep soil out until fully cured |
| Rigid garden fitting | High | Clean water minerals first |
| Outdoor plastic cover | Medium to high | Check lid or cover alignment |
| Heavy-load PVC part | Medium | Reinforcement may be needed |
Plastic Outdoor Gear ABS
ABS is commonly used in hard plastic outdoor gear because it is tougher than many brittle plastics. It may appear in tool cases, equipment housings, plastic trims, latches, clips, hard covers, and small outdoor accessories. ABS repairs usually work well when the broken surfaces are clean and still fit together closely. The challenge is that many ABS parts break near screw holes, corners, tabs, or clips, where pressure is concentrated. If the repaired area will be pulled, snapped, or tightened with screws too soon, the bond can weaken before it has enough time to settle.
- Best for: hard cases, equipment shells, clips, trim pieces, plastic tabs
- Works well on: clean breaks, casing cracks, non-flexing latches
- Clean first: hand oil, dust, old adhesive, grease, outdoor dirt
- Repair tip: lightly roughen hidden glossy surfaces for better grip
- Avoid: tightening screws immediately after repair
| ABS Gear Part | Common Break | Better Repair Method |
|---|---|---|
| Tool case latch | Snapped tab | Glue, align, cure before closing |
| Equipment housing | Crack near screw | Glue first, tighten screw later |
| Bike accessory bracket | Split edge | Keep still during curing |
| Hard storage case | Corner chip | Thin glue line, not a blob |
Plastic Outdoor Gear Acrylic
Acrylic outdoor gear needs a glue that not only holds but also looks clean after drying. Acrylic is often used in clear lantern covers, outdoor light panels, protective covers, display pieces, patio décor, and transparent plastic parts. Since the damage is easy to see, glue overflow, cloudy marks, or rough edges can make the repair look worse. A crystal-clear plastic glue is a better choice for acrylic repairs because it helps the repaired area blend into the material. Precision also matters. The glue should go into the crack, not smear across the clear surface.
- Best for: lantern covers, clear panels, acrylic décor, transparent shells
- Works well on: clean cracks, chipped clear edges, small splits
- Clean first: dust, fingerprints, water spots, outdoor film
- Repair tip: use a fine-tip nozzle and apply very little glue
- Avoid: sanding visible clear areas unless absolutely needed
| Acrylic Repair | Main Concern | Best Practice |
|---|---|---|
| Lantern cover crack | Appearance | Use clear glue sparingly |
| Clear outdoor panel | Surface marks | Wipe with soft cloth first |
| Acrylic décor chip | Visible edge | Align before gluing |
| Light cover split | Glue overflow | Apply from the inside if possible |
Plastic Outdoor Gear Flexible Plastics
Flexible plastics are harder to repair because they move, bend, and sometimes resist glue. Storage bins, soft lids, buckets, some outdoor containers, flexible clips, and certain garden accessories may be made from polypropylene or polyethylene. These plastics often feel slightly waxy or slippery, which means glue may not grip them as well as it grips PVC, ABS, or acrylic. A repair may feel strong at first but peel later when the part bends. Before repairing flexible plastic, test the glue on a hidden spot and let it cure before judging the result.
- Best for: small low-stress cracks only
- Harder on: flexible lids, soft bins, bendable hinges, waxy surfaces
- Test first: apply glue on a hidden area and check adhesion later
- Repair tip: add a backing patch if the crack keeps opening
- Avoid: expecting glue alone to restore heavy flexing parts
| Flexible Plastic Sign | What It Means | Repair Advice |
|---|---|---|
| Waxy surface feel | Glue may not grip well | Test before full repair |
| Part bends easily | Joint may peel | Reduce movement |
| Crack opens during use | High stress | Add support or replace |
| Glue peels after cure | Poor material match | Do not force repair |
Plastic Outdoor Gear Clear Glue
Clear glue is useful for plastic outdoor gear because many repaired areas remain visible after fixing. Cooler corners, acrylic covers, lantern shells, garden décor, sports accessories, and storage boxes often look better when the glue dries transparent. A visible yellow, cloudy, or raised repair can make the item look dirty even if the bond holds. GleamGlee Plastic Glue dries 100% transparent, which is helpful for clean-looking repairs on clear plastics, delicate parts, and small outdoor accessories. Clear glue is especially valuable when the repair sits on the front, edge, lid, or cover of the item.
- Best for: clear plastic, visible cracks, outdoor décor, acrylic covers
- Works well when: the crack is clean and the glue line is thin
- Appearance tip: apply from the inside when possible
- Repair tip: remove excess before it hardens
- Avoid: thick glue buildup on visible surfaces
| Clear Repair Need | Why It Matters | Better Method |
|---|---|---|
| Acrylic cover | Crack is easy to see | Use minimal glue |
| Lantern shell | Light reflects flaws | Keep glue line narrow |
| Outdoor décor | Appearance matters | Press edges cleanly |
| Storage lid | Repair stays visible | Wipe overflow quickly |
Plastic Outdoor Gear Precision Nozzles
Precision nozzles make a big difference in plastic outdoor gear repair because most useful repairs are small. Cracks, tabs, latch corners, screw-hole splits, and acrylic cover breaks do not need a large amount of glue. They need accurate placement. A fine nozzle helps place glue into the actual break instead of spreading it over the surface. This reduces mess, waste, and overflow. GleamGlee Plastic Glue includes fine-tip nozzles, making it easier to handle narrow cracks, delicate plastic parts, and hard-to-reach repair points without flooding the area.
- Best for: hairline cracks, clips, tabs, corners, small plastic parts
- Works well when: the repair area is narrow or detailed
- Control tip: squeeze gently and stop before glue overflows
- Repair tip: keep spare nozzles clean for future repairs
- Avoid: cutting the nozzle too wide for small cracks
| Repair Detail | Why Nozzle Matters | Best Application |
|---|---|---|
| Hairline crack | Needs glue inside split | Thin direct line |
| Broken tab | Small contact face | Tiny dots or edge line |
| Screw-hole crack | Tight space | Controlled placement |
| Clear cover edge | Visible repair | Minimal glue flow |
Plastic Outdoor Gear Glue Limits
Even a strong plastic glue has limits. Some outdoor gear should not be repaired with glue alone because the damaged part carries heavy weight, bends constantly, holds pressure, or affects safety. A cracked garden chair leg, ladder part, heavy cooler handle, scooter component, machine guard, or pressurized sprayer part needs more caution. Glue can help many small repairs, but it should not be used to hide serious structural damage. If the part could cause injury if it fails, replacement or mechanical reinforcement is the safer choice.
- Good repair targets: cracks, covers, tabs, decorative parts, light-duty clips
- Risky repair targets: chair legs, heavy handles, ladder parts, safety guards
- Check first: load, bending, vibration, water pressure, safety risk
- Repair tip: reinforce medium-stress areas from the back side
- Avoid: using glued parts as if they were brand new under heavy stress
| Repair Risk | Example | Glue Advice |
|---|---|---|
| Low risk | Planter crack, lantern cover | Glue repair is reasonable |
| Medium risk | Tackle box latch, cooler edge | Glue plus careful use |
| High risk | Heavy handle, chair leg | Reinforce or replace |
| Safety risk | Ladder part, machine guard | Do not rely on glue alone |

How to Repair Plastic Outdoor Gear?
Repairing plastic outdoor gear starts with one simple rule: make the broken plastic surfaces clean, dry, tight, and still before applying glue. Most failed repairs happen because the surface has dust, oil, soil, rainwater, sunscreen, or old adhesive sitting inside the crack. If the glue touches dirt instead of plastic, the repair may look fixed at first but peel open after a few uses.
The best repair process is: inspect the damage, clean the surface, dry it fully, test-fit the broken parts, apply a thin line of plastic glue, press the parts together, support the repair if needed, and let it rest before outdoor use. Small cracks may take only a few minutes to glue, but handles, lids, clips, and curved parts need more patience because they face more pressure after repair.
For most plastic outdoor gear, controlled glue application works better than a thick layer. GleamGlee Plastic Glue includes fine-tip nozzles, which helps place glue inside narrow cracks, tabs, corners, and clear plastic edges. A clean repair should close the crack, keep the part aligned, avoid glue overflow, and allow the item to return to normal use without blocking hinges, lids, screw holes, or moving parts.
| Repair Step | Main Purpose | Suggested Time | Key Detail |
|---|---|---|---|
| Inspect damage | Decide if repair is safe | 1–2 minutes | Avoid high-load or safety parts |
| Clean surface | Remove dirt and oil | 2–5 minutes | Clean inside the crack |
| Dry fully | Prevent weak bonding | 10–30 minutes | Longer if gear was wet |
| Test-fit parts | Check alignment | 1–3 minutes | Do this before opening glue |
| Apply glue | Bond broken faces | 10–30 seconds | Thin line, not thick blob |
| Press and hold | Keep contact tight | 30–60 seconds | Do not slide parts |
| Support repair | Stop movement | 10 minutes or more | Tape, clamp, band, or weight |
| Rest before use | Improve durability | Several hours or more | Avoid water, load, bending |
Plastic Outdoor Gear Inspection
Inspection comes before any glue because not every broken plastic part should be repaired the same way. A cracked planter, lantern cover, storage lid, tackle box latch, or cooler corner can often be repaired if the broken edges still match closely. A cracked garden chair leg, ladder piece, heavy cooler handle, machine guard, or high-pressure water part needs more caution because failure could cause injury or make the item unsafe. Look closely at where the crack sits, how much pressure the part carries, and whether the plastic bends during normal use. If the crack opens wider when you lift, twist, or close the item, glue alone may not be enough. Early inspection also helps you decide whether the repair needs tape support, a clamp, or an inside backing patch.
- Check whether the broken edges still fit together tightly
- Press the crack gently and see if it closes flat
- Look for missing chips, warped plastic, or white stress marks
- Avoid glue-only repair on body-weight or safety-related parts
- Plan support before applying glue if the part springs open
| Damage Check | Good Sign | Warning Sign |
|---|---|---|
| Edge fit | Edges meet closely | Gap stays open |
| Plastic shape | Part returns to normal shape | Warped or bent |
| Stress level | Crack stays still | Crack opens during use |
| Safety risk | Decorative or cover part | Load-bearing part |
| Surface condition | Clean and solid | Brittle, flaky, oily, wet |
Plastic Outdoor Gear Cleaning
Cleaning is one of the most important steps because outdoor plastic collects more residue than indoor plastic. A cooler may have food oil near the handle. A garden planter may have soil and fertilizer dust inside the crack. A tackle box may carry salt, bait residue, sand, or moisture. A bike reflector bracket may have road dust and grease. If these layers are not removed, the glue may bond to contamination instead of the plastic itself. Use mild soap and water for general cleaning, then dry the area completely. For narrow cracks, use a toothpick, soft brush, cotton swab, or folded paper edge to remove hidden debris. Do not rush this step after rain or washing, because trapped moisture inside the crack can weaken the repair.
- Wash away visible dirt before detailed cleaning
- Clean inside the crack, not only the outside surface
- Remove oil, soil, sunscreen, dust, and old adhesive
- Let wet outdoor gear dry longer before gluing
- Avoid touching the cleaned repair area with fingers
| Outdoor Item | Common Residue | Cleaning Focus |
|---|---|---|
| Cooler | Food oil, drink spills, dust | Handle, lid edge, corner crack |
| Planter | Soil, fertilizer, water marks | Inside the split |
| Tackle box | Salt, sand, bait residue | Latch and hinge area |
| Bike accessory | Road dust, grease | Bracket and screw area |
| Lantern cover | Fingerprints, dust, rain marks | Clear crack edge |
Plastic Outdoor Gear Drying
Drying sounds simple, but it has a big effect on repair strength. Outdoor gear can hold moisture in cracks, screw holes, seams, textured surfaces, and hollow spaces even when the outside looks dry. If glue is applied too soon, water may sit between the adhesive and plastic, creating a weak layer. This is especially common with garden gear, coolers, watering cans, fishing boxes, poolside items, and storage bins left outside. After cleaning, wipe the area with a dry cloth and let the item sit in a warm, ventilated place. Do not dry plastic with extreme heat because heat can warp thin covers or soften certain plastics. Normal room temperature drying is safer and more reliable.
- Dry the surface after washing
- Give deep cracks more time than flat surfaces
- Keep the item indoors or under cover while drying
- Avoid repairing right after rain or heavy humidity
- Do not use strong heat on thin or clear plastic
| Surface Condition | Minimum Drying Approach | Repair Risk If Rushed |
|---|---|---|
| Light dust wiped off | Dry cloth may be enough | Low |
| Washed with water | Air dry before gluing | Medium |
| Crack held rainwater | Longer drying needed | High |
| Textured plastic | Check grooves carefully | Medium |
| Hollow handle or lid | Let hidden moisture escape | High |
Plastic Outdoor Gear Test-Fit
Test-fitting means pressing the broken pieces together before glue is applied. This step prevents crooked repairs, blocked lids, misaligned clips, and screw holes that no longer match. Once fast-drying plastic glue touches the surface, there is little time to adjust. Test-fitting shows whether the crack closes tightly, whether the part needs support, and whether the item can still work after repair. For a cooler lid, check whether it closes. For a tackle box latch, check whether it snaps into the right place. For a bike reflector bracket, check whether the screw hole still lines up. For clear acrylic covers, check whether the crack becomes less visible when pressed. If the part springs open, prepare tape, a clamp, rubber band, or small weight before applying glue.
- Fit parts together without glue first
- Check lid, latch, screw hole, and hinge alignment
- Prepare support if the crack does not stay closed
- Make sure the item keeps its original shape
- Do not begin gluing until the holding method is ready
| Test-Fit Result | Meaning | Best Action |
|---|---|---|
| Crack closes smoothly | Good repair chance | Apply thin glue line |
| Small gap remains | Missing material or warping | Add support or backing |
| Part springs open | Built-in tension | Use tape or clamp |
| Latch does not align | Position is wrong | Adjust before gluing |
| Screw hole shifts | Assembly may fail | Hold alignment carefully |
Plastic Outdoor Gear Gluing
Gluing should be controlled and neat. Most plastic outdoor gear repairs need a small amount of adhesive placed exactly where the broken plastic surfaces touch. A thick layer on the outside does not automatically create a stronger repair. In many cases, too much glue prevents the edges from closing, squeezes out around the joint, hardens into rough lumps, or blocks moving parts. Use the precision nozzle to guide glue into the crack or along the broken edge. For clear covers and visible outdoor parts, apply from the inside when possible so the repair looks cleaner. After applying glue, press the pieces together directly. Do not slide them back and forth, because sliding can smear the glue away from the contact area.
- Use a thin line for cracks and edges
- Use small dots for tabs and clips
- Keep glue away from hinges, screw holes, and seals
- Wipe small overflow before it hardens
- Apply less glue on clear plastic to avoid visible marks
| Damage Type | Glue Amount | Best Method |
|---|---|---|
| Hairline crack | Very thin line | Let glue flow into crack |
| Broken tab | Small dots or edge line | Press straight, no sliding |
| Corner split | Thin layer inside break | Support while curing |
| Clear cover crack | Minimal amount | Apply from back side if possible |
| Screw-hole crack | Tiny controlled amount | Avoid filling screw path |
Plastic Outdoor Gear Pressing
Pressing keeps the broken plastic faces in close contact while the glue begins to set. The goal is steady contact, not excessive force. If you press too hard, you may push too much glue out of the joint or bend thin plastic out of shape. If you press too lightly, gaps may remain. For small parts, fingers may be enough. For long cracks, tape can hold the repair more evenly. For round or curved covers, rubber bands can help. For flat lids or panels, a small weight can keep the repair still. Clear plastic should be protected with a soft cloth if a clamp is used, because scratches may remain visible after the repair.
- Keep the crack closed evenly
- Avoid twisting or moving the joint while pressing
- Use tape or bands for curved parts
- Use light clamps only when needed
- Protect clear plastic from clamp marks
| Repair Shape | Best Support | Why It Helps |
|---|---|---|
| Short crack | Finger pressure | Quick alignment |
| Long lid crack | Tape | Even pressure along crack |
| Curved cover | Rubber band | Holds shape naturally |
| Flat panel | Small weight | Keeps surface still |
| Delicate clear part | Soft cloth plus light clamp | Prevents scratches |
Plastic Outdoor Gear Curing
Curing is the waiting stage that helps the repair survive real outdoor use. Fast-drying glue may hold quickly, but outdoor gear should not be loaded, bent, soaked, or dropped right after repair. A planter should not be filled with wet soil too soon. A cooler should not be packed with ice immediately. A tackle box latch should not be snapped open and closed repeatedly right away. A bike accessory should not face road vibration before the bond has rested. Keep the repaired item dry, still, and away from heavy pressure during the early curing period. The first use after curing should also be gentle so the repair is not shocked by full force immediately.
- Keep repaired gear indoors or under cover while resting
- Avoid rain, water, bending, and heavy load early
- Test the repaired part gently before normal use
- Inspect the glue line after the first outdoor use
- Add reinforcement if the crack starts to reopen
| Repaired Gear | First Use After Repair | What To Avoid Early |
|---|---|---|
| Planter | Add dry soil first | Wet heavy soil |
| Cooler corner | Use lightly first | Full ice load |
| Tackle box latch | Open slowly | Hard snapping |
| Storage lid | Close gently | Slamming shut |
| Bike reflector | Reinstall after resting | Immediate road vibration |
| Lantern cover | Handle gently | Dropping or twisting |
Do Plastic Outdoor Gear Repairs Last?
Plastic outdoor gear repairs can last well when the broken part is rigid, clean, properly aligned, and not under heavy bending or load. A repaired lantern cover, planter crack, storage box corner, cooler shell, tackle box latch, or acrylic panel can stay useful for a long time if the glue bonds directly to clean plastic and the item is allowed to rest before outdoor use.
Repair life depends less on the size of the glue tube and more on five practical details: plastic type, crack shape, surface cleaning, stress level, and weather exposure. Hard plastics such as PVC, ABS, and acrylic usually give better results than waxy or flexible plastics. A thin, well-closed crack usually lasts longer than a wide crack with missing pieces. A clean, dry surface always performs better than a dusty or oily one.
The honest answer is that not every plastic outdoor gear repair should be expected to act like a brand-new part. A fixed garden planter or lantern shell may last through many uses. A repaired chair leg, heavy cooler handle, pressure sprayer, or safety cover needs more caution. Good repair means restoring useful function without ignoring risk.
| Repair Factor | Better Chance of Lasting | Higher Risk of Failing |
|---|---|---|
| Plastic type | PVC, ABS, acrylic, rigid plastic | PE, PP, waxy or flexible plastic |
| Crack shape | Clean crack, tight edges | Wide gap, missing plastic |
| Surface condition | Clean, dry, oil-free | Wet, dusty, greasy, soil-filled |
| Stress level | Cover, shell, light clip | Handle, hinge, chair leg |
| Weather exposure | Kept dry during curing | Rain or heat too soon |
| Use after repair | Gentle first use | Loaded, bent, snapped immediately |
Plastic Outdoor Gear Weather
Weather has a direct effect on plastic outdoor gear repairs because outdoor items often sit in sun, rain, cold air, damp sheds, garages, cars, and garden areas. Heat can expand plastic, cold can make old plastic more brittle, and rain can push moisture into small repair edges. Even a good glue repair can weaken if the item is put back outside too soon, especially before the bond has had time to settle. Gear that stays outdoors all year needs more careful curing than gear used only on weekends. A repaired planter, storage lid, lantern cover, or cooler corner should be kept dry during the early resting stage, then checked after the first rain or hot day.
- Keep repaired gear indoors, in a garage, or under cover while it rests
- Avoid rain, wet soil, pool water, or damp grass right after repair
- Do not cure repaired plastic on a very hot patio, dashboard, or metal table
- Inspect the repair after the first outdoor use, especially after heat or rain
| Weather Condition | Repair Risk | Better Handling |
|---|---|---|
| Rain within first use | High | Keep item covered longer |
| Strong sun | Medium | Cure in shade or indoors |
| Cold weather | Medium | Let repair rest at room temperature |
| High humidity | Medium | Allow longer drying before gluing |
| Dusty wind | Low to medium | Cover the repair while resting |
Plastic Outdoor Gear Stress
Stress is the biggest reason some plastic outdoor gear repairs last and others fail. A crack on a flat cover may stay closed because nothing pulls it apart. A crack on a handle may reopen because every lift pulls against the repair line. A latch may fail if it snaps shut with force. A hinge may fail because it bends at the same spot every time. Before trusting a repaired item, watch how the damaged area moves during normal use. If the crack opens, flexes, twists, or carries weight, the repair needs extra support or lighter use. Plastic glue works best when the broken surfaces stay pressed together instead of being pulled apart.
- Low-stress repairs usually last longer than bending or load repairs
- Handles, hinges, clips, and screw holes need more caution
- Avoid hard snapping, twisting, or lifting right after repair
- Reduce load on repaired gear whenever possible
| Gear Part | Stress Level | Repair Outlook |
|---|---|---|
| Lantern cover | Low | Good |
| Planter side crack | Low to medium | Good with dry curing |
| Storage box corner | Medium | Good if lid does not flex heavily |
| Tackle box latch | Medium | Good if opened gently |
| Cooler handle | Medium to high | Needs caution or support |
| Garden chair leg | High | Replacement is safer |
Plastic Outdoor Gear Material
Material decides how well the glue can grip the plastic. Rigid plastics usually repair better because the surface stays still after bonding. PVC, ABS, acrylic, and many hard plastic casings can often form a strong repair when cleaned properly. Flexible plastics are more difficult because the repair line keeps moving. Some storage bins, soft lids, buckets, and flexible garden containers may be made from polypropylene or polyethylene, which can feel waxy and resist many adhesives. If the material is unknown, a hidden-area test is useful. Apply a tiny amount of glue on an unseen spot, let it cure, and check whether it grips or peels.
- Rigid plastics usually give stronger, cleaner repairs
- Waxy or flexible plastics should be tested before full repair
- Clear acrylic repairs need a transparent glue line for a cleaner look
- Mixed plastic items may repair unevenly, depending on the surface
| Plastic Material | Common Outdoor Gear | Lasting Chance |
|---|---|---|
| PVC | Planters, fittings, covers | High |
| ABS | Tool cases, clips, housings | High |
| Acrylic | Clear covers, panels, décor | High |
| Polystyrene | Light covers, hobby parts | Medium |
| Polypropylene | Storage bins, flexible lids | Low to medium |
| Polyethylene | Buckets, soft containers | Low |
Plastic Outdoor Gear Reinforcement
Reinforcement can make a repair last longer when the crack is long, curved, or likely to reopen. Glue alone works best when two broken edges meet tightly. If the part flexes, carries light pressure, or has a small gap, an inside backing patch can spread force across a wider area. This is helpful on storage lids, planter cracks, cooler corners, equipment covers, and some outdoor plastic shells. The backing does not need to be large; it only needs to support the crack without blocking movement. A thin strip of compatible plastic on the hidden side can make the repair stronger while keeping the outside cleaner.
- Use reinforcement when a crack is longer than about 1 inch
- Add backing on the hidden side when appearance matters
- Keep patches away from hinges, seals, screw holes, and sliding grooves
- Use tape, rubber bands, or clamps only to hold shape while curing
| Damage Type | Reinforcement Needed? | Better Support |
|---|---|---|
| Short hairline crack | Usually no | Thin glue line |
| Long storage lid crack | Often yes | Inside plastic strip |
| Planter side split | Often yes | Inner backing patch |
| Cooler corner crack | Sometimes | Internal support |
| Flexible hinge split | Usually yes | Backing or replacement |
Plastic Outdoor Gear Cure Time
Cure time affects repair life more than many people expect. Fast-drying plastic glue can grab quickly, but outdoor gear should not be treated as fully ready the moment it feels stuck. Early handling should be gentle. The repair needs time away from water, bending, weight, and vibration. A repaired tackle box latch should not be snapped repeatedly right away. A repaired cooler corner should not be packed with ice immediately. A repaired planter should not be filled with wet soil too soon. Letting the item rest longer gives the bond a better chance to handle outdoor use.
- Keep the repaired area still during the early resting period
- Avoid water, heavy load, bending, and vibration too soon
- Test the item gently before returning to normal use
- Check the repair line after the first real outdoor use
| Repaired Item | Early Use Risk | Safer First Use |
|---|---|---|
| Planter | Wet soil pressure | Start with dry, light soil |
| Cooler corner | Heavy ice load | Use lightly first |
| Tackle box latch | Hard snapping | Open and close slowly |
| Bike reflector | Road vibration | Reinstall after resting |
| Storage lid | Lid flexing | Close gently |
| Lantern cover | Impact | Handle carefully |
Plastic Outdoor Gear Warning Signs
A plastic repair can look fine on day one but show warning signs after use. Small changes around the repair line often show whether the bond is holding or starting to fail. Watch for edges lifting, a crack reopening, white stress marks, peeling glue, uneven gaps, stiffness around a hinge, or a part that no longer lines up. These signs do not always mean the item is ruined, but they mean the repair needs attention before the damage spreads. Checking early is especially helpful for storage boxes, cooler parts, tackle boxes, planters, and gear that moves during use.
- Look for gaps, lifting edges, peeling, or white stress marks
- Stop using the item if the crack grows after repair
- Add support early if the repaired area begins to move
- Replace the part if the repair affects safety or load strength
| Warning Sign | What It Means | What To Do |
|---|---|---|
| Crack opens again | Stress is too high | Add support or stop using |
| Glue edge lifts | Poor surface grip | Clean and repair again if safe |
| White marks appear | Plastic is under stress | Reduce load or reinforce |
| Part feels stiff | Glue may block movement | Trim excess carefully if safe |
| Handle flexes | Load risk | Do not carry heavy weight |
| Hinge splits wider | Movement is too strong | Replace or reinforce |

What Mistakes Hurt Plastic Outdoor Gear Repair?
Most plastic outdoor gear repair mistakes happen before the glue has time to work. Dirty cracks, wet plastic, poor alignment, thick glue layers, and early use can all weaken the repair. Outdoor gear is usually exposed to dust, soil, oil, sunscreen, food residue, rainwater, and temperature changes, so a quick “wipe and glue” repair is often not enough.
The biggest mistake is treating every plastic break the same way. A cracked acrylic lantern cover, a snapped tackle box latch, a split planter, and a cooler handle do not face the same pressure. Some parts only need a neat glue line. Others need support from the back side. Heavy-load parts may need replacement instead of glue. A repair should match the part’s job.
A better repair comes from slowing down at the right moments: clean inside the crack, dry fully, test-fit before applying glue, use a thin amount, hold the part still, and let it rest before outdoor use. These steps take only a few extra minutes, but they can decide whether the repair lasts one trip or many uses.
| Mistake | Common Result | Better Choice |
|---|---|---|
| Gluing over dirt | Weak bond, peeling edge | Clean inside the crack first |
| Gluing wet plastic | Repair softens or opens | Dry fully before gluing |
| Using too much glue | Messy joint, poor fit | Apply a thin controlled line |
| Skipping test-fit | Crooked repair | Align parts before glue |
| Moving parts too soon | Crack reopens | Let the item rest |
| Repairing high-load parts | Safety risk | Replace or reinforce |
| Ignoring plastic type | Glue may peel | Test unknown plastic first |
Plastic Outdoor Gear Cleaning Mistakes
Cleaning mistakes are one of the main reasons plastic outdoor gear repairs fail. Outdoor items collect more residue than they show on the surface. A cooler corner may have food oil or drink residue. A garden planter crack may hold soil, fertilizer dust, and water minerals. A fishing tackle box latch may have salt, bait oil, sand, or moisture. A bike reflector bracket may carry road dust and grease. If these layers stay inside the break, the glue bonds to dirt instead of plastic. The repair may feel firm for a short time, then lift after the first pull, bend, or wet outdoor use.
- Clean the inside of the crack, not only the outside
- Remove oil, dust, soil, salt, sunscreen, and old adhesive
- Use a toothpick, cotton swab, or soft brush for narrow cracks
- Avoid touching the cleaned area with fingers before gluing
| Outdoor Gear | Hidden Residue | Repair Risk |
|---|---|---|
| Cooler | Food oil, drink spills | Glue edge may peel |
| Planter | Soil, fertilizer dust | Crack may reopen |
| Tackle box | Salt, bait residue | Latch repair may fail |
| Bike accessory | Grease, road dust | Bracket may loosen |
| Lantern cover | Fingerprints, rain marks | Clear repair may look messy |
Plastic Outdoor Gear Drying Mistakes
Drying mistakes are easy to miss because plastic can look dry while water remains inside the crack. This happens often with garden gear, coolers, watering cans, storage boxes, fishing boxes, and outdoor toys left in rain or washed before repair. Moisture trapped inside a seam, screw hole, textured surface, or hollow handle can sit between the glue and the plastic. When the item is used later, the repair may lift, turn cloudy, or split open again. Rushing this step is especially risky when the gear was recently washed, stored outside overnight, or used around water.
- Do not glue right after washing or rain exposure
- Dry deep cracks longer than flat surfaces
- Keep repaired areas away from wet soil and water early
- Use normal airflow instead of strong heat that may warp plastic
| Surface Condition | Common Mistake | Better Handling |
|---|---|---|
| Rain-wet crack | Gluing too soon | Air dry longer |
| Washed planter | Filling with soil early | Let crack dry fully |
| Cooler lid seam | Hidden water remains | Open lid while drying |
| Textured plastic | Water stays in grooves | Wipe and air dry |
| Hollow handle | Moisture hides inside | Give extra drying time |
Plastic Outdoor Gear Glue Mistakes
Using too much glue is a common mistake in plastic outdoor gear repair. Many people think a thicker layer gives a stronger hold, but plastic repairs usually need tight contact between broken surfaces. A thick glue layer can stop the edges from closing, squeeze out around the joint, harden into sharp lumps, or block a hinge, latch, screw hole, or lid seal. Small cracks, tabs, covers, and corners usually need precise placement, not a large amount. With GleamGlee Plastic Glue, the fine-tip nozzle helps place adhesive into the actual break, which keeps the repair cleaner and reduces waste.
- Use a thin line for cracks and split edges
- Use small dots for tabs, clips, and latches
- Keep glue away from hinges, screw holes, and seals
- Wipe small overflow before it hardens
| Damage Type | Common Glue Mistake | Better Method |
|---|---|---|
| Hairline crack | Covering only the outside | Let glue enter the crack |
| Broken tab | Adding a large blob | Use small dots |
| Clear cover | Smearing across surface | Apply minimal glue |
| Hinge crack | Glue enters moving area | Keep hinge path clear |
| Screw-hole split | Filling the screw hole | Glue only the crack edge |
Plastic Outdoor Gear Alignment Mistakes
Alignment mistakes can ruin an otherwise good repair. Fast-drying glue leaves little time to correct the part once it touches the surface. If a storage box latch is glued slightly crooked, it may not lock. If a cooler lid edge is glued with a raised corner, the lid may not close well. If a bike reflector bracket is repaired out of position, the screw hole may not line up. If a clear acrylic cover is pressed unevenly, the crack may remain visible. Test-fitting before gluing prevents these problems and also shows whether tape, a rubber band, clamp, or small weight is needed.
- Press the pieces together without glue first
- Check lid, latch, hinge, and screw alignment
- Prepare tape or clamps before opening glue
- Do not slide the pieces after glue is applied
| Test-Fit Problem | What It Means | Better Action |
|---|---|---|
| Crack does not close | Missing piece or warped plastic | Add support or backing |
| Latch sits unevenly | Wrong angle | Reposition before gluing |
| Screw hole shifts | Part will not assemble | Hold alignment carefully |
| Cover edge rises | Uneven pressure | Use tape while curing |
| Clip springs open | Built-in tension | Support until set |
Plastic Outdoor Gear Curing Mistakes
Curing mistakes happen when the repaired item is used too soon. Fast-drying glue may hold the part in place quickly, but outdoor gear still needs time before it faces pulling, bending, vibration, water, heat, or weight. A repaired cooler corner should not be packed with ice right away. A planter crack should not be filled with wet soil too soon. A tackle box latch should not be snapped open and closed repeatedly right after repair. A bike reflector should not go straight onto a rough road before the bond has rested. Early stress can break a repair that would have held with more patience.
- Keep repaired gear still during the early resting period
- Avoid water, heavy load, bending, and vibration too soon
- Test gently before normal outdoor use
- Inspect the repair after the first real use
| Repaired Item | Early Use Mistake | Safer First Use |
|---|---|---|
| Cooler corner | Loading with ice immediately | Use lightly first |
| Planter crack | Filling with wet soil | Start with dry light soil |
| Tackle box latch | Snapping hard | Close slowly |
| Storage lid | Slamming shut | Close gently |
| Bike reflector | Immediate road vibration | Reinstall after resting |
Plastic Outdoor Gear Safety Mistakes
The most serious mistake is repairing a part that should be replaced. Plastic glue can help with many cracks, covers, tabs, corners, and light-duty clips, but it should not be trusted alone on parts that carry body weight, hold heavy load, control movement, protect from injury, or contain pressure. A cracked garden chair leg, ladder part, heavy cooler handle, pressure sprayer body, scooter part, or machine guard needs extra caution. A repair may look neat on the table but fail under real force. Before gluing, ask what happens if the part breaks again during use. If the answer involves injury, falling, leaking pressure, or equipment damage, replacement is safer.
- Avoid glue-only repairs on body-weight parts
- Reinforce medium-stress areas when possible
- Replace parts linked to safety, pressure, or heavy load
- Do not hide serious structural damage with surface glue
| Part Type | Repair Risk | Safer Choice |
|---|---|---|
| Lantern cover | Low | Glue repair is reasonable |
| Planter side crack | Low to medium | Glue with dry curing |
| Tackle box latch | Medium | Glue and use gently |
| Cooler handle | Medium to high | Reinforce or replace |
| Garden chair leg | High | Replace |
| Ladder or machine guard | Very high | Do not rely on glue |
Is GleamGlee Plastic Glue Good for Plastic Outdoor Gear?
GleamGlee Plastic Glue is a good choice for many plastic outdoor gear repairs, especially when the broken part is hard plastic, the crack is small, and the repair needs to look clean. It is designed for PVC, ABS, acrylic, and other common plastics, so it fits many everyday items such as cooler corners, storage box lids, tackle box clips, lantern covers, garden planters, bike accessories, and hard plastic gear housings.
Its biggest advantages are fast curing, a 100% transparent dry finish, strong bonding on suitable plastics, and fine-tip nozzles for controlled application. These details matter because outdoor gear cracks are often narrow, visible, and awkward to reach. A thick adhesive bead may look messy or block a latch, while a precise glue line can seal the damage without changing how the item works.
GleamGlee Plastic Glue works best when the surface is clean, dry, and held still during curing. It should not be used as the only repair for body-weight parts, high-load handles, pressure parts, or safety-related gear. For small and medium household outdoor repairs, it offers a practical way to extend the life of useful gear instead of replacing it too quickly.
Plastic Outdoor Gear Fit
GleamGlee Plastic Glue fits many plastic outdoor gear repairs because it is made for hard plastic surfaces that need a strong, neat bond. Outdoor gear often breaks in small but important places: a cooler corner splits, a lantern cover cracks, a garden planter opens along the side, or a storage box lid chips near the hinge. These repairs need a glue that can enter a narrow crack, hold the edges together, and dry without leaving an obvious mark. GleamGlee Plastic Glue is especially useful when the broken pieces still match closely and the part does not need to bend heavily after repair. It is not meant to replace a structural part, but it can bring many everyday items back into use.
- Good for PVC, ABS, acrylic, and many rigid plastics
- Best for small cracks, clean breaks, chips, covers, tabs, and corners
- Useful for home, garden, camping, fishing, cycling, and hobby gear
- More suitable for hard plastic than soft, waxy, or flexible plastic
| Outdoor Gear Item | Repair Use | Fit Level |
|---|---|---|
| Cooler corner | Crack or chipped edge | High |
| Garden planter | Side split or rim crack | High |
| Lantern cover | Clear crack or chipped shell | High |
| Tackle box latch | Small broken tab | Medium to high |
| Storage box lid | Corner crack or hinge-side split | Medium |
| Bike reflector holder | Bracket crack | Medium |
| Heavy chair leg | Deep load crack | Low |
Plastic Outdoor Gear Finish
The clear finish is one of the main reasons GleamGlee Plastic Glue is useful for plastic outdoor gear. Many repairs stay visible after fixing, especially on lantern covers, acrylic panels, outdoor décor, clear storage lids, garden accessories, and cooler shells. If the glue dries yellow, cloudy, or raised, the item may look dirty even when the repair holds. GleamGlee Plastic Glue dries 100% transparent, which helps the repaired area look cleaner and less noticeable. This is especially important for clear plastic and visible front-facing parts. The best result comes from using a small amount of glue and keeping the line narrow, instead of spreading adhesive across the whole surface.
- Dries transparent for cleaner-looking repairs
- Better for visible cracks than cloudy or colored adhesive
- Helps repair acrylic, clear covers, and decorative outdoor plastic
- Works best when overflow is wiped before it hardens
| Repair Area | Why Clear Finish Matters | Best Method |
|---|---|---|
| Acrylic lantern cover | Light shows marks clearly | Apply a very thin line |
| Patio décor | Repair stays visible | Keep edges aligned |
| Storage lid | Top surface is easy to see | Wipe excess early |
| Cooler shell | Crack may be on outer corner | Apply inside the split |
| Clear plastic panel | Smears stand out | Use fine nozzle control |
Plastic Outdoor Gear Control
Control is important because most plastic outdoor gear damage is small. A cracked latch, broken tab, thin split, screw-hole crack, or clear cover edge does not need a large amount of glue. It needs accurate placement. GleamGlee Plastic Glue comes with fine-tip nozzles, which helps guide adhesive into small cracks and tight corners without flooding the surface. This makes the repair easier for people who do not have professional tools. It also reduces glue waste and helps prevent messy buildup around lids, hinges, clips, and screws. For outdoor gear that still needs to open, close, snap, or slide, controlled application can be the difference between a working repair and a stiff, blocked part.
- Fine-tip nozzles help reach narrow cracks and tiny edges
- Better control reduces overflow and rough glue buildup
- Useful around clips, tabs, screw holes, covers, and corners
- Helps keep moving parts clear during repair
| Repair Detail | Common Problem | How Precision Helps |
|---|---|---|
| Hairline crack | Glue sits only on surface | Nozzle guides glue into crack |
| Broken latch tab | Too much glue blocks snap | Small dots control placement |
| Screw-hole split | Glue fills screw path | Thin line avoids blockage |
| Clear cover edge | Glue smears visibly | Narrow application looks cleaner |
| Curved corner | Glue runs outward | Controlled flow reduces mess |
Plastic Outdoor Gear Strength
GleamGlee Plastic Glue is designed to create a strong, long-lasting bond on suitable plastics such as PVC, ABS, acrylic, and more. This matters because outdoor gear often faces real pressure after repair. A storage box lid flexes when opened. A tackle box latch snaps closed. A planter holds soil. A cooler corner gets bumped during transport. A bike accessory vibrates on the road. A good repair needs more than a surface patch; the broken edges should meet closely so the glue can bond the actual plastic faces. Strength also depends on curing time and use habits. Even fast-drying glue should be allowed to rest before the gear goes back outside.
- Strongest on clean, dry, rigid plastic surfaces
- Best when the broken edges fit tightly
- Better for covers, shells, tabs, corners, and light-duty parts
- May need reinforcement for longer cracks or medium-stress areas
| Repair Situation | Strength Outlook | Better Handling |
|---|---|---|
| Clean PVC crack | Strong | Keep dry while curing |
| ABS tool case corner | Strong | Avoid impact early |
| Acrylic cover crack | Strong | Use thin clear line |
| Tackle box latch | Medium to strong | Close gently after repair |
| Cooler handle split | Uncertain | Reinforce or replace if heavily loaded |
| Flexible bin lid | Lower | Test first |
Plastic Outdoor Gear Limits
GleamGlee Plastic Glue is useful, but it should be used with the right expectations. Some plastic outdoor gear is too flexible, too oily, too worn, or too stressed for glue alone. Polypropylene and polyethylene parts, such as some storage bins, flexible lids, buckets, and bendable containers, may resist many adhesives. A repair may look fine at first but peel later when the part bends. Heavy-load parts also need caution. A cracked garden chair leg, ladder piece, scooter part, machine guard, pressure sprayer, or cooler handle carrying heavy weight should not depend only on glue. When a damaged part affects safety, replacement is often the better choice.
- Not ideal for very flexible, waxy, or oily plastics
- Not recommended as the only fix for body-weight parts
- High-load handles may need reinforcement or replacement
- Safety-related parts should be replaced instead of hidden with glue
| Part Type | Repair Risk | Best Choice |
|---|---|---|
| Lantern cover | Low | Glue repair is suitable |
| Planter side crack | Low to medium | Glue and let cure fully |
| Storage lid corner | Medium | Glue plus support if needed |
| Tackle box latch | Medium | Glue and use gently |
| Cooler handle | Medium to high | Reinforce or replace |
| Chair leg | High | Replace |
| Ladder or guard part | Very high | Do not rely on glue |
Plastic Outdoor Gear Value
GleamGlee Plastic Glue offers strong value for people who want to keep useful outdoor gear longer. Many outdoor items are not completely broken; they only have one cracked corner, loose tab, chipped edge, or split cover. Replacing the whole item can cost far more than repairing the damaged part. A cooler, storage box, tackle box, planter, lantern, or bike accessory may still have plenty of life left if the damage is handled early. A small tube of clear plastic glue can cover many small repairs around the home, garage, garden, campsite, and workshop. It is also compact enough to keep in a household repair drawer for quick fixes.
- Helps extend the life of outdoor gear instead of replacing it early
- Useful across many repair scenes, not only one item
- Saves small but frequent replacement costs
- Good for home repair kits, garage shelves, camping supplies, and hobby benches
| Repair Example | Replacement Cost Level | Repair Value |
|---|---|---|
| Tackle box latch | Low to medium | Saves a usable box |
| Cooler corner | Medium | Prevents crack spreading |
| Garden planter | Low to medium | Keeps pot in service |
| Lantern cover | Medium | Protects the light housing |
| Storage lid | Medium | Keeps box useful outdoors |
| Bike reflector holder | Low | Restores safety visibility |
Conclusion
Plastic outdoor gear repair is worth doing when the item is useful, the damage is small, the plastic is repair-friendly, and the repaired part does not create safety risk. Cracks, clips, covers, corners, plastic tabs, acrylic panels, cooler parts, garden planters, tackle boxes, camping accessories, bike reflectors, and hard plastic housings are often good repair targets. The repair is much more likely to last when the surface is clean, the parts fit tightly, the glue is applied in a thin controlled line, and the item is allowed to rest before outdoor use.
GleamGlee Plastic Glue helps customers handle many everyday plastic outdoor gear repairs with a fast-drying formula, crystal-clear finish, strong bonding performance, and precision nozzles for cleaner application. It is suitable for many PVC, ABS, acrylic, and hard plastic repairs in home, garden, camping, sports, hobby, and outdoor maintenance use. For customers who want ready products, GleamGlee can supply branded plastic glue. For retailers, distributors, Amazon sellers, Shopify brands, and private-label companies, GleamGlee can support OEM and ODM plastic glue projects with formula support, packaging design, compliance documents, samples, bulk production, and international logistics. Contact GleamGlee to order plastic glue products or request a custom quotation for your own outdoor plastic repair product line.





















