 Skip to content
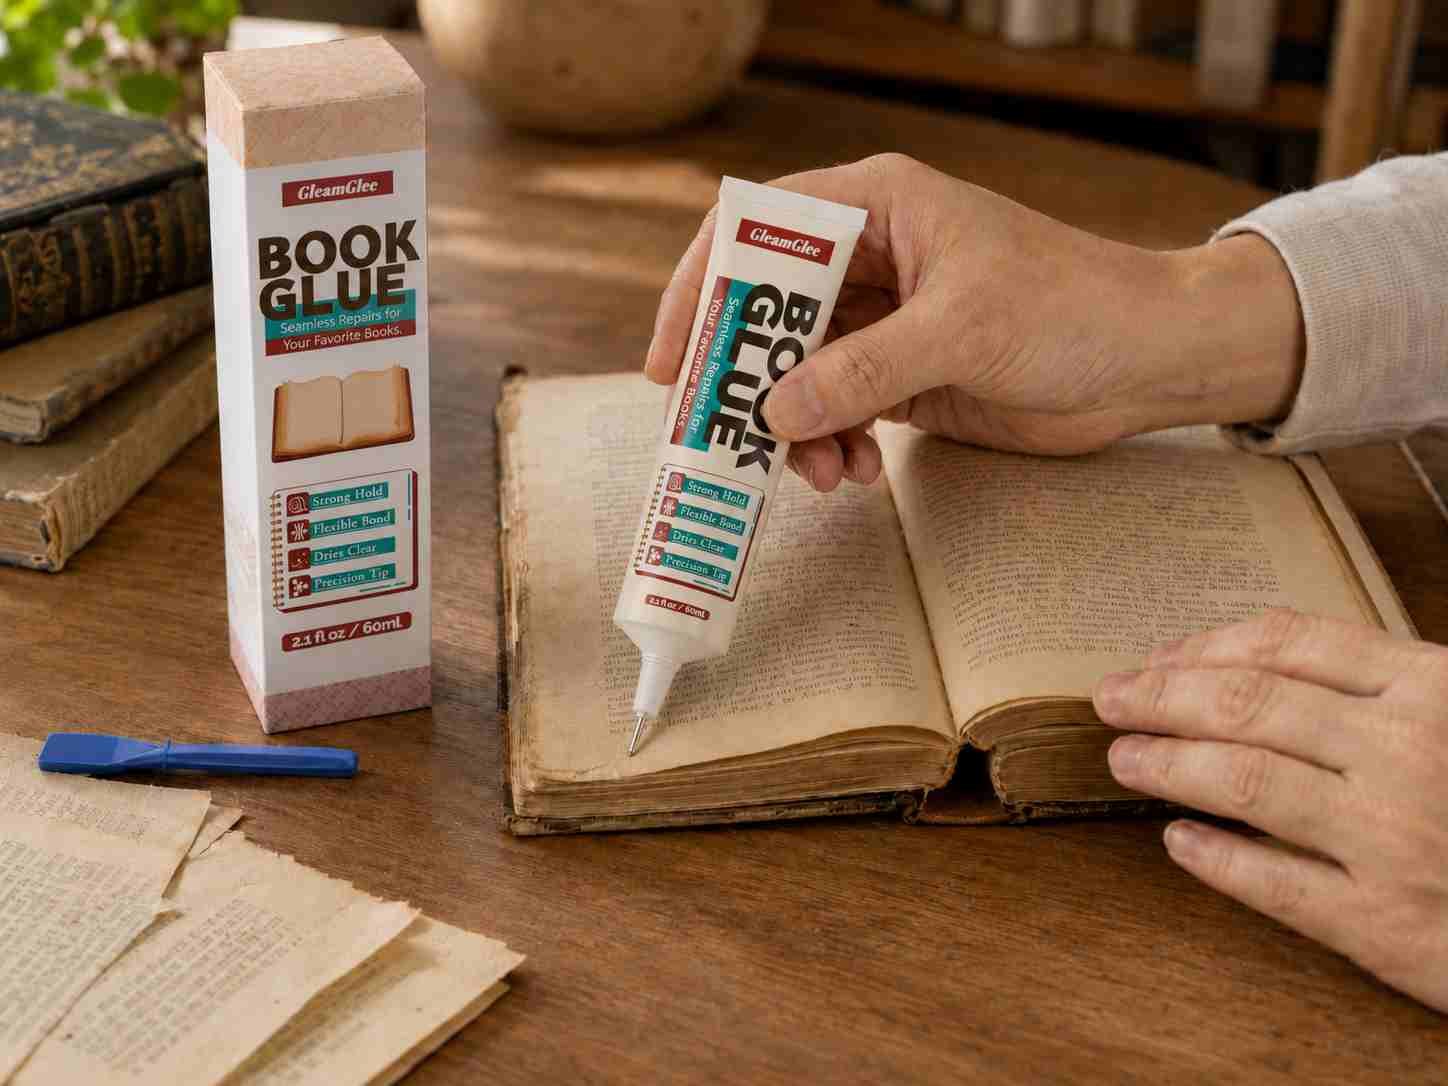
Restoring antique books is different from fixing a modern notebook. An old book may have weak paper, dry spine glue, faded ink, soft cloth, cracked leather, or a cover that has slowly pulled away after years of use. Many people reach for tape or strong household glue because they want a fast repair, but those quick fixes often create bigger problems later. Tape can stain paper. Hard glue can make the spine crack again. Thick glue can leave visible ridges, wrinkle pages, or make a book difficult to open.
To restore antique books using book glue, first check whether the paper is still flexible and clean enough for repair. Then use a clear, flexible book glue in a very thin line on the loose page, cracked spine, or lifted cover. Press the part into position gently, protect nearby pages with wax paper, and let the book dry flat under light weight. Valuable, brittle, moldy, or rare books should be reviewed by a professional before any glue is applied.
The safest repair is not always the strongest-looking repair. A good antique book repair should feel neat, flexible, and quiet. The page should stay in place without a thick glue mark. The cover should close naturally. The spine should support the book without becoming stiff like plastic. Think of a family cookbook with sauce marks, a grandfather’s worn Bible, a vintage poetry book, or an old school reader with one loose page. These books do not need to look new. They need to stay together, open gently, and keep their story alive.
What Can Book Glue Fix?
Book glue can fix loose pages, cracked spines, lifted covers, weak hinges, and small paper separations in antique books when the paper is still flexible and the structure has not fully collapsed. It is best for books that can still be opened gently, aligned by hand, and pressed flat without cracking. If the paper breaks like dry leaves, glue may add stress instead of solving the problem.
Most antique book damage begins in small places. One page starts to pull away. The spine opens by a few millimeters. A cover corner lifts after years of handling. These are the moments when clear, flexible book glue can help most. A narrow glue line can stop a small problem from becoming a full detached cover or a loose section of pages.
The safest repair does not hide the age of the book. It keeps the book usable, cleaner-looking, and easier to handle. A good repair should not create thick glue ridges, shiny stains, or a stiff spine. For family cookbooks, old novels, children’s books, journals, religious texts, and sentimental paper items, book glue can extend the life of the book without replacing its original character.
Which Antique Book Pages Loosen?
Loose pages are one of the most common problems in antique books because the inner page edge carries repeated pulling force every time the book opens. Pages near the front, back, center fold, title page, photo section, recipe section, or frequently read chapter often loosen first. In old paperbacks, the original spine glue may dry out and lose grip. In hardcovers, pages near the hinge may separate because the cover pulls against them over many years. Book glue can help when the page is still complete, the inner edge has not crumbled, and the page can return to its original place without being forced. The repair should be thin, clean, and placed only at the page edge where it meets the spine.
Key repair checks:
- The loose page should slide back into position smoothly.
- The top and bottom edges should line up within about 1–2 mm of nearby pages.
- The inner edge should not shed flakes when touched.
- The printed area should stay free from glue.
- Wax paper should be placed on both sides before the book is closed.
| Loose Page Type | Repair Difficulty | Book Glue Use |
|---|---|---|
| Single loose page | Easy | Thin glue line on inner edge |
| Two to three loose pages | Medium | Repair one page at a time |
| Glossy photo page | Medium | Use very little glue and test carefully |
| Torn inner edge | Medium to high | Needs careful alignment |
| Crumbling page edge | High | Do not glue at home |
Why Antique Book Spines Crack?
Antique book spines crack because old adhesive dries, paper fibers weaken, stitching loosens, and the book has been opened wide many times. Cookbooks, Bibles, dictionaries, poetry books, schoolbooks, and reference books are especially likely to crack because they are often held open on tables. A cracked spine may look serious, but it can sometimes be repaired if the pages are still aligned and the gap is narrow. Book glue should be applied inside the crack in a thin bead, not spread heavily across the whole spine. The goal is to support the original structure, not fill the spine with a hard block of glue.
Useful spine repair signs:
- A narrow crack under 3–5 mm is often easier to repair.
- Pages should still sit in a straight block.
- The book should close without a large gap.
- The spine should not feel damp, powdery, or moldy.
- The cover should not be fully separated from the text block.
| Spine Condition | Can Book Glue Help? | Best Handling |
|---|---|---|
| Small inside crack | Yes | Thin glue bead inside gap |
| Medium spine gap | Often | Apply in short controlled lines |
| Pages pulling in a group | Sometimes | Repair slowly, section by section |
| Fully detached text block | Not ideal | May need rebinding |
| Brittle, powdery spine | No | Store safely and avoid pressure |
When Antique Book Covers Lift?
Antique book covers lift when the hinge weakens, the old glue dries out, or the cover material starts pulling away from the page block. Softcover books usually lift along the spine edge. Hardcovers may loosen at the front or back hinge, especially near the first and last pages. This happens often with family recipe books, old diaries, children’s storybooks, church books, magazines, and vintage manuals because they are opened, stored, and handled repeatedly. Book glue can fix a lifted cover when the cover still fits the book naturally. If the cover sits crooked, curls badly, or needs strong pressure to stay in place, gluing it down may lock the book into a strained shape.
Cover repair points:
- Dry-fit the cover before applying glue.
- Glue only the original contact area, not the whole inside cover.
- Use wax paper to protect the first or last page.
- Press with light, even weight.
- Avoid rubber bands because they can dent old covers.
| Cover Problem | Repair Choice | Risk |
|---|---|---|
| Small lifted softcover edge | Thin glue line | Low |
| Loose front cover hinge | Controlled hinge repair | Medium |
| Detached dust jacket flap | Very light glue or paper repair | Medium |
| Warped cover | Do not force flat | High |
| Powdery leather cover | Avoid DIY glue | High |
Are Antique Books Too Fragile?
Some antique books are too fragile for book glue repair. If the paper cracks when turned, corners fall off like crumbs, pages smell strongly musty, or the book has water damage, glue may not solve the real problem. Fragile books need less handling, better storage, and sometimes professional repair. A book can also be too important for DIY work even if it looks strong. Signed editions, rare prints, family records, old maps, handwritten notes, and valuable religious texts should be treated more carefully because a visible repair may affect both appearance and value.
Before deciding to glue, check the book with a simple risk test:
- Can one page bend gently without cracking?
- Does the page edge stay intact when touched?
- Is there no active mold or damp smell?
- Can the loose part return to position without force?
- Is the book mainly sentimental or practical, not rare or high-value?
| Book Condition | Repair at Home? | Reason |
|---|---|---|
| Stable old cookbook | Yes | Practical repair can extend use |
| Loose page in family journal | Often | Use thin glue and protect writing |
| Vintage paperback with cracked spine | Yes | Good fit for flexible book glue |
| Brittle paper that flakes | No | Paper may break during repair |
| Moldy or damp book | No | Needs safe cleaning first |
| Rare signed edition | No | Repair may reduce value |
| Old book with maps or plates | Usually no | Images and folds need special care |
Book glue is most useful when the book is still strong enough to handle gently. If the book feels weak in your hands, the first step should be storage, not glue.
Which Book Glue Works Best?
The best book glue for antique books should dry clear, stay slightly flexible, apply in a thin controlled line, and avoid visible stains when used correctly. Old books need a glue that supports paper movement, not one that turns the spine into a hard block. A fine nozzle also matters because most repairs need only a very small amount.
Antique book repair is not about maximum strength alone. Super glue may feel strong, but it dries hard and can crack paper. Hot glue is bulky and difficult to control. Tape is quick, but it can yellow and leave marks. A proper book glue should hold pages neatly while still allowing the book to open and close naturally.
GleamGlee Book Glue fits common antique book repair needs because it is made for books, paper, vellum, photos, journals, cards, scrapbooks, and bookbinding projects. It dries transparent and comes with a fine metal nozzle, making it easier to repair loose pages, cracked spines, and lifted covers without spreading glue across visible paper.
Is Clear Book Glue Better?
Clear book glue is usually better for antique books because old paper rarely has a clean white surface. Pages may be cream, yellow, tan, speckled, or slightly uneven from age. A white or cloudy glue line can stand out immediately, especially near the spine, title page, illustrated pages, or handwritten notes. Clear glue helps the repair blend into the book instead of making the damaged area more noticeable. It is especially useful when fixing family cookbooks, vintage novels, journals, religious texts, old manuals, photo albums, and scrapbooks. The repair should look quiet: the page stays attached, the cover closes properly, and the glue line does not become the main thing people see.
Clear glue works best when used in the right amount:
- Use a thin line, not a wide layer.
- Keep glue away from printed text and handwriting.
- Wipe overflow before it dries.
- Use wax paper to protect nearby pages.
| Repair Area | Why Clear Book Glue Helps | Watch Out For |
|---|---|---|
| Loose page edge | Less visible near the spine | Too much glue can darken paper |
| Cracked spine | Cleaner inside repair gap | Do not flood the spine |
| Lifted cover | Neater hinge repair | Avoid glue on outer cover |
| Photo album page | Cleaner finish around images | Test glossy paper first |
| Scrapbook paper | Less visible on decorative layouts | Avoid page curling |
Is Flexible Book Glue Safer?
Flexible book glue is safer for antique books because books move every time they are opened. A repaired page has to bend. A spine has to curve. A cover has to pull slightly against the hinge. If the glue dries too hard, the repaired spot may hold for a short time, but the paper beside it can crack later. This is why hard household adhesives are risky for old books. A flexible glue gives the repair enough grip while allowing the book to keep its natural movement. This matters most for books that will still be read, such as cookbooks, family Bibles, journals, schoolbooks, poetry books, and children’s books.
A safer book glue repair should feel stable but not stiff:
- The repaired page should turn without a sharp pull.
- The spine should not feel like a plastic strip.
- The cover should open gently without tearing the hinge.
- The repair should not create a raised ridge.
| Glue Behavior After Drying | Good for Antique Books? | What It Means |
|---|---|---|
| Clear and slightly flexible | Yes | Best fit for pages and spines |
| Clear but very hard | No | May crack paper under movement |
| Thick and rubbery | Not ideal | Can create bulky spine areas |
| Watery and soaking | Risky | May wrinkle or stain paper |
| Fast but brittle | No | Poor fit for old bindings |
Does Book Glue Yellow Pages?
Good book glue should not yellow pages when applied correctly, but the final result also depends on the book’s paper, glue amount, and storage conditions. Antique paper can be sensitive because it may already contain acids, old dust, moisture history, or weakened fibers. Even a clear glue can leave a mark if too much is used or if it spreads into absorbent paper. Yellowing often comes from poor adhesive choice, old tape residue, heavy glue layers, damp storage, or heat exposure after repair. To reduce risk, use a controlled glue line and keep the adhesive only where the page meets the spine.
A neat repair usually follows these habits:
- Apply less glue than expected.
- Test hidden paper if the book is not rare.
- Avoid gluing damp or dusty paper.
- Let the book dry naturally, not near heat.
- Store repaired books away from sunlight and moisture.
| Cause of Yellowing or Marks | How to Reduce the Risk |
|---|---|
| Too much glue | Use a fine nozzle and thin line |
| Wrong adhesive | Choose clear book glue, not tape or super glue |
| Damp paper | Dry and inspect the book first |
| Heat drying | Let glue dry at room temperature |
| Old tape residue | Do not peel aggressively |
| Poor storage | Keep books dry, shaded, and supported |
Why Use Book Glue Carefully?
Book glue should be used carefully because antique books are easy to over-repair. A loose page may look like it needs a lot of adhesive, but often it only needs a fine line along the inner edge. A cracked spine may look like a gap that should be filled, but filling the whole space can make the book stiff and difficult to open. Careful use means placing glue exactly where the structure needs support, then letting the repair dry without movement. The best repair does not make the book look newly manufactured; it keeps the book readable, stable, and closer to its original feel.
Good glue control prevents the most common repair problems:
- St Use Book Glue Carefully?
Book glue should be used carefully because antique books are easy to over-repair. A loose page may look like it needs a lot of adhesive, but often it only needs a fine line along the inner edge. A cracked spine may look like a gap that should be filled, but filling the whole space can make the book stiff and difficult to open. Careful use means placing glue exactly where the structureuck pages.
- Wavy paper.
- Visible glue shine.
- Crooked page placement.
- Stiff spine movement.
- Cover misalignment.
| Repair Job | Careful Glue Method | Common Mistake |
|---|---|---|
| Single loose page | Thin line on inner edge | Coating the full page side |
| Cracked spine | Short glue bead inside gap | Filling the spine heavily |
| Lifted cover | Glue original contact area | Spreading glue across endpaper |
| Loose journal page | Align before pressing | Pressing before page is straight |
| Old photo page | Use tiny dots or edge line | Applying glue near image surface |
A careful repair also means stopping when the book is too fragile. If the paper flakes, smells moldy, or has rare value, storage and expert advice are safer than glue. For ordinary antique books with stable paper, GleamGlee Book Glue gives enough control for clean, small repairs without making the process feel complicated.

How to Prepare Antique Books?
Prepare antique books by checking paper strength, cleaning loose dust, testing the page or cover fit, and setting up protection before using book glue. The book should be dry, stable, and easy to handle. Good preparation helps prevent glue stains, crooked pages, stuck sheets, swollen spines, and repairs that feel too stiff after drying.
Old books should never be rushed into repair. A loose page, cracked spine, or lifted cover may look simple, but antique paper can react badly to moisture, pressure, and pulling. Before applying any book glue, place the damaged part back into position without adhesive. If it fits naturally, the repair is usually safer. If it bends, buckles, or needs force, stop and reassess.
A clean setup makes the repair easier. Use a dry table, soft brush, wax paper, cotton swabs, light weight, and a clear book glue with a fine nozzle. Avoid wet cloths, strong cleaners, heavy clamps, rubber bands, and direct heat. The best preparation keeps the book calm, supported, and protected before one small line of glue is added.
How to Check Antique Book Paper?
Checking antique book paper is the first step because old paper does not always show weakness at first glance. A page may look complete but crack when turned. Another page may feel soft because it absorbed moisture years ago. Before using book glue, turn one nearby page slowly and watch how it bends. Stable paper should curve gently without snapping, flaking, or shedding powder. Check the inner edge where the page meets the spine, because that is where glue will touch first. If the edge is still intact and the page can return to its place easily, a careful repair may be suitable. If the edge breaks into small pieces, glue may add stress instead of support.
Key checks before repair:
- Bend one page gently; do not fold it flat.
- Check whether corners flake when touched.
- Look for stains, waves, mold spots, or sticky areas.
- Make sure printed ink or handwriting does not rub off.
- Take photos of important pages before repair.
| Paper Condition | What It Means | Repair Choice |
|---|---|---|
| Page bends softly | Paper is still workable | Safe for light book glue repair |
| Edge is slightly worn | Normal age damage | Use a thin glue line |
| Page feels stiff and dry | Higher cracking risk | Handle slowly |
| Corners crumble | Paper is too fragile | Do not glue at home |
| Musty smell or dark spots | Possible moisture or mold | Avoid repair until checked |
| Ink transfers when touched | Surface is sensitive | Keep glue away from text |
A simple “10-second paper check” can prevent most repair mistakes. Touch the page edge, lift it slightly, bend it gently, and watch for dust or cracking. If the page survives this without damage, continue with caution. If it reacts badly, storage is safer than glue.
How to Clean Antique Book Spines?
Clean antique book spines with a dry soft brush, not water or household cleaner. The spine area often holds loose dust, dried glue crumbs, paper fibers, and small debris from years of use. These loose particles can stop book glue from bonding evenly. However, cleaning should be gentle. The goal is not to scrape the spine clean like a hard surface. The goal is only to remove loose material that would block a neat repair. Open the book only as far as needed, support both sides with your hands, and brush away from the spine gap. If old adhesive is still firmly attached, leave it alone unless it comes away without pulling paper fibers.
Safe cleaning points:
- Use a dry soft brush only.
- Brush loose dust outward, not deeper into the spine.
- Remove only loose crumbs or flakes.
- Do not scrape hard glue with a knife.
- Do not use alcohol, water, wipes, or sprays.
| Spine Issue | Safe Action | Avoid |
|---|---|---|
| Light dust | Brush gently | Blowing hard into the spine |
| Loose paper crumbs | Lift with brush or tweezers | Pulling attached fibers |
| Dry glue flakes | Remove only loose pieces | Digging into the binding |
| Old tape residue | Leave it if stuck | Peeling quickly |
| Damp spine | Let book dry safely first | Applying book glue |
| Mold smell | Isolate the book | Brushing heavily indoors |
If the spine has a narrow crack, cleaning may only take one minute. If the spine is full of old debris, work in small movements. A spine that becomes wider during cleaning is a warning sign that the book is weaker than expected. Stop before the damage grows. After cleaning, close the book gently and check whether the page block sits straighter. Sometimes removing loose crumbs helps the book align better and reduces the amount of glue needed.
What Book Glue Tools Help?
The right tools make antique book repair cleaner and less stressful. Most small repairs do not need professional equipment, but they do need control. A fine-nozzle book glue helps place adhesive in narrow gaps. Wax paper protects nearby pages from sticking. Cotton swabs remove tiny glue overflow before it dries. A soft brush cleans dust without scratching paper. A light weight keeps the repaired area flat while drying. These tools are simple, but each one prevents a common problem. Without wax paper, pages may stick together. Without a nozzle, too much glue may come out. Without light pressure, a cover may dry slightly lifted or crooked.
Useful repair tools:
- Fine-nozzle book glue for thin glue lines.
- Wax paper to separate repaired pages.
- Cotton swabs for small glue cleanup.
- Soft brush for dry dust removal.
- Smooth card for gentle pressing.
- Light book weight for even drying.
| Tool | Best Use | Practical Tip |
|---|---|---|
| Fine metal nozzle | Loose pages and spine cracks | Test flow on scrap paper first |
| Wax paper | Prevents accidental sticking | Cut larger than the repair area |
| Cotton swab | Removes glue overflow | Roll gently, do not scrub |
| Soft brush | Cleans dry dust | Keep it dry and clean |
| Smooth card | Presses page edge evenly | Cover with clean paper if needed |
| Light weight | Holds repair flat | Use even pressure, not force |
| Clean paper sheet | Protects table and cover | Replace if glue touches it |
Avoid tools that squeeze too hard. Binder clips, tight rubber bands, and heavy clamps can dent covers, crush old page edges, and bend boards. For most small antique book repairs, one or two medium books placed on top provide enough pressure. The repaired area needs contact, not compression.
How to Protect Antique Books?
Protect antique books before using book glue by isolating the repair area and keeping the rest of the book clean. Wax paper is one of the most useful protections because it stops wet glue from transferring to nearby pages. Place it behind a loose page, inside a cover hinge, or between the repaired section and the next sheet before closing the book. Also protect the outer cover by working on a clean dry surface. Old cloth, leather, and paper covers can pick up stains from tables, moisture, oil, or dust. Good protection means planning where glue may spread before it happens.
Protection steps:
- Wash and dry hands before touching pages.
- Keep drinks, food, lotion, and wet cloths away.
- Place wax paper around the repair zone.
- Repair one area at a time.
- Keep the glue nozzle clean.
- Let the book dry before shelving.
| Risk During Repair | Protection Method |
|---|---|
| Pages sticking together | Insert wax paper on both sides |
| Glue staining the cover | Work on clean dry paper |
| Crooked page repair | Dry-fit before gluing |
| Wet glue spreading | Use a fine nozzle and less glue |
| Spine drying unevenly | Apply light, flat pressure |
| Dust entering glue | Brush before repair |
| Reopening too early | Leave book closed until fully dry |
After repair, protection continues. Do not push the book tightly back onto the shelf right away. Let the repaired area settle. Store the book away from direct sunlight, damp rooms, and hot air. If the book is heavy or weak, store it flat for a few days. A careful book glue repair can hold the damaged area together, but good storage helps the repair last longer.
How to Use Book Glue?
Use book glue in a thin, controlled line on the damaged area, then align the page, spine, or cover before pressing it into place. Antique books do not need a heavy layer of glue. They need accurate placement, gentle pressure, and enough drying time. The repair should hold the book together without making pages stiff or leaving visible glue marks.
The safest method is to test the fit before applying glue. Place the loose page, cracked spine, or lifted cover back into position with no adhesive first. If it sits naturally, the repair is more likely to dry cleanly. If it bends, buckles, or needs strong pressure, adding glue may lock the damage into the wrong shape.
For better control, use a clear book glue with a fine nozzle, such as GleamGlee Book Glue. Apply less than you think you need, protect nearby pages with wax paper, remove overflow before it dries, and keep the book closed under light weight. A neat repair should look natural, open smoothly, and feel stable after drying.
How to Glue Loose Pages?
Loose pages should be repaired one page at a time, especially in antique books. First, confirm the page number and position. Slide the page back into the book without glue and check whether the top, bottom, and outer edge match nearby pages. A small difference of 1–2 mm may be normal in old books, but a page sticking out unevenly will look worse once glued. Apply a very thin line of book glue along the inner page edge, not across the printed area. The glue line should be narrow, controlled, and close to the spine. After placing the page, press only the inner edge gently, then use wax paper on both sides before closing the book.
Key steps:
- Dry-fit the page before applying glue.
- Use a thin glue line along the inner edge only.
- Keep glue away from text, handwriting, and illustrations.
- Place wax paper on both sides of the repaired page.
- Let the book dry closed under light weight.
| Loose Page Situation | Glue Amount | Best Method |
|---|---|---|
| One loose page | Very thin 1 mm line | Glue inner edge and close with wax paper |
| Two loose pages | Repair separately | Let first page dry before the second |
| Glossy insert page | Tiny amount | Test hidden edge if possible |
| Torn inner edge | Thin line plus careful pressing | Avoid pulling fibers |
| Crumbling edge | Do not glue | Store safely or seek repair help |
A common mistake is opening the book too soon to check whether the page has stuck. Wet glue can shift easily. Leave the book closed until the adhesive has set according to the product instructions. If extra glue appears near the spine, remove it gently with a dry cotton swab before closing the book.
How to Fix Antique Book Spines?
Fixing an antique book spine requires slow handling because the spine controls how the whole book opens. First, identify whether the damage is a small inside crack, a medium gap, or a full structural break. Book glue works best on small to medium spine cracks where the pages are still aligned. Open the book only enough to see the crack. Do not press the book flat, because that can widen the split. Use the fine nozzle to place a thin bead of book glue inside the gap. For longer cracks, apply glue in short sections of 3–5 cm instead of one heavy line. This gives better control and helps prevent glue from pooling.
Spine repair points:
- Keep the book supported while open.
- Apply glue inside the crack, not over the full outside spine.
- Use short glue lines for longer damage.
- Close the book slowly and check that the spine stays straight.
- Dry the book flat with light, even weight.
| Spine Damage | Can Book Glue Help? | Repair Method |
|---|---|---|
| Hairline crack | Yes | Thin bead inside the crack |
| 3–5 mm spine gap | Often | Glue in short sections |
| Pages pulling as a group | Sometimes | Repair carefully in small areas |
| Detached text block | Not ideal | Rebinding may be needed |
| Powdery old spine | No | Avoid pressure and store safely |
The spine should not be filled like a hole in a wall. Too much glue can dry into a hard strip and stop the book from opening naturally. After drying, open the book gently to a small angle first. If the spine feels stiff, avoid forcing it flat. Antique books should be opened with support, especially after repair.
How to Reattach Book Covers?
A lifted or detached cover should be reattached only after checking how it originally sat on the book. Place the cover back into position without glue and look at the top edge, bottom edge, spine edge, and page block alignment. If the cover sits naturally, apply book glue only along the original contact area. For a softcover, this is usually the spine-side strip. For a hardcover, the repair may be near the hinge or endpaper edge. Use wax paper to protect the first or last page before pressing the cover closed. The goal is to restore the cover’s hold without flooding the hinge or making the book open stiffly.
Cover repair steps:
- Test the cover position before gluing.
- Apply glue only where the cover originally attached.
- Protect endpapers with wax paper.
- Press with light, even weight.
- Avoid rubber bands on fragile antique covers.
| Cover Problem | Glue Placement | Caution |
|---|---|---|
| Lifted softcover edge | Thin line along spine strip | Do not coat the whole cover |
| Loose front hinge | Small controlled line inside hinge | Protect the first page |
| Back cover lifting | Glue original contact area | Check alignment before pressing |
| Dust jacket flap | Very light edge repair | Avoid soaking thin paper |
| Warped cover | Avoid forcing flat | Glue may dry crooked |
Do not use strong pressure to make a warped cover behave. If a cover curls badly, cracks, or no longer matches the page block, glue may not solve the problem. A cover that dries crooked will make the whole book look twisted. Take extra time during alignment, because once the cover dries in place, clean correction is difficult.
How Long Should Book Glue Dry?
Book glue drying time depends on the glue amount, paper thickness, repair depth, room humidity, and how much air reaches the repair area. A single loose page usually dries faster than a spine repair because the glue line is thinner and closer to the surface. A spine or cover repair needs more patience because the adhesive is partly hidden inside the book. Always follow the product label first. As a safe home habit, let antique book repairs rest longer than modern paper repairs. Light page repairs should not be handled too soon, and spine or cover repairs are often best left overnight before regular use.
Drying tips:
- Keep the book closed and flat while drying.
- Use light weight, not heavy clamps.
- Leave wax paper in place until the glue has set.
- Do not use heat, sunlight, or a hair dryer.
- Open the repaired area gently after drying.
| Repair Type | Drying Care | Handling Advice |
|---|---|---|
| Single loose page | Closed with wax paper | Check only after glue has set |
| Several loose pages | Dry one repair before the next | Avoid stacking wet repairs |
| Small spine crack | Flat under light weight | Do not open wide too early |
| Lifted cover | Even pressure across cover | Check alignment before drying |
| Hardcover hinge | Slow drying is safer | Avoid pulling cover open |
Heat may seem helpful, but it can warp paper, curl covers, and dry glue unevenly. A normal dry room is better. After drying, remove wax paper slowly and check for any accidental sticking. If a page resists, do not pull hard. Work carefully at the edge. A good repair should feel stable, smooth, and flexible enough for gentle reading.

What Book Glue Mistakes Hurt?
The book glue mistakes that hurt antique books most are using too much glue, choosing a hard household adhesive, adding tape, repairing rare books too quickly, and opening the book before the glue has dried. Old paper reacts badly to moisture, pressure, and stiff repairs. A small glue mistake can leave stains, waves, stuck pages, or a spine that no longer opens smoothly.
Antique book repair should be slow and controlled. A loose page does not need a thick glue layer. A cracked spine should not be filled like a wall gap. A lifted cover should not be forced flat with heavy pressure. The safest repair uses a thin glue line, careful alignment, wax paper protection, and light weight during drying.
Most bad repairs happen because people try to make the book look fixed too quickly. Tape may look clean at first, but it can yellow later. Super glue may feel strong, but it can dry too hard. Too much book glue can soak into the paper and leave a dark edge. A better repair should keep the book flexible, readable, and closer to its original shape.
Do Antique Books Need Less Glue?
Antique books usually need much less glue than people expect because old paper absorbs moisture faster than new paper. A thick layer may look stronger, but it can cause the page edge to swell, wrinkle, or darken. The best repair is often a thin line placed exactly where the page, spine, or cover needs support. For a loose page, the glue should sit near the inner edge only. For a spine crack, the glue should go inside the gap in a narrow bead. For a lifted cover, the glue should follow the original contact area. If glue squeezes out visibly after pressing, too much was applied.
Key control points:
- Use a fine line instead of a wide layer.
- Keep glue away from printed text and handwriting.
- Repair one small area at a time.
- Remove overflow before it dries.
- Use wax paper before closing the book.
| Repair Area | Better Glue Amount | Warning Sign |
|---|---|---|
| Single loose page | Thin line on inner edge | Glue spreads onto the page face |
| Cracked spine | Narrow bead inside the gap | Glue pools at the bottom |
| Lifted cover | Light line on contact strip | Endpaper turns damp or wavy |
| Photo page | Tiny edge dots or line | Surface becomes glossy or curled |
| Journal page | Small controlled line | Page dries stiff near the spine |
Can Tape Harm Antique Books?
Tape can harm antique books because its adhesive often ages badly. Clear tape may look neat on the first day, but over time it can turn yellow, brown, brittle, sticky, or cloudy. On old paper, the adhesive can sink into the fibers and leave a stain that is much harder to hide than the original tear. Tape also makes the repaired area stiff. When the page turns, the paper bends around the tape edge instead of bending naturally. That stress can create a new tear beside the tape. For loose pages, cracked spines, and torn book edges, tape is usually a fast fix with poor long-term results.
Common tape problems:
- Yellow or brown stains around the tape line.
- Sticky residue that attracts dust.
- Stiff page movement near the repair.
- Torn fibers when old tape is removed.
- Glossy strips that make the repair obvious.
| Tape Use | What Often Happens Later | Better Choice |
|---|---|---|
| Taping a loose page | Page stiffens and may tear beside tape | Thin book glue at inner edge |
| Taping a torn page | Adhesive stain spreads into paper | Paper repair method or careful glue |
| Taping a spine crack | Spine still splits under the tape | Flexible glue inside the crack |
| Taping a cover hinge | Cover pulls unevenly | Controlled hinge glue repair |
| Removing old tape fast | Paper surface lifts or tears | Slow handling or expert help |
Should Rare Antique Books Wait?
Rare antique books should wait before any glue is applied. A book may look like a simple repair, but its value can come from details that are easy to damage: a signature, first edition page, old map, handwritten family record, original binding, decorative endpaper, or special illustration. Even clear book glue can reduce value if it is placed badly or if the repair changes the way the book opens. A common vintage cookbook, old schoolbook, or reading copy may be suitable for careful home repair. A rare or historically important book should be stored safely first and inspected before any adhesive is used.
Pause before repair if the book has:
- Author signature or personal inscription.
- First edition or limited edition markings.
- Old maps, plates, photos, or foldout pages.
- Handwritten family records.
- Decorative leather, cloth, or unusual binding.
- High resale value or collector interest.
| Book Type | Use Book Glue at Home? | Safer Decision |
|---|---|---|
| Common old cookbook | Yes | Repair loose pages carefully |
| Worn vintage paperback | Yes | Use thin flexible glue |
| Family diary | Maybe | Protect handwriting first |
| Signed first edition | No | Get expert advice |
| Old map book | No | Avoid DIY adhesive |
| Moldy inherited book | No | Isolate and check safely |
| Brittle religious text | Usually no | Store flat and reduce handling |
How to Store Antique Books?
Antique books need proper storage after repair because poor storage can undo a clean glue job. A repaired spine can weaken again if the book is squeezed tightly on a shelf. A loose cover can warp if the book is stored in a hot room. Pages can wave or smell musty if the book sits in a damp basement. After using book glue, let the repaired area fully dry before regular handling. Store the book in a dry, shaded, stable place. If the book is large, heavy, or weak, flat storage is often safer than standing it upright. Good storage protects both the repair and the original book materials.
Storage habits that help:
- Keep books away from direct sunlight.
- Avoid damp basements, bathrooms, garages, and hot attics.
- Do not pack repaired books tightly between heavy books.
- Store weak or large books flat.
- Handle with clean, dry hands.
- Do not pull old books from the shelf by the top of the spine.
| Storage Factor | Better Choice | Avoid |
|---|---|---|
| Light | Shaded shelf or box | Direct sunlight |
| Moisture | Dry indoor room | Damp basement or bathroom |
| Heat | Stable room temperature | Attic, heater, hot car |
| Shelf space | Slight room on both sides | Tight squeezing |
| Position | Upright if strong, flat if weak | Leaning at an angle |
| Handling | Hold both sides of the book | Pulling from spine top |
| After repair | Let glue fully dry first | Shelving while still soft |
Conclusion
Restoring antique books with book glue is about careful repair, not heavy fixing. Loose pages, cracked spines, lifted covers, journals, cookbooks, children’s books, family Bibles, and vintage paperbacks can often be repaired when the paper is still flexible and the damaged part can be aligned by hand. The best results come from simple habits: check the paper first, clean loose dust gently, use a thin line of clear flexible book glue, protect nearby pages with wax paper, press lightly, and allow enough drying time. Avoid tape, super glue, hot glue, heavy clamps, and rushed repairs, especially on brittle or valuable books.
GleamGlee Book Glue gives book lovers, families, schools, libraries, craft users, and repair hobbyists a cleaner way to handle everyday book restoration. Its transparent finish and fine metal nozzle help control small repairs without leaving thick glue marks or stiff paper edges. It can also be used for paper crafts, handmade journals, scrapbooks, photo albums, cards, invitations, and memory books. To order GleamGlee Book Glue or discuss custom book glue products, packaging, samples, or wholesale supply, contact the GleamGlee team with your product needs and target market.


