 Skip to content
Ceramic Glue for Ember Mug Chip Repair: A Safe Guide
Your trusted adhesives glue & cleaner manufacturer
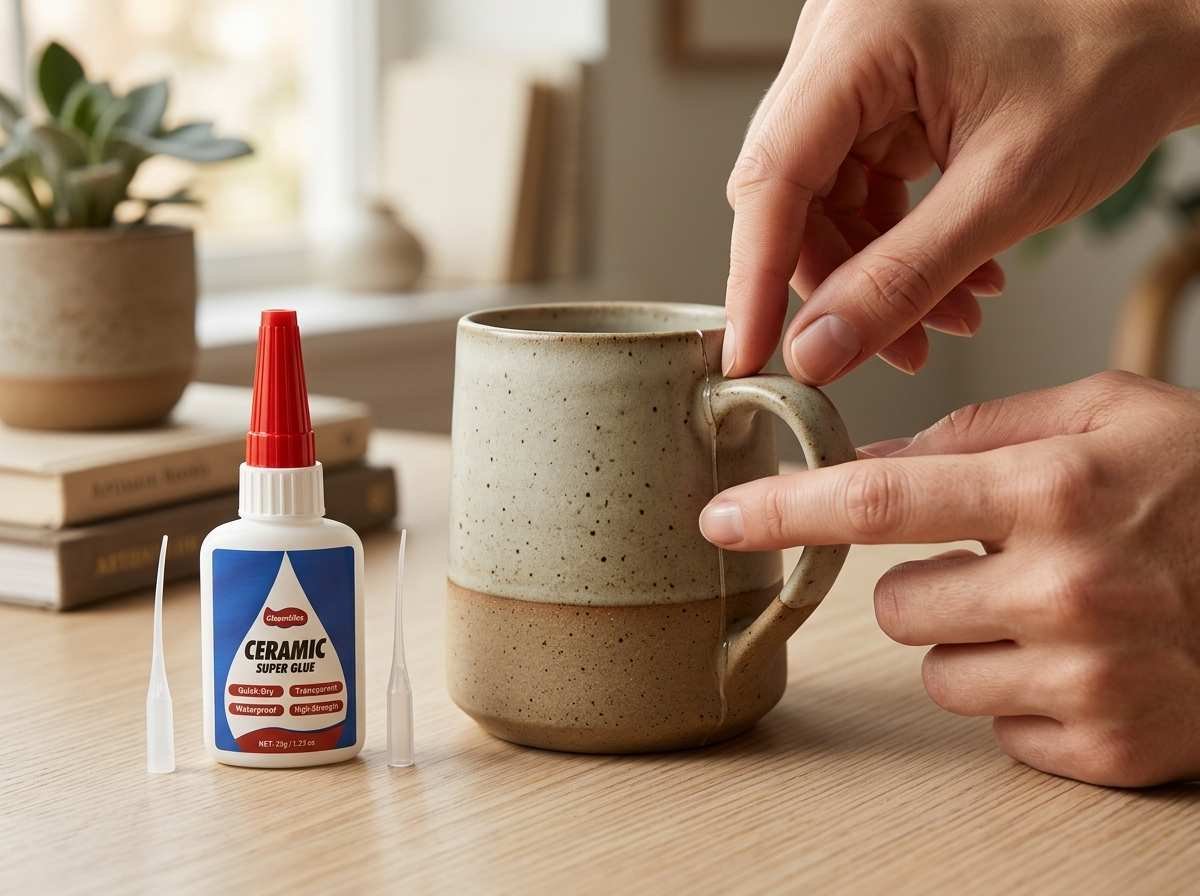
An Ember mug is more than a ceramic cup with a nice shape. It is a heated smart mug with an internal battery, charging contacts on the base, temperature-control parts, and a ceramic-coated drinking surface. That makes chip repair more sensitive than fixing an ordinary coffee mug. A tiny outer chip may only affect appearance. A chip near the rim may touch lips. A chip inside the cup may touch coffee. A chip near the bottom may affect charging safety if glue, water, or residue reaches the metal contact area. The repair decision should start with location, not glue strength.
Ceramic glue for Ember mug chip repair is best used on small, dry, exterior chips that do not touch coffee, lips, heating parts, charging rings, or the inner cup surface. Clean the chip gently, dry the mug fully, apply a tiny amount of clear ceramic glue only on the damaged outer ceramic area, let it cure, then hand wash carefully and keep the base dry before charging.
A smart mug has two jobs: holding a drink and powering safely. Glue should not interfere with either. The safest repair is small, clean, and controlled. If the chip is inside the cup, on the drinking rim, close to the gold charging rings, or connected to a deeper crack, the mug may not be a good candidate for normal drinking use after repair. A careful outer chip repair can make the mug look better and feel smoother in the hand, but a risky chip should not be hidden under glue and used as if nothing happened.
What Is Ceramic Glue for Ember Mug Chip Repair?
Ceramic glue for Ember mug chip repair is a clear repair adhesive used to stabilize small exterior chips, secure loose ceramic fragments, and smooth minor rough edges on the outside surface of an Ember mug. It works best when the chip is dry, shallow, and away from the rim, cup interior, gold charging rings, and bottom contact area.
An Ember mug is a heated smart mug, so chip location matters more than glue strength. A small chip on the outside wall may be repairable, while a chip inside the cup, near the drinking rim, or close to the charging base can create safety, hygiene, or charging concerns. Before applying ceramic glue, check whether the mug still heats, charges, and holds liquid normally.
Ceramic glue for small chips
Ceramic glue for Ember mug chip repair is most suitable for small exterior chips that do not affect the mug’s heating, charging, or drinking surface. These chips often happen when the mug lightly hits a sink, countertop, spoon, or another cup. The damage may look small, but the edge can feel rough in the hand, catch on a cloth, or continue flaking if left untreated. In that situation, a tiny amount of clear ceramic glue can help secure the edge and make the chip look cleaner. The repair should stay very small. A chip only a few millimeters wide usually needs less than one drop of glue, applied with a fine-tip nozzle.
| Chip Type | Repair Outlook | Glue Amount | Main Concern |
|---|---|---|---|
| 1–2 mm outer nick | Good | Tiny dot | Appearance |
| 3–5 mm side chip | Good to moderate | Thin layer | Rough edge |
| Loose small fragment | Good if it fits | Thin contact coat | Alignment |
| Deep chip with crack | Risky | Glue may not be enough | Hidden damage |
| Inner coating chip | Poor for drink use | Not advised | Coffee contact |
| Base chip near rings | Poor | Not advised | Charging risk |
- Repair only small outside chips that stay away from coffee and charging parts.
- Do not use ceramic glue to rebuild a large missing area.
- Do not apply glue inside the cup bowl.
- Do not use a thick glue patch to hide a deep crack.
- Stop using the mug for hot drinks if the chip spreads into the inner surface.
A good small-chip repair should look almost invisible from a normal distance. If the repaired spot becomes a raised shiny lump, too much glue was used.
Ceramic glue for outer chips
Ceramic glue for Ember mug chip repair performs best on outer chips because the outside wall has the lowest contact with coffee, lips, and internal heating exposure. A chip on the middle outer wall is usually easier to handle than a chip near the rim or base. The middle area gives more room to apply a tiny amount of glue without risking the drinking edge or charging rings. For a lower outside chip, the mug should stay upright during repair so glue does not run downward. If adhesive reaches the gold charging rings, bottom contact surface, or charging coaster, it may interfere with normal use.
| Outer Chip Location | Repair Difficulty | Main Risk | Better Repair Habit |
|---|---|---|---|
| Middle outside wall | Easy | Visible glue mark | Use clear glue lightly |
| Upper outside wall | Medium | Too close to rim | Keep away from lip area |
| Lower outside wall | Medium to high | Glue running to base | Keep mug upright |
| Handle-side area | Medium | Hand contact | Smooth tiny excess |
| Near bottom edge | High | Charging parts nearby | Avoid if too close |
| Bottom surface | Not suitable | Charging contact | Do not glue |
Outer chip repair should focus on edge control, not surface coating. Use a fine nozzle, place the glue only on the damaged ceramic edge, and lift away any tiny excess before it cures. A clear adhesive such as GleamGlee ceramic glue is helpful because Ember mugs often have a smooth modern finish where white or cloudy glue marks stand out.
- Keep glue on the outside wall only.
- Avoid the drinking rim, inner cup, and bottom contact area.
- Place the mug on a dry towel so it does not slide.
- Work under bright light to see the edge clearly.
- Check the base before charging after the repair cures.
If the chip is close enough to the bottom that glue could run into the base area, it is safer not to repair it with glue.
Ceramic glue for chip limits
Ceramic glue for Ember mug chip repair has clear limits because an Ember mug is not a simple ceramic cup. Glue can help with a small outer chip, but it cannot fix electronics, battery problems, charging failures, deep cracks, damaged heating parts, or inner coating loss. It should also not be used as a food-contact coating unless the adhesive is specifically approved for direct food or beverage contact after full cure. A glue that is clear, waterproof, or heat-resistant is not automatically safe for coffee contact.
The most important limit is location. Inner cup chips, rim chips, and base-area chips deserve extra caution. Interior chips may touch hot coffee, milk, sugar, spoons, and cleaning tools. Rim chips may touch lips. Base chips may affect charging or drying. These are not cosmetic problems only.
| Damage Area | Use Ceramic Glue? | Main Risk | Safer Choice |
|---|---|---|---|
| Small exterior chip | Usually yes | Appearance | Careful repair |
| Exterior chip far above base | Sometimes | Glue control | Tiny amount only |
| Rim chip | Not for normal drinking | Lip contact | Avoid drinking from that area |
| Inner cup chip | No for coffee use | Beverage contact | Stop drink use |
| Crack through wall | No | Liquid and heat path | Retire or replace |
| Gold charging rings | No | Charging failure | Keep clean and dry |
| Bottom seal damage | No | Electronics risk | Do not glue |
- Do not glue over charging rings.
- Do not use glue to fix charging failure.
- Do not seal a crack that reaches the inside cup.
- Do not use repaired inner chips with hot coffee.
- Do not continue normal use if the mug leaks, smells strange when heated, or charges irregularly.
Ceramic glue is useful when the problem is a small surface chip. Once the damage affects drinking, heating, or charging, the repair should be treated as unsafe for normal Ember mug use.
Which Ceramic Glue for Ember Mug Chip Repair Works?
The best ceramic glue for Ember mug chip repair should dry clear, apply through a fine-tip nozzle, bond well to ceramic, and resist light moisture and warmth after curing. For a smart mug, control matters as much as strength. The glue should stay only on the small exterior chip, not on the rim, inside cup surface, gold charging rings, bottom contact area, or any seam related to heating and charging.
A good glue choice should match the chip location. A small side chip needs clean appearance. A lower outer chip needs careful placement so glue does not run toward the base. A warm exterior surface needs heat resistance, but heat resistance does not make the glue suitable for direct coffee contact. If the chip touches the drink area, rim, or charging base, adhesive repair is not the safest answer.
Clear ceramic glue
Clear ceramic glue for Ember mug chip repair works best for visible outer chips because Ember mugs usually have a smooth, modern finish where repair marks show easily. A white, cloudy, yellow, or thick glue line can make a tiny chip look larger than it really is. A clear adhesive helps the repaired spot blend better when the glue layer is thin and the chip is away from the rim and inner cup surface. The goal is not to cover the whole damaged area like paint. The goal is to secure the chipped edge with the smallest amount of glue that can do the job.
Clear glue still needs careful handling. If too much adhesive is used, it may dry as a raised glossy spot. That patch can catch light, feel rough in the hand, or collect dirt during washing. A good clear-glue repair should look quiet from normal viewing distance. If the glue becomes the most visible part of the mug, the amount was too heavy or the repair area was not suitable.
| Glue Finish | Result on Ember Mug | Better Use |
|---|---|---|
| Crystal clear | Less visible on outer chips | Best for small exterior repairs |
| White | Obvious on most mug colors | Not ideal |
| Yellowish | Looks stained or aged | Avoid for visible chips |
| Cloudy | Dulls the smooth finish | Poor cosmetic result |
| Thick glossy | Raised and easy to notice | Too much glue |
GleamGlee ceramic glue creates a crystal-clear bond for ceramic, pottery, porcelain, mugs, cups, vases, plates, and small household pieces. On an Ember mug, that clear finish is most useful for small outer chips where the repair can stay away from coffee, lips, and charging parts.
Waterproof ceramic glue
Waterproof ceramic glue for Ember mug chip repair is useful because a repaired mug still needs gentle hand washing. Even if the chip is only on the outside, the repaired area may touch warm soapy water, a soft sponge, or a towel during cleaning. A glue that weakens easily with moisture may lift at the edge, especially if the chip is shallow or the surface was not fully dry before repair.
Waterproof performance should be understood carefully. It helps the repair handle light moisture after curing, but it does not mean the mug should be soaked. An Ember mug contains heating and charging components, so long water exposure is not a good habit. A repaired chip also creates a small edge where water can sit if the mug is not dried well. The best cleaning routine is short hand washing, mild soap, soft cloth or sponge, and quick drying before charging.
| Cleaning Situation | Suitable After Repair? | Reason |
|---|---|---|
| Quick hand wash | Yes, after full cure | Lower stress on glue |
| Damp cloth wipe | Yes | Good for exterior chips |
| Long soaking | No | Water may sit in chip edges |
| Dishwasher | No | Heat, pressure, and detergent stress |
| Abrasive scrubbing | No | Can roughen coating and repair |
| Charging while damp | No | Base contacts should stay dry |
GleamGlee ceramic glue is waterproof after curing, which helps with exterior chip repairs that need light cleaning. The repair will last longer when the mug is washed gently and dried fully, especially around the bottom and charging rings.
Heat-safe ceramic glue
Heat-safe ceramic glue for Ember mug chip repair matters because the mug is designed to keep drinks warm. A small exterior chip may be exposed to warmth from the mug body during normal use, so the adhesive should not soften easily after curing. Heat resistance gives an exterior repair more practical durability than ordinary craft glue, especially when the mug is used daily on a desk, nightstand, or kitchen counter.
Heat-safe does not mean the glue should touch hot coffee. It also does not mean the mug can be microwaved. An Ember mug is an electronic heated mug, so microwave use is not appropriate. A heat-resistant ceramic glue is best used on the outside of the mug, where it may meet mild surface warmth but not direct beverage contact. If the chip is inside the cup or on the rim, heat resistance does not solve the food-contact and mouth-contact concern.
| Repair Location | Heat Risk | Glue Use |
|---|---|---|
| Middle outer wall chip | Low to medium | Suitable if dry and small |
| Lower outside chip | Medium | Use carefully, away from base |
| Handle-side chip | Medium | Keep repair thin and smooth |
| Rim chip | High | Avoid normal drinking use |
| Inner cup chip | High | Do not glue for coffee contact |
| Crack linked to chip | High | Stop hot-drink use if spreading |
GleamGlee ceramic glue is heat-resistant and waterproof, which makes it suitable for many mug, cup, plate, vase, planter, ornament, and ceramic household repairs. For Ember mug chip repair, its heat-safe performance is most helpful on small exterior chips, not on inner drinking surfaces.
Fine-tip ceramic glue
Fine-tip ceramic glue for Ember mug chip repair is often more important than a large tube size. Most Ember mug chips are small, and a wide applicator can release too much glue too quickly. Once excess adhesive spreads over the smooth finish, it can dry as a shiny patch. If the chip is low on the mug, extra glue can run toward the base, which should be avoided because the charging rings and bottom contact area must stay clean.
A fine-tip nozzle lets the glue go exactly where it is needed: on the chipped ceramic edge or under a small loose fragment. It also helps prevent waste because a tiny chip may need only a dot of adhesive. For curved mug surfaces, the nozzle should be touched lightly to the damaged edge, and the tube should be squeezed slowly. The mug should stay upright so gravity does not pull glue downward.
| Repair Need | Why Fine Tip Helps |
|---|---|
| 1–2 mm chip | Prevents over-application |
| Curved outer wall | Keeps glue from sliding |
| Loose small fragment | Places glue under the piece |
| Lower body chip | Reduces risk near base |
| Visible smooth surface | Limits messy glue marks |
| Future small repairs | Saves glue and nozzles |
GleamGlee ceramic glue includes 4 precision nozzles in a standard pack, and a 2-pack can include 8 nozzles. For Ember mug chip repair, that precision helps keep the repair small, clean, and away from sensitive areas.
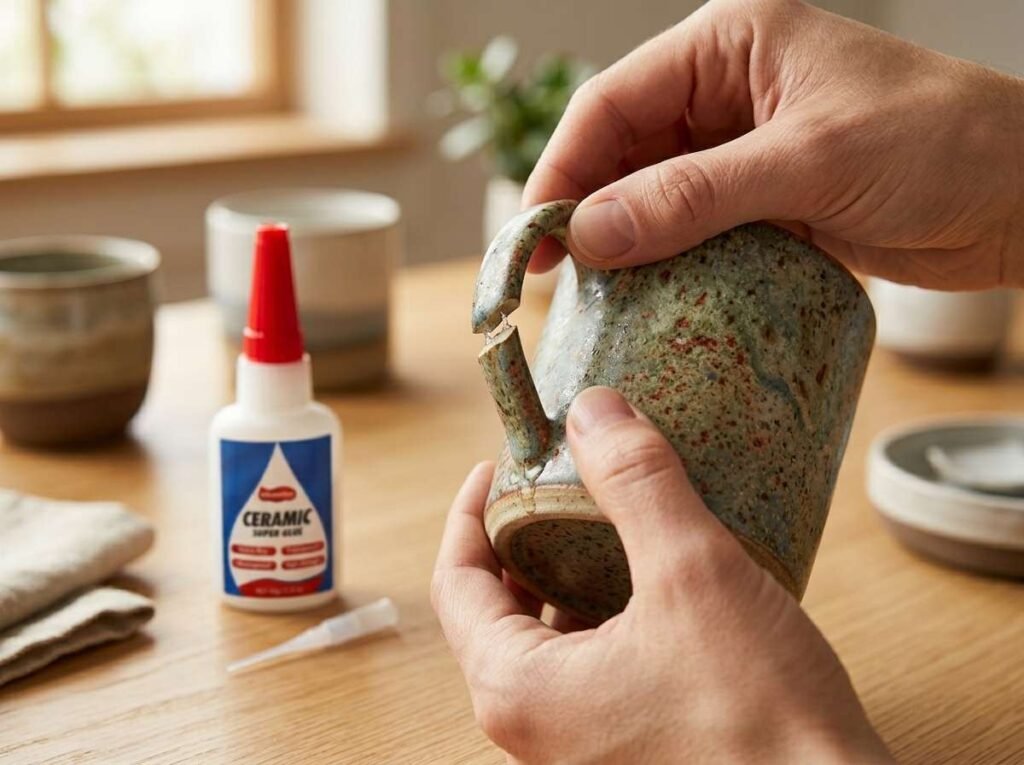
How to Use Ceramic Glue for Ember Mug Chip Repair?
Ceramic glue for Ember mug chip repair should be used only on small, dry, exterior chips that do not touch coffee, lips, the cup interior, gold charging rings, or the bottom contact area. The safest process is to clean the chip gently, dry the entire mug fully, apply a tiny amount of clear ceramic glue with a fine-tip nozzle, and allow the repair to cure before washing, heating, or charging the mug again.
An Ember mug is a heated smart mug, so the repair area must stay controlled. Do not repair while the mug is warm, wet, charging, or sitting on the charging coaster. Keep the mug upright during application so glue cannot run toward the base. If the chip is inside the cup, on the rim, near the gold rings, or connected to a deep crack, do not treat it like a normal exterior chip repair.
Step 1: Clean the chip
Before applying ceramic glue for Ember mug chip repair, the chipped area needs gentle cleaning. A chip can hold coffee film, dust, skin oil, tiny ceramic powder, or dried dish soap. If these stay on the broken edge, the glue may bond to residue instead of the ceramic surface. That can make the repair weaker even if it looks neat after curing. The goal is not to scrub the mug aggressively. The goal is to remove loose dirt and oil without making the coating damage larger.
Use a soft cloth, cotton swab, or soft sponge with a small amount of mild dish soap only if the chip has coffee or greasy residue. Avoid abrasive pads, hard brushes, metal tools, powdered cleaners, and scraping. A chipped ceramic-coated surface can become worse if it is rubbed too hard. For a very small outer chip, a damp cotton swab may be enough.
| Cleaning Tool | Use for Ember Mug Chip? | Reason |
|---|---|---|
| Soft cloth | Yes | Gentle on coating |
| Cotton swab | Yes | Good for small edges |
| Mild dish soap | Yes, if needed | Removes coffee oil |
| Soft sponge | Yes | Safe for light cleaning |
| Scouring pad | No | Can worsen the chip |
| Metal blade | No | Can scratch coating |
| Abrasive powder | No | Can dull the surface |
Use short, careful movements around the chip. Do not soak the mug to clean one damaged spot. Keep water away from the bottom as much as possible, especially the gold charging rings and contact area.
Step 2: Dry the mug
Drying is not optional when using ceramic glue for Ember mug chip repair. The adhesive needs a dry surface to bond properly, and the Ember mug base must be dry before charging. A chip can trap water in a tiny hollow, and the lower mug body can hold moisture after cleaning. If glue is applied while the chip is damp, the bond may lift later. If the mug is placed on the charger while the base is damp, charging problems may occur.
After cleaning, wipe the chipped area with a lint-free cloth. Then dry the outside wall, cup rim, and full base area. Check the gold charging rings carefully. Let the mug sit upright in a dry place before applying glue. If the chip is near the lower body, give it more drying time because water can travel downward during cleaning.
| Dryness Check | Ready for Glue | Wait Longer |
|---|---|---|
| Chipped edge | Same color as nearby surface | Dark, wet, or glossy |
| Base | Fully dry | Damp ring or water marks |
| Gold rings | Clean and dry | Moisture or residue |
| Cup interior | No droplets | Water still visible |
| Surface feel | Dry and room temperature | Cool, slick, or damp |
| Smell | No soap smell | Detergent or coffee odor |
A simple rule works well: if the chip looks darker than the surrounding surface or feels cool and slick, wait. Extra drying time is safer than a weak repair or a damp charging base.
Step 3: Apply thin glue
Apply ceramic glue for Ember mug chip repair in the smallest useful amount. Most small exterior chips need only a tiny dot or a very thin line. A thick patch can dry as a raised glossy spot, collect residue, feel rough in the hand, or run toward the base. On an Ember mug, glue control is especially important because adhesive should never reach the drinking rim, inner cup, charging rings, or bottom contact area.
Use the fine-tip nozzle and keep the mug upright. Touch the nozzle lightly to the damaged ceramic edge, then squeeze slowly. If a loose ceramic fragment is available, test-fit it first. If the piece sits neatly, apply a thin coat only on the contact surface and press it into place. If the chip is shallow and no fragment is available, do not try to build a thick replacement layer with glue. A small edge seal is cleaner and safer.
| Chip Location | Glue Amount | What to Avoid |
|---|---|---|
| 1–2 mm side nick | Tiny dot | Full drop |
| Small outer wall chip | Thin line | Wide smear |
| Loose fragment | Thin contact coat | Glue on visible face |
| Lower exterior chip | Minimal amount | Glue running to base |
| Rim chip | Avoid drink use | Glue touching lips |
| Interior chip | Not advised | Glue touching coffee |
If a tiny amount squeezes out, lift it with a toothpick or cotton swab tip before it cures. Do not wipe it across the mug with your finger. Smearing spreads glue and can leave a shiny mark much larger than the chip.
Step 4: Cure before reuse
After applying ceramic glue for Ember mug chip repair, leave the mug alone until the repair cures. A fast initial grip does not mean the mug is ready for coffee, washing, heating, or charging. The adhesive needs time to become stable, and the mug should stay dry during that period. Place it upright on a dry table, away from the sink, steam, coffee machine, and charging coaster.
Do not place the mug on its charger while the glue is fresh. Do not rub the repaired area to test it. Do not wash the mug the same hour. Around 24 hours is a safer waiting period before gentle handling or careful hand washing, especially if the chip needed more than a tiny dot of glue. Larger or lower-body repairs may need extra caution because they are closer to hand pressure and base moisture.
| Time After Gluing | Better Action | Avoid |
|---|---|---|
| First 5–10 seconds | Hold fragment steady | Sliding the piece |
| First 10 minutes | Keep mug upright | Touching the glue |
| First few hours | Keep dry and off charger | Washing or heating |
| Around 24 hours | Inspect carefully | Hot coffee immediately |
| After full cure | Hand wash gently | Dishwasher or soaking |
| Before charging | Dry base fully | Damp charging rings |
Before using the mug again, check three areas: the repaired chip, the drinking surface, and the base. The glue should be hard, dry, and limited to the exterior chip. There should be no adhesive on the rim, inside the cup, or near the gold charging rings. If the repair feels rough, sticky, loose, or too close to coffee contact, do not return the mug to normal heated drinking use.
Is Ceramic Glue for Ember Mug Chip Repair Safe?
Ceramic glue for Ember mug chip repair can be safe for small exterior chips when the repair stays away from coffee, lips, the inner cup surface, heating-sensitive areas, gold charging rings, and the bottom contact area. The safest repair area is a dry outer side chip that does not affect drinking, heating, charging, or cleaning.
Safety depends on chip location more than glue strength. A strong glue on the outside wall may be useful. The same glue inside the cup or on the rim may create food-contact, mouth-contact, or cleaning concerns. For an Ember mug, glue should never be used to hide a deep crack, seal electronics, cover charging contacts, or repair a mug that leaks, smells unusual when heated, or charges irregularly.
Safe near coffee?
Ceramic glue for Ember mug chip repair should not directly touch coffee unless the adhesive is clearly approved for direct food and beverage contact after full cure. This point matters because an Ember mug is designed to keep drinks warm for a long period, so the inside surface is exposed to heat, coffee acidity, milk residue, sugar, stirring spoons, and repeated cleaning. A clear, waterproof, or heat-resistant glue is not automatically suitable for hot beverage contact. Those features help exterior durability, but they do not replace food-contact approval.
If the chip is on the outside wall, coffee contact is usually not the main concern. If the chip is inside the cup bowl, the repair becomes much riskier. Coffee can sit against the repaired area, seep into tiny edges, and leave residue that is hard to clean. A repaired inner chip may also feel rough when stirred with a spoon or wiped with a sponge.
- Exterior side chip: lower risk if the glue stays outside and fully cures.
- Inner cup chip: not recommended for normal coffee use.
- Crack reaching the inside: stop using the mug for hot drinks.
- Glue touching coffee: avoid unless direct food-contact safety is confirmed.
- Darkening around the chip after use: stop using and inspect the damage.
| Chip Area | Coffee Contact Risk | Safer Decision |
|---|---|---|
| Middle outer wall | Low | Careful exterior repair possible |
| Lower outer body | Low to medium | Keep away from base and dry fully |
| Outer rim edge | Medium | Avoid drinking from that side |
| Inner rim | High | Do not repair for normal drinking |
| Cup interior | High | Do not use glue for coffee contact |
| Crack into cup wall | Very high | Retire from hot drinks |
For coffee safety, the repair should be simple: glue outside only, keep the inside clean, and do not let adhesive become part of the drinking surface.
Safe near the rim?
Ceramic glue for Ember mug chip repair near the rim needs extra caution because the rim touches lips every time the mug is used. A chip on the rim may feel sharp, rough, or uneven. If glue is applied there, the repaired area may touch lips, hot coffee, saliva, napkins, and cleaning tools. Even if the repair looks neat, it may not feel comfortable or safe during daily drinking.
A small outer rim nick may sometimes be repaired for appearance, but it should not become a normal lip-contact area. An inner rim chip is more serious because it can contact both the mouth and the drink. A crack starting from the rim and running downward is also risky because heat and liquid may widen the damage over time.
- Do not place glue where lips touch the mug.
- Do not repair a sharp rim chip and continue drinking from that side.
- Do not use a thick glue patch to smooth the drinking edge.
- Do not ignore a crack that begins at the rim.
- Use the mug only if the repaired area stays away from mouth contact.
| Rim Damage Type | Safety Level | Better Choice |
|---|---|---|
| Tiny outer rim nick | Medium | Cosmetic repair only; avoid lip contact |
| Sharp lip-contact chip | High risk | Do not drink from that area |
| Inner rim coating chip | High risk | Stop normal drinking use |
| Rim crack moving downward | Very high risk | Retire from hot drinks |
| Missing rim fragment | High risk | Use as display or dry storage |
Rim repairs should be conservative. A mug can still look better after a small cosmetic repair, but if lips or coffee touch the glue, the repair is no longer just cosmetic.
Safe near heat?
Ceramic glue for Ember mug chip repair near heat depends on where the glue sits. A heat-resistant ceramic glue can support a small exterior chip because the outside wall may become warm during use. That does not mean the glue should sit inside the cup where hot coffee touches it. Exterior heat exposure and direct hot beverage contact are different situations.
The Ember mug warms drinks, so a repaired chip may experience repeated temperature cycles. If the chip is shallow and on the outer wall, a fully cured heat-resistant glue can be practical. If the chip is connected to a crack, inside the cup, or near the rim, heat may make the damage worse. A crack can expand slightly during warming and cooling, especially if moisture or coffee enters the damaged edge.
- Heat-resistant glue is useful for small exterior repairs.
- Heat resistance does not mean microwave-safe.
- Heat resistance does not mean food-contact safe.
- Do not test a repaired mug with boiling water.
- Stop use if the repaired chip softens, smells, darkens, or spreads after heating.
| Repair Location | Heat Risk | Practical Advice |
|---|---|---|
| Small outer wall chip | Low to medium | Use only after full cure |
| Lower exterior chip | Medium | Keep away from base and dry well |
| Rim chip | High | Avoid hot drink and lip contact |
| Inner cup chip | High | Do not glue for hot coffee use |
| Chip with crack line | High | Watch for spreading or leaking |
| Base damage | Very high | Do not glue or heat |
The safe approach is to let heat-resistant glue do one job only: support small exterior ceramic damage. It should not be used to rebuild the heated drinking surface.
Safe near charging?
Ceramic glue for Ember mug chip repair should not be used near the gold charging rings, bottom contact area, or charging coaster contact surface. The bottom of an Ember mug is part of the charging system, not just a ceramic base. If glue covers the rings, dries unevenly near the bottom, traps moisture, or transfers to the charger, the mug may not charge properly.
A lower outer chip needs special care because glue can run downward if too much is applied or if the mug is tilted during repair. Keep the mug upright, use a very small amount, and check the base before charging. Do not place the mug on the coaster while glue is curing. Do not use glue to cover corrosion, charging damage, a loose bottom, or any area that looks connected to electronics.
- Keep glue away from the gold charging rings.
- Keep the bottom contact surface clean, flat, and dry.
- Do not charge while the repair is curing.
- Do not use glue to fix charging failure.
- Dry the base fully before placing the mug on the coaster.
| Charging Area Issue | Use Ceramic Glue? | Reason |
|---|---|---|
| Side chip far from base | Maybe | Low charging risk |
| Lower chip above base | Only with caution | Glue may run downward |
| Chip on bottom surface | No | May affect charging contact |
| Glue on gold rings | No | Can block charging |
| Corroded contacts | No | Needs cleaning or support guidance |
| Cracked base area | No | Electronics safety concern |
Charging safety should come before appearance. If a chip is close enough to the base that glue could reach the rings, the safer choice is not to repair that area with adhesive.

What Mistakes Hurt Ceramic Glue for Ember Mug Chip Repair?
The most common mistakes in ceramic glue for Ember mug chip repair are gluing a damp surface, using too much adhesive, letting glue move toward the charging base, and washing or charging the mug too soon. These mistakes can turn a small exterior chip into a larger problem, especially because an Ember mug has heating and charging parts that ordinary ceramic mugs do not have.
A good Ember mug chip repair should stay small, dry, and exterior-only. The glue should not touch coffee, lips, the inner cup coating, gold charging rings, or bottom contact area. If the repair creates a raised patch, sticky edge, blocked base contact, or rough drinking surface, the repair is no longer clean or practical.
Wet ceramic
Wet ceramic is one of the easiest ways to weaken ceramic glue for Ember mug chip repair. A chip may look dry from the outside, but water can sit inside the tiny rough edge after cleaning. If glue is applied over hidden moisture, it may not grip the ceramic surface properly. The repair may look smooth on the first day, then lift after hand washing, heating, or normal handling. This is especially important for an Ember mug because cleaning water can also travel toward the base if the mug is tilted or wiped carelessly.
After cleaning the chipped area, dry the mug fully before opening the glue. Do not rely only on a quick towel wipe. Use a lint-free cloth for the chip, then let the mug air dry upright. Check the base and gold charging rings too, because a damp base should not be placed on the charger.
- Do not apply glue right after rinsing the mug.
- Do not repair if the chip looks darker than the surrounding surface.
- Do not charge the mug while the base is damp.
- Do not leave soap residue in the chipped edge.
- Do not touch the cleaned chip with oily fingers before gluing.
| Warning Sign | What It Means | Better Action |
|---|---|---|
| Chip looks dark | Moisture may be trapped | Wait longer |
| Surface feels cool or slick | Water may remain | Air dry more |
| Soap smell remains | Detergent residue may block bonding | Rinse lightly, dry fully |
| Cotton swab comes away damp | Hidden moisture is still present | Do not glue yet |
| Gold rings look wet | Charging risk | Dry before charging |
| Glue beads up | Surface may be contaminated | Clean and dry again |
Dry ceramic gives the adhesive a cleaner surface to grip. It also protects the charging area from avoidable moisture problems.
Too much glue
Too much ceramic glue for Ember mug chip repair can make the damage look worse and create new risks. A small chip usually needs only a tiny dot or a thin edge line. When too much glue is used, it can dry as a raised glossy patch, collect dirt, feel rough in the hand, or spread toward unsafe areas. On an Ember mug, excess glue is more serious than on an ordinary cup because it can move toward the rim, inner cup, or charging base.
A thick repair does not mean a stronger repair. Ceramic chips usually bond better when the glue layer is thin and controlled. If a loose fragment fits well, the glue should sit only between the broken surfaces. If no fragment is available, the glue should smooth only the damaged edge, not rebuild a large missing section.
- Use a fine-tip nozzle instead of squeezing directly from a wide opening.
- Apply less than one drop for a tiny outer nick.
- Keep glue only on the damaged exterior edge.
- Remove tiny squeeze-out before it hardens.
- Do not spread glue with fingers across the mug surface.
| Chip Type | Better Glue Amount | Common Mistake |
|---|---|---|
| 1–2 mm nick | Tiny dot | Full drop |
| Small side chip | Thin edge coat | Wide glossy patch |
| Loose fragment | Thin contact layer | Glue on the visible face |
| Lower outer chip | Minimal amount | Glue running toward base |
| Curved chip | Slow controlled line | Squeezing too hard |
| Rim chip | Avoid normal drinking use | Trying to smooth lip area with glue |
A clean repair should look smaller after curing, not larger. If the glue mark is more noticeable than the original chip, too much adhesive was likely applied.
Covered base
Covering the base is one of the worst mistakes in ceramic glue for Ember mug chip repair. The bottom of the mug is part of the charging system, so it must stay clean, dry, and flat. Glue should never cover the gold charging rings, bottom contact area, or any surface that needs to sit properly on the charging coaster. Even a thin film of dried adhesive can interfere with contact or trap moisture.
This problem can happen by accident. A lower side chip may seem safe, but if the mug is tilted or too much glue is applied, adhesive can run downward. Placing the mug on the charging coaster while the glue is still curing can also transfer residue to the base or coaster. Once glue dries on charging surfaces, it can be difficult to remove without scratching or damaging the contact area.
- Keep the mug upright during repair.
- Do not repair chips that touch the gold rings.
- Do not place the mug on the charger while glue is curing.
- Do not use glue to cover corrosion or charging damage.
- Check the base carefully before charging after repair.
| Base Area Problem | Use Ceramic Glue? | Reason |
|---|---|---|
| Side chip far above base | Maybe | Low charging risk |
| Lower side chip near base | Only with caution | Glue may run downward |
| Chip on bottom surface | No | May affect coaster contact |
| Glue on gold rings | No | Can block charging |
| Corroded contacts | No | Glue will not fix corrosion |
| Cracked base edge | No | Possible electronics risk |
If the chip is close enough to the base that glue could reach the charging area, skip the repair or use the mug only after proper inspection. Charging function matters more than cosmetic repair.
Early washing
Early washing can weaken ceramic glue for Ember mug chip repair before the bond is ready. A fast-setting adhesive may feel dry on the surface, but the repair still needs time to cure. If the mug is washed too soon, water, soap, sponge pressure, and towel rubbing can disturb the glue line. The repaired edge may become cloudy, lift, or smear.
An Ember mug should also be kept off the charger until the mug and base are fully dry. Washing too soon creates two risks: it can weaken the fresh repair and leave moisture around the base. The first wash after repair should be gentle, short, and done only after the adhesive has cured.
- Wait until the repair has fully cured before washing.
- Use mild soap and a soft sponge only.
- Do not soak the mug to test waterproofing.
- Do not scrub the repaired chip.
- Dry the base completely before charging.
| Time After Repair | Better Action | Avoid |
|---|---|---|
| First 10 minutes | Keep mug upright and still | Touching the glue |
| First few hours | Keep dry | Washing or wiping |
| Around 24 hours | Inspect gently | Hot coffee immediately |
| First wash | Soft sponge, short rinse | Scrubbing the chip |
| Before charging | Check base is fully dry | Damp charger contact |
The first wash should be treated like part of the repair process. Gentle cleaning protects the glue line and helps the mug return to careful use without stressing the chip.
Wrong repair area
Using ceramic glue on the wrong area can make Ember mug chip repair unsafe or impractical. A small outer wall chip is different from an inner cup chip, rim chip, or base chip. The wrong repair area may expose glue to coffee, lips, heating cycles, or charging contacts. Even if the glue bonds well, the repaired mug may no longer be suitable for normal heated drinking.
The safest glue repairs stay on the outside wall, away from the rim and base. Interior chips should not be covered with ordinary ceramic glue for coffee use. Rim chips should not place adhesive where lips touch. Base-area chips should not be glued if the repair may affect charging.
- Do not glue inside the cup bowl for normal coffee use.
- Do not place glue on the drinking rim.
- Do not glue over the gold rings or bottom contact area.
- Do not use glue to seal a crack that leaks.
- Do not hide damage that affects heating or charging.
| Repair Area | Mistake Risk | Better Decision |
|---|---|---|
| Middle outer wall | Low | Repair carefully |
| Upper outer wall near rim | Medium | Keep glue away from lip area |
| Inner cup surface | High | Avoid drink use |
| Drinking rim | High | Do not use repaired area for lips |
| Lower base area | High | Avoid charging contact |
| Deep crack | Very high | Retire from heated drinks |
Choosing the right repair area is more important than choosing the strongest glue. A safe exterior repair is useful; a hidden inner or charging-area repair can create bigger problems.
Conclusion
Ceramic glue for Ember mug chip repair can help when the damage is small, dry, and located on a safe exterior area. The best repair is careful and limited: clean the chip gently, dry the mug fully, apply a tiny amount of clear glue with a fine-tip nozzle, keep the adhesive away from the rim, inner cup, base, and charging rings, then allow full curing before hand washing or reuse. A small outer chip may be manageable, but inner chips, rim chips, base damage, charging issues, and deep cracks should not be covered with glue and treated as normal.
GleamGlee ceramic glue supports clean household repair with a clear finish, strong ceramic bond, waterproof and heat-resistant performance, precision nozzles, and a resealable anti-clog cap. It is suitable for mugs, cups, vases, plates, planters, ornaments, figurines, mosaics, and many small home repairs when used in the right place. Customers can order GleamGlee ceramic glue for practical repair needs, while retailers, e-commerce sellers, distributors, and private-label brands can contact GleamGlee for product sourcing, custom packaging, label design, formula support, sample development, bulk production, and FBA-ready logistics.
Share:
Table of Contents
Here, creating your adhesives glue & removal cleaner collection is no longer a barrier—it’s a collaborative journey where GleamGlee helps brands and businesses transform their vision into durable, certified, and market-ready solutions.
Partner with GleamGlee
Join hundreds of global partners who trust GleamGlee for adhesives and cleaners that combine innovation, compliance, and speed. Our vertically integrated system—from R&D to warehouse—guarantees consistent performance and reliable delivery.
Whether you’re sourcing FBA-ready stock or developing your own formula, our team provides unmatched technical support and responsive service.





















