 Skip to content
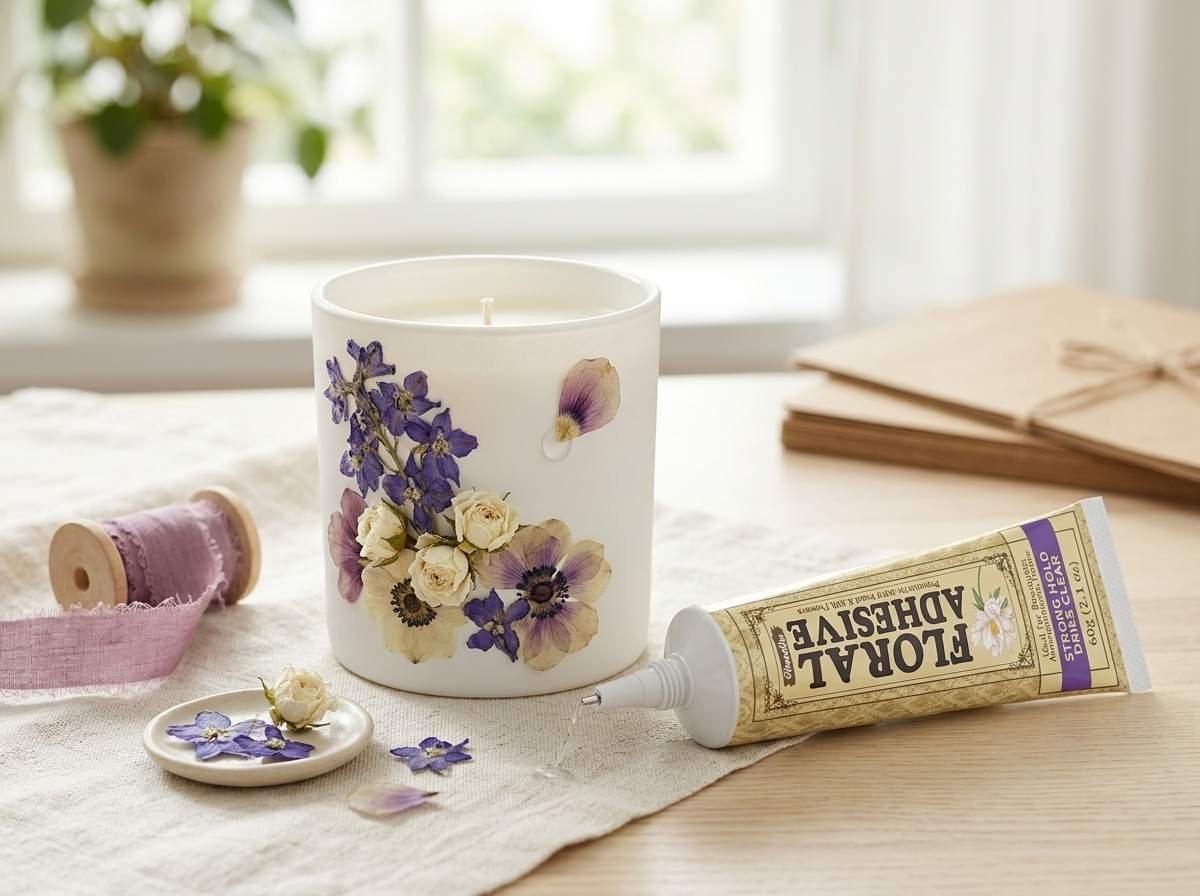
What Damages Dried Flower Arrangements?
Dried flower arrangements are usually damaged by a combination of brittleness, dust, sunlight, humidity changes, and repeated handling. Most problems do not start with one big accident. They build slowly in daily use. A bouquet may look fine from a distance, but inside the arrangement, stems may already be drying out further, petals may be loosening, and the base may be starting to shift. By the time a flower head drops or a stem snaps, the arrangement has often been weakening for weeks or even months.
In real home use, the biggest causes are usually simple: the arrangement sits too close to a sunny window, gets touched too often during cleaning, stays in a humid room, or is moved from place to place without enough support. For keepsake bouquets, wreaths, centerpieces, and boxed preserved flowers, these small stresses matter a lot because dried materials do not recover the way fresh flowers can. Once the fibers lose flexibility, even a light bump can create visible damage.
A practical way to think about it is this: dried flower arrangements last longer when they are treated more like fragile décor than like everyday tabletop items. If they are displayed in a stable, dry, low-traffic spot, many arrangements can stay attractive for a year or more. If they are exposed to direct sun, steam, frequent dusting, or constant handling, visible aging often shows up much sooner.
Why Do Dried Flower Arrangements Break?
Dried flower arrangements break because the stems and blooms lose moisture and become stiff, thin, and fragile. Once that natural flexibility is gone, the arrangement cannot absorb pressure well. A small twist while moving the vase, a finger pressing down during cleaning, or the weight of a large bloom pulling forward can all cause the stem to crack or snap. In many cases, the break happens at the narrowest point, such as the neck below the flower head, a branch joint, or the lower section near the foam or base.
The most common break points are usually:
- Thin stems carrying heavy heads Large roses, peonies, or dense preserved blooms often put too much weight on a narrow dried stem.
- Branch connections Areas where smaller stems split off are often weaker than the main stem body.
- The base insertion point If the stem is pressed into foam, wire, or a tight holder, that pressure point can weaken over time.
- Outer edges of the arrangement Flowers on the outside are more likely to be bumped when cleaning, storing, or moving the piece.
A useful rule is that if one area already looks lower, tilted, or thinner than the rest, that section is often close to breaking. In practical use, stem damage is more likely in arrangements that are moved more than 2-3 times a month, especially if they are large, top-heavy, or displayed without a protective cover. This is why many people feel the arrangement “suddenly” broke, when in reality the stress had been building for a long time.
Which Dried Flower Arrangements Shed Petals?
Dried flower arrangements shed petals when the flower surface becomes too dry, too thin, or too exposed to friction. This is especially common in arrangements with papery flowers, preserved roses, delicate filler blooms, grasses, and lightweight decorative petals. Petal drop often starts slowly. At first, only one or two pieces fall. Then the bottom of the vase or shelf begins collecting small fragments, and the flower gradually looks less full from the front.
The arrangements most likely to shed petals are usually:
- Open bouquets on shelves or tables These are exposed to dust, air movement, sleeves brushing past, and regular room traffic.
- Wedding keepsake bouquets These often contain delicate blooms with emotional value, but they are also handled more often for storage, display, or photography.
- Wreaths with grasses and filler flowers Their outer edges rub against walls, doors, storage boxes, or wrapping materials.
- Preserved flower boxes These are better protected, but petals can still loosen if the box is moved often or stored in warm conditions.
In real use, a dried bloom usually starts looking visibly uneven after it loses around 10% to 20% of the petals on its front-facing side. That is why light petal loss may not need repair, but heavier loss changes the overall look quickly. One more point customers often care about: cleaning causes a lot of petal drop. A rough brush, repeated wiping, or strong airflow from very close range can remove more petals than normal aging itself. So if an arrangement is already shedding, gentler care matters just as much as glue repair.
How Do Dried Flower Arrangements Fade?
Dried flower arrangements fade mainly because of light exposure, dust buildup, and long-term air exposure. Sunlight is usually the biggest reason. Even when the arrangement does not break, the color can slowly lose depth. Pink flowers may turn pale beige, purple tones may go gray, and deep red blooms may become brownish. Once this happens, the arrangement often starts looking older than it really is, even if the shape is still mostly intact.
The most common fading causes are:
- Direct sunlight This is the fastest way to bleach color and weaken plant material at the same time.
- Bright window display Even indoor light can fade one side of the arrangement if it always faces the same direction.
- Dust sitting in textured petals This makes color look flat, dull, and gray.
- Heat and dry airflow Rooms near heaters, vents, or hot windows often age arrangements faster.
A useful way to judge fading is to compare the front and back of the arrangement. If the window-facing side looks much lighter, sunlight is usually the main problem. If the whole arrangement looks dull and gray, dust may be part of the issue. In many homes, noticeable color loss can appear within 3 to 6 months in direct sun, while arrangements kept in shaded indoor areas often keep a better look for 12 months or longer. Fading usually cannot be fully reversed, so the best approach is early prevention: place the arrangement in bright but indirect light, clean it gently, and keep it away from heat and damp air.
How Do You Check Dried Flower Arrangements?
You should check dried flower arrangements from the base upward, not from the top down. Most people notice the visible problem first, such as a bent flower head, a missing petal, or one section looking thinner than before. But in real use, the true problem often starts lower down. A weak foam insert, a loose stem at the base, or a container that has shifted slightly can slowly affect the whole arrangement. If you only fix the top, the same section may lean or loosen again within days or weeks.
A careful check does not need to take long. For most home arrangements, 5 to 10 minutes is enough to judge whether the piece needs light cleaning, spot repair, or a more structural fix. The safest approach is to place the arrangement on a stable table in good light and inspect it with as little touching as possible. Many dried flowers break during “checking” because people keep lifting stems, turning the bouquet by hand, or pressing flowers back into place too early. A slow visual check is usually more useful than heavy handling.
A practical inspection should answer four simple questions: Is the base still stable? Are the main stems holding shape? Are the blooms still balanced from the front? Is the damage light, moderate, or severe? If the answer shows only one or two weak points, repair is often straightforward. If the arrangement looks uneven from several angles, drops pieces when lightly moved, or leans from one side, it usually needs more than a quick touch-up.
What Should You Inspect in Dried Flower Arrangements?
You should inspect the base, support points, main stems, bloom heads, and loose surface debris in that order. This order matters because dried flower problems often spread upward. A bouquet that looks messy at the top may actually have started loosening at the foam, vase neck, wire support, or insertion point below. If the base is unstable, even well-shaped flowers above it can start leaning, twisting, or dropping out of position over time.
A useful inspection checklist includes:
- Base or container stability Check whether the vase, box, foam, or support insert is still firm. If the container shifts or the foam has widened, stems may no longer hold properly.
- Main structural stems Look for stems that lean lower than the rest, show pale split lines, or sit at a sharper angle than before.
- Bloom direction Compare the front-facing flowers. If one bloom points down or sideways while similar flowers remain upright, the stem or insertion point may already be weak.
- Petal and filler loss Look at the surface below the arrangement. If fragments are collecting regularly, the arrangement is actively shedding.
- Dust level Light surface dust is common. Dust deep inside petals, grasses, or textured filler usually means the piece has been sitting too long without safe cleaning.
In practical use, if you notice problems in three or more of these areas at the same time, the arrangement usually needs structured repair rather than simple dusting. This is especially true for wedding bouquets, wreaths, and table centerpieces that have many clustered stems in one support point.
Which Dried Flower Arrangements Can Be Saved?
Most dried flower arrangements can be saved if the overall shape is still recognizable, at least 60% to 70% of the main structure remains stable, and the damage is limited to a few sections instead of the whole piece. That is a useful rule for home users because it stops them from throwing away arrangements that still have good repair potential. A bouquet does not need to be perfect to be worth saving. It only needs enough stable material left to rebuild its shape cleanly.
The arrangements easiest to save usually have:
- a firm base or container
- one to three damaged stems instead of widespread breakage
- blooms that still hold most of their shape
- limited fading on the main front-facing side
- light or moderate shedding rather than constant crumbling
Harder cases usually include:
- heavy collapse at the base
- broad petal loss across many flowers
- severe fading on the most visible side
- flowers that crumble when lightly touched
- signs of moisture damage or mold
A simple repair guide is below:
| Condition | Saveable? | Best next step |
|---|---|---|
| One broken stem, light dust | Yes | Spot repair |
| A few loose blooms, stable base | Yes | Section repair |
| Leaning shape, weak support point | Usually yes | Structural reset |
| Strong fading but stable shape | Sometimes | Reposition and selective repair |
| Crumbling across most of the arrangement | Limited | Partial salvage or remake |
| Moisture damage or mold | Often no | Remove damaged parts or replace |
For sentimental arrangements, such as wedding bouquets or memorial flowers, even a partially saveable piece is often worth repairing. In real customer use, people usually accept small imperfections if the arrangement still looks balanced, meaningful, and display-ready.
How Badly Are Dried Flower Arrangements Damaged?
You can judge dried flower arrangement damage by sorting it into light, moderate, or severe levels. This makes repair decisions much easier. Many people either underestimate damage and do too little, or overreact and think the whole arrangement is ruined. A simple damage check helps you choose the right approach without wasting time or making the arrangement worse.
A practical way to classify damage is:
- Light damage A little dust, one weak stem, minor leaning, or a few fallen petals. This level is often repairable in 15 to 30 minutes.
- Moderate damage Several loose stems, visible shape loss, repeated petal drop, or one section no longer holding properly. This usually needs 30 to 90 minutes and should be repaired in steps.
- Severe damage The arrangement collapses when moved, crumbles during inspection, or has broad fading and structural failure. This may take 1 to 3 hours or more to salvage, and sometimes partial rebuilding is the better option.
Here is a quick reference:
| Damage level | What it looks like | Practical action |
|---|---|---|
| Light | Dust, small break, slight imbalance | Clean and spot repair |
| Moderate | Leaning sections, repeated shedding, weak base points | Repair structure first |
| Severe | Collapse, heavy crumbling, broad aging | Salvage best parts and rebuild |
A useful tip is to check how the arrangement responds to very light movement. If nothing falls and the shape stays stable, damage is usually light. If petals or filler pieces drop immediately, or one side shifts noticeably, the arrangement is already in the moderate range. If the whole piece feels unstable before you even touch it, repair should be planned very carefully, because one rushed adjustment can turn a repairable arrangement into a salvage job.

How Do You Check Dried Flower Arrangements?
You should check dried flower arrangements in a fixed order: base first, main stems second, flower heads third, and loose surface details last. That order helps you find the real problem instead of only the most visible one. In many arrangements, the top looks damaged because the lower support has already weakened. A rose head may droop because the foam grip has loosened. A side section may look thinner because one main stem has shifted a few millimeters and started pulling nearby filler out of place. If you only look at the front-facing flowers, you can easily miss the part that actually needs repair.
A proper check is usually quick. For a small bouquet or flower box, 5-8 minutes is often enough. For a fuller centerpiece, wreath, or preserved wedding bouquet, 10-15 minutes is more realistic. The safest method is to place the arrangement on a stable table with bright light from the front and side, then inspect it with very little touching. In real home use, many dried flowers are damaged more during “checking” than during normal display because people keep lifting stems, rotating the arrangement by hand, pressing flowers back into place, or shaking off dust before they understand where the weakness is.
A useful inspection should tell you five things clearly: whether the support is stable, whether the main shape is still balanced, whether any stems are close to breaking, whether petal loss is local or widespread, and whether the arrangement still has enough good material to repair cleanly. If most of the shape is still intact and the weak points are limited, repair is usually worth doing. If the arrangement shifts in several places at once, sheds pieces during light handling, or looks uneven from multiple angles, it usually needs a more careful structural repair instead of a quick surface fix.
What Should You Inspect in Dried Flower Arrangements?
You should inspect the arrangement from the outside and the inside at the same time, because dried flower damage often has two layers: what you can see from the front, and what is quietly failing underneath. Start with the base or support system, then move upward to the stems, flower heads, filler materials, and decorative add-ons such as ribbon, moss, beads, wire, or wrap. This approach gives you a much better chance of spotting the true weak point before you start repairing.
The most important areas to inspect are:
- Base stability Check whether the vase, foam, gift box insert, wire frame, or backing board still holds firmly. If the base shifts even slightly, the whole arrangement can slowly open up or lean over time.
- Main support stems These are the stems that control the shape of the arrangement. One weak support stem can affect 3-5 nearby flowers, especially in tightly packed bouquets.
- Stem joints and branch points Look for pale split lines, sharp bends, dry cracking, or areas where the stem looks thinner than nearby sections.
- Flower head angle Compare similar blooms. If one rose, carnation, or preserved flower head sits much lower than the others, the neck or base point is often already weak.
- Petal and filler debris If fragments keep collecting under the arrangement, it usually means the piece is still actively shedding, not just aging quietly.
- Dust depth Surface dust is normal. Dust buried deep in layered petals, grasses, or textured filler usually means the arrangement has gone too long without gentle care.
A practical rule is this: if you see weakness in three or more structural areas at once, treat the arrangement as more than a simple touch-up job. That is especially important for wreaths, wedding keepsake bouquets, and dried centerpieces, where one unstable zone can affect the whole front view very quickly.
Which Dried Flower Arrangements Can Be Saved?
Most dried flower arrangements can be saved if the overall design still reads clearly from normal viewing distance and at least 60-70% of the main structure remains stable. That is a useful working standard because it reflects what people actually care about at home: not whether every tiny detail is perfect, but whether the arrangement still looks full, balanced, and worth displaying after repair. A bouquet can still be very saveable even if one side has weakened, a few petals are missing, or two or three blooms need repositioning.
The easiest arrangements to save usually have these features:
- The base is still firm If the foam, vase neck, or support insert still holds most stems securely, repair becomes much simpler.
- Damage is concentrated in one area A weak front corner, one broken flower head, or one leaning side is much easier to fix than widespread instability.
- Most blooms still hold their outline Even if some petals are missing, the arrangement is still repairable if the front-facing flowers keep their basic shape.
- Color is still acceptable from display distance Light fading is manageable. Heavy discoloration across the full front view often makes repair less worthwhile.
- The arrangement does not crumble during light handling If you can inspect it gently without constant fallout, it is usually still in repair range.
Arrangements become much harder to save when they have:
- widespread crumbling across many flowers
- broad collapse at the base
- repeated shedding from several zones
- severe front-facing fading
- signs of moisture damage, soft spots, or mold
This quick guide helps:
| Condition | Chance of saving | What usually works best |
|---|---|---|
| One broken stem, light dust | High | Spot repair |
| Several loose blooms, stable base | High | Section-by-section repair |
| Leaning arrangement, weak insert | Medium to high | Structural reset first |
| Strong fading, stable shape | Medium | Selective repair and repositioning |
| Broad crumbling across the whole piece | Low to medium | Partial salvage |
| Mold or moisture damage | Low | Remove damaged material or rebuild |
For sentimental pieces, such as wedding bouquets, memorial flowers, or handmade gifts, many people are happy with a result that is 85-90% visually restored, even if it is not perfect up close. That is why saveability should be judged by both structure and emotional value, not by perfection alone.
How Badly Are Dried Flower Arrangements Damaged?
You can judge dried flower arrangement damage by dividing it into light, moderate, and severe levels, then matching the repair method to the level. This is one of the most useful parts of the checking process because it stops you from treating every problem the same way. A little dust and one tilted bloom do not need the same response as a collapsing bouquet base or a wreath that drops filler every time it is moved.
A practical way to judge the level is to watch how the arrangement behaves during very light inspection. If the shape stays stable, the damage is usually light. If one section shifts, or small pieces drop while you inspect it, the damage is usually moderate. If the arrangement looks unstable before you even touch it, or if it visibly sheds from multiple zones during checking, it is usually severe and needs much more careful handling.
The three levels work like this:
- Light damage Surface dust, one weak stem, slight leaning, a few fallen petals, minor loss in one visible bloom. This is often repairable in 15-30 minutes.
- Moderate damage Several weak stems, one side opening up, repeated petal drop, loose foam grip, obvious imbalance from the front. This usually needs 30-90 minutes and should be repaired in steps.
- Severe damage Broad crumbling, major shape collapse, several unstable base points, heavy fading across the front, or whole sections dropping out of place. This often takes 1-3 hours or more and may require partial rebuilding instead of simple repair.
Here is a clearer reference:
| Damage level | What you usually see | What it means in practice |
|---|---|---|
| Light | Dust, one break, slight tilt | Clean first, then spot repair |
| Moderate | Visible shape loss, repeated shedding, weak support point | Repair structure before details |
| Severe | Collapse, heavy crumbling, instability across several zones | Salvage best parts and rebuild carefully |
A good final check is to ask one simple question: If I move this arrangement once to a safer display spot, will it probably stay together? If the answer is yes, it is usually still in the light or moderate range. If the answer is no, and the arrangement seems likely to lose more pieces during one careful move, then it has already crossed into severe damage and should be handled like a fragile salvage project, not a quick repair task.
How Do You Repair Dried Flower Arrangements?
You repair dried flower arrangements best by working in a fixed order: stabilize the base first, repair the main broken stems second, reattach loose petals or decorative pieces third, and only then adjust the final shape. This order matters because many repair failures happen when people start with the most visible damage and ignore the part underneath that is still shifting. A drooping bloom may not need more glue on the flower head at all. It may need the stem reset lower down, or the foam grip tightened so the whole section stops moving.
In real home use, the repair itself is usually not complicated. What makes it difficult is that dried flowers are fragile and the arrangement often contains more than one material at the same time: dried stems, preserved blooms, floral foam, ribbon, fabric wrap, wire, ceramic, glass, or cardboard inserts. That is why control matters more than speed. For a small bouquet or flower box with light damage, most repairs take about 20-40 minutes. For a fuller centerpiece, wreath, or keepsake wedding bouquet with moderate damage, 45-90 minutes is more realistic if you want a neat result.
A practical repair should aim for three things: the arrangement should hold its shape, the repaired areas should not stand out, and the flowers should still look natural from normal viewing distance. The most common mistake is over-repair. Too much glue, too much squeezing, or too much reshaping often creates a result that technically holds together but looks stiff, shiny, or uneven. A good repair is usually a light repair. It supports the arrangement without making the repair itself obvious.
How Do You Repair Dried Flower Arrangements with Broken Stems?
You repair broken stems by checking whether the break is clean, split, or crushed, then choosing the lightest fix that will hold the flower in its natural position. A clean break is usually the easiest to fix because the two sides still match. A split stem can often be repaired if the damaged area is short. A crushed or crumbling stem is harder, and in many cases it is better to trim the weak section and reset the stem deeper into the arrangement rather than trying to glue a badly damaged break back together.
The safest way to repair a broken stem is to support the flower head first so its weight is not pulling on the break while you work. Then apply a small, controlled amount of clear floral adhesive directly on the damaged line, not across the whole stem. In real use, most dried stem repairs fail for one of two reasons: either the user uses too much glue, or the flower is moved before the bond has had enough time to settle. For light dried stems, even an extra 2-3 seconds of squeezing pressure can flatten nearby material or shift the bloom angle.
A good stem repair usually follows these steps:
- Support the bloom head before touching the stem This reduces downward pull while you align the break.
- Apply glue only to the damaged point Extra glue usually spreads onto nearby petals or filler.
- Match the original angle carefully If the flower sits even slightly too high, too low, or too far forward, the repair may look obvious from the front.
- Hold gently, not tightly Dried stems crack easily under finger pressure.
- Let the area settle before moving the arrangement Even if the glue feels set on the surface, early movement can weaken the joint.
Here is a useful guide:
| Stem condition | Best repair method | Practical result |
|---|---|---|
| Clean break | Direct rejoin | Usually the neatest fix |
| Short split | Controlled glue along split | Good if stem shape is still firm |
| Crushed section | Trim and reset lower | Stronger than forcing the break back together |
| Very brittle stem near base | Reinsert and rebalance shape | Better than visible patch repair |
A simple rule is that if the break is within the top 20-30% of the visible stem, direct repair often looks cleaner. If it is lower down near foam, wire, or a crowded insertion point, resetting the stem is often the better long-term solution.
How Do You Repair Dried Flower Arrangements with Loose Petals?
You repair loose petals by deciding first whether the petal actually needs to go back. In many dried flowers, very small edge loss is normal and not worth fixing. But if the missing petal changes the visible shape of the flower from normal display distance, then selective repair can make a big difference. The key is to restore the bloom’s outline without making the petal look pasted on or stiff.
The best method is to place a tiny amount of adhesive at the petal’s original attachment point and return it to its natural angle with very light pressure. Do not spread glue across the whole underside. That often causes hard spots, shine, and a flatter shape. In real repair work, petal repair is less about strength and more about appearance. A petal that holds firmly but sits at the wrong angle can look worse than a bloom with one petal missing.
A few practical points make petal repair much easier:
- Repair only the petals that matter visually If the loss is only visible up close, leaving it alone often looks more natural.
- Work from the front view first Focus on the side people will actually see.
- Use the original placement line Guessing the angle often creates an unnatural look.
- Do not force brittle petals flat Dried petals need to sit lightly, not be pressed into place.
- If one petal is too damaged, rebalance instead of over-fixing Sometimes removing one small damaged edge on the opposite side creates a more even look than trying to save a badly weakened petal.
This guide helps:
| Petal condition | Best action | Why it works |
|---|---|---|
| Slight loose edge | Tiny spot repair | Keeps bloom natural |
| One missing visible front petal | Reattach if shape changes | Restores outline |
| Brittle petal cracking in hand | Avoid full reattachment | Often looks worse if forced |
| Several petals weak on one bloom | Selective rebalance or replace bloom position | Cleaner visual result |
In practice, a flower usually starts looking visibly incomplete once the front-facing side has lost around 10-15% of its visible petal coverage. That is why selective repair works better than trying to put every tiny piece back. The goal is not to rebuild the flower perfectly. The goal is to make the bloom look full and believable again.
How Do You Repair Dried Flower Arrangements in Foam?
You repair dried flower arrangements in foam by treating the foam as a structural support point, not just a place where flowers sit. If stems keep leaning, turning, or slipping deeper, the problem is often that the original hole in the foam has widened or weakened. In that case, adding glue only to the flower head or upper stem does not solve the real issue. The support point itself has to be reset so the stem can hold its position again.
The first step is to identify whether the stem is loose because of the foam, the stem, or both. If the bloom angle changes when the arrangement is lightly moved, and the stem base feels unstable, the insertion point is usually the problem. For a small flower box or centerpiece, one weak foam point can affect 3-6 surrounding stems because the flowers are packed closely and depend on each other for shape.
A cleaner foam repair usually works like this:
- Lift the unstable stem carefully Do not twist it out quickly, or the surrounding foam may widen further.
- Check the insertion hole If it looks enlarged, crumbly, or too loose, it no longer gives enough grip.
- Apply a small amount of floral adhesive where support is needed The goal is to reinforce the reset point, not soak the foam.
- Reinsert the stem at the correct angle Compare it with nearby flowers before letting it settle.
- Repair one unstable zone at a time Fixing too many nearby stems at once often disturbs the arrangement’s balance.
This table is useful:
| Foam problem | What you usually see | Best repair approach |
|---|---|---|
| Loose insertion point | Stem turns or leans | Reset and reinforce hole |
| Widened foam hole | Stem sinks too deep | Reinsert carefully with controlled glue |
| Crumbling surface foam | Several stems unstable together | Repair section by section |
| One side of arrangement opening up | Main support zone weakened | Stabilize key stems first |
In real use, the foam repair stage often decides whether the arrangement will stay stable for weeks or start leaning again after a few days. That is why this part should be done slowly. If the foam is repaired well, many top-level flower problems become much easier to correct.
How Do You Repair Dried Flower Arrangements Neatly?
You repair dried flower arrangements neatly by controlling glue volume, hand pressure, repair order, and final viewing angle. Neat repair is not only about making the damaged part hold. It is about keeping the arrangement visually soft and balanced so that nobody notices the fix first. Most people view dried flowers from about 2-6 feet away, so the repaired arrangement should look natural from that distance, not just technically secure up close.
A neat repair usually depends on small habits more than advanced skill. For example, repairing from the back or side first can keep the front cleaner. Letting one repair settle before moving to the next reduces accidental smearing. Checking the arrangement from the front after each small fix helps stop over-adjustment. In many home repairs, the biggest visual problems come from trying to do too much in one session.
The most useful neat-repair habits are:
- Use less glue than you think you need In floral repair, excess glue is more visible than a slightly smaller bond line.
- Work from structure to detail Repairing petals first while the stem is still unstable often wastes time.
- Keep fingers away from visible bloom surfaces Pressure marks can flatten delicate dried flowers.
- Pause and look from display distance A repair that looks slightly uneven up close may already look perfect from normal viewing distance.
- Stop when the arrangement looks balanced again Trying to make every flower perfect usually creates overworked results.
A quick finish check helps:
| Final check point | What to look for |
|---|---|
| Front view | Main shape looks balanced |
| Side view | No major bloom leaning forward unnaturally |
| Surface appearance | No visible glue shine or buildup |
| Base stability | Arrangement stays steady when table is lightly touched |
| Loose debris | No new petal drop after repair settles |
For most customers, “neat” means three simple things: the arrangement looks whole again, the glue is hard to see, and the repaired area does not attract attention before the flowers do. That is the standard worth aiming for.

Which Glue Helps Repair Dried Flower Arrangements?
The glue that helps repair dried flower arrangements best is usually a clear, fast-setting floral adhesive with a fine applicator. Dried flowers are light, brittle, and highly visible, so the repair has to do more than hold. It also has to stay neat. In real use, the wrong glue often causes more trouble than the original damage. It may come out too fast, leave white marks, dry too hard, soak into petals, or create a glossy patch that stands out from the rest of the arrangement. That is why dried floral repair needs a glue that is controlled, light, and clean rather than simply “very strong.”
A good glue for dried flower arrangements should solve four practical problems at the same time: it should bond small fragile parts, dry with low visibility, set fast enough to reduce shifting, and work on mixed materials such as stems, petals, foam, ribbon, fabric, glass, or ceramic accents. For most home users and small floral businesses, a floral adhesive is the safer choice because it matches how these arrangements are actually built and repaired.
What Glue Can Repair Dried Flower Arrangements Best?
The best glue for dried flower arrangements is usually a floral adhesive made for delicate decorative work, because dried flower repair is more about control and appearance than raw bond strength. A bouquet, wreath, or flower box does not need a thick industrial bond. It needs a glue that can hold a weak stem or loose petal without spreading into the visible parts of the arrangement. In practical use, this is why many ordinary household glues feel frustrating: they may stick well enough, but they often leave strings, blobs, cloudy spots, or hard shiny marks that make the arrangement look worse up close.
The most useful glue features are:
- Clear drying This matters because most repairs happen in visible areas, not hidden joints.
- Fine flow control A narrow nozzle helps place glue exactly on a break line or petal base.
- Fast initial set A flower head that keeps shifting for 20-30 seconds is much harder to align neatly.
- Light flexibility after drying A glue that dries too rigid can reopen the break or make the flower sit unnaturally.
- Low mess on mixed materials Dried arrangements often combine stems, foam, ribbon, fabric, and decorative containers in one small area.
This quick comparison is useful:
| Glue type | Best use | Main problem in dried flower repair |
|---|---|---|
| White craft glue | Paper crafts, school projects | Slow drying, visible residue |
| Hot glue | Heavy craft decoration | Too bulky, too hot for delicate petals |
| General super glue | Small hard-surface repairs | Can whiten, dry too rigid, hard to control |
| Floral adhesive | Dried flowers, foam, ribbon, mixed decorative work | Needs careful small-volume use |
| Thick all-purpose glue | Heavier non-delicate décor | Too messy for fine floral repair |
For most readers, the easiest rule is this: if the arrangement is decorative enough that glue marks would bother you, then a floral adhesive is usually the better choice.
How Does Floral Glue Repair Dried Flower Arrangements?
Floral glue repairs dried flower arrangements by giving small, targeted support exactly where the arrangement is weak, without adding much weight or bulk. That makes a big difference in dried flowers because the materials are already fragile. A heavy glue drop can flatten a petal, darken a stem, or pull a small bloom out of place while drying. Floral glue works better because it is meant for detail work. It lets you support the damaged point while keeping the repaired section visually light.
In real use, floral glue helps most in these situations:
- Broken thin stems It can join a clean break without flooding nearby petals.
- Loose petals or bloom edges A tiny amount at the original attachment point is often enough.
- Leaning stems in foam It helps stabilize the insertion point without soaking the whole area.
- Ribbon and accessory repair Useful for wedding bouquets, wreaths, flower boxes, and keepsake pieces.
- Mixed decorative repairs Helpful where dried flowers meet foam, fabric, plastic, glass, or ceramic.
A simple performance guide:
| Repair task | Why floral glue works well |
|---|---|
| Stem break | Small line of glue, clean join |
| Petal reattachment | Better appearance, less stiffness |
| Foam reset | Focused support at insertion point |
| Ribbon detail | Cleaner edge control |
| Decorative accent | Better finish on visible surfaces |
For home users, the biggest benefit is often confidence. The repair feels manageable because the glue gives more control. For florists and small sellers, it also reduces waste, because fewer arrangements are spoiled by over-application or visible residue.
Which Surfaces Help Repair Dried Flower Arrangements?
The best glue for dried flower arrangements should work across the surfaces that actually appear in floral products, because dried arrangements are rarely made of flowers alone. A simple bouquet may include stems, petals, floral tape, foam, and ribbon. A preserved flower box may include cardboard, fabric lining, plastic inserts, and decorative accessories. A wreath may include wood, wire, grasses, moss, and fabric bows. If the glue only performs well on one surface, the repair becomes harder very quickly.
The most common surfaces in dried flower repair are:
- Dried stems and bloom bases
- Floral foam
- Ribbon and fabric wrap
- Silk or artificial floral additions
- Plastic inserts
- Ceramic or glass containers
- Wood boards or decorative backing
- Wire, moss, or lightweight accessories
This matters because different surfaces create different repair problems. Foam needs grip without oversaturation. Ribbon needs a clean edge without visible seepage. Glass and ceramic need a clear finish because even a small smear is easy to see. Wood and cardboard may absorb glue differently. That is why a floral adhesive with broader craft-surface compatibility is much more practical than a glue chosen only for stems.
A useful surface guide:
| Surface | What the glue needs to do |
|---|---|
| Dried stem | Hold a fine break without bulk |
| Petal base | Dry clear and stay low-visibility |
| Foam | Reinforce without flooding |
| Ribbon | Bond neatly at edges |
| Fabric wrap | Hold without staining visible areas |
| Glass or ceramic | Stay clean and nearly invisible |
| Plastic insert | Keep decorative parts from shifting |
This is one reason GleamGlee floral adhesive fits dried flower repair well. It is designed not only for floral stems and blooms, but also for foam, ribbon, silk, plastic, ceramic, glass, fabric, and similar craft surfaces. For home users, that makes repair simpler because one glue can handle more than one part of the arrangement. For floral studios, gift-packaging businesses, and private-label customers, it also makes the product easier to position across several categories instead of just one narrow use.
How Do You Keep Repaired Dried Flower Arrangements Longer?
You keep repaired dried flower arrangements longer by reducing stress after the repair. In real home use, most repaired arrangements do not fail because the glue was bad. They fail because they go back to the same damaging conditions: direct sun, rough cleaning, damp air, frequent moving, or display in busy areas where sleeves, bags, children, or pets brush against them. Once a dried arrangement has been repaired, it should be treated more carefully than before, because the flowers may look stable again but the materials are still delicate.
The best long-term care usually comes down to four habits: display the arrangement in a dry low-traffic spot, keep it out of direct sunlight, clean it gently before dust gets heavy, and avoid unnecessary handling. In practical terms, those four habits often make a bigger difference than the repair itself. A neatly repaired bouquet that is placed under a cover or on a shaded shelf can often keep its shape for many more months. The same bouquet, if placed back on a sunny window ledge or dusty entry table, may start shedding again within a short time.
How Do You Clean Repaired Dried Flower Arrangements?
You should clean repaired dried flower arrangements as lightly as possible, because once dust becomes heavy, the cleaning itself often causes more damage than the dust. The safest goal is not to make the arrangement look freshly washed. It is to remove loose surface dust without disturbing repaired stems, petals, or filler materials. In most homes, a light clean every 2 to 4 weeks is safer than waiting 2 to 3 months and then trying to remove a thick layer of dust all at once.
The safest cleaning habits are:
- Let fresh repairs settle fully first A recently repaired section should not be brushed or moved too soon. Even if the bond feels dry on the surface, the area is often safer if left undisturbed for at least several hours.
- Clean from top to bottom This helps loose dust fall away naturally instead of being pushed deeper into the arrangement.
- Use the gentlest method first A soft brush or very light airflow from a safe distance is usually better than touching the petals directly.
- Stop if the arrangement starts shedding If petals or small filler pieces begin falling during cleaning, the arrangement is already too fragile for more brushing in that area.
The methods most likely to cause damage are:
- wiping with a damp cloth
- spraying water or household cleaner
- shaking the arrangement
- brushing quickly back and forth
- using strong air too close to the flowers
A practical cleaning guide looks like this:
| Display condition | Light cleaning frequency | Risk level |
|---|---|---|
| Under a dome or cover | Every 6-10 weeks | Low |
| Open shelf in a quiet room | Every 3-4 weeks | Medium |
| Dining table or entry area | Every 1-2 weeks check, clean only as needed | Medium to high |
| Near kitchen steam or active airflow | Frequent dust checks, very gentle cleaning | High |
For most customers, the simplest rule is this: clean early, clean lightly, and never try to “scrub” a dried arrangement back to freshness.
Where Should You Store Repaired Dried Flower Arrangements?
You should store repaired dried flower arrangements in a cool, dry, shaded, low-movement area. Good storage is not only for packing the arrangement away. It also applies to everyday display. In practical use, the best location is usually one where the arrangement can be seen easily but touched rarely. A shaded shelf, display cabinet, bedroom dresser, sideboard, or covered decorative nook is usually much safer than a window ledge, bathroom counter, kitchen shelf, or entry table.
The best storage and display conditions usually include:
- Bright but indirect light This helps the arrangement stay visible without accelerating fading.
- Low humidity Damp air can weaken preserved flowers, soften some decorative materials, and increase mold risk.
- Stable room temperature Repeated heating and cooling can dry the flowers further and weaken repaired points.
- Limited passing contact A repaired arrangement lasts much longer when sleeves, bags, or everyday objects do not brush past it.
The worst locations are usually:
- sunny windows
- bathrooms
- kitchens near sinks or ovens
- shelves near heating vents
- entry tables in busy homes
- open areas within reach of pets or small children
This quick guide helps:
| Location | Long-term result |
|---|---|
| Covered shelf or cabinet | Best protection |
| Bedroom dresser away from window | Good |
| Living room sideboard in indirect light | Good |
| Window ledge | Poor |
| Bathroom or laundry area | Poor |
| Kitchen counter | Poor to very poor |
For seasonal or sentimental pieces, such as wreaths and wedding bouquets, a rigid storage box or shadow-box style display usually gives much better results than leaving the arrangement exposed all year.
How Do You Protect Repaired Dried Flower Arrangements?
You protect repaired dried flower arrangements best by reducing movement, reducing exposure, and checking them before small problems become bigger ones. Once an arrangement has been repaired, it should not keep being reshaped, turned, or carried around unless necessary. In real use, many dried arrangements survive the repair itself but start failing again because they are still being moved for cleaning, photography, seasonal decorating, or table styling.
The most effective protection habits are:
- Move the arrangement only when necessary Even one careful move every few weeks is better than frequent small adjustments.
- Use a dome, box, or partial cover for keepsake pieces Covered display can cut dust exposure sharply and reduce accidental contact.
- Check weak areas once a month A stem that starts leaning slightly is much easier to fix early than after it fully breaks.
- Keep the arrangement away from open windows, fans, and air vents Constant airflow dries flowers faster and can shake loose filler materials over time.
- Avoid heavy decorating around it Candles, books, ornaments, and other décor placed too close can bump or compress the flowers.
A practical protection table:
| Protection step | Why it matters |
|---|---|
| Covered display | Less dust, less touching |
| Monthly visual check | Catches weak spots early |
| Low-traffic placement | Fewer accidental bumps |
| No direct sun | Slower fading and less brittleness |
| Dry room air | Better shape retention |
| Minimal reshaping | Less stress on repaired joints |
In many homes, a repaired arrangement that is protected well can stay attractive for 6 to 12 months longer, sometimes even more, depending on the flower type, original condition, and display environment. For customers keeping wedding flowers, memorial pieces, or handmade gifts, that extra life can make the repair feel truly worthwhile.

Why Choose GleamGlee to Repair Dried Flower Arrangements?
GleamGlee is a strong choice for repairing dried flower arrangements because this kind of repair is small-scale, visible, and easy to ruin with the wrong glue. In real use, people do not only want the broken part to stick. They want the repaired area to look clean, dry clear, stay in place, and not make the arrangement look shiny, stiff, or overworked. That is where GleamGlee fits well. Its floral adhesive is designed for decorative floral work that needs precision, a clear finish, fast drying, and a flexible hold, which are exactly the points that matter most in dried flower repair.
This also matters for different types of customers. A home user may be fixing a keepsake bouquet from a wedding or anniversary. A florist may need to repair a dried bouquet before sale. A wedding studio may use the same adhesive on corsages, flower crowns, wreaths, centerpieces, and flower boxes. A gift-packaging business may need one glue that works across flowers, ribbon, foam, fabric, plastic, and decorative containers. GleamGlee is practical in all of these cases because it is not limited to one narrow floral use. It supports both ready-made branded product orders and custom product inquiries, which is important for online sellers, retail brands, florists, and private-label businesses.
How Does GleamGlee Repair Dried Flower Arrangements Cleanly?
GleamGlee repairs dried flower arrangements cleanly because it is built for controlled application in visible decorative work. In dried flower repair, neatness often matters just as much as bonding strength. A stem can be fixed, but if the glue leaves a white line, a shiny patch, or a thick bead around the break, the arrangement still looks damaged. That is why a clear-drying formula and a precision applicator are so useful. They help the repair blend into the arrangement instead of standing out from it.
The clean-repair advantages are clear in everyday use:
- Clear drying formula Helps repaired stems, petals, and decorative points stay low-visibility from normal viewing distance.
- Precision metal nozzle Gives better control on small repair areas such as thin stems, loose petals, ribbon corners, and foam insertion points.
- Less excess glue A controlled nozzle reduces overflow, which is one of the biggest reasons dried floral repairs look messy.
- Better front-facing appearance This matters a lot for bouquets, wreaths, flower boxes, and keepsake pieces that are viewed from the front.
A practical comparison looks like this:
| Repair area | Common problem with ordinary glue | Cleaner result with GleamGlee |
|---|---|---|
| Broken stem | Glue spreads onto nearby petals | Glue stays close to the break |
| Loose petal | Visible blob or stiff edge | Smaller, neater repair point |
| Foam repair | Too much glue in one spot | Better control at insertion point |
| Ribbon detail | Glue seepage on visible fabric | Cleaner edge bonding |
| Decorative base | Residue easy to notice | Lower-visibility finish |
For many customers, “clean” means three things: the glue is hard to see, the flower still looks natural, and the repaired section does not draw attention before the arrangement itself does. GleamGlee performs well on all three.
Why Does GleamGlee Repair Dried Flower Arrangements Fast?
GleamGlee repairs dried flower arrangements fast because its floral adhesive is designed with fast-drying performance, which reduces how long fragile flowers need to be held in place by hand. This matters more than people first expect. In dried flower repair, every extra second of holding, squeezing, or adjusting increases the chance of new damage. A weak rose head may keep pulling downward. A loose foam section may shift again while waiting. A brittle petal may crack if it has to be pressed for too long. Faster initial setting helps reduce that risk.
In practical use, faster drying improves the repair process in several ways:
- Less hand pressure on fragile flowers Shorter hold time means less risk of flattening petals or bending stems.
- Less shifting during repair Helpful when one bloom, one ribbon edge, or one foam point keeps moving out of place.
- Better workflow for multiple repairs Useful for bouquets, wreaths, and centerpieces that have more than one weak section.
- More efficient for florists and small businesses When repairing several items in one session, faster setting can save noticeable time.
This simple table shows why speed matters:
| Repair situation | Slower glue result | Faster GleamGlee result |
|---|---|---|
| Broken flower head | Must be held longer, more stress on stem | Quicker support, less movement |
| Leaning stem in foam | Nearby stems may shift while waiting | Faster stabilization |
| Ribbon repair | Edge can slide before setting | Cleaner positioning |
| Several weak spots in one bouquet | Repair takes longer and handling increases | Better step-by-step efficiency |
For home users, faster drying means the work feels easier and less frustrating. For florists, event stylists, and floral gift businesses, it also helps improve consistency when working across many pieces.
Which Projects Can GleamGlee Repair Dried Flower Arrangements For?
GleamGlee can repair dried flower arrangements across a wide range of home, floral, wedding, gift, and decorative projects, which makes it more useful than a glue that only works for one narrow purpose. Many dried arrangements are not just loose flowers in a vase. They often include ribbon, foam, fabric, gift box inserts, wood bases, glass covers, ceramic pots, wire, and decorative accessories. A glue that performs across several floral surfaces is much more practical in real use.
For home and hobby use, GleamGlee is suitable for:
- dried flower bouquets
- preserved wedding bouquets
- wreaths
- flower crowns
- corsages and boutonnieres
- flower boxes and hat boxes
- wall floral décor
- seasonal centerpieces
- shadow box flower art
- gift-wrapping floral decoration
For professional and business use, it also fits:
- florist display repair
- wedding floral setup
- boutique gift packaging
- event decoration details
- workshop and DIY floral kits
- retail floral accessories
- custom floral décor products
- floral packaging for online brands
This range is important because many businesses want one adhesive platform that can support more than one product line. GleamGlee helps with that because it works well on multiple common surfaces:
| Project type | Common materials | Why GleamGlee fits |
|---|---|---|
| Dried bouquet repair | Stems, petals, foam, ribbon | Clear finish and precision |
| Wreath making | Dried foliage, wood, wire, ribbon | Flexible mixed-surface use |
| Flower box | Preserved flowers, foam, cardboard, fabric | Clean decorative bonding |
| Wedding floral work | Fresh/dried blooms, accessories, ribbon | Fast drying and neat detail work |
| Floral craft décor | Flowers, plastic, glass, ceramic, fabric | Broad surface compatibility |
This is also where GleamGlee becomes attractive for inquiry and customization. For retail customers, it offers a ready-to-use floral adhesive with practical performance. For B-end customers, GleamGlee can support private label, packaging customization, multilingual design, low-MOQ orders from 200 units, and export-ready supply. That makes it suitable for florists, floral craft brands, wedding suppliers, gift businesses, Amazon sellers, Shopify brands, and distributors looking for a floral adhesive product that can match their market needs.
Conclusion
In the end, repairing dried flower arrangements is not about making them look brand new. It is about helping them look beautiful, stable, and worth keeping again. Most dried arrangements fail slowly, not all at once, so a careful check, the right repair order, and a clean floral adhesive can often solve problems that seem much worse at first glance. A broken stem, loose petal, weak foam point, or dusty faded section does not always mean the arrangement is finished. In many cases, a light but precise repair is enough to bring back the shape, balance, and display value that made the piece special in the first place.
For people who want a repair that looks neat and lasts longer, the glue matters just as much as the method. A clear, fast-drying floral adhesive with good control makes dried flower repair much easier at home and much more practical for florists, wedding suppliers, gift businesses, and private-label brands. GleamGlee is well positioned for both needs: ready-to-use branded products for everyday floral repair, and flexible customization support for businesses that want to develop or source floral adhesive products for their own market. If you are looking for a reliable floral adhesive or want to discuss product orders, packaging, or custom cooperation, GleamGlee is ready to support your next project.


