 Skip to content
What Is the Best Waterproof Glue?
Waterproof glue is one of those categories where marketing words feel clear, but real-world repairs are not. A “waterproof” label can still fail in a bathroom, on a shoe sole, after a dishwasher cycle, or during a wet winter. The difference is rarely luck—it’s usually the wrong glue chemistry, incomplete surface prep, insufficient clamping, or getting the repair wet before full cure.
Most people also underestimate what “waterproof” must survive. A bond might hold against splashes, but fail under repeated washing. It might resist humidity, but crack under flex. It might stick to wood, but peel cleanly off low-energy plastics like PP/PE. The good news: once you use a simple selection method, waterproof repairs become repeatable.
The best waterproof glue depends on your material and exposure. For wood joints, use a water-resistant crosslinking PVA or polyurethane glue with clamping and full cure. For metals and rigid parts, use a 2-part epoxy for strong water resistance and gap-filling. For shoes and flexible rubber repairs, choose a flexible adhesive with high peel resistance. For plastics, identify the plastic type and use a compatible plastic-bonding adhesive. Always clean, roughen when possible, clamp, and cure fully before water contact.
What Problem Does Waterproof Glue Actually Solve?
This section clearly defines the real-world problem behind “waterproof glue” searches. It explains what users are truly trying to fix, which use cases this guide covers, and where expectations need to be realistic to avoid choosing the wrong adhesive from the start.
The exact problem statement
When people search “waterproof glue,” they usually mean one of these:
- “I repaired it once and it failed again after getting wet.”
- “I need a bond that survives cleaning, washing, or rain.”
- “The joint flexes (shoes/rubber) and ordinary glue cracks.”
- “I’m not sure which ‘waterproof’ label is actually right for my material.”


What we do cover
- Indoor humidity (bathroom/kitchen)
- Outdoor splash/rain
- Repeated wipe-down or washing
- Rigid repairs (metal/ceramic/wood)
- Flexible repairs (shoes/rubber/vibration)
- Glue selection, application SOP, curing, testing, and troubleshooting
What we don’t cover
- Structural marine/boat hull engineering work
- Long-term underwater pressure applications requiring specialized systems

Common Waterproof Repair Scenarios and User Pain Points
Here we translate “waterproof” into everyday repair situations—wet shoes, humid bathrooms, outdoor metal, washable items—and explain what users usually expect versus what causes repeated repair failures in practice.
What “success” really means to users
A successful waterproof repair usually requires three outcomes:
- Water resistance: no edge-lift, no whitening, no softening under moisture
- Mechanical durability: survives pull/peel, vibration, and repeated handling
- Time durability: holds up after days/weeks of use, not just an initial “stick”


Common high-intent scenarios
- “Best waterproof glue for shoe sole repair”
- “Waterproof glue for outdoor metal repair”
- “Glue that can handle bathroom humidity”
- “Waterproof glue for plastic that keeps peeling”
- “Dishwasher-safe glue for small household repairs”
- “Strong waterproof glue for ceramic or porcelain”
Why users keep redoing the same repair
- They pick a glue based on “strength” instead of flex, water exposure, and material compatibility
- They test too early (“it feels dry”) before full cure
- The surface still has oil, soap film, or polish
- The joint design creates high peel stress at the edge

Why Waterproof Glue Repairs Fail in Real Use
This section breaks down the most common failure mechanisms behind waterproof glue repairs, including surface contamination, material mismatch, joint movement, glue thickness errors, and premature water exposure before full curing.
The 3 levels of “waterproof”
Many product descriptions blur these together. In practice, they’re different:

- Humidity resistant (bathroom air, condensation)

- Splash / wipe resistant (wet hands, rain, cleaning)

- Wash / soak resistant (repeated cycles, short submersion)
If your use case is #3, you need a glue that reaches full crosslinked strength and maintains it.
Failure mechanism 1: Contamination blocks adhesion
- Oils, soap residue, silicone sprays, waxes, and fingerprints create a barrier
- The glue bonds to the contamination layer—not the material
Fix: degrease properly, wipe until a clean cloth stays clean, and let it dry fully.
Failure mechanism 2: Smooth surfaces provide low mechanical grip
- Very smooth plastics/metals/glazed ceramics reduce “keying”
- Even good glue can peel because it has nothing to grip
Fix: light abrasion (when safe) + clean dust.
Failure mechanism 3: Brittle glue on a flexing joint
- Shoe soles flex constantly → brittle glue micro-cracks → water creeps in → peeling
- Vibration (tools, outdoor fixtures) accelerates crack growth
Fix: choose flexible adhesive with high peel resistance.
Failure mechanism 4: Thick glue layers trap solvents / weaken the bond
- More glue is not always stronger
- Thick layers can shrink, trap moisture, or stay soft inside
Fix: apply an appropriate layer for the glue type; fill gaps only with gap-filling adhesives (like epoxy).
Failure mechanism 5: Early water exposure interrupts cure
- “Set” ≠ “fully cured”
- Water can reduce cure quality for many systems
Fix: respect full cure time before wet use.
Key Factors That Determine the Right Waterproof Glue
Choosing the right waterproof glue is not about strength alone. This section introduces a practical decision framework based on material type, water exposure level, joint movement, and gap size—the four factors that truly determine long-term durability.
The 4-factor selection framework
- Material: wood, metal, ceramic, rubber, plastic (and plastic type)
- Exposure: humidity, splash, washing, short soak
- Movement: rigid vs flexing vs vibration
- Gap: tight fit vs uneven surfaces vs missing material

Quick “routing” decisions
- Rigid + wet + high strength needed: 2-part epoxy
- Wood joint + water wipe: crosslinking PVA or PU glue
- Flexing + wet: flexible/rubber-based or flexible PU adhesive
- Sealing + wet: silicone sealant (adhesive/sealant), not structural glue
- Plastic: must confirm plastic type first

Key factors and what they change
| Factor | What to identify | What it changes | Example |
|---|---|---|---|
| Material | substrate type + coatings | chemical compatibility | PP/PE plastics resist many glues |
| Water exposure | splash vs wash vs soak | required water resistance | sink splash ≠ repeated washing |
| Movement | rigid vs flexing | needed flexibility | shoes need elastic bond lines |
| Gap size | tight vs uneven | need gap-filling | epoxy fills; thin CA doesn’t |
Best Glue Types for Cotton Applications
This module compares adhesive types specifically in the context of cotton fabric, focusing on flexibility, wash durability, visual impact, and real-world use conditions. The goal is not to rank products, but to match adhesive behavior to cotton scenarios.

Waterproof glue types
(A) Crosslinking PVA
Best for: wood-to-wood joinery, furniture repairs, indoor projects that may face wipe-down moisture
Strength profile: excellent in shear; depends on joint fit and clamping
Water profile: very good for water resistance when rated appropriately and fully cured
Not ideal for: metal, rubber, most plastics
(B) 2-part Epoxy
Best for: metal, ceramic, glass, rigid composites, many rigid plastics (not all)
Strength profile: high strength + gap-filling
Water profile: strong water resistance after full cure
Not ideal for: high-flex joints unless epoxy is formulated for flexibility
(C) Polyurethane (PU) adhesive
Best for: porous surfaces, outdoor wood repairs, some plastics
Strength profile: good; can foam and fill
Water profile: strong moisture resistance after full cure
Not ideal for: precision cosmetic joints if foaming is uncontrolled
(D) Flexible rubber-based / shoe repair adhesives
Best for: shoes, rubber, flexing joints, peel-resistant needs
Strength profile: excellent peel resistance and flexibility; moderate structural strength
Water profile: good in wet use when fully cured
Not ideal for: high-load rigid structural metal joints
(E) Silicone sealant
Best for: sealing + flexible waterproofing, bathrooms, gaps, seams
Strength profile: great as sealant; limited structural bonding
Water profile: excellent waterproof sealing after cure
Not ideal for: high-strength bonding of load-bearing parts
(F) Cyanoacrylate
Best for: tiny rigid repairs needing fast tack
Water profile: limited for wet long-term; can become brittle
Not ideal for: flexible joints, repeated wet cycles, shock/vibration

Selection table
| Glue type | Best materials | Best exposure level | Best joint type | Key advantage | Key limitation |
|---|---|---|---|---|---|
| Crosslinking PVA | wood | splash/wipe | tight-fitting rigid | clean + strong in wood | needs clamping |
| 2-part epoxy | metal/ceramic/glass | splash/wash/short soak | rigid + gaps | high strength + fills | can be rigid |
| PU adhesive | wood + some plastics | outdoor moisture | rigid/semi-flex | moisture resistance | foaming control |
| Flexible shoe/rubber adhesive | rubber/shoes | wet + flex | flexible | peel resistance | not structural metal |
| Silicone sealant | many surfaces (sealing) | waterproof sealing | flexible gaps | best sealing | not high strength |
| CA super glue | small rigid parts | light moisture | rigid micro joints | instant set | brittle/wet fatigue |
“Best match” by real-world repair scenario
- Shoe sole regluing: flexible/rubber-based or flexible PU adhesive
- Outdoor metal bracket: 2-part epoxy (rigid)
- Wood chair joint that may be wiped: crosslinking PVA + clamp
- Ceramic planter crack (rigid, wet contact): 2-part epoxy
- Bathroom seam sealing: silicone sealant (adhesive/sealant)

How to Apply Waterproof Glue for Long-Lasting Results
A waterproof bond depends as much on process as on product. This section provides a step-by-step application workflow covering surface preparation, glue application, clamping, curing time, and safe water testing to ensure repeatable results.
The waterproof bonding SOP
- Identify the material (and plastic type if plastic).
- Dry-fit the joint: confirm alignment and contact area; plan clamps/tape.
- Degrease: remove oils/soap/polish; wipe until the cloth stays clean.
- Create micro-texture (when safe): light abrasion; remove dust.
- Apply glue correctly: thin & even for contact joints; fill gaps only with gap-filling glue.
- Clamp/hold: stable pressure; do not slide the joint during set.
- Cure fully: keep dry and undisturbed.
- Test progressively: light splash → normal use after full cure window.

Timing table
| Glue type | Typical initial set | Typical clamp/hold | Full cure before wet use |
|---|---|---|---|
| Crosslinking PVA | 15–30 min | 30–60+ min | ~24 hours (longer in cold) |
| 2-part epoxy | 5–30 min | 30–120 min | 24–72 hours (max resistance) |
| PU adhesive | 20–60 min | 1–2 hours | 24–48 hours |
| Flexible shoe/rubber | 5–20 min | 30–60 min | ~24 hours |
| Silicone sealant | skins 10–30 min | n/a | 24–48 hours |

How to clamp correctly
- Use even pressure (too much squeezes out glue; too little leaves gaps).
- Prevent joint movement during early set (movement creates micro-voids).
- For shoes: use tape + elastic bands or a shoe clamp to maintain alignment.

Safe water testing protocol
- Do not do a “soak test” immediately.
- Start with light splash after full cure.
- If it survives, move to normal washing or outdoor exposure.
Our Practical Experience with Waterproof Adhesive Solutions
This section explains why our guidance is based on real formulation, testing, and product development experience. It highlights how we evaluate waterproof performance across materials, climates, and user behaviors rather than ideal laboratory conditions.
Why GleamGlee can speak credibly about waterproof repair adhesives
GleamGlee operates across adhesives and repair solutions with a development approach that includes formulation understanding, packaging communication, and scalable production considerations. The goal is not just “strong bonding in ideal conditions,” but reducing failure in real user hands—where prep steps are skipped, cure time is rushed, and surfaces vary.
Capability highlights
- nvested in four specialized factories covering daily chemical manufacturing, packaging, label printing, and raw materials—supporting end-to-end product development.
- Team includes 25+ chemists/material scientists/process engineers and 18+ product & packaging designers, enabling engineering-driven product and instruction design.
- Multi-market brand operations help connect technical performance with customer expectations and real-world failure patterns.


Common failure patterns we see
- Users apply glue on slightly oily surfaces → we emphasize degreasing steps.
- Users test too early → we communicate “full cure before wet use” clearly.
- Flex joints fail → we recommend flexible adhesive options for shoes/rubber.
- Plastic mismatch → we advise confirming plastic type before choosing glue.
“Case-style” examples
- Improved durability outcomes by switching a flexing repair recommendation from brittle glue types to peel-resistant flexible adhesives.
- Reduced repeat failures by making cure-time guidance explicit: set time vs full cure.

Frequently Asked Questions About Waterproof Glue
These FAQs address the most common and high-intent questions users ask before choosing waterproof glue, including curing time, underwater use, plastic compatibility, shoe repairs, safety considerations, and how to fix failed bonds.
1. Is waterproof glue the same as “works underwater”?
Not necessarily. “Waterproof” often means water-resistant after full cure, but continuous underwater exposure may require specialized systems.
2. How long before I can get the repair wet?
Usually 24–72 hours, depending on adhesive type, thickness, and temperature/humidity. Full cure matters most.
3. What is best for shoe sole repairs?
Use a flexible, peel-resistant adhesive (shoe/rubber adhesive or flexible PU). Rigid glues often crack.
4. What is best for metal outdoor repairs?
2-part epoxy is typically the most reliable for rigid metal bonding under wet conditions.
5. Why does glue peel off plastic?
Some plastics (especially PP/PE) resist bonding. Confirm plastic type and use a compatible adhesive with proper prep.
6. Do I really need sanding?
If the surface is smooth and sanding is safe, yes—micro-texture increases mechanical grip and improves durability.
7. Can I glue a wet surface?
Usually no. Moisture blocks adhesion and can interfere with curing. Dry completely first.
8. Why did my glue turn white/cloudy?
Some glues “bloom” in humidity or from excess. Reduce glue amount, improve ventilation, and choose a better-matched adhesive.
9. Can waterproof glue handle heat?
Some can, some can’t. Heat resistance varies widely by chemistry. Consider your temperature range when selecting.
10. How do I redo a failed repair?
Remove loose glue, clean residues, lightly roughen, and re-bond with proper clamp and full cure time.
11. Is silicone a glue or a sealant?
It’s primarily a sealant. It can “stick,” but it’s not ideal for high-load structural bonding.
12. What’s the biggest reason waterproof repairs fail?
The 1 cause is process: contamination + early water exposure + wrong cure time.
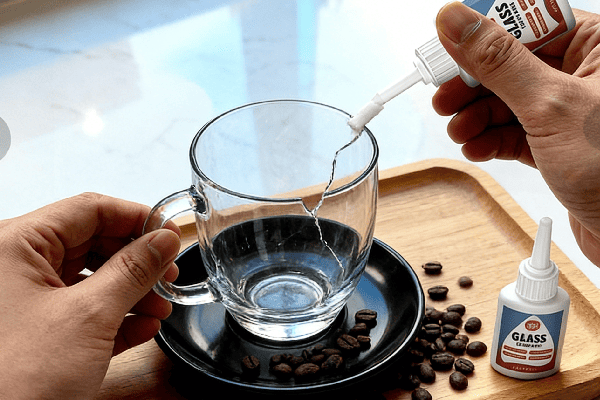
Waterproof Glue Selection Checklist and Decision Tools
This module turns knowledge into action: a buyer checklist, a decision scorecard, and supplier/product evaluation questions. It helps users purchase confidently and helps B2B buyers screen suppliers based on consistency, QC, and realistic performance communication.
Buyer checklist
- What material am I bonding (and exact plastic type if plastic)?
- Is exposure humidity, splash, washing, or short soak?
- Will the joint flex, peel, or vibrate in use?
- Is the fit tight or are there gaps/uneven surfaces?
- Do I need transparent, non-yellowing appearance?
- How much cure time can I realistically allow?
- Will the repair see heat/sun/cold cycles?
- Do I have clamping tools or a plan to hold alignment?
- Is the product instruction clear about set vs full cure?
- Is packaging designed for controlled application and storage?


Decision scorecard table
| Requirement | Best typical choice | Why it wins |
|---|---|---|
| Rigid + strong + wet durability | 2-part epoxy | strong bond + gap filling + water resistance |
| Flexing + wet durability | shoe/rubber adhesive or flexible PU | high peel resistance + elasticity |
| Wood joints + water wipe exposure | crosslinking PVA or PU glue | optimized for wood fibers + clamping |
| Waterproof sealing | silicone sealant | best flexible waterproof sealing |
| Instant small rigid tack | CA super glue | very fast set but not always durable wet |
Supplier/product screening questions
- What test methods support water resistance claims (wash cycles, humidity aging, short soak)?
- Is cure guidance explicit (set time vs full cure)?
- Is the product intended for flexible joints or rigid joints?
- How consistent is QC across batches?
- Are instructions and packaging designed to reduce user misuse?

Getting the Right Waterproof Glue Solution
This final section offers a natural next step for readers who need further guidance. It invites users to share their specific repair or product development scenario so a suitable waterproof adhesive strategy can be evaluated realistically.
Contact invitation
If you’re developing a waterproof glue product or building a repair kit that must perform reliably across real customer behaviors, send us your scenario. We can help you clarify the right adhesive direction, usage instructions, and positioning so customers get repeatable results.
What to send
- Material(s) and surface condition (smooth/porous/coated)
- Exposure: humidity / splash / washing / short soak
- Joint type: rigid / flexing / vibrating
- Appearance needs: clear / non-yellowing / paintable
- Allowed cure time window
- Target market and packaging size preference





















