 Skip to content
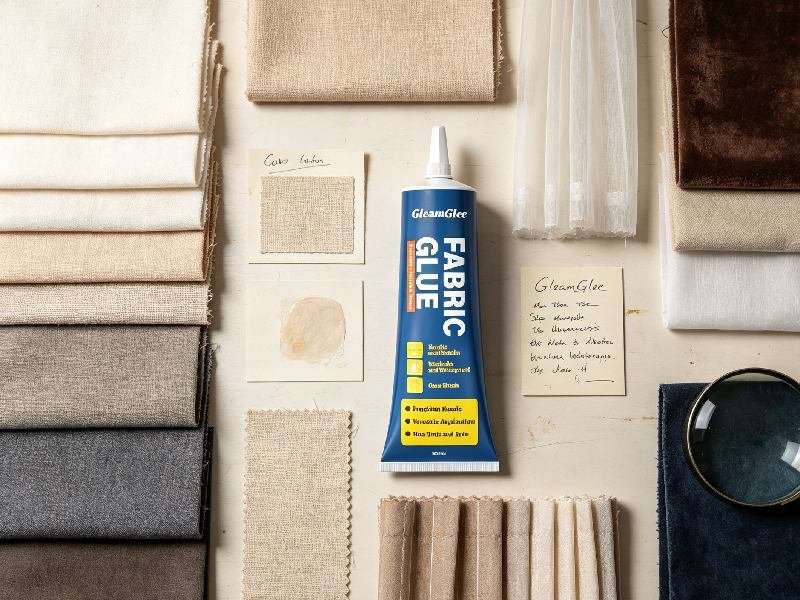
Curtains and household textiles are often replaced for surprisingly small reasons: a loose hem, a short opening along a seam, a detached decorative trim, or a tear hidden behind a cushion. Sewing remains an excellent repair method, but it is not always practical. Many homes do not have a sewing machine, some fabrics are difficult to control under a needle, and a simple repair may not justify sending an item to a professional alteration service. A suitable fabric glue can turn many of these problems into manageable no-sew projects.
Fabric glue can be used to hem curtains, secure lightweight trims, repair small textile seams, attach patches, and reinforce fraying edges. The best results come from choosing a flexible, washable adhesive, testing it on a hidden area, applying a thin and even layer, pressing the bond carefully, and allowing the adhesive to cure fully before hanging, washing, or ironing the textile.
The important question is not simply whether fabric glue sticks to cloth. A useful repair must remain flexible when a curtain moves, discreet when light passes through the fabric, and durable when a cushion cover or table runner is cleaned. Imagine shortening two curtain panels in the evening, hanging them the next day, and discovering that one hem has become stiff while the other has begun to separate. The difference usually comes down to fabric compatibility, glue quantity, pressure, alignment, and curing time. Understanding those details is what turns a quick fix into a clean, reliable result.
Is Fabric Glue Suitable for Curtains?
Fabric glue is suitable for curtain hems, decorative trims, small seam repairs, patches, and other low-stress textile work. It performs best when the fabric is clean, the bonded area has enough overlap, and the adhesive remains flexible after curing. Curtain headings, rings, hooks, eyelets, and other parts exposed to repeated pulling normally require sewing or additional reinforcement.
What Can Fabric Glue Replace?
Fabric glue can replace stitching when a repair mainly needs to hold two flat textile surfaces together. A folded curtain hem is a good example. Once the curtain is hanging, the hem carries relatively little direct pulling force, so a well-prepared adhesive bond can remain secure without visible stitches.
It is also useful for attaching lightweight lace, ribbon, braid, fabric strips, appliqués, and flat decorative elements. These details can be difficult to sew neatly, particularly when the material is narrow, slippery, or likely to shift under a sewing-machine foot. A fine nozzle allows the adhesive to be placed in a controlled line rather than across the entire decoration.
Small openings along existing seams may also be repaired with glue if the surrounding fabric is still strong. The adhesive should be placed inside the original seam allowance so that it remains hidden when the textile is turned back to the correct side.
Fabric glue is less suitable when the bond must carry concentrated weight. It should not be treated as a direct replacement for structural stitching around curtain hooks, tabs, grommets, pleated headings, or draw cords. These areas are repeatedly pulled in one direction, and failure may occur in the fabric itself even if the adhesive remains attached.
| Curtain or Textile Task | Typical Stress | Glue-Only Suitability | Better Method |
|---|---|---|---|
| Bottom curtain hem | Low | Usually suitable | Thin, continuous adhesive layer |
| Lightweight ribbon trim | Low | Usually suitable | Glue in short sections |
| Small loose lining seam | Low to moderate | Often suitable | Glue inside seam allowance |
| Cushion-cover patch | Moderate | Suitable with backing | Rounded patch extending beyond tear |
| Curtain heading tape | High | Limited | Sewing or glue plus stitching |
| Eyelets, rings, or hooks | High and concentrated | Not recommended | Mechanical reinforcement |
| Fixed sofa upholstery | High and continuous | Limited | Upholstery repair or stitching |
| Decorative fabric banner | Low | Highly suitable | Dots or narrow adhesive lines |
When Is Glue Better Than Sewing?
Glue is often more practical when the work is straightforward but the user does not have a sewing machine. Shortening ready-made curtains, repairing a table runner, attaching a trim, or securing a decorative patch can usually be completed on a flat table with measuring tools, clips, and protective paper.
It can also provide a cleaner appearance on projects where visible stitches are unwanted. A line of thread may interrupt the surface of sheer panels, decorative borders, or patterned textiles. A clear adhesive placed inside an overlap is usually less noticeable, provided it is applied sparingly and does not soak through to the face of the fabric.
Another advantage is control around irregular shapes. Sewing a curved appliqué, narrow lace edge, or small fabric motif often requires frequent turning and careful thread-tension control. Adhesive can be applied in short sections, allowing the piece to be positioned gradually.
Glue is not always faster in practice. Long curtain hems still need accurate measurement, and the textile must remain undisturbed while the bond sets. A rushed adhesive repair can become uneven, stiff, or visible. Glue is most efficient when the project has a flat bonding area, moderate or low stress, and enough time for full curing.
Sewing is generally better when the item will be stretched, pulled, heavily washed, or used in a safety-related setting. Glue is better when the priority is a discreet and accessible no-sew alteration that does not carry heavy loads.
How Does It Compare With Hem Tape?
Fabric glue and iron-on hem tape are both common no-sew methods, but they work differently. Hem tape uses heat to activate an adhesive strip placed between two layers. Fabric glue is applied directly and cures without requiring an iron during bonding.
Hem tape is convenient for long, straight folds when the fabric can tolerate heat. It creates a consistent adhesive width and can be easy to position on simple curtain panels. However, it is less adaptable around curves, corners, patches, and narrow decorative trim.
Liquid fabric glue gives more control over the amount and placement of adhesive. It can be used as a narrow line, thin film, or small dots. This makes it more versatile for repairs and decorative work. It is also useful on fabrics that should not be exposed to the heat required by iron-on tape.
Heat-sensitive synthetics, some blackout coatings, printed finishes, velvet, and delicate lace may distort, flatten, or discolor under an iron. These materials still require a patch test with liquid adhesive, but the absence of heat during application removes one source of risk.
Hem tape can produce a noticeable strip if it is too wide or stiff for the curtain. Fabric glue can remain softer when applied thinly, although too much liquid adhesive can also create a hard edge. The finished feel depends as much on application quantity as on the bonding method.
Which Repairs Still Need Sewing?
Curtain headings should normally be sewn because they carry the weight of the entire panel. This includes heading tape, tabs, pleats, rod pockets, hook points, rings, and eyelets. Every time the curtain is opened, the force is concentrated through these areas.
Large tears also need more than a narrow glue line. When a tear is pulled closed without a backing patch, the stress remains concentrated along the damaged fibers. The bond may hold while the fabric tears again beside it. A backing patch spreads the force over a wider area, and stitching may still be needed when the curtain is heavy.
Frequently stretched textiles require similar caution. Fitted cushion covers, tightly upholstered chairs, mattress covers, bag handles, and fabric straps experience continuous tension. Glue may stabilize these areas during repair, but it should not automatically become the only structural connection.
Valuable, antique, fire-retardant, theatrical, or contract-grade curtains should be assessed before any adhesive is applied. Some finishes are difficult to identify, and an unsuitable product may leave a permanent mark or interfere with fire-performance requirements.
A practical test is to ask where the force will travel during use. When the repaired area mostly rests in position, adhesive may be enough. When it is repeatedly pulled, stretched, loaded, or twisted, sewing or mechanical reinforcement is usually the more reliable choice.
Which Fabrics and Textiles Work Best?
Fabric glue usually bonds most predictably to clean, stable, moderately absorbent fabrics such as cotton, polyester, canvas, denim, felt, and common woven blends. Very sheer, heavily coated, oily, stretchy, water-repellent, or pile fabrics need more testing. Fabric thickness, weave density, surface treatment, and intended care method can matter as much as the fiber name on the label.
Which Curtain Fabrics Bond Well?
Cotton and cotton-polyester blends are among the easiest curtain materials to bond. Their woven structure allows controlled adhesive penetration, while their moderate thickness helps prevent glue from appearing on the front surface.
Standard polyester curtain fabric can also work well, but polyester varies considerably. A plain woven panel may bond easily, while a tightly woven or stain-resistant version may accept less adhesive. A hidden test is still necessary because surface finishes are not always listed on the care label.
Canvas, denim-weight cloth, and heavier decorative weaves provide a broad bonding surface. They can tolerate slightly more adhesive than sheer fabrics, but the layers may need stronger and longer pressure. Heavy material should not be flooded with glue. A thick application between dense layers can remain soft internally even when the exposed edge appears dry.
Linen and linen blends can bond well when the weave is stable. Loose linen may absorb adhesive unevenly, so the amount should be controlled carefully. Frayed edges should be trimmed before bonding because loose yarns can prevent full contact.
The best-performing fabric is not simply the most absorbent one. Excessively open fabric may allow adhesive to pass through, while a coated fabric may prevent penetration entirely. A successful bond requires enough surface contact without visible saturation.
| Fabric Type | General Bonding Behavior | Main Risk | Practical Test Focus |
|---|---|---|---|
| Cotton | Usually predictable | Excess absorption | Check for darkening |
| Cotton-polyester blend | Usually reliable | Finish may vary | Test flexibility after cure |
| Standard polyester | Often suitable | Tight weave or coating | Check edge peel |
| Linen blend | Generally suitable | Open weave and fraying | Check penetration |
| Canvas | Strong surface contact | Thick bond cures slowly | Check full internal cure |
| Sheer voile | Possible with care | Soak-through | Inspect against window light |
| Velvet | Variable | Flattened pile and staining | Test on hidden reverse area |
| Blackout fabric | Highly variable | Coating separation | Test backing adhesion |
| Stretch jersey | Limited for structural seams | Repeated extension | Stretch sample after cure |
| Water-repellent fabric | Variable | Low surface energy | Test after moisture exposure |
Can You Glue Sheer or Blackout Curtains?
Sheer curtains require very small amounts of adhesive because even a clear glue can change how light passes through the fabric. The cured product may be transparent, but the bonded fibers can still appear slightly darker or denser than the surrounding area.
The most discreet position is usually inside a folded hem. Applying glue directly to a single exposed layer increases the risk of visible marks. A protective release sheet should be placed beneath the work because adhesive can pass through open weaves and bond the curtain to the table.
A sheer-fabric test should be viewed in daylight, not only under indoor lighting. Hold or hang the sample in front of a bright window after curing. Look for glossy areas, darker lines, stiffness, and uneven drape.
Blackout curtains create a different problem. Their backing may be acrylic, foam, rubber-like, flocked, or laminated. Some coatings bond well, while others resist adhesive or separate from the decorative fabric. In that case, the glue may remain attached to the coating while the coating itself peels away.
Test the actual backing surface before hemming the full panel. After 24 hours, fold the sample repeatedly and pull gently from several directions. If the coating cracks, powders, stretches, or lifts from the textile, a stitched hem or separate fabric facing may be safer.
Ironing should also be approached carefully. Even when the adhesive is ironable, the blackout coating may not tolerate direct heat.
Which Home Textiles Are Suitable?
Removable cushion covers are practical repair candidates because they can be laid flat, turned inside out, and kept away from filling material while the glue cures. Small loose seams and patches can often be repaired neatly from the reverse side.
Tablecloths and runners are also suitable for edge reinforcement, decorative borders, and small patches. These textiles are generally flat and carry little structural stress. However, they may be washed frequently, so the adhesive must complete its full cure before cleaning.
Pillowcases and duvet covers can be repaired when the damage is small and located away from heavily pulled openings, zippers, buttons, or corner ties. The repaired area should remain soft because bedding is repeatedly folded and placed against the body.
Fabric storage boxes, banners, seasonal decorations, lampshade trim, craft panels, and removable chair covers can all be bonded in suitable areas. The key factor is not the product category but the type of movement the bond will experience.
Fixed upholstery is less predictable. A loose decorative edge on a chair may be glued, but a seat surface stretched over foam and a frame carries continuous load. Upholstery fabric may also have stain-resistant treatments that reduce adhesion.
Before beginning, remove inserts or fillings whenever possible. A piece of release paper placed inside a cushion cover or pillowcase prevents glue from passing through and bonding the front and back layers together.
Which Materials Need a Patch Test?
A patch test is essential for silk, satin, velvet, lace, sheer polyester, microfiber, stretch fabrics, coated blackout material, outdoor textiles, and stain-resistant upholstery. These materials can react in ways that are not obvious from the fiber label.
The test should reproduce the real application. Placing one drop on a scrap does not show how a folded hem will behave. Bond two small pieces using the same overlap, adhesive amount, pressure, and cure time planned for the final project.
After curing, inspect the sample for at least five issues:
- Visible darkening or gloss change
- Stiffness compared with untreated fabric
- Adhesive transfer to the front surface
- Weak edge adhesion
- Damage to coatings, pile, or printed finishes
When washing or ironing is part of normal use, test those conditions on the sample as well. Do not increase the heat or wash intensity beyond the textile care label.
A 24-hour test gives useful initial information, but commercial buyers evaluating a formula should use repeated cycles. Depending on the target product, a test plan may include several wash cycles, repeated folding, edge-peel checks, storage in warm conditions, and comparisons across different fabric suppliers.
The purpose is not to prove that one adhesive works identically on every textile. It is to identify a safe operating range and produce accurate instructions for the intended application.

How Do You Apply Fabric Glue?
Prepare the textile by cleaning, drying, measuring, and testing it before applying glue. Use a thin, continuous adhesive layer, align the surfaces without stretching, and press them evenly. Keep the project flat during the initial 6–10-minute setting period and avoid washing, ironing, hanging, or stressing the bond until it has completed its recommended 24-hour cure.
How Should You Prepare the Fabric?
Begin with a clean, dry textile. Dust, oil, fabric softener, starch, and stain-resistant residue can reduce direct contact between the glue and fibers. If the care label permits washing, clean the item before repair and allow it to dry completely.
Do not apply adhesive to fabric that is still damp from washing or steam. Moisture trapped inside the bond can extend curing time and reduce early strength.
For curtain hemming, measure the panel while it is hanging in its normal position. Floors, rods, tracks, and window frames are not always perfectly level. Mark the intended finished length at the left side, center, and right side rather than relying on one measurement.
After removing the curtain, place it face down on a large flat surface. Use tailor’s chalk or a removable fabric marker to create a clear fold line. Compare paired curtain panels before applying glue. A difference of 10–15 mm can be noticeable when the panels hang next to each other.
Trim only loose fibers that prevent flat contact. Do not pull frayed threads because this can enlarge the damage.
Prepare the following before opening the adhesive:
- Release paper or baking parchment
- Measuring tape and fabric marker
- Clean clips or flat weights
- A straightedge for long hems
- A small cloth for accidental excess
- The tested sample for comparison
Good preparation prevents rushed repositioning once the glue is wet.
How Much Glue Should You Apply?
A thin, even film normally produces a more flexible and discreet bond than a thick bead. The exact quantity depends on fabric thickness, weave, overlap width, and adhesive viscosity, so a universal volume per meter is not reliable.
For a curtain hem, place the glue slightly inside the folded edge. This reduces squeeze-out when the layers are pressed. The adhesive should form a continuous line or film without large gaps, but it should not saturate the full thickness of the textile.
Work in short sections rather than applying glue across the entire width at once. Sections of approximately 20–30 cm are manageable for most household curtain projects. They provide enough time to align and press each area before the adhesive begins to set.
Open-weave and sheer fabrics need a very light application. Thick canvas or multilayer curtain fabric may need a slightly broader film, but adding a heavy bead is usually not the solution. Better surface contact and longer pressure are often more useful than more glue.
Too much adhesive can cause:
- Visible wet marks or cured gloss
- A stiff ridge along the hem
- Longer internal curing time
- Glue squeezing onto the face
- Uneven drape between curtain panels
Too little adhesive can produce dry gaps and isolated bonded points. The test sample should show a continuous bond after curing without excessive stiffness.
How Do You Align and Press the Bond?
Dry-fit the pieces before applying adhesive. For a curtain hem, fold the fabric along the marked line and check the width at several points. If the fold becomes narrower toward one side, correct it before the glue is introduced.
Apply adhesive to one surface and bring the layers together once the position is confirmed. Avoid repeatedly lifting and replacing the fabric. Each movement spreads the adhesive farther and may create thin, weak areas.
Press from the center toward the edges. This pushes out trapped air without forcing a large amount of glue toward one end. Use firm hand pressure, a clean flat board, or light weights protected by release paper.
Do not stretch the curtain while pressing. Stretching temporarily changes the panel length and can cause puckering after the fabric relaxes.
On wide hems, check alignment every 20–30 cm. Small errors accumulate across the width of the curtain. A 2 mm change in each short section can become a clearly uneven edge by the opposite side.
Clips can be useful, but they should not leave permanent marks. Place them at reasonable intervals rather than clamping only the ends.
Remove excess adhesive immediately using the cleaning method specified for the product. Do not spread wet glue over a larger area in an attempt to hide it. Once aligned, leave the bond undisturbed during the initial setting stage.
How Long Should the Glue Cure?
Setting time and full curing time describe different stages. During the initial setting period, the adhesive begins to hold the surfaces in place. Full curing is the longer process during which the bond develops its intended strength, flexibility, and resistance.
GleamGlee Fabric Glue typically begins setting in approximately 6–10 minutes under suitable indoor conditions. The textile should remain flat and should not be pulled or repositioned during this stage.
Full cure requires approximately 24 hours. Washing, ironing, hanging heavy curtain panels, stretching a repaired cushion cover, or testing the bond aggressively before this time can disturb adhesive that is dry at the edge but still developing internally.
| Application Stage | Typical Timing | What to Do | What to Avoid |
|---|---|---|---|
| Positioning | First few minutes | Align and press accurately | Repeated lifting |
| Initial set | About 6–10 minutes | Keep flat and supported | Pulling or folding |
| Early inspection | After initial set | Check visually and gently | Peel testing |
| Full cure | About 24 hours | Leave undisturbed when possible | Washing or ironing |
| Normal use | After full cure | Follow textile care instructions | Excessive unsupported load |
Cold rooms, high humidity, thick glue layers, dense fabric, and coated curtain backings can extend the effective cure time. When conditions are unfavorable, allowing additional time is safer than assuming the minimum period is sufficient.
Surface dryness is not proof of full cure. The center of a wide or thick bond may remain softer than the exposed edges. For long curtain hems, leaving the panels flat overnight usually produces a more reliable result than hanging them as soon as they appear dry.
What Curtain and Textile Projects Work Best?
The most reliable fabric-glue projects have broad, flat bonding areas and low or moderate stress. Curtain hems, lightweight trims, small lining repairs, frayed edges, decorative patches, table runners, cushion covers, and selected bedding repairs are good examples. Large tears, heavily stretched upholstery, curtain hardware, and load-bearing seams require backing material, stitching, or another form of reinforcement.
How Do You Hem Curtains Without Sewing?
Measure the curtain in its intended hanging position before making any permanent change. Decide whether the finished panel should sit above the floor, touch it, or intentionally gather on it. Mark the target length at several points.
Remove the curtain and lay it face down. A fold depth of approximately 25–50 mm is practical for many lightweight and medium curtain fabrics, although the existing hem style, fabric weight, and available excess material may require a different size.
A narrow fold uses less fabric but provides a smaller bonding area. A wider fold spreads the bond and can add weight to the bottom of the curtain, but it may show through sheer material. Match the fold to the original construction where possible.
Apply a thin layer inside the fold in sections of about 20–30 cm. Press each section before moving forward. Check the hem depth regularly rather than assuming the original fold remains straight.
For two curtain panels, place them next to each other after the adhesive has cured. Compare the finished lengths at the outer edge, center, and meeting edge. Correcting a mismatch before rehanging is easier than repeatedly removing both panels.
Before normal use, inspect the hem for:
- Continuous bonding without dry gaps
- No visible glue on the face
- Similar flexibility across both panels
- Straight alignment along the full width
- Secure ends where lifting often begins
Do not hang the curtains until the adhesive has fully cured.
How Can You Add Trims and Ribbons?
Position the trim across the full project before applying glue. Long ribbon or lace may appear straight at close range but drift noticeably across a curtain panel. Mark guide points at regular intervals and view the dry layout from normal room distance.
Apply adhesive to the back of the trim rather than coating the curtain broadly. A narrow line along each edge can work for flat ribbon, while small controlled dots may be better for lace with open spaces.
Work in short sections and avoid stretching the trim. Elastic or loosely woven ribbon can contract after bonding and create puckering. Allow the material to rest in its natural shape while pressing.
Fold and secure the ends neatly around the curtain edge when possible. Exposed cut ends can fray or lift during cleaning. A tiny amount of adhesive can seal the edge, but thick end deposits may remain visible.
Lightweight flat trim is well suited to glue-only application. Heavy tassels, beadwork, rope, metal decoration, and thick fringe create concentrated downward force. Use adhesive for positioning, then add stitching at intervals where long-term support is needed.
The care requirements of the trim and base fabric must match. A washable adhesive cannot prevent a decorative ribbon from shrinking, bleeding color, or losing its finish. Test a complete bonded sample through the intended cleaning method before decorating expensive or custom-made curtains.
How Do You Repair Loose Seams?
Turn the textile inside out if the construction allows it. This exposes the original seam allowance and keeps the adhesive hidden from the visible surface.
First identify whether the thread failed or the fabric tore. A broken thread with intact fabric is easier to repair. Realign the original seam edges, apply a narrow adhesive layer inside the allowance, and press the surfaces together.
If the textile has frayed, the original seam allowance may no longer be wide enough to hold securely. Add a backing strip extending approximately 10–20 mm beyond the damaged area on each side. The strip should have similar flexibility and wash behavior to the original fabric.
Remove loose thread only when it interferes with alignment. Do not pull intact stitches, as this can open a longer section of seam.
Glue-only seam repairs work best on curtain linings, pillowcases, table linens, and removable cushion covers in areas that are not repeatedly stretched. Zipper ends, cushion corners, duvet openings, straps, and fitted covers usually experience more force and may require stitching.
After the repair has cured, turn the textile to the correct side and check for puckering. If the seam was bonded while one layer was stretched, the surface may no longer lie flat.
A properly repaired seam should follow the original shape without a thick adhesive line. The goal is to restore normal movement, not create a rigid reinforced strip.
Can You Patch Cushions and Bedding?
Small holes in cushion covers, pillowcases, sheets, and duvet covers can be repaired with a backing patch. Cut the patch with rounded corners because square corners are more likely to lift during washing and folding.
The patch should normally extend at least 10–15 mm beyond the damaged area on every side. Larger extensions may be needed when the surrounding fibers are weak or frayed.
Place release paper inside the cover before applying glue. This prevents adhesive from passing through the tear and bonding the opposite side of the textile.
Apply a thin film to the patch, position it behind the damaged area, and press from the center outward. Keep the original fabric relaxed. Pulling the tear tightly closed can create a puckered surface after the material returns to its natural shape.
A decorative front patch may be more practical when the damage is visible and the textile design allows it. This method is common for children’s bedding, craft cushions, fabric storage items, and casual household textiles.
Glue-only patches are best for small, low-stress damage. Tears near fitted-sheet corners, pillow openings, buttons, zippers, duvet ties, or cushion edges experience repeated pulling and should be sewn or reinforced.
For items placed directly against the skin, allow the full curing period and confirm that no uncured adhesive remains exposed. Always follow the adhesive safety instructions and the care requirements of the textile.

How Do You Protect the Bond?
Allow the adhesive to cure fully before washing, ironing, hanging, or stretching the textile. Use cleaning settings accepted by both the fabric and glue, avoid concentrated pulling at the repaired area, and inspect the bond after the first wash. Thin, flexible applications generally tolerate normal textile movement better than thick glue lines that cure into a noticeable ridge.
When Can You Wash Bonded Textiles?
Do not wash the project during the initial setting period. A bond that holds after 10 minutes has not necessarily reached the strength and water resistance expected after full curing.
For GleamGlee Fabric Glue, wait approximately 24 hours before washing. In cool, humid conditions or when the adhesive is trapped between dense layers, additional time may be helpful.
Before the first wash, check the entire bonded edge. Look for sections that were not fully pressed or areas where the fabric lifted during curing. Repairing a small loose point before washing is easier than dealing with a longer peeled section afterward.
A separate test sample is useful for expensive curtains, custom cushions, and commercial products. Bond a small piece of the same fabric using the same method, allow it to cure, and wash it with the intended settings.
After washing, support the wet textile when removing it from the machine. Water increases fabric weight, and lifting a large curtain only by its glued hem creates unnecessary stress.
Allow the item to dry before making a final assessment. Wet fibers may feel softer, heavier, or less stable than they do after drying.
Inspect the bond for edge lifting, whitening, stiffness, puckering, coating separation, and trim shrinkage. These signs help identify whether the issue came from the adhesive, fabric finish, decoration, or wash conditions.
Which Wash Settings Are Safest?
Use the gentlest washing conditions permitted by the textile care label. When the glue, base fabric, trim, lining, and coating have different requirements, follow the most restrictive one.
Cool or moderate water generally creates less stress than high-temperature washing. A gentle cycle limits repeated bending and twisting along the repaired area. Mild detergent is preferable to bleach, strong solvents, or aggressive stain removers unless compatibility has been confirmed.
Do not overload the machine. Large curtains need room to move without becoming tightly wrapped or pulled around other heavy items. Washing one curtain panel at a time may be safer when the fabric is thick.
Air drying usually places less thermal stress on the bond than high-temperature tumble drying. If the care label allows machine drying, select a low setting and avoid overdrying.
For curtains that are only dusty, vacuuming with a clean soft attachment or careful spot cleaning may reduce the number of full wash cycles. This is particularly useful for blackout curtains and multilayer window treatments.
Support wet curtains across both arms or in a clean basket. Do not lift the entire panel by one repaired corner or hem edge.
The adhesive may be washable, but the final result depends on the complete textile system. A decorative trim that shrinks by even a few percent can pull against an otherwise secure bond and cause puckering.
Can You Iron Glued Fabric?
Iron the bonded textile only after the adhesive has fully cured and only when both the glue and fabric permit ironing. The adhesive may tolerate heat while a blackout backing, printed design, ribbon, or synthetic face fabric does not.
Begin with the lowest temperature suitable for the textile. Use a clean pressing cloth between the iron and the repaired area. This protects the surface from shine, direct heat, and accidental adhesive transfer.
Do not hold the iron in one place for a long period. Keep it moving and allow the repaired section to cool before checking the bond.
Steam introduces heat and moisture at the same time. Use it cautiously, especially on layered hems and coated curtain fabrics. Direct steam may temporarily soften some materials or affect the backing even when the adhesive remains stable.
Never use ironing as a shortcut to force faster curing unless the adhesive instructions specifically require heat activation. Heating an uncured liquid glue can spread it, trap moisture, or create an uneven surface.
For blackout curtains, test the decorative face and backing separately. Ironing directly on a foam or rubber-like coating can damage it at temperatures that appear safe for the outer fabric.
After ironing, place the textile flat until it returns to room temperature. Do not pull the warm bond immediately. Some adhesive systems temporarily soften under heat and regain their normal properties after cooling.
What Causes Fabric Glue to Fail?
Surface contamination is one of the most common causes. Dust, oil, fabric softener, waterproofing treatment, and stain-resistant finishes can prevent the adhesive from reaching the fibers.
Another common problem is excessive glue. A thick layer may look strong, but it can cure slowly and create a hard edge. If the outside dries before the center, early washing or bending may disturb the internal bond.
Insufficient adhesive produces the opposite result. Broken lines and dry gaps allow peeling to begin at isolated points. Once an edge lifts, normal fabric movement can extend the separation.
Poor pressure leaves air pockets and incomplete contact. Pressing should be firm and even, not brief or concentrated only at the ends.
Premature use is another major cause. Hanging heavy curtain panels, washing cushion covers, or stretching a repaired seam before full cure interrupts bond development.
Failure patterns often reveal the cause:
- Peeling cleanly from one surface may indicate contamination or poor compatibility.
- Glue visible on the front usually indicates overapplication or a fabric that is too thin.
- A hard ridge usually comes from an unnecessarily thick adhesive layer.
- Fabric tearing beside the bond indicates that the repair area is too narrow for the load.
- Blackout coating lifting from the curtain may be coating failure rather than adhesive failure.
- Puckered trim may have been stretched during application or shrunk during washing.
When a repair fails, identify the cause before adding more glue. Applying a second thick layer over weak fabric rarely creates a durable result.
Is GleamGlee Fabric Glue Suitable?
GleamGlee Fabric Glue is suitable for curtain hems, fabric trims, patches, clothing alterations, cushion covers, bedding repairs, and many other low- to moderate-stress textile projects. It dries transparent, remains flexible after curing, and is designed to withstand washing and ironing. The formula begins setting in 6–10 minutes and reaches full cure in approximately 24 hours.
What Makes the Bond Flexible?
Curtains and home textiles move constantly. Curtain hems fold when panels are opened, cushion covers bend under body pressure, and bedding is gathered during use and washing. A rigid adhesive can create an unnatural edge or crack after repeated movement.
The cured GleamGlee bond is designed to remain soft and elastic rather than brittle. This helps the repaired section move with the surrounding fabric and reduces the hard, plastic-like feel associated with unsuitable general-purpose adhesives.
Flexibility still depends on the amount applied. Any adhesive can create stiffness when used in an unnecessarily thick layer. A thin, continuous application produces a cleaner result and allows the textile to retain more of its original drape.
This is particularly important for:
- Curtain bottom and side hems
- Cushion-cover patches
- Pillowcase and duvet-cover seams
- Decorative ribbon and lace
- Clothing alterations
- Fabric appliqués and craft projects
Bond strength and flexibility should be considered together. A repair that survives a strong pull test but feels hard may not be suitable for soft household textiles. Repeated folding, washing, and edge inspection provide a more realistic picture of performance.
For commercial evaluation, the adhesive should be tested on the exact fabrics planned for sale or promotion. Curtain textiles from different suppliers may use different coatings even when described with the same fiber content.
How Does It Dry Clear?
The adhesive cures to a transparent, non-yellowing finish, helping the bond remain discreet on visible repairs. This is useful for hems, decorative trims, patches, ribbons, sequins, and other areas where dried residue would reduce the appearance of the project.
Clear adhesive is not automatically invisible on every textile. Thin and sheer materials can still show a darker line where the fibers have been bonded together. The amount applied and position of the bond remain important.
Placing the adhesive inside a fold or beneath a patch gives a more discreet result than leaving it exposed on the face of the fabric. A thin layer is also less likely to form a glossy raised edge.
The precision nozzle supports narrow application on trims, loose seams, and detailed craft work. The pin built into the cap helps keep the opening clear between projects. A clean nozzle matters because partial blockage can cause uneven flow or sudden oversized drops.
On light-colored, patterned, or sheer fabric, complete a hidden test and inspect it under natural light. On dark fabric, look for gloss changes as well as discoloration.
Transparent curing is most effective when the glue remains within the intended overlap. Careful placement, moderate pressure, and immediate control of excess adhesive are still necessary for a professional-looking result.
Is It Washable and Ironable?
The cured formula is designed for textile projects that may need machine washing and ironing. This makes it more suitable for practical household use than temporary craft adhesives intended only for decorative items.
The bond should be allowed to cure for approximately 24 hours before the first wash or ironing session. Initial setting in 6–10 minutes is not the same as full wash-ready curing.
The care process must still match the textile. A washable glue does not change a dry-clean-only curtain into a machine-washable product. It also cannot prevent lace, ribbon, printed decoration, or blackout coating from being damaged by unsuitable heat or detergent.
For dependable results:
- Bond only clean and dry material.
- Use a thin, even layer.
- Press both surfaces into full contact.
- Keep the textile flat during initial setting.
- Wait 24 hours before washing or ironing.
- Follow the fabric’s care label.
- Use a pressing cloth when ironing.
- Test delicate or coated fabrics first.
Retailers and private-label buyers may require more specific performance targets. Testing can be arranged around selected fabrics, expected wash cycles, regional care habits, or benchmark products. The instructions should then reflect the tested application rather than making one broad claim for every textile.
Which Pack Size Fits the Project?
The product is available as a single 50 g tube and a two-tube pack containing two 50 g tubes. The single tube is practical for small repairs, occasional alterations, trims, patches, and household craft projects.
The two-tube pack is better suited to paired curtain panels, multiple rooms, repeated textile repairs, larger craft projects, or users who want an unopened spare tube.
A curtain project can consume more adhesive than a small clothing patch because the bond runs across a long width. Actual coverage varies with fabric thickness, fold width, weave, and application amount, so the pack should be selected after testing rather than from a fixed coverage promise.
| Pack Format | Suitable Use | Main Advantage | Typical Buyer |
|---|---|---|---|
| 1 × 50 g | Small hems, patches, trims, occasional repairs | Lower starting quantity | Household DIY user |
| 2 × 50 g | Curtain pairs, several rooms, repeated projects | Better project continuity | Frequent user or crafter |
| Custom retail pack | Market-specific consumer positioning | Custom branding and instructions | Retailer or online brand |
| OEM/private label | Formula and packaging requirements | Scalable product development | Distributor or brand owner |
For commercial projects, tube size is only one specification. Nozzle diameter, cap sealing, label language, carton quantity, shelf presentation, leakage protection, and shipping classification can all affect the final product.
Private-label and OEM options can include formula selection, benchmark-product evaluation, custom branding, multilingual labels, packaging design, and regulatory documentation. Customized projects may begin from 200 units, depending on the formula, packaging, and testing requirements.
Suitable projects can use an existing mature formula with custom branding or move into a tailored development process when the buyer requires different viscosity, setting behavior, packaging, textile compatibility, or market positioning. Sample production commonly requires about 7–14 days, while standard bulk production is typically around 20 days, with faster scheduling available for qualifying urgent projects.
Conclusion
Using fabric glue on curtains and home textiles can be a practical alternative to sewing when the project is selected carefully. Curtain hems, lightweight trims, short loose seams, frayed edges, decorative patches, cushion covers, table linens, and some bedding repairs are all realistic applications. The strongest results come from matching the adhesive to the fabric, testing a hidden area, applying a thin layer, maintaining even pressure, and allowing the full curing period before hanging, washing, or ironing.
The method also has clear limits. Curtain hardware, headings, rings, hooks, heavy pleats, large tears, stretched upholstery, and safety-critical textiles may require stitching or additional reinforcement. A professional repair is not defined by using the greatest amount of adhesive. It is defined by understanding how the textile moves, where the load is concentrated, how the item will be cleaned, and how the repaired area should look and feel after months of use.
GleamGlee offers 50 g single-tube and two-tube fabric glue options for consumer repairs, curtain projects, textile crafts, and household alterations. The formula provides a strong, flexible, transparent bond, begins setting in approximately 6–10 minutes, and reaches full cure in approximately 24 hours. After curing, the bonded textile can be washed and ironed according to the product instructions and the care requirements of the fabric.
For retailers, distributors, Amazon sellers, Shopify brands, textile-care companies, and private-label buyers, GleamGlee also provides customized fabric adhesive solutions. Services can include formula development, benchmark sample evaluation, custom logos, multilingual labels, compliant packaging, precision applicators, SDS and regulatory support, sample testing, and FBA-ready production.
GleamGlee integrates adhesive research, raw-material support, packaging development, label printing, filling, testing, and export services. Customized projects can begin from an order quantity of 200 units, depending on the formula and packaging requirements. Design files may be prepared in as little as two days for suitable projects, samples commonly require 7–14 days, and standard bulk production is usually completed in approximately 20 days.
Businesses seeking fabric glue for curtains, clothing alterations, home textiles, crafts, or specialized washable applications can submit their target fabric, preferred pack size, benchmark sample, expected order quantity, destination market, and performance requirements. The technical and sales teams can recommend an existing formula, arrange product samples, or develop a customized adhesive and packaging solution for the project.





















