 Skip to content
Clear Ceramic Glue for Decorative Projects
Clear, controlled ceramic bonding for figurines, ornaments, mosaics, pottery décor, ceramic jewelry, and mixed-material craft details where appearance matters.
- GleamGlee Ceramic Glue dries clear, helping closely aligned repair lines stay less noticeable across visible ceramic, porcelain, pottery, and decorative surfaces.
- A medium-viscosity liquid formula and four precision applicator tips help place small dots or fine lines along narrow breaks and detailed parts.
- The single-component CA formula needs no measuring or mixing; align the pieces and press firmly for 5–10 seconds after applying a thin layer.
- Allow 24 hours for full curing before returning repaired décor, ornaments, planters, figurines, or handmade projects to normal handling or moisture exposure.

Is Clear Ceramic Glue Right for Decorative Work?
Start by checking joint fit, appearance, part size, material combination, and missing material before choosing a clear adhesive for a visible decorative project.
Best-Fit Decorative Tasks
Clear liquid ceramic glue works especially well when two small pieces can return closely to their original position. Typical examples include a figurine ear, ornament detail, ceramic flower petal, vase decoration, pottery accent, mosaic fragment, miniature component, or ceramic charm. GleamGlee combines transparent curing with controlled dispensing, making it useful where the bond line remains visible after assembly. Thin adhesive and accurate alignment matter more than covering the joint with a large amount of glue.
Projects to Check First
A wide cavity, missing ceramic material, heavily uneven edge, large structural break, or part carrying substantial load may need a filling adhesive, reinforcement, or another repair method. Decorative projects involving valuable antiques, unknown coatings, unusual plastics, food-contact areas, sustained high heat, or permanent water immersion also require additional evaluation. GleamGlee performs best as a precision bonding adhesive for close-fitting ceramic parts rather than as a ceramic filler, tile mortar, construction adhesive, or replacement for missing material.
Six Decorative Projects Made for Precise Ceramic Bonding
From collectible figurines to handmade mosaics, small decorative projects often need a narrow bond line, accurate placement, and a clean cured appearance.

Porcelain Figurines
Arms, ears, tails, wings, flowers, hats, and other projecting figurine details often break along small contact areas. Dry-fit every piece first, then use a precision tip to place a small amount directly on the break. Accurate positioning matters because decorative surfaces expose even minor misalignment. Press the parts firmly for 5–10 seconds and support delicate or unbalanced pieces while the adhesive completes its 24-hour cure.

Ceramic Ornaments
Christmas ornaments, seasonal villages, souvenir ceramics, commemorative pieces, and decorative miniatures often contain small painted details. A clear adhesive helps avoid introducing a strongly colored bond line beside patterns or glaze. Keep glue away from the visible face whenever possible. Repair larger body sections before adding tiny projecting details, and leave the finished ornament in a stable position for a full 24-hour cure before hanging or displaying it.

Decorative Vases
Small rim fragments, ornamental flowers, raised patterns, handles used only as decoration, and exterior ceramic details can often be repaired when broken edges still fit together closely. Curved surfaces may need a soft support to prevent movement after pressing. Use only enough adhesive to wet the contact area. A transparent bond helps preserve the visual character of glazed, patterned, or painted pieces without introducing an opaque repair line.

Mosaic Artwork
Loose ceramic fragments, decorative tile pieces, tabletop inlays, picture-frame accents, and small mosaic compositions benefit from controlled spot application. Complete the dry layout before opening the glue, then lift one piece at a time, apply a small dot or short line, and return it to its marked position. GleamGlee can also support listed mixed-material combinations such as ceramic fragments bonded to wood or stone in compact decorative projects.

Ceramic Jewelry
Ceramic pendants, charms, miniature tiles, and decorative ceramic pieces may connect to metal findings or other small components. Clean both contact surfaces, verify the parts meet securely, and use a precision tip to keep adhesive inside the bond area. Tweezers can improve placement on very small components. Allow the completed piece to cure for 24 hours before handling, packaging, wearing, or placing repeated stress on the bonded connection.

Handmade Home Décor
Ceramic flowers on frames, pottery accents on display boards, decorative shards, miniature arrangements, and mixed-media ornaments combine creative freedom with demanding visible joints. Plan the complete layout before gluing. Work from larger anchor pieces toward smaller details and keep each adhesive layer thin. GleamGlee is designed primarily for ceramic, porcelain, and pottery, with additional listed compatibility across glass, metal, wood, plastic, and concrete for small craft applications.
Four Factors Control How Visible a Repair Looks
Transparent glue helps, but the finished appearance also depends on edge fit, adhesive thickness, alignment accuracy, and control of excess material.
Clear Cured Color
GleamGlee dries clear, reducing the contrast created by a colored adhesive between closely aligned ceramic pieces. Clear curing is especially valuable on white porcelain, painted figurines, patterned pottery, decorative tiles, and glossy ornaments. The original crack can still remain visible under certain lighting, so transparent adhesive should be understood as an appearance advantage rather than a promise that every repaired break disappears completely.
Close Edge Fit
Two complete broken edges that return naturally to their original position usually create a narrower repair line than pieces separated by a missing chip or wide cavity. Dry fitting exposes gaps before adhesive is applied. If the parts rock, leave a large void, or cannot return to their original geometry, a precision liquid CA adhesive may not be the correct material for the entire repair.
Thin Glue Layer
A thin, even coating is generally enough for close-fitting ceramic joints. Excess adhesive can squeeze onto glaze, collect around a painted detail, or create a raised line beside the repair. More glue does not automatically mean more strength. Use the smallest controlled amount that covers the effective bonding area, then bring the pieces together without repeatedly sliding them across one another.
Accurate Alignment
Clear glue cannot hide an offset pattern, uneven rim, rotated figurine arm, or misplaced ornament detail. Practice the full positioning movement before applying adhesive, especially when the part must engage at a specific angle. Mark orientation on a hidden area when helpful. Once adhesive is applied, bring both parts together in one controlled motion and maintain stable pressure for 5–10 seconds.
GleamGlee Ceramic Glue Facts at a Glance
Use verified specifications to judge decorative project fit, application control, curing schedule, material compatibility, and pack size before starting a visible ceramic repair.
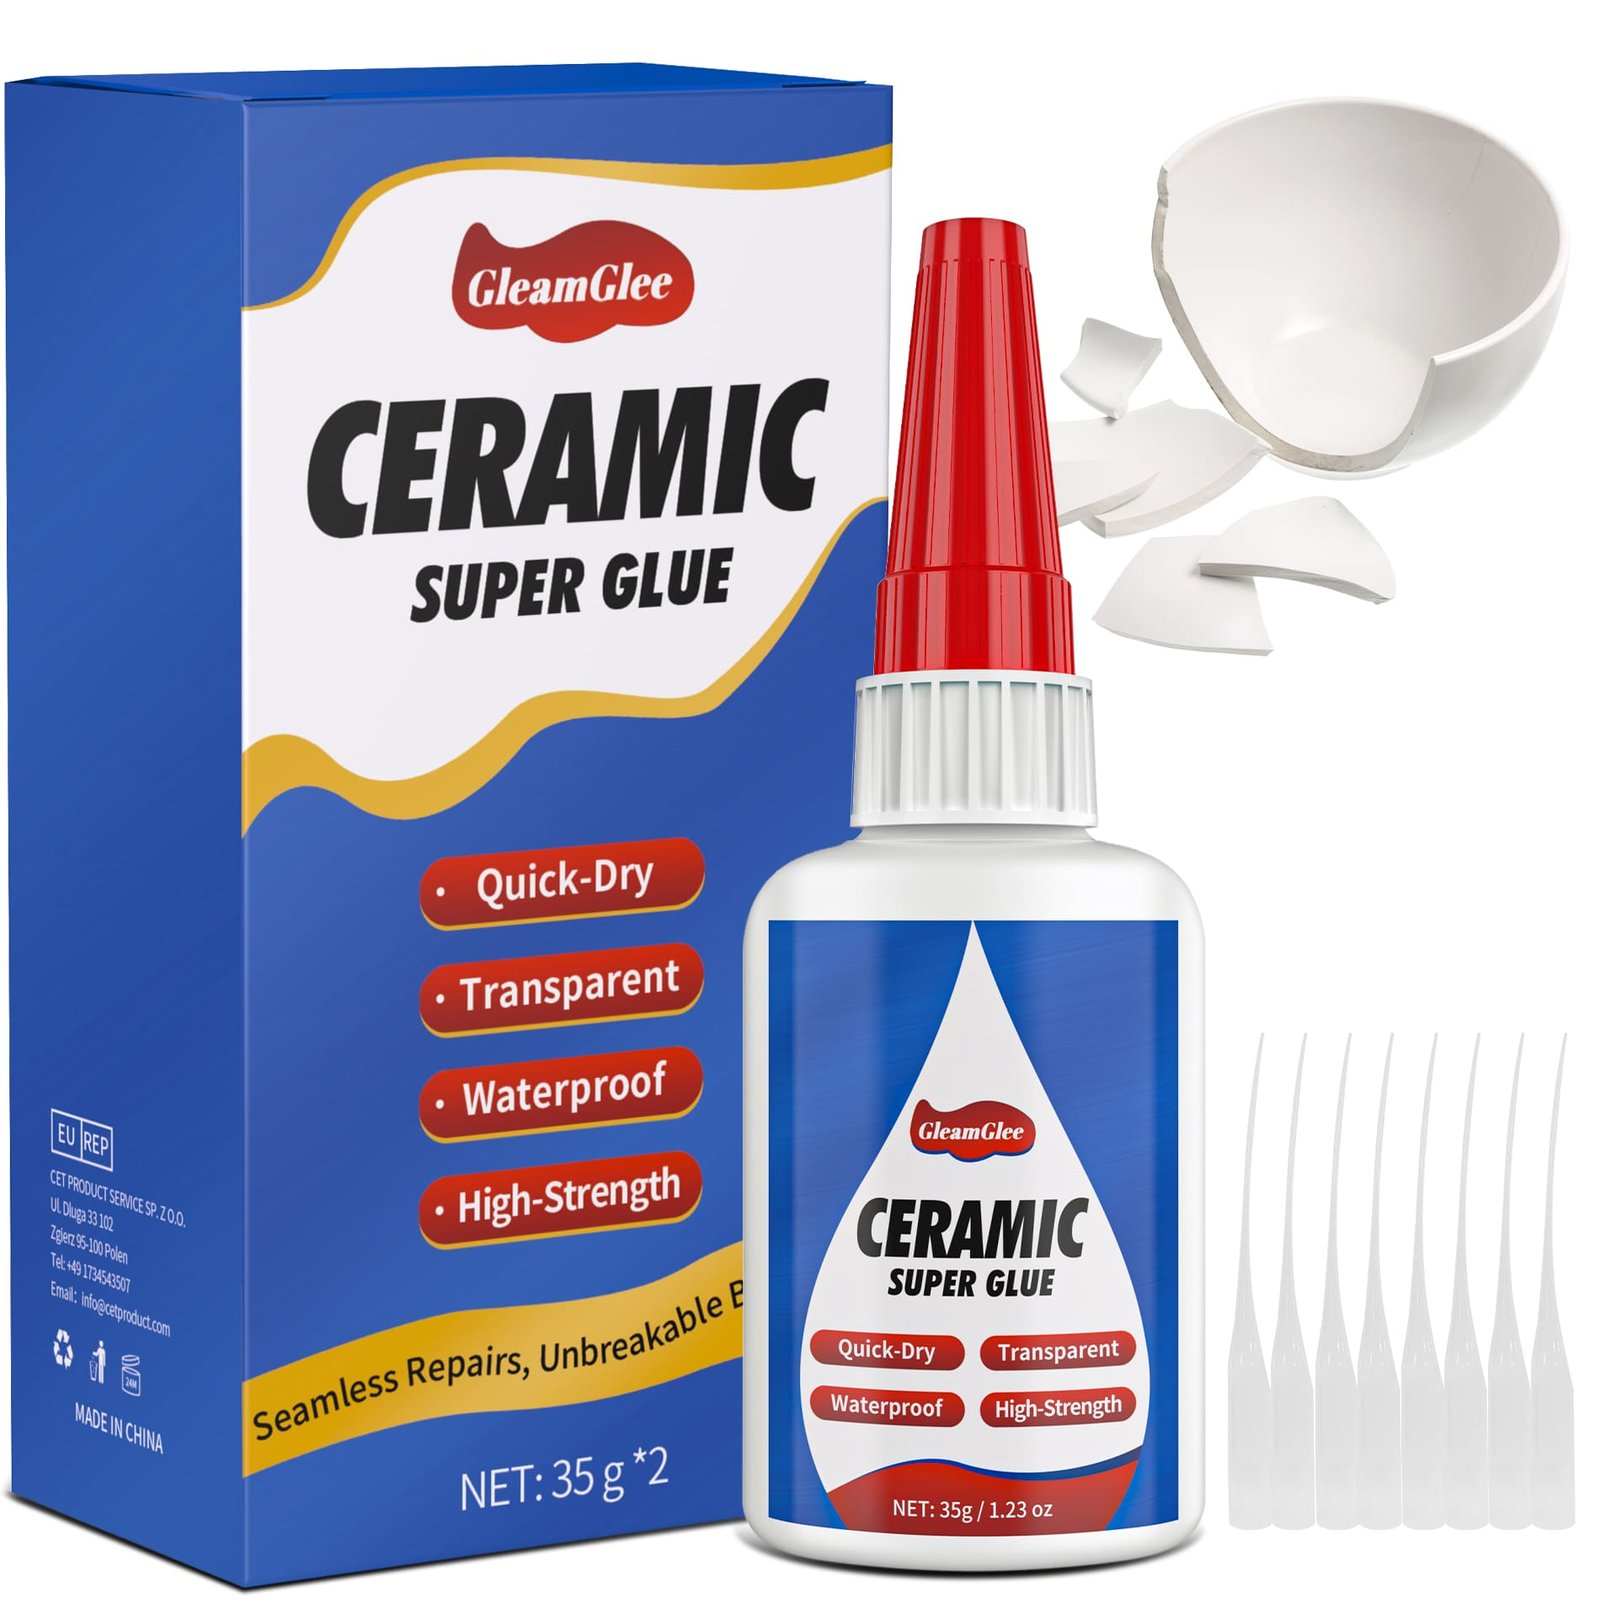
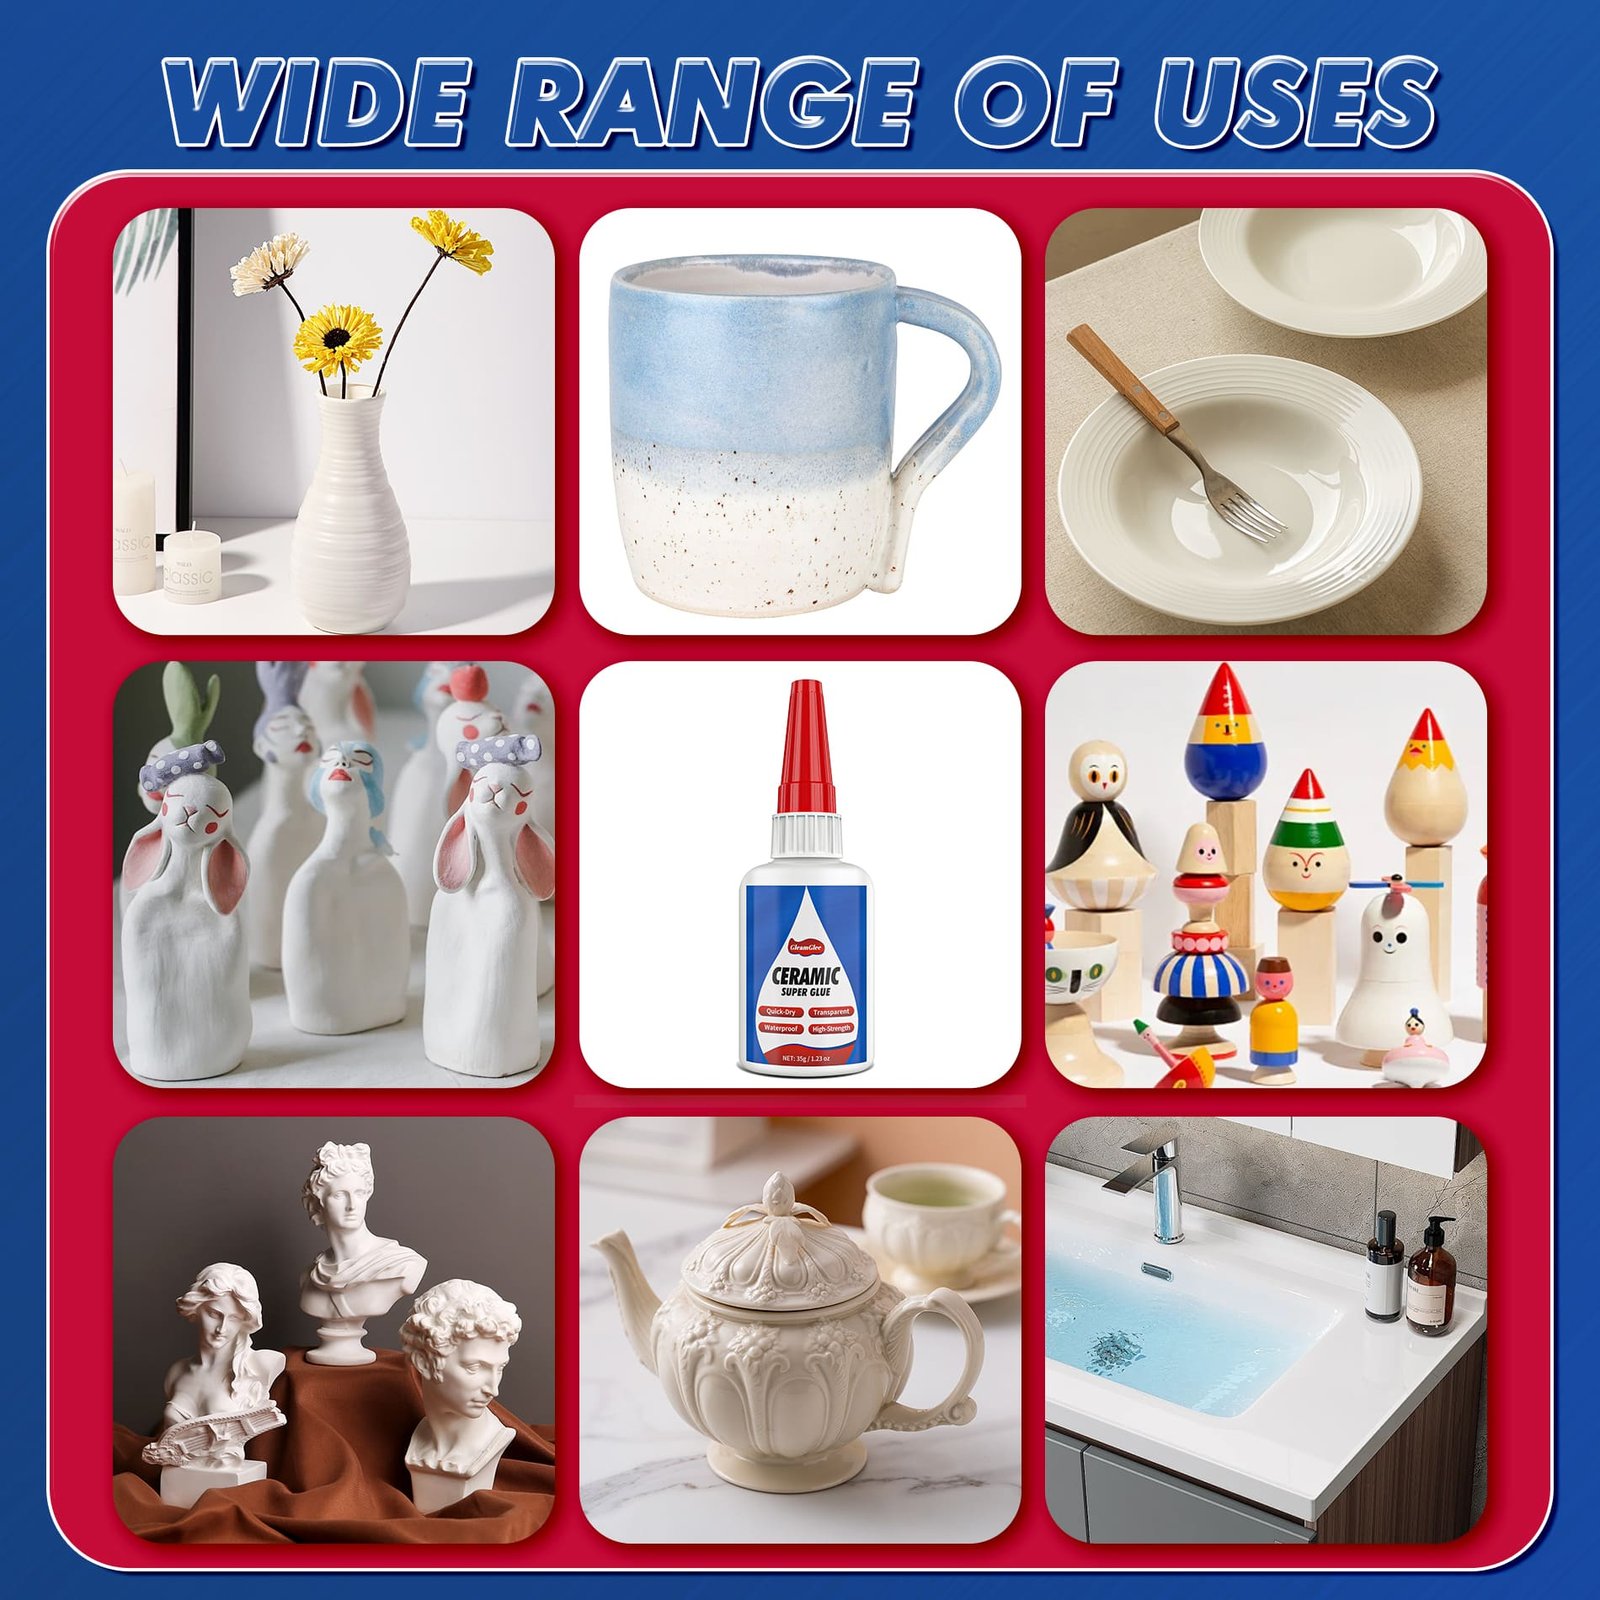
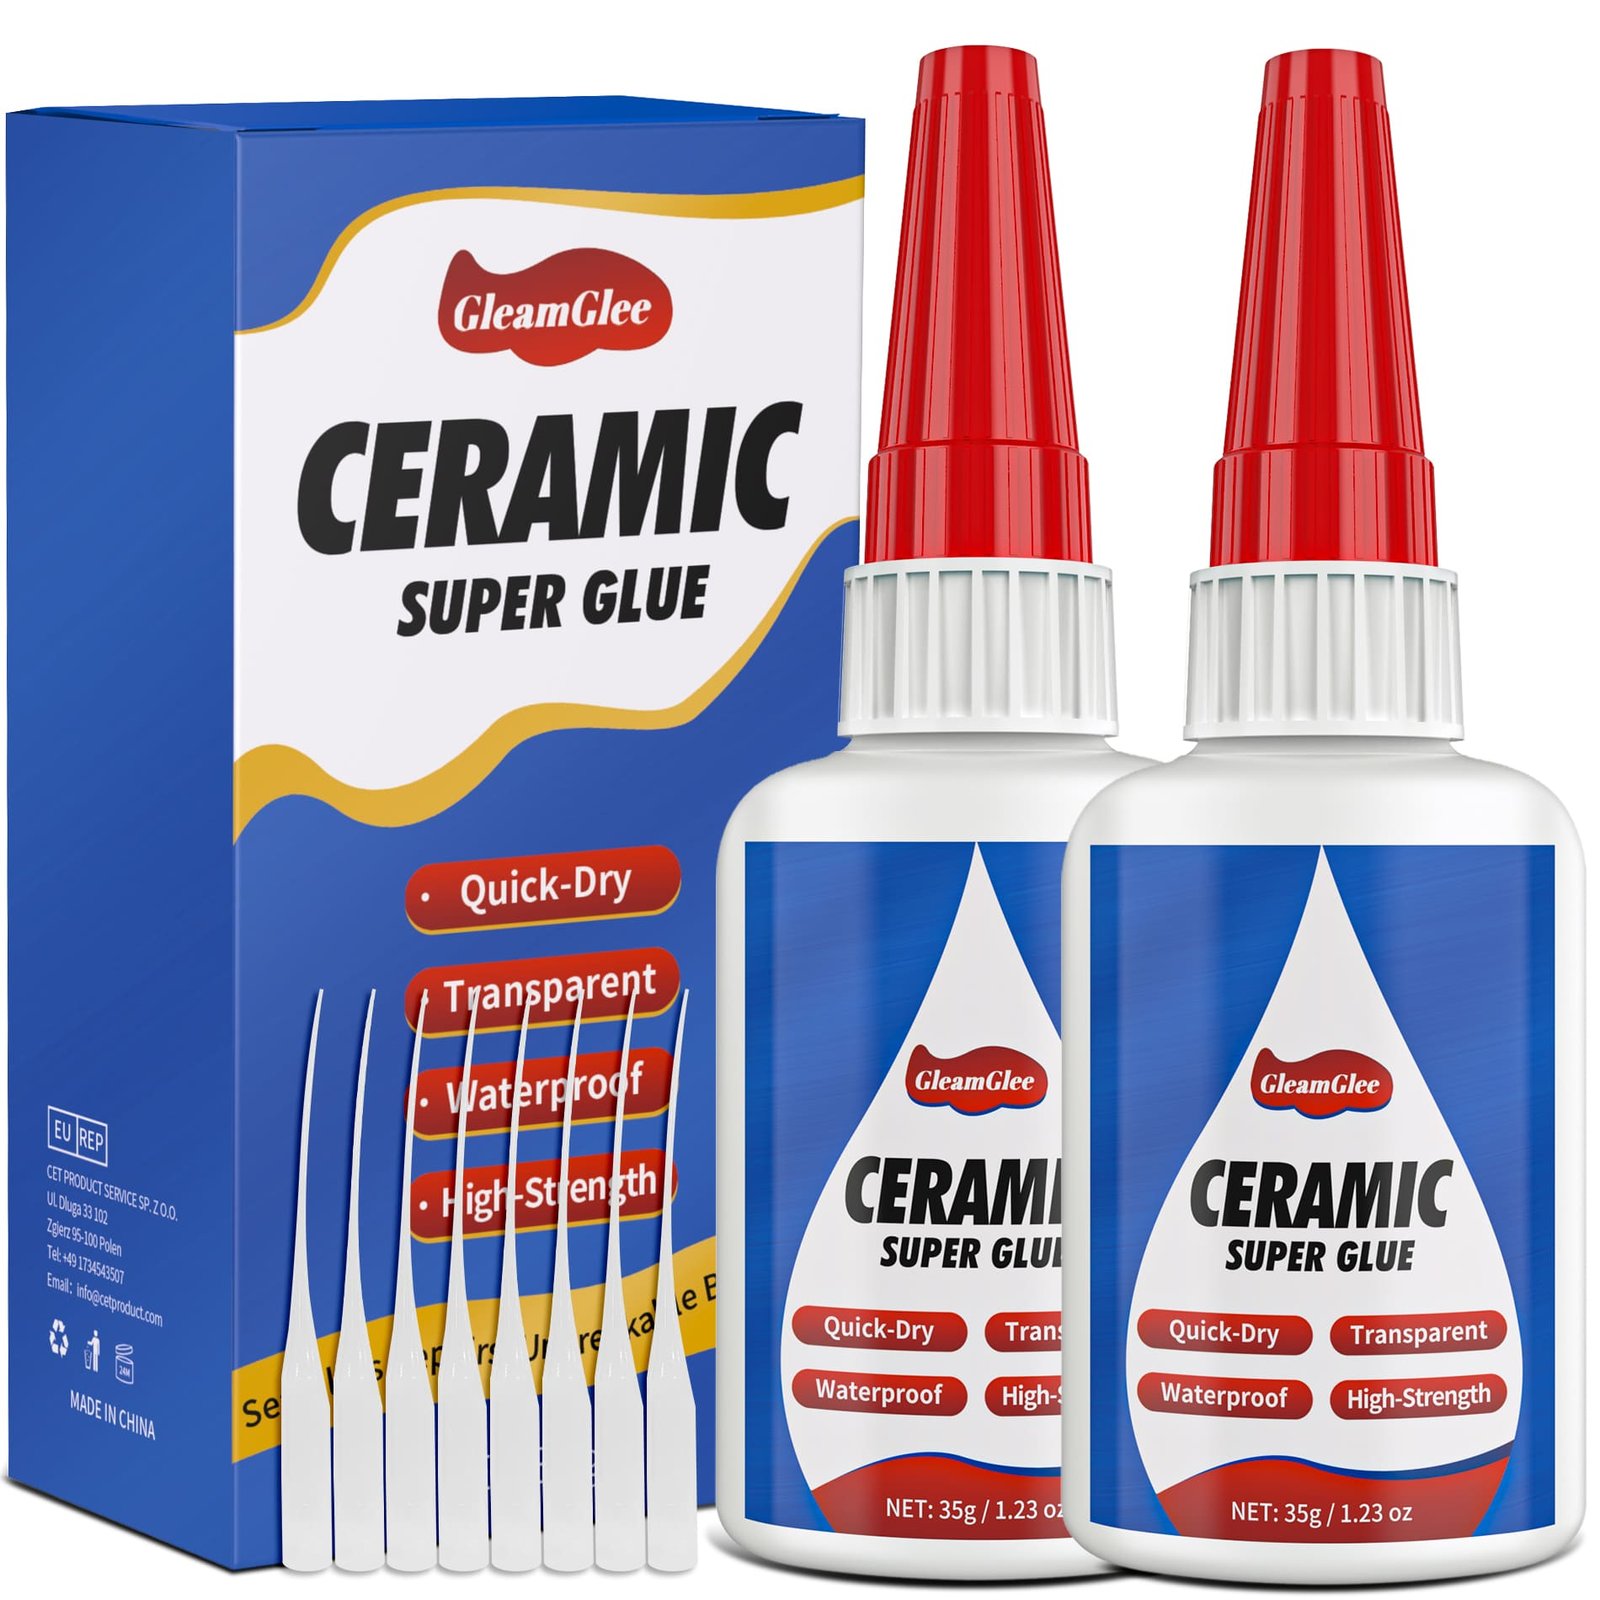
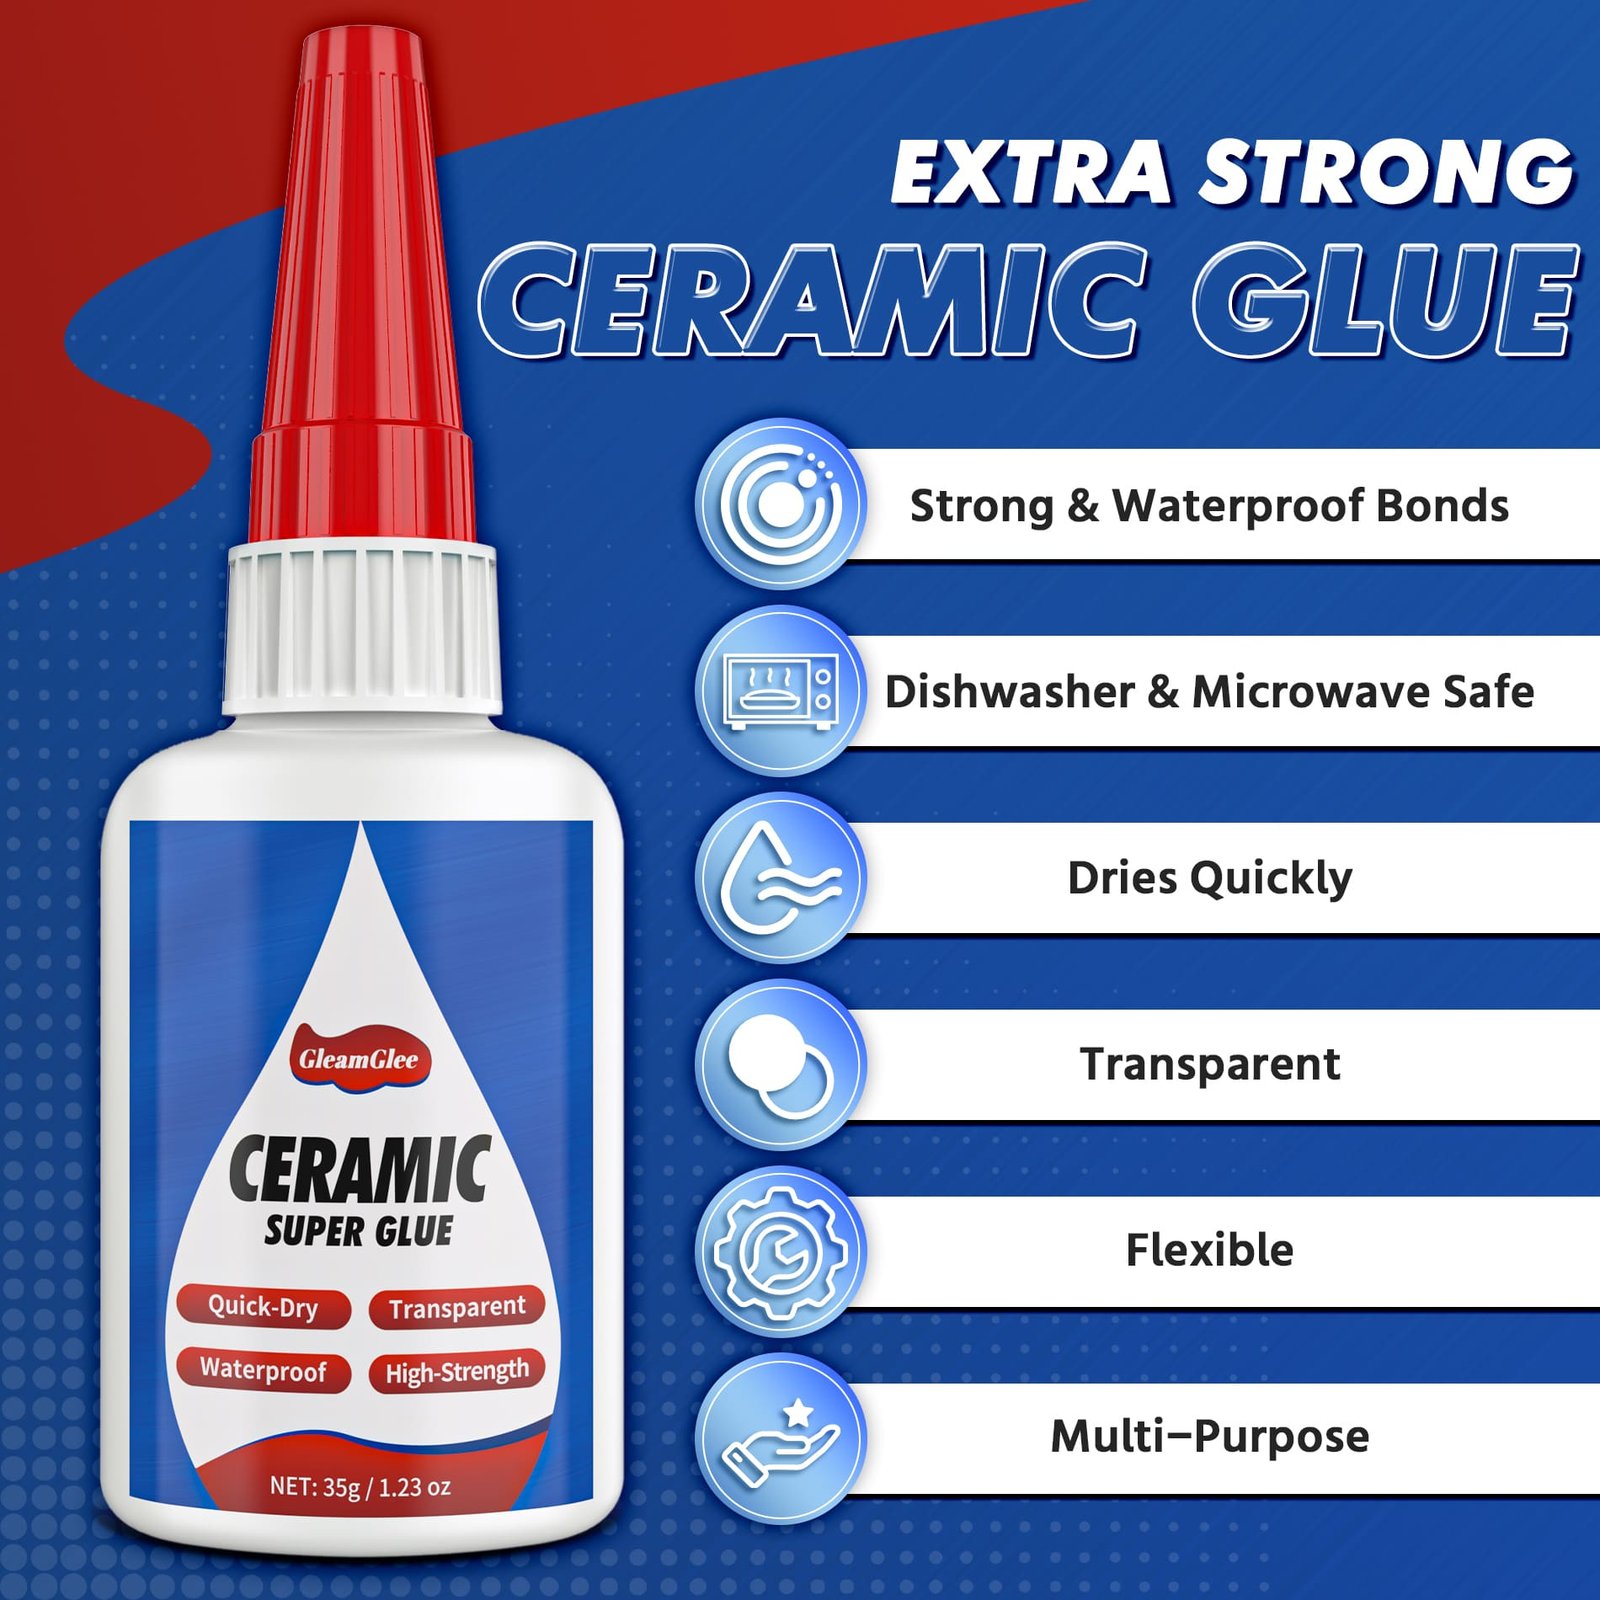
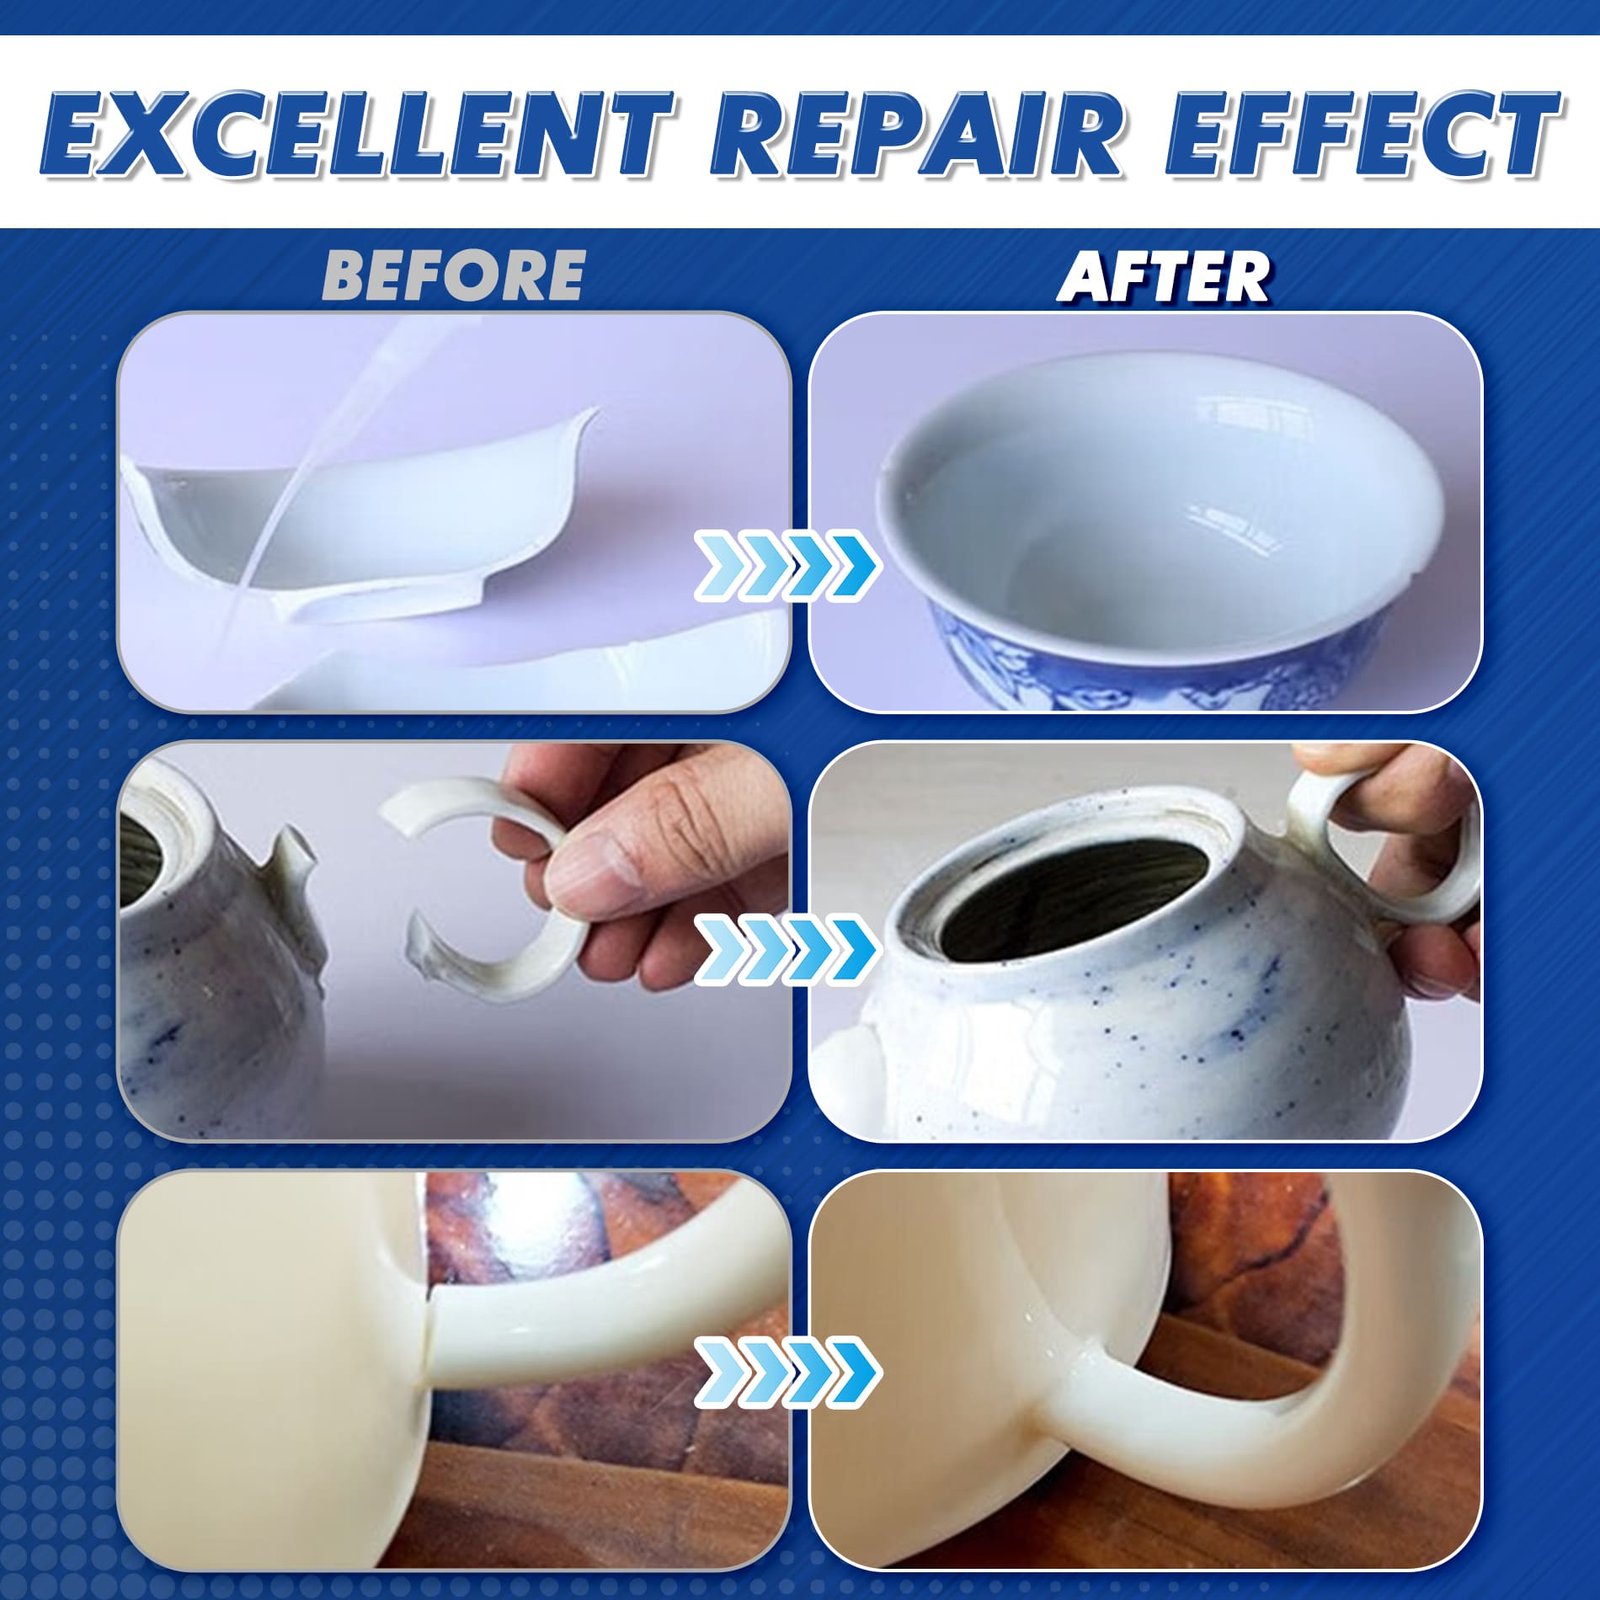
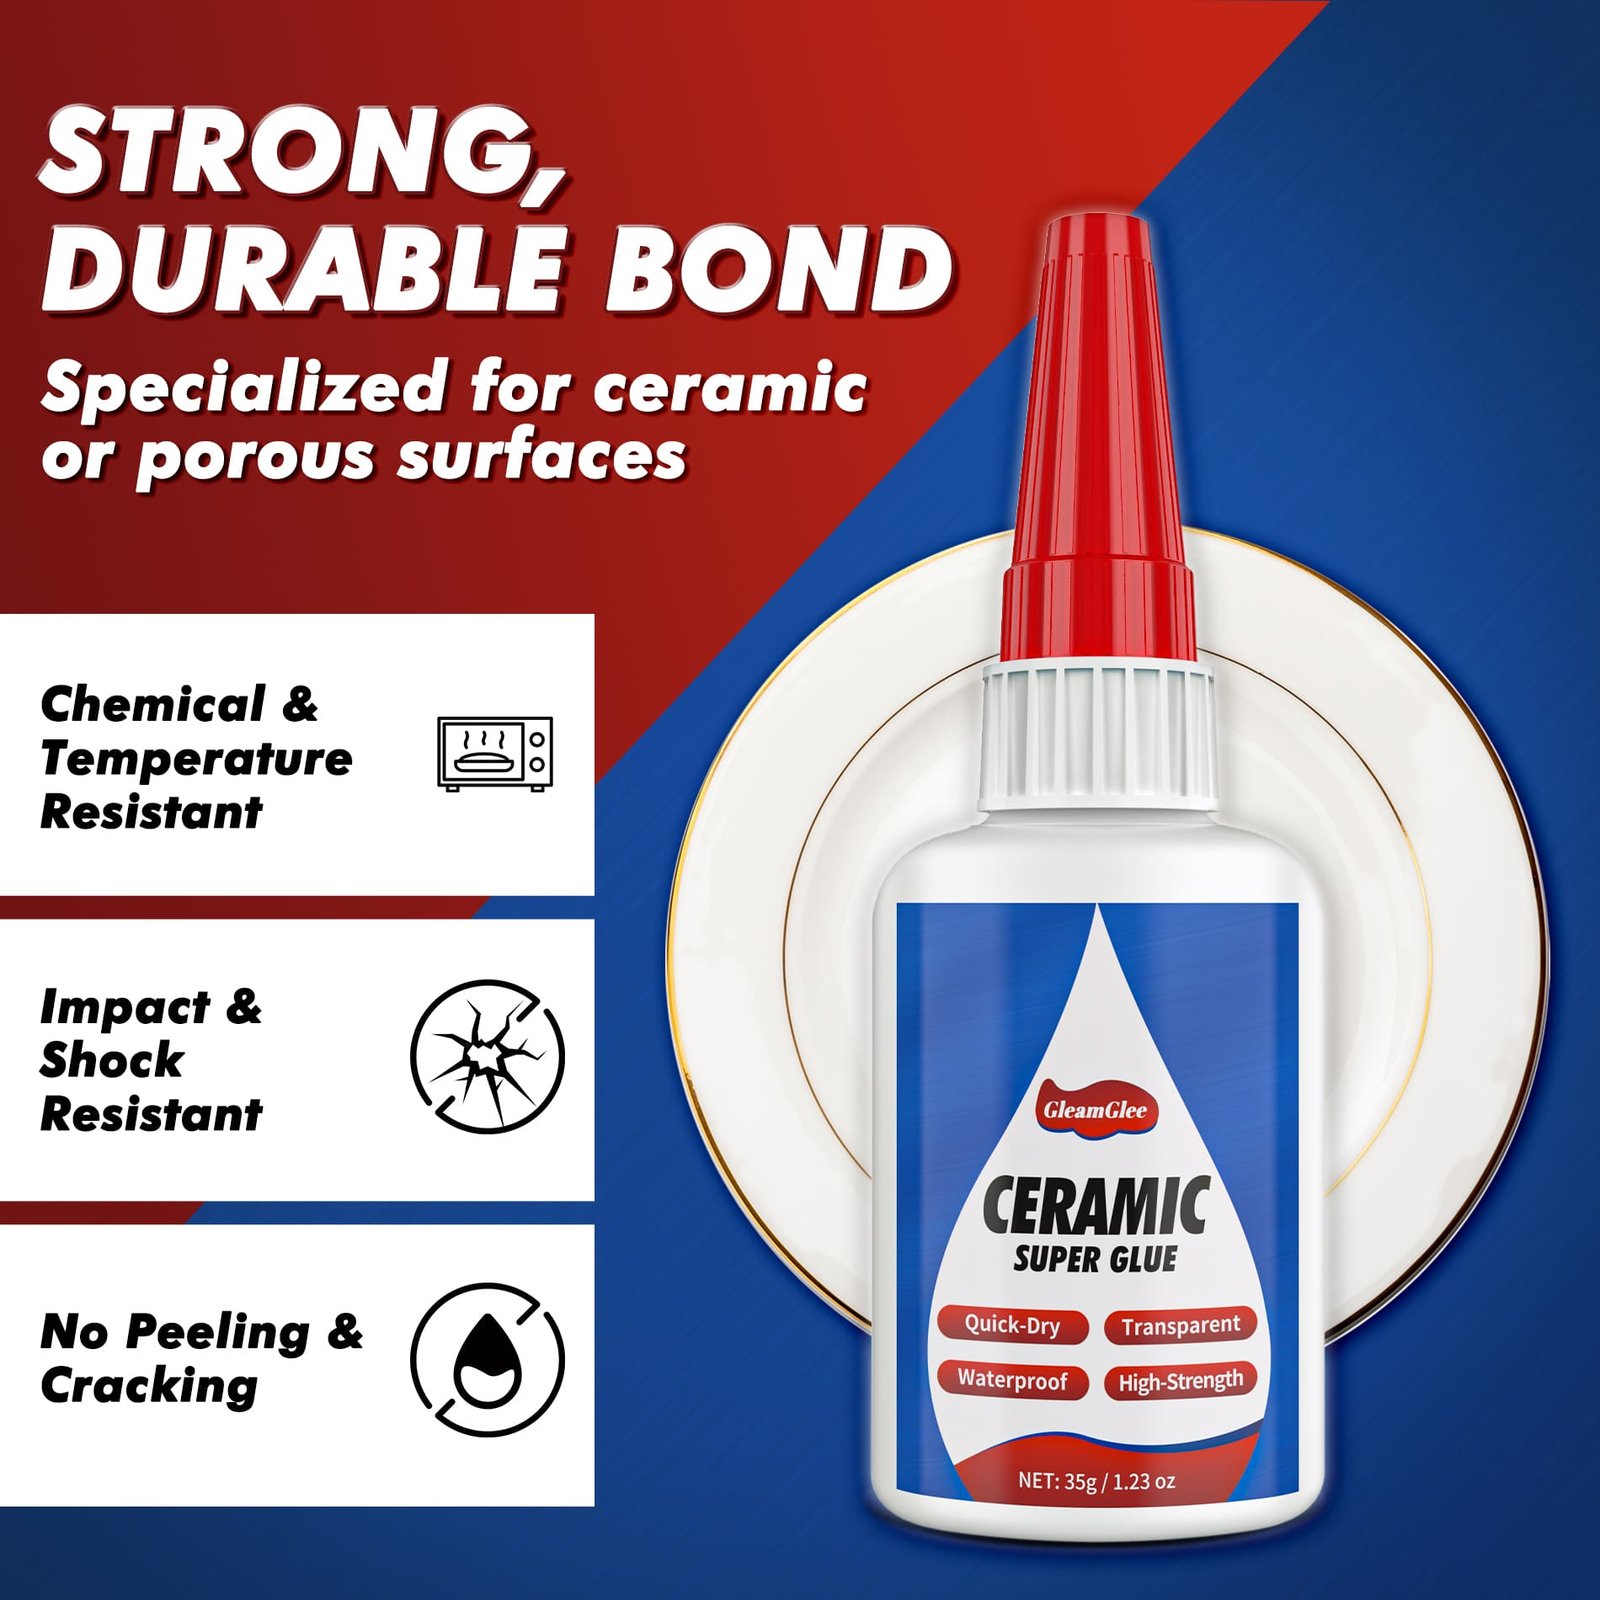
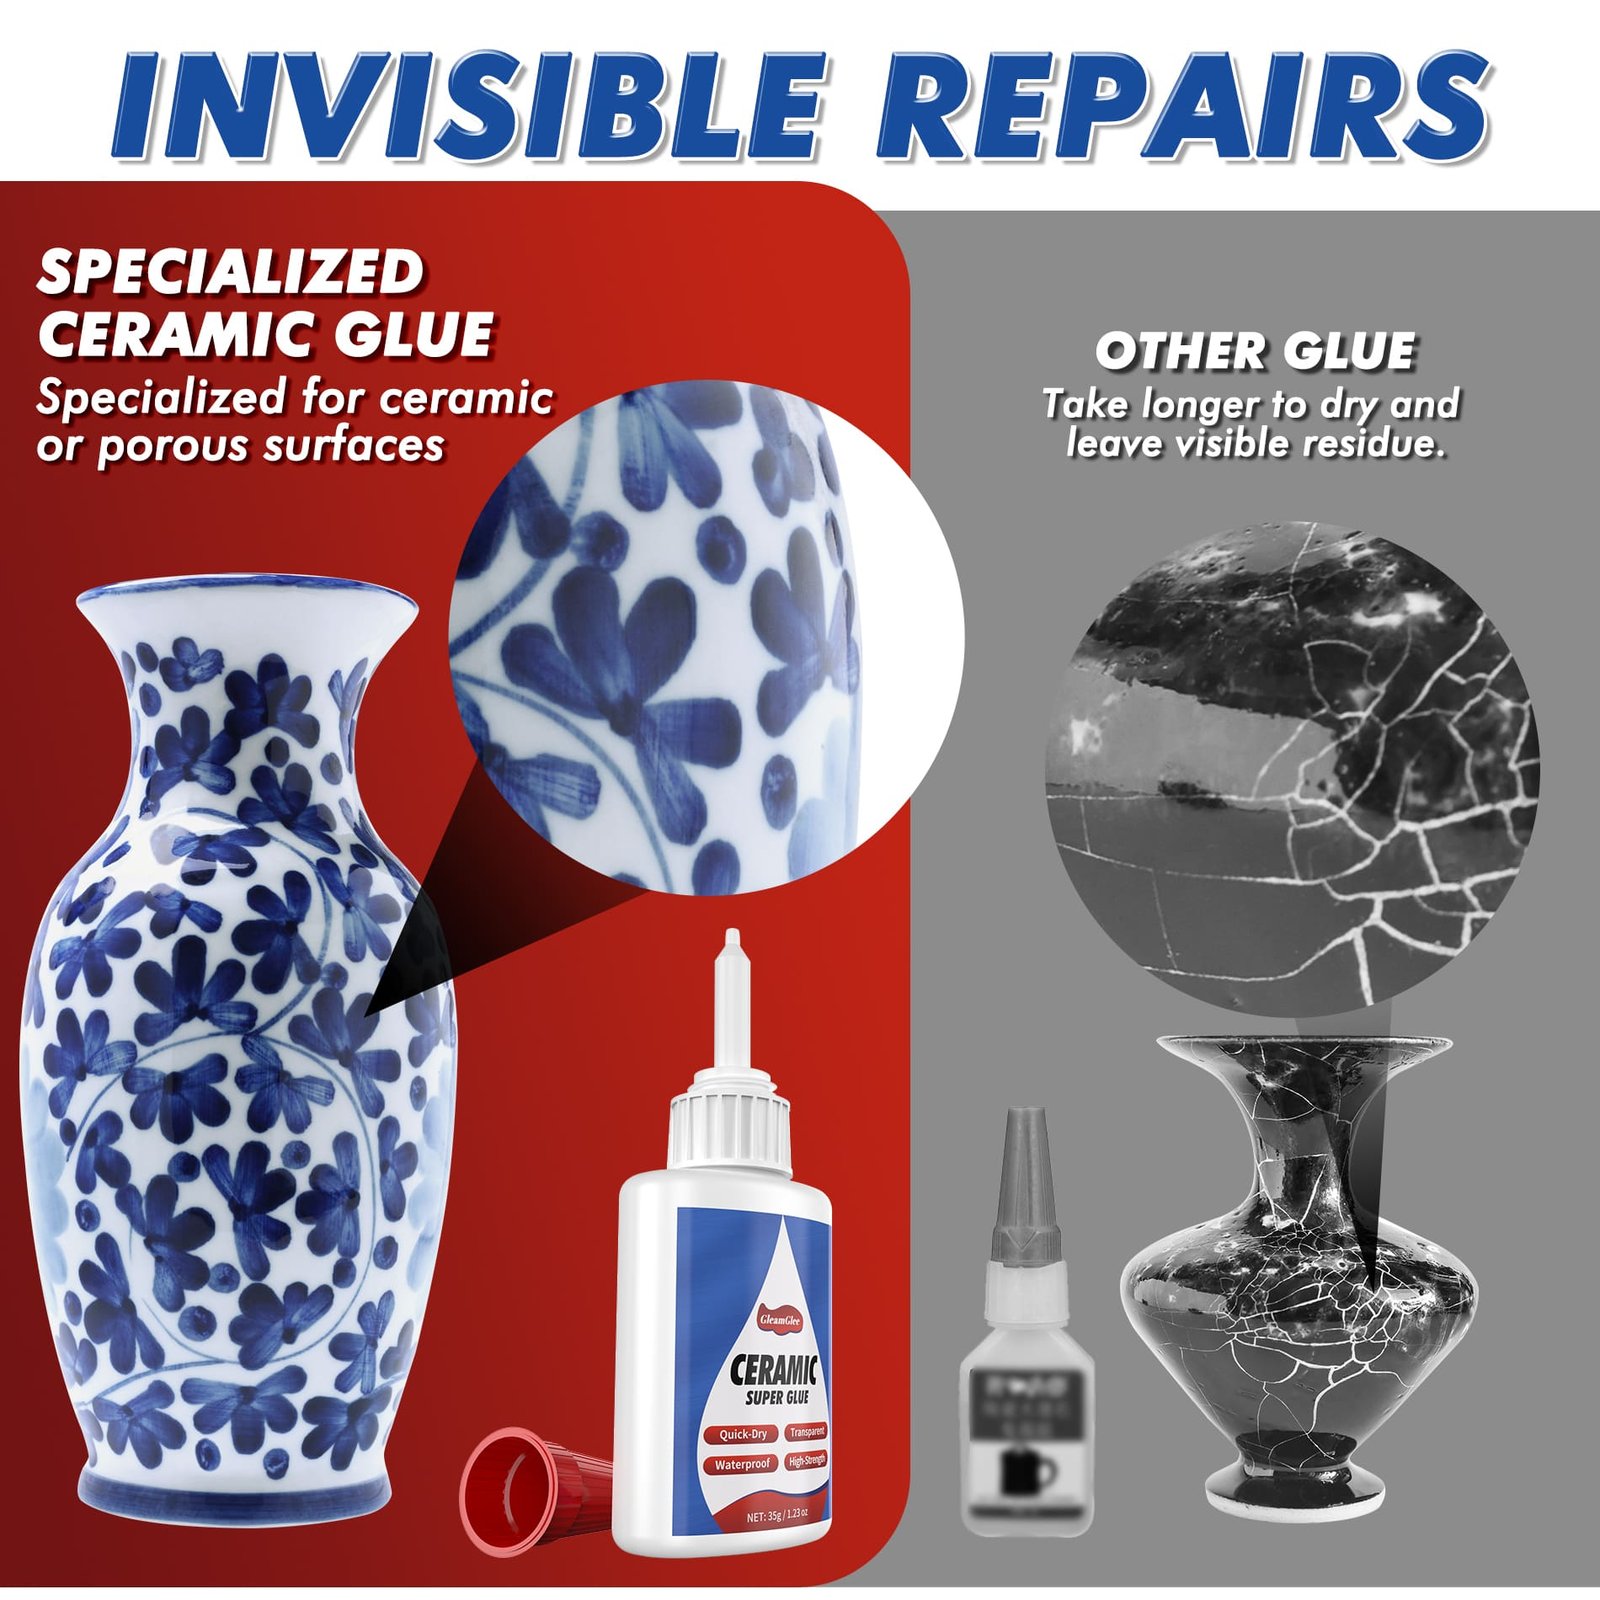
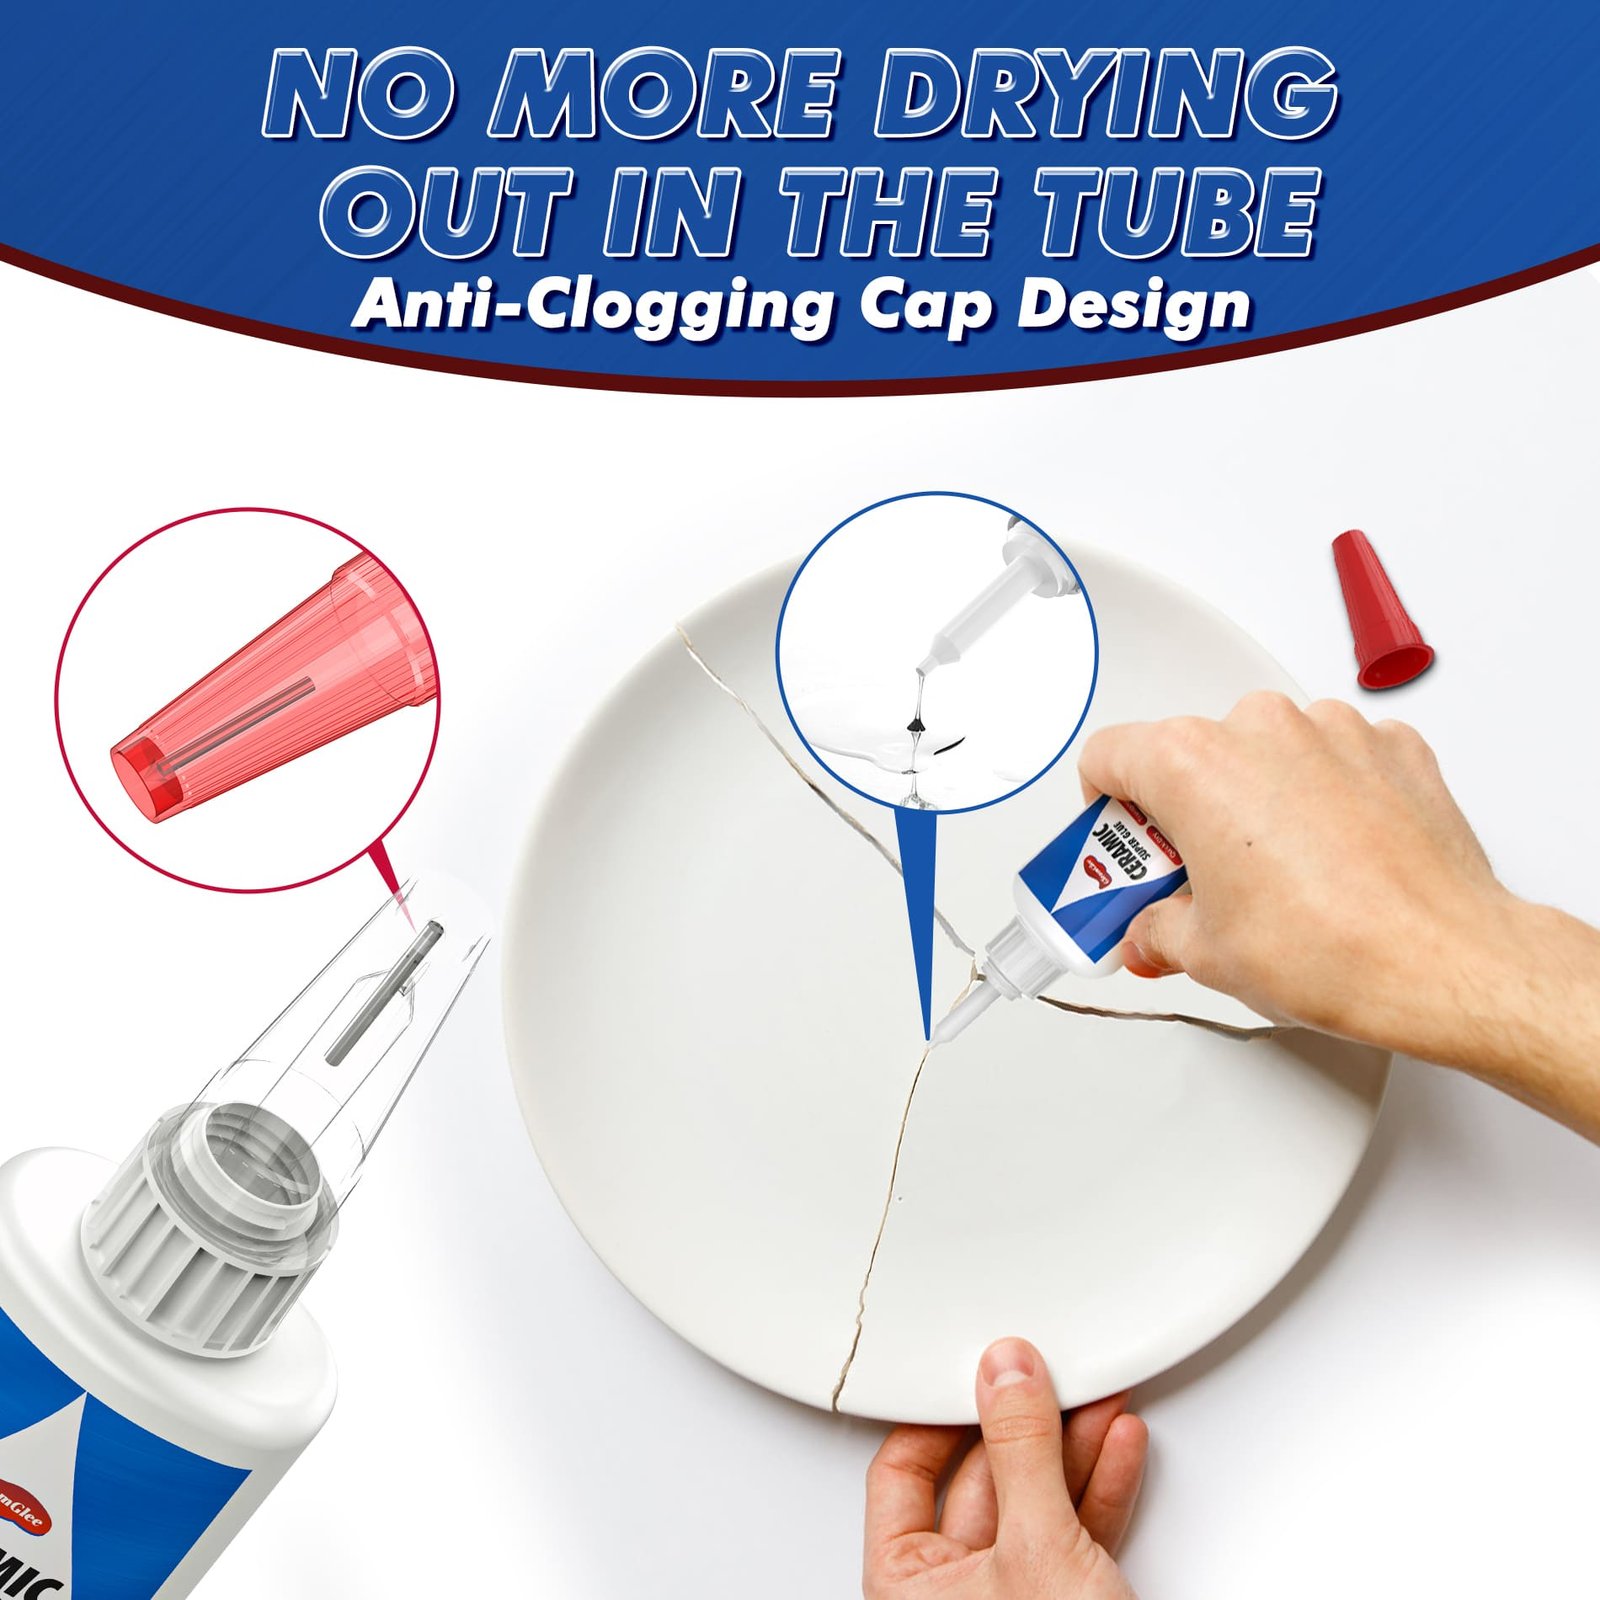
| Product Detail | Verified Information |
|---|---|
| Brand | GleamGlee |
| Product | Ceramic Glue / Ceramic Repair Glue |
| Adhesive Type | Single-component cyanoacrylate / CA adhesive |
| Physical Form | Clear liquid |
| Viscosity | Medium viscosity |
| Cured Appearance | Clear / transparent |
| Single Bottle | 35g / 1.23 oz |
| Single-Bottle Applicators | 4 precision applicator tips |
| Two-Bottle Pack | 2 × 35g |
| Two-Pack Applicators | 8 precision applicator tips |
| Mixing | No mixing or separate hardener required |
| Recommended Press | 5–10 seconds |
| Full Cure | 24 hours |
| Core Materials | Ceramic, porcelain, pottery, glazed ceramic, decorative ceramic |
| Additional Listed Materials | Glass, metal, wood, plastic, concrete |
| Moisture Positioning | Water-resistant after full cure |
| Temperature Positioning | Heat-resistant for normal household use |
| Intended Scale | Small household, decorative, and craft repairs |
| Warranty | 1 Year Manufacturer |
| Purchase Channel | Amazon US |
Three Precision Application Methods for Decorative Details
Choose dots, fine lines, or recessed placement according to contact shape instead of dispensing the same amount of adhesive across every ceramic project.

Small Glue Dots
Tiny ceramic flowers, miniature ornaments, mosaic pieces, charms, and figurine details often need only a small localized contact point. Fit a precision applicator, position the tip close to the surface, and release a controlled dot rather than squeezing from a distance. The goal is complete contact without surrounding buildup. Test the dispensing pressure on disposable material before approaching a valuable decorative surface, especially when working with very small pieces.

Fine Bond Lines
Longer but narrow breaks, such as a vase rim fragment, decorative tile edge, pottery accent, or continuous ornament break, benefit from a thin line following the effective contact area. Move the applicator steadily along the broken edge while applying light bottle pressure. Avoid doubling back repeatedly. A uniform narrow line is easier to align and usually produces less squeeze-out than several oversized drops placed along the same break.

Recessed Placement
Figurine details, miniature architecture, ornamental flowers, deep decorative patterns, and tight corners may be difficult to reach with a standard bottle opening. A precision tip can move closer to a recessed break and place adhesive directly on the contact face. Arrange lighting, tweezers, support blocks, and hand position before dispensing. Do not treat the extension tip as a tool for filling inaccessible cavities; the bonded surfaces still need usable contact.
Decorative Repair and Decorative Creation Need Different Planning
Restoring an existing break and assembling a new craft can use similar adhesive skills, yet alignment, material selection, and project sequencing differ considerably.

Repair Existing Décor
Repair work starts with the original geometry. Every fragment should be identified, dry-fitted, and returned as closely as possible to its previous position before glue is introduced. Figurines, ornaments, vases, pottery decorations, and collectible pieces often demand careful control because the original pattern or glaze provides a visible reference for alignment. Repair the main body first when several pieces are involved, then attach smaller projecting details after the larger structure is stable.

Create New Décor
Craft assembly begins with a planned layout rather than a broken original. Mosaic fragments, ceramic flowers, charms, picture-frame accents, mixed-media pieces, and decorative inlays can be arranged dry until spacing and orientation look correct. Mark positions when helpful, then bond one component at a time. Listed mixed-material combinations can expand creative options, but coatings and unfamiliar surfaces should be tested before completing a visible project.
Match Ceramic Glue to Decorative Materials Correctly
Material names matter because ceramic décor often combines glaze, porous pottery, glass, metal, wood, plastic, stone-like bases, and different surface treatments.
| Material Combination | Decorative Examples | Preparation Focus | Application Direction |
|---|---|---|---|
| Ceramic + Ceramic | Figurines, ornaments, pottery details | Remove dust, moisture, loose fragments | Thin layer on a close-fitting break |
| Porcelain + Porcelain | Collectibles, decorative plates, miniatures | Protect painted or glazed faces | Use minimal adhesive and accurate alignment |
| Pottery + Pottery | Handmade décor, earthenware ornaments | Remove loose powder and particles | Wet effective contact area without flooding |
| Ceramic + Glass | Decorative accents, mixed-media ornaments | Remove fingerprints and cleaner residue | Test first and keep glue inside contact area |
| Ceramic + Metal | Pendants, knobs, brooches, craft fittings | Remove oil and loose oxidation | Favor stable, close contact over narrow peel edges |
| Ceramic + Wood | Mosaic boards, picture frames, décor panels | Remove dust, wax, oil, unstable finish | Dry-layout first, then bond one piece at a time |
| Ceramic + Plastic | Miniatures and selected decorative parts | Identify plastic and surface coating first | Hidden-area or scrap test recommended |
| Ceramic + Concrete | Decorative plaques and small accents | Remove dust and loose surface material | Use for small detail attachment, not structural work |
| Ceramic Mosaic + Stone | Artwork and decorative bases | Clean both surfaces and test fit | Spot-bond individual fragments precisely |
Check Four Joint Conditions Before Opening the Bottle
A one-minute dry assessment can reveal whether a decorative break suits thin CA bonding or needs filling, reinforcement, reconstruction, or professional restoration.
Complete Broken Edges
Place the pieces together without adhesive. A suitable joint should recover most of its original shape without forcing the fragments. Fine irregularities are normal, but large missing chips create empty space that liquid glue cannot rebuild. Decorative repairs benefit greatly from retaining every fragment because complete edges support both a narrower adhesive layer and better visual alignment.
Stable Contact Area
Small parts can be repairable when enough surface remains to create meaningful contact. A figurine ear with a broad base differs from a thin ceramic spike connected by a tiny point. Evaluate the direction in which the part will be handled after repair. A larger, flatter contact surface generally gives a liquid adhesive a more favorable joint than an extremely narrow peeling connection.
Manageable Gap Size
GleamGlee is a medium-viscosity liquid CA adhesive rather than a ceramic filler or putty. If two fragments meet closely, a thin bond line suits the formula well. If a deep cavity remains after alignment, repeatedly adding liquid glue does not recreate missing ceramic. Separate bonding from gap rebuilding and select a filling system when the geometry requires one.
Safe Final Use
Decorative display pieces, ornaments, figurines, mosaics, craft projects, planters, and small household décor often fit the intended repair scale. High structural loads, critical safety parts, direct food-contact claims, ovens, microwaves, open flames, or continuous high-temperature service require information beyond the verified product facts. Repair decisions should reflect final use, not only whether the pieces initially stick together.
Prepare Four Decorative Ceramic Surfaces Before Bonding
Glaze, porous pottery, painted porcelain, and previously repaired objects collect different contaminants, so preparation should match the actual surface surrounding the broken joint.
Glazed Ceramic
A fresh ceramic break often exposes a rough internal body while the outside remains smooth and glazed. Focus adhesive on the actual broken faces rather than spreading it across the decorative glaze. Remove dust, moisture, fingerprints, and cleaning residue from the contact area. Protect the visible surface from excess glue by planning hand position and alignment before dispensing. Do not roughen valuable glaze simply to create a larger adhesive area without a documented need.
Porous Pottery
Earthenware and some pottery breaks may release fine powder or loose grains after fracture. Gently remove unstable debris so adhesive contacts solid material rather than a layer of dust. Avoid saturating a porous edge with excessive cleaner immediately before repair. Let both faces dry completely, inspect whether the geometry still fits, then apply a thin adhesive layer. Heavy crumbling may indicate deterioration beyond a simple small-bond repair.
Painted Porcelain
Painted figurines and decorated porcelain demand careful handling around graphics, metallic accents, decals, and glazed finishes. Keep cleaning limited to the bonding faces whenever possible and avoid aggressive chemicals on visible artwork. Dry-fit first and determine where fingers or tweezers can hold the part without touching decoration. Transparent curing helps preserve visual continuity, but excess adhesive on a painted surface can remain noticeable even when colorless.
Previously Glued Pieces
Old repairs may leave brittle, uneven, or loose adhesive on the fracture. If residue prevents the fragments from returning to their original position, the joint cannot achieve close contact. Remove only unstable material using a method suitable for the ceramic finish and protect valuable decoration. After preparation, repeat the dry fit. High-value collectibles or difficult old adhesive may justify professional evaluation before another repair attempt.
Use the Right Amount of Glue for Each Joint
Glue quantity should follow contact geometry: a small dot for tiny details, a fine line for continuous edges, and a thin film for broader close-fitting faces.
Tiny Contact Points
Small ornament details, petals, ears, horns, miniature decorations, and jewelry components need very little adhesive. Place a controlled dot within the contact face instead of covering the surrounding surface. Once both parts meet, the adhesive should spread across the useful area without creating a visible pool. Precision improves when the bottle is tested on scrap first and the final positioning movement has already been rehearsed.
Continuous Edges
Rim fragments, decorative tile pieces, broken pottery borders, and longer figurine sections may need a narrow line rather than separate large drops. Follow the break with steady applicator movement and light pressure. Avoid gaps in the adhesive path, but do not build a ridge. When the pieces are brought together, even contact should distribute the thin layer across the joint instead of forcing large amounts onto the visible glaze.
Broader Flat Faces
Decorative ceramic accents attached to wood, metal, glass, stone-like bases, or another ceramic piece may present a wider contact area. Spread only enough adhesive to create a thin, continuous film where the surfaces actually touch. Uneven, warped, or widely separated faces are not improved simply by adding more liquid glue. Confirm flat contact first and choose a filling system when a genuine cavity remains.
Complete a Decorative Ceramic Repair in Four Stages
A clean repair depends on preparation before dispensing, controlled application during assembly, and enough undisturbed time for the bond to develop fully.

Clean and Dry
Remove dust, oil, moisture, loose ceramic particles, cleaning residue, and unstable old glue from both bonding surfaces. Use preparation methods suitable for the finish surrounding the break. Let cleaned areas dry completely. A visually clean glazed surface can still carry fingerprints or residue, while a pottery fracture may hold fine powder. Direct adhesive contact with sound material is more important than aggressive surface treatment.

Apply Thinly
Place a thin, even adhesive layer on one bonding face. Tiny pieces can use a small dot; a narrow continuous break can use a fine line. Keep the applicator close to the surface to improve placement. Avoid filling the joint with a large pool. Excess adhesive can move onto glaze or decoration when pressure is applied, so controlled quantity supports both cleaner appearance and easier alignment.

Align and Press
Bring both pieces together in the rehearsed position without repeatedly sliding or rotating them. Check the outline, pattern, rim, or figurine geometry immediately. Press firmly for 5–10 seconds according to the product guidance. An unbalanced vase detail, figurine limb, or curved ornament component can benefit from low-force support after initial positioning. Short pressing time is an initial-hold step, not complete curing.

Cure for 24 Hours
Place the repaired project somewhere stable, dry, ventilated, and protected from contact. Allow 24 hours for full curing before normal handling or moisture exposure. Do not judge final performance from the first few seconds after the pieces stop moving. After curing, inspect alignment, adhesive overflow, and joint stability gently before returning the object to display, craft use, or normal decorative handling.
Separate Fast Initial Hold From Full Ceramic Cure
Decorative work benefits from quick positioning, but a part that stops moving after several seconds still needs time before regular handling or moisture exposure.
Apply and Align
The single-component formula is ready to use without measuring resin, adding hardener, or mixing two materials. Apply a thin layer after every piece has already been dry-fitted. Bring the parts together immediately and verify decorative alignment. Fast-working adhesive rewards preparation, so tools, supports, lighting, and hand position should be ready before the bottle is opened.
Press 5–10 Seconds
Hold the pieces firmly together for approximately 5–10 seconds. Small, balanced components may remain positioned after the initial hold, while heavier or awkward shapes can still need tape, a soft block, or another gentle support. Do not interpret the short pressing interval as final strength. Avoid pulling, twisting, cleaning aggressively, or moving the item simply to test whether the repair has worked.
Cure for 24 Hours
Keep the project stable and undisturbed for 24 hours to reach full cure. Normal bond performance develops after the complete curing period rather than during the first seconds of initial positioning. Delay regular handling and moisture exposure until curing is complete. Temperature, humidity, glue thickness, contact quality, and surface preparation can influence the real-world curing experience, so thicker accidental application may require additional caution.
Why Clear Glue Does Not Mean an Invisible Seam
Transparent adhesive removes one major source of visual contrast, while fracture geometry, surface damage, glue thickness, alignment, and lighting still influence what the eye sees.
Clear Curing Protects Visual Continuity Across Decorative Surfaces
The best result comes from four conditions working together. First, both broken edges should return closely to their original position. Second, adhesive should form a thin layer rather than a raised ridge. Third, decorative patterns, contours, and edges need accurate alignment. Fourth, excess glue should be kept away from the visible surface as much as possible.
A transparent joint can still reveal the original fracture. Light can reflect differently from a broken glaze edge, a missing chip can create a dark shadow, and slightly rotated parts can interrupt a painted line even when the adhesive itself is clear. Deep-color ceramics can also reveal surface residue under strong side lighting.
A credible decorative repair should therefore aim for a low-visibility bond, not a guaranteed invisible result. Use close-up photography when evaluating a finished repair instead of relying only on a distant room view. A genuine macro view showing the remaining ceramic texture builds more confidence than an image where editing has digitally removed every sign of the original break.

GleamGlee Ceramic Glue is a clear liquid and develops a transparent cured bond. For white porcelain, patterned pottery, glazed figurines, seasonal ornaments, decorative vases, and colored ceramic art, the lack of an opaque adhesive line helps preserve more of the original visual character.
Better Alignment Often Matters More Than Adding More Adhesive
Dry fitting is the simplest control method. Bring the parts together without glue, check whether the edges close naturally, study the visible pattern, and rehearse the exact motion needed to reach the final position. Multi-piece repairs benefit from numbering or arranging fragments before any adhesive is dispensed.
Glue amount also affects alignment. An oversized liquid layer can allow a small part to slide, force adhesive onto the glaze, or prevent two rough fracture faces from seating completely. A thin film lets the original ceramic geometry control the final position more directly. Precision tips help place adhesive inside the contact area instead of surrounding it.
Once the parts meet, avoid repeated rubbing or repositioning. Press firmly for 5–10 seconds, add gentle external support when needed, and leave the work undisturbed for 24 hours. Decorative quality comes from control at every stage: complete fragments, good fit, small adhesive quantity, accurate placement, and sufficient curing time.

Decorative projects frequently fail visually before they fail mechanically. A figurine arm attached one millimeter out of position, a vase rim slightly higher on one side, or a mosaic fragment rotated away from the original layout remains obvious even when the adhesive cures perfectly clear. Alignment should therefore be treated as part of adhesive performance rather than as a separate cosmetic step.
Four Mixed-Material Ideas for Decorative Ceramic Projects
Ceramic can become part of jewelry, frames, mosaics, models, and home décor when the second material, contact geometry, finish, and final handling are considered carefully.

Ceramic and Metal
Ceramic pendants, brooch elements, miniature ornaments, knobs, and decorative fittings may attach to metal components when both faces provide stable contact. Remove oil from the metal and dust from the ceramic surface before dry fitting. Flat supported contact generally suits bonding better than a narrow edge exposed to repeated peeling force. Allow the completed connection to cure for 24 hours before normal handling.

Ceramic and Wood
Decorative tiles, broken-pottery art, mosaic fragments, ceramic flowers, and frame accents can be arranged on wood for compact craft projects. Wood should be stable, clean, and free from loose dust, wax, oil, or unstable coatings. Finish the complete layout before bonding. Lift and return individual pieces one at a time so spacing remains consistent and adhesive stays underneath the decoration rather than spreading across visible wood.

Ceramic and Glass
Ceramic flowers, small ornaments, mosaic pieces, and mixed-media accents can create attractive combinations with glass. Clean glass carefully because fingerprints and cleaner residue can interrupt direct contact. Test the project first when appearance is critical. Transparent adhesive can reduce visual contrast around a small joint, but excess glue remains visible through clear glass, making controlled placement especially important on transparent surfaces.

Ceramic and Plastic
Miniature models, craft decorations, display pieces, and mixed-media projects sometimes combine ceramic with plastic components. Plastic formulations and coatings vary widely, so identify the material when possible and test an inconspicuous area or spare part before final assembly. Favor small, close-fitting decorative connections. Avoid assuming every plastic behaves the same simply because the product listing includes plastic among its compatible material categories.
Compare Adhesive Types for Decorative Ceramic Projects
No single chemistry fits every ceramic project; joint gap, working time, visibility, part size, filling needs, and material combination should guide the choice.
| Adhesive Type | Where It Often Fits | Decorative Advantage | Main Trade-Off |
|---|---|---|---|
| Liquid CA Ceramic Glue | Close-fitting breaks, figurines, ornaments, pottery details, small ceramic parts | Thin clear bond line, fast initial hold, precise placement | Not designed to rebuild large missing gaps |
| Gel CA Glue | Vertical parts or areas where reduced running is useful | Better stay-in-place behavior on some surfaces | Gel layer may be less suited to very fine capillary-style contact |
| Clear Craft Adhesive | Broader craft assembly, flexible decorative components, mixed-media work | Longer positioning time can help complex layouts | Usually slower setting and may create a thicker bond layer |
| Two-Part Clear Epoxy | Gaps, broader joints, some mixed-material assemblies | Can handle more filling than thin liquid CA | Requires measuring or mixing and usually creates a thicker adhesive layer |
| Hot Glue | Temporary positioning and some lightweight craft decoration | Fast and easy to apply in hobby projects | Thick visible bead is poorly suited to refined ceramic fracture lines |
| Silicone Adhesive | Flexible sealing and selected moisture-related decorative tasks | Useful when sealing flexibility matters | Not the same task as rapid precise reattachment of close ceramic breaks |
| Repair Putty | Missing material, rebuilding shapes, larger cavities | Can restore volume where ceramic is absent | Requires shaping and finishing; not intended as a thin invisible bond line |
Choose Another Method for These Four Project Types
Clear CA glue excels at controlled close-fitting bonds, but wide gaps, missing material, structural loads, and specialized environments call for different repair strategies.
Missing Ceramic Material
When a chip or fragment is completely missing, liquid adhesive cannot reproduce its original shape. Joining the surviving sections may still be possible, but the remaining cavity requires a separate filling or restoration approach if appearance demands reconstruction. Repeatedly pouring CA glue into the space creates adhesive volume rather than replacement ceramic. Select a suitable filler or professional restoration method when rebuilding geometry is part of the project.
Large Uneven Gaps
A warped or incomplete joint that rocks when dry-fitted does not provide the close contact preferred by thin liquid CA adhesive. More glue may increase squeeze-out without solving the geometry. A clear epoxy or another gap-filling system can be more appropriate depending on the materials and final use. Decorative planning should begin with the gap itself rather than selecting glue solely from the word “ceramic.”
High-Load Connections
Large shelves, heavy suspended objects, load-bearing handles, construction installations, structural furniture parts, and other failure-critical connections should not rely on a small decorative CA repair. Decorative ceramic glue is intended for household objects, ornaments, figurines, craft details, mosaics, and similar compact projects. Mechanical support, structural adhesive, replacement hardware, or professional work may be required where failure could cause injury or property damage.
Specialized Exposure
Direct food-contact claims, oven interiors, microwave use, open flame, continuous high heat, long-term immersion, pressure systems, and demanding industrial environments require performance information beyond the verified GleamGlee decorative-use facts. The product is described as water-resistant after full cure and heat-resistant for normal household use, but those descriptions should not be expanded into unsupported certifications or extreme-service guarantees.
Three Decorative Project Scenarios From Start to Finish
Realistic project planning shows how clear curing, precision dispensing, surface preparation, alignment, and full cure work together on different ceramic repair geometries.

Figurine Flower Repair
Project: A painted porcelain figurine has one intact decorative flower separated from a small stem.
Fit check: Both fracture faces are complete and return closely to their original position.
Method: Dry-fit with tweezers, remove loose dust, install a precision tip, and place a tiny adhesive dot within the contact area.
Timing: Press firmly for 5–10 seconds, support the detail if needed, and leave the figurine untouched for 24 hours.
Result goal: A secure, accurately aligned flower with a clear, low-profile bond rather than a large visible adhesive ring.

Mosaic Frame Project
Project: Small ceramic fragments are arranged as a decorative border on a wooden picture frame.
Fit check: The wood surface is clean, stable, dry, and free from loose dust, wax, or oil.
Method: Complete the full mosaic layout first. Mark or remember positions, lift one fragment, apply a small amount underneath, then return it precisely before moving to the next piece.
Timing: Assemble in controlled sections and allow the finished frame to remain flat for 24 hours.
Result goal: Consistent spacing, minimal visible adhesive, and individually secured ceramic accents.

Ceramic Pendant Assembly
Project: A small ceramic decorative piece needs to attach to a metal pendant finding.
Fit check: The metal and ceramic present a stable contact area rather than a narrow unsupported edge.
Method: Remove oil from the metal, clean the ceramic back, dry-fit the orientation, and apply a very small amount through a precision tip. Position with tweezers if necessary.
Timing: Hold the pieces together for 5–10 seconds and allow 24 hours before normal handling or wearing.
Result goal: Controlled ceramic-to-metal attachment with minimal adhesive visible around the decorative face.
Why GleamGlee Fits Visible Decorative Ceramic Work
Four product characteristics work together to support small ceramic projects where bond placement, cured appearance, preparation time, and repeat use all matter.
Clear Cured Bond
GleamGlee dries clear, helping avoid an opaque adhesive stripe beside white porcelain, patterned pottery, glazed figurines, decorative vases, ornaments, and mosaic pieces. Clear curing does not erase the original fracture or compensate for missing material. The lowest-visibility result comes from complete fragments, close fit, a thin adhesive layer, accurate alignment, and careful control of any squeeze-out.
Four Precision Tips
A 35g bottle includes four precision applicator tips for narrow breaks, small contact points, recessed areas, figurine details, ceramic jewelry, and mosaic work. The smaller dispensing route helps place adhesive closer to the intended joint and can reduce unnecessary cleanup on decorative faces. Actual flow still depends on bottle pressure and technique, so a small trial dispense before a delicate project remains worthwhile.
No Mixing Required
The single-component cyanoacrylate formula applies directly from the bottle without measuring resin, matching ratios, stirring components, or preparing a separate hardener. Reduced preparation is useful for small repairs where the pieces have already been dry-fitted and the final alignment is clear. The formula remains best suited to thin, close-fitting bonds rather than being treated as a replacement for every gap-filling two-part adhesive.
Clear Time Expectations
GleamGlee separates initial positioning from final cure clearly: apply a thin layer, align the pieces, press firmly for 5–10 seconds, then leave the project undisturbed for 24 hours. The short pressing interval helps reduce extended hand-holding, while the full curing period protects the developing bond before normal use. Clear timing is especially valuable for delicate ornaments and multi-stage craft assemblies.
Clear Ceramic Glue Frequently Asked Questions
Find concise answers about decorative project fit, transparent curing, glue amount, precision tips, materials, pressing time, full cure, moisture, limitations, and Amazon purchasing.
1. Does GleamGlee Ceramic Glue dry clear?
Yes. GleamGlee Ceramic Glue is a clear liquid adhesive and develops a transparent cured bond. Clear curing helps reduce the contrast of the adhesive line on visible figurines, ornaments, pottery, porcelain, mosaics, and decorative ceramics. A repair can still show the original fracture, missing chips, misalignment, or excess adhesive. For the cleanest appearance, dry-fit first, apply a thin layer, align accurately, and keep overflow away from the visible face.
2. Is it good for porcelain figurines?
Yes, especially for small figurine parts that can return closely to their original position. Typical examples include ears, arms, tails, wings, flowers, hats, and decorative details. The included precision tips help place a small amount directly on narrow contact areas. Dry-fit before applying glue, repair larger body sections before tiny details when multiple pieces are involved, press for 5–10 seconds, and allow 24 hours for full curing.
3. Can I use it for ceramic ornaments?
Yes. Ceramic Christmas ornaments, seasonal decorations, souvenir pieces, miniature houses, commemorative ornaments, and other small decorative objects fit the intended household and craft repair range when the broken surfaces remain sound and closely fitting. Transparent curing is useful around visible patterns and glaze. Support hanging or unbalanced pieces during curing and wait 24 hours before returning an ornament to display or normal handling.
4. How much Ceramic Glue should I apply?
Use the smallest amount needed to cover the effective contact area with a thin, even layer. Tiny decorative parts often need a small dot, while a continuous fracture may need a fine line. Large pools can squeeze onto glaze or create a raised bond line. More adhesive does not automatically create a stronger repair. The four precision tips are intended to help control placement on narrow and detailed ceramic joints.
5. How long should I press the pieces?
Press aligned pieces firmly for approximately 5–10 seconds after applying a thin adhesive layer. The short pressing period supports initial positioning but does not represent complete curing. Heavy, curved, or unbalanced components may need gentle tape or another support afterward. Keep the entire project stable and undisturbed for 24 hours before regular handling, moisture exposure, or other demanding use.
6. Can it bond ceramic to other materials?
The product listing identifies compatibility beyond ceramic, porcelain, and pottery to include glass, metal, wood, plastic, and concrete. Decorative combinations may include ceramic charms with metal findings, mosaic pieces on wood or stone, and ceramic accents with glass. Surface treatments and plastic formulations vary, so clean both materials, inspect the contact geometry, and perform a small test when compatibility or appearance is uncertain.
7. Is clear Ceramic Glue completely invisible?
No adhesive should be assumed to make every fracture disappear. GleamGlee cures clear, helping closely aligned bonds remain less noticeable. Final visibility still depends on the original break, missing ceramic, glaze damage, adhesive thickness, alignment, surface residue, and lighting. A thin layer between complete edges usually produces a cleaner visual result than an oversized adhesive bead. “Clear” describes cured adhesive color, not guaranteed disappearance of the original crack.
8. Is GleamGlee Ceramic Glue water resistant?
The product is positioned as water-resistant after full cure and can support small decorative repairs exposed to occasional household moisture. The bonding surfaces should be clean and dry during application, and the repaired object should remain undisturbed for 24 hours before moisture exposure. No specific immersion duration, waterproof rating, dishwasher cycle count, or continuous underwater performance should be assumed without supporting test documentation.
9. Can I use it to fill missing ceramic?
GleamGlee is a medium-viscosity liquid CA adhesive designed primarily for bonding close-fitting surfaces. It is not a ceramic filler, repair putty, tile mortar, or material-rebuilding compound. If a chip or section is missing and a visible cavity remains after dry fitting, another filling or restoration material may be required in addition to any bonding step. Large or valuable reconstruction projects may also benefit from professional assessment.
10. Where can I buy GleamGlee Ceramic Glue?
GleamGlee Ceramic Glue is available through Amazon. The single bottle contains 35g / 1.23 oz and four precision applicator tips, while the two-pack contains 2 × 35g and eight tips. Open the live Amazon listing to confirm current price, inventory, pack choices, seller information, delivery estimate, promotions, and marketplace terms. The single-bottle Amazon ASIN is B0DJSQRHYN.
Need Help Matching Glue to Your Decorative Project?
Share the materials, object type, broken area, joint fit, environment, and project photos so the repair can be evaluated before adhesive is applied.
Decorative ceramic projects vary widely. A porcelain figurine ear, pottery ornament, mosaic fragment, ceramic pendant, decorative vase detail, and ceramic-to-metal fitting can all require different preparation even when the same clear adhesive is being considered.
For a more useful project assessment, provide the ceramic type or object, the second material if present, the approximate size of the broken part, whether both pieces can fit together without a visible gap, and how the item will be handled or displayed after repair. Photos are especially helpful: include one complete view of the object, one close photograph of each bonding face, and one image showing how the pieces fit together before glue is applied.
Please also mention whether the object will encounter moisture, normal household temperature changes, outdoor decorative use, repeated handling, or unusual conditions. Avoid applying adhesive before sending photographs when the project involves a valuable collectible, uncertain material, missing ceramic, a previous failed repair, or a difficult multi-piece assembly.





















