 Skip to content

A mixed-material fabric craft can look simple on a worktable and become surprisingly complicated as soon as it is picked up, folded, worn, washed, or hung. Cotton may absorb liquid adhesive quickly, lace may allow it to pass through, vinyl may resist bonding, and a metal charm may place more force on a small area than its size suggests. The practical question is therefore not merely, “Which glue should I use?” The better question is, “What must each connection do after the craft is finished?”
After more than two decades of working with adhesive formulation, surface preparation, application control, and material testing, I have seen many projects fail for a reason unrelated to the advertised strength of the product. The maker selected one joining method for the entire craft without separating the individual material pairs. A decorated tote bag, for example, may contain canvas joined to felt, felt joined to rhinestones, canvas joined to ribbon, and canvas joined to a metal ring. Those are four separate joints with four different risks.
The most dependable approach is to divide the project into “Material A + Material B” connections. Classify each connection as decorative, structural, or functional. Then evaluate its likely exposure to tension, shear, peeling, bending, abrasion, water, detergent, and heat. Sewing, flexible fabric adhesive, fusible web, hot-melt adhesive, snaps, rivets, and other fasteners are tools rather than universal answers. A well-made craft may use three different methods in one finished design.
For a fast starting point, use the following decision table before cutting or applying anything. It does not replace the product label or a sample test, but it helps eliminate unsuitable choices early.
| Project condition | Sensible starting method | Main question to answer before proceeding |
|---|---|---|
| Load-bearing seam, bag handle, strap, hanging loop, or zipper | Machine sewing, reinforced hand stitching, rivet, eyelet, or another structural fastener | Where will the force travel, and can the base material resist tearing? |
| Lightweight felt, lace, ribbon, patch, or fabric decoration | Flexible fabric adhesive, stitching, fusible web, or a hybrid method | Will the method remain clean, flexible, and secure during normal handling? |
| Flat appliqué on a heat-tolerant textile | Fusible web followed by optional edge stitching | Can every fabric, coating, print, and decoration tolerate the required heat and pressure? |
| Beads, sequins, rhinestones, or fabric flowers | Micro-dot adhesive, hand stitching, machine attachment, or a combination | How much real contact area exists, and could the decoration detach during washing or wear? |
| Fabric joined to wood, metal, glass, ceramic, or plastic | An adhesive specifically listed for both materials, or a mechanical fixing | Is the hard surface clean, compatible, sufficiently large, and free from a difficult coating? |
| Removable decoration or replaceable component | Button, snap, hook-and-loop tape, tie, clip, or hook-and-eye | Can the attachment withstand repeated opening without damaging the fabric? |
1. What Should You Check Before Joining Different Materials?
Selecting a joining method begins with the finished object rather than the adhesive shelf. A wall decoration, washable sweatshirt, evening costume, handbag, fabric-covered box, and child’s craft may contain similar materials, yet their joints perform very different jobs. Before choosing a method, write a short use statement covering load, movement, care, temperature, expected lifetime, and user safety. This simple note provides a practical specification against which every proposed joint can be checked.
Is the Joint Decorative, Structural, or Functional?
A decorative joint mainly controls appearance. Felt letters on a banner, lace on a greeting card, or lightweight fabric flowers on a display hoop are common examples. These pieces may still face gravity, rubbing, transport, folding, and storage, but they do not normally hold the entire project together. A carefully tested fabric adhesive, fusible material, or a few hidden stitches can often provide enough support without adding unnecessary bulk.
A structural joint holds weight or maintains the shape of the object. Bag bottoms, backpack straps, upholstery seams, garment side seams, and hanging loops belong in this group. These connections need a reliable load path. In practical terms, the force should travel through thread, reinforced fabric, suitable hardware, or another structural system rather than ending at the edge of a thin decorative glue layer.
A functional joint opens, closes, adjusts, or moves repeatedly. Buttons, zippers, snaps, elastic loops, buckles, and hook-and-loop strips are functional even when they also decorate the craft. Repeated opening can create concentrated force around a small area. A positioning adhesive may help during assembly, but the final attachment usually needs stitching, a rivet, an eyelet, or another method capable of carrying repeated movement.
Oak National Academy classifies textile joining into mechanical and chemical processes and specifically identifies the idea that every joining method performs equally on every material as a misconception. The lesson provides a clear educational foundation for separating decorative adhesive work from mechanical and structural fastening.
- Evidence and explanatory video: Oak National Academy — Joining Processes for Textiles. The page includes a lesson video, slides, and worksheet material covering mechanical fixings, adhesives, heat, and material-dependent selection.
Will the Joint Face Tension, Shear, or Peeling?
Three forces explain many craft failures. Tension pulls the joined pieces directly apart. Shear slides one surface across the other. Peeling lifts the material progressively from an exposed edge. Adhesive joints often tolerate a broad, evenly distributed load better than a concentrated peeling force. A patch may therefore feel secure when pressed flat but begin lifting after one corner catches on a sleeve, bag opening, or washing-machine drum.
Picture a ribbon attached along a ten-inch section. A gentle pull parallel to the fabric spreads force across much of the bonded length, which resembles shear. Pulling one loose end upward concentrates the load at a narrow moving line, which resembles peeling. Securing the ribbon ends with stitches, rounding an appliqué corner, or placing the decoration away from a high-friction edge can reduce this concentrated stress.
Sewn seams also need force-direction planning. The current ISO method for measuring maximum force at seam rupture applies force perpendicular to a prepared straight seam using controlled equipment. A home craft test cannot reproduce the laboratory method, but the standard illustrates an important point: seam strength is connected to load direction, specimen preparation, and consistent testing conditions rather than stitch count alone.
- Technical evidence: ISO 13935-2:2026 — Seam Tensile Properties Using the Grab Method. The standard covers maximum force to rupture for straight sewn seams and uses a constant-rate-of-extension testing machine, so ordinary hand pulling should never be described as an ISO strength test.
Will the Craft Be Washed, Ironed, Stretched, or Folded?
“Washable” is not a complete use condition. A useful project note should identify water temperature, detergent, cycle intensity, drying method, ironing, and washing frequency. A lightly lightly decorated table runner washed twice a year faces different stress from a child’s garment washed every week. If the finished piece will be folded for storage, include repeated bending in the test even when it will rarely be washed.
Stretch creates another compatibility problem. If a stable woven patch covers a highly elastic knit, the surrounding fabric may stretch while the patch and bonded zone resist. This difference can produce puckering, a stiff panel, or edge lifting. A smaller patch, segmented decoration, stretch-compatible stitch, or placement on a less flexible area can reduce the mismatch. The goal is not always maximum bonded area; sometimes controlled movement produces the better result.
Heat must be assessed across the complete assembly. Cotton may tolerate an iron setting which damages synthetic ribbon, plastic sequins, heat-sensitive printing, coated leather, or the adhesive layer. Follow the lowest safe temperature among all components. When the material identity is uncertain, avoid direct heat until a hidden-area test confirms the appearance, texture, color, and bond remain acceptable.
Are the Surfaces Porous, Open, Coated, or Smooth?
Porous cotton, canvas, felt, and untreated paper can draw liquid adhesive into their structure. Moderate penetration may assist anchoring, but too much can leave insufficient product at the joint line while also producing a dark mark, hard patch, or visible outline. The correct amount is the minimum capable of creating continuous contact after pressing, not the largest amount the fabric can absorb.
Lace, mesh, and loosely woven textiles behave differently because their openings provide little surface area and allow wet product to pass through. Adhesive should be placed behind thicker motifs, border threads, or intersections. A release liner or compatible protective sheet beneath the work prevents accidental attachment to the table. A full-surface coating is rarely necessary for an open decorative material.
Smooth plastic, glazed ceramic, glass, sealed wood, coated fabric, and painted metal permit little mechanical penetration. Bonding depends on the adhesive wetting the surface and remaining compatible with its coating, additives, oils, or finish. Cleaning helps only when performed with a method safe for the material. Aggressive sanding or solvent use can permanently cloud, soften, discolor, or remove a finish, so surface preparation should begin with the least damaging method allowed by the product instructions.
2. Which Joining Method Should You Use?
Once the joint has been classified, compare available methods by performance rather than convenience alone. Sewing offers flexibility and repairability, adhesives distribute load across an area, fusible web positions flat textile layers, and hardware transfers force through a physical component. The best choice meets the necessary performance with the smallest risk of material damage. The table below provides a practical comparison, followed by detailed guidance for each method.
| Joining method | Best applications | Useful strengths | Limits requiring attention |
|---|---|---|---|
| Hand or machine sewing | Structural fabric seams, flexible joints, washable projects, patches, beads, buttons, and repairs | Flexible, inspectable, repairable, and adaptable through stitch and thread selection | Creates permanent holes and may distort delicate, coated, thick, or highly stretchy materials |
| Flexible fabric adhesive | Hems, felt shapes, ribbon, lace, fabric patches, flat trims, and low-stress decorations | No sewing machine required, no visible stitches, and precise placement is possible | Compatibility and cure time vary; overapplication can produce bleed, shine, stiffness, or long drying |
| Fusible web or heat bonding | Flat appliqué, stabilized fabric shapes, badges, and layered textile designs | Even film, clean positioning, and little wet mess | Requires controlled heat, time, and pressure; unsuitable for some finishes, coatings, pile, and heat-sensitive fibers |
| Hot-melt adhesive | Dimensional display crafts, temporary positioning, and selected non-wash decorations | Rapid setting and useful gap filling | Can remain bulky, form hard spots, soften with heat, and perform poorly under repeated folding |
| Mechanical fastening | Straps, handles, closures, removable pieces, heavy charms, and selected hard-surface joints | Transfers force through hardware and can provide structural support | Requires suitable tools, reinforced holes, backing support, and protection from sharp edges |
| Hybrid joining | Appliqué, ribbon ends, patches, complex layouts, costumes, and washable decoration | One method controls placement while another manages movement or long-term load | Assembly order must keep adhesive away from needles, moving parts, and hardware holes |
When Is Hand or Machine Sewing the Better Choice?
Sewing is usually the first option for structural textile joints because the maker can choose seam type, stitch pattern, thread, needle, reinforcement, and repair method. Stable woven fabrics commonly accept straight stitching, while knit fabrics may need a zigzag, stretch stitch, overlock formation, or another seam capable of extending without thread breakage. Reinforcement should spread the load rather than create an excessively dense cluster of needle holes.
A tote-bag handle illustrates the difference between more stitching and better stitching. Repeated lines placed too close together can perforate a weak fabric, while a reinforced box-and-cross pattern over an additional backing layer spreads force across a larger area. Before committing, sew an offcut containing the same number of layers and pull it in the direction expected during use. Inspect the thread, stitch line, fabric, and seam edge separately.
Hand sewing is valuable when the item cannot fit under a machine, the decoration is very small, or machine stitching would be visually intrusive. It also allows a needle to pass through existing bead holes, sequin centers, fabric-flower bases, and concealed loops. Choose the smallest practical needle which can carry the thread without excessive force, and use a thimble rather than pushing a resistant needle directly with a fingertip.
- Step-by-step video: Hand Sewing 101 demonstrates basic knotting, needle handling, thread control, and starting technique for readers who have never sewn by hand. The video is most useful beside the first hand-stitching instructions rather than in a general resource sbe73″}}
When Is Flexible Fabric Adhesive Appropriate?
Flexible fabric adhesive is useful for lightweight decorative joints, small pieces which are awkward to sew, and areas where needle holes or visible thread would be undesirable. Suitable projects can include felt lettering, ribbon trim, lace motifs, simple hems, textile patches, and flat fabric flowers. The adhesive should be applied only to the intended contact zone, with enough product to wet the surfaces after pressing but not enough to flood beyond the edge.
A precision tip improves control but does not automatically prevent overapplication. Practice three or four lines and dots on scrap fabric before touching the finished piece. Press a second offcut over the practice applications and inspect how far the product spreads. This small exercise reveals the relationship between nozzle pressure, line width, fabric absorption, and final appearance more accurately than looking at the wet bead alone.
“Clear drying” does not make excess material invisible. A thick clear layer can reflect light, create a glossy perimeter, darken absorbent fibers, or form a hard ridge. Apply product slightly inside the visible boundary. On lace, use tiny deposits behind solid threads. On ribbon, work in short sections and keep both materials relaxed. If wet product escapes, follow the manufacturer’s cleanup instructions instead of rubbing it across a larger fabric area.
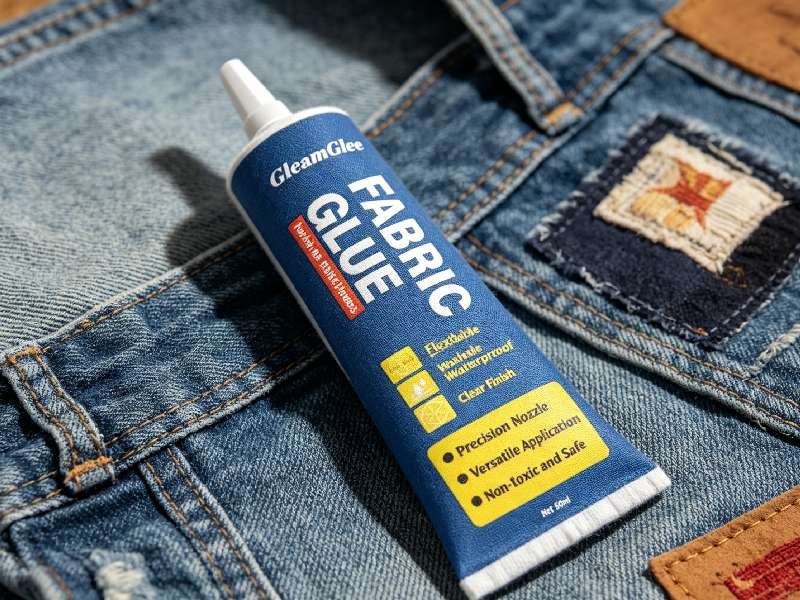
GleamGlee Fabric Glue is one possible option for projects involving fabrics and lightweight decorative materials. Current product information describes a 50 ml no-sew adhesive with a precision applicator, transparent drying, and a flexible layer after full cure. The listed textile range includes cotton, denim, polyester, canvas, felt, ribbon, lace, sequin fabric, textile patches, and upholstery fabric. Unlisted hard materials should not be assumed compatible without separate technical confirmation.
Its instructions describe approximately 6–10 minutes for initial positioning and about 24 hours for full cure. These figures apply to this product rather than fabric adhesives as a category. Initial positioning means the pieces may remain aligned under limited disturbance; it does not mean the joint is ready for stretching, wearing, washing, ironing, or structural loading. Keep the project supported and undisturbed for the complete stated period.
When Should You Use Fusible Web?
Fusible web places a controlled heat-activated adhesive film between textile layers. It works especially well for flat appliqué because the maker can trace the design, attach the web to the appliqué fabric, cut an accurate shape, remove the backing, and press the piece into position. The film also reduces movement while the perimeter is being stitched.
Successful fusing depends on four linked variables: temperature, pressing time, pressure, and material construction. If the iron is too cool or removed too soon, the adhesive may not activate adequately. Excess heat or prolonged pressing may damage synthetic fibers, coatings, metallic finishes, printed decoration, pile, or even certain fusible products. Use the exact instructions supplied with the web and test the complete fabric combination before pressing the final piece.
- Technical evidence: Applying Heat for Joining Textile Materials explains sewing, fusing, and welding and describes how temperature, time, pressure, fabric construction, and fusible material influence the quality of a heat-joined textileew1″]}}
Press the iron vertically instead of sliding it across the shape. Sliding can stretch the base fabric or move the appliqué away from its registration marks. Allow the fused area to cool before pulling at an edge because some systems develop handling strength during cooling. If the item will be worn or washed often, a perimeter stitch can control fraying and reduce the effect of edge peeling.
- Video demonstration: How to Use Fusible Web and Other Adhesives compares fusible web, glue sticks, and adhesive spray and is useful immediately after the explanation of how these materials serve different positioning and bondingbe12″}}
Interfacing should not be confused with every form of fusible web. Interfacing is generally used to add structure, body, or stability, while web products are commonly used to join layers or position appliqué. Some products combine functions, so the package instructions remain essential. A small fused swatch can reveal show-through, stiffness, color change, bubbling, or flattened texture before the final fabric is exposed.
- Downloadable file: Interfacing 101 PDF explains fusible and sew-in interfacing, pressing considerations, testing, and possible appearance changes. It can be placed beside the paragraph distinguishing interfacing from fusibch52″}}
When Are Mechanical Fasteners More Reliable?
Mechanical fastening is often the practical choice when a component must carry weight, open repeatedly, or remain removable. Buttons, snaps, rivets, eyelets, buckles, hook-and-loop tape, ties, clips, and hooks hold materials through physical geometry and pressure rather than depending only on surface adhesion. They can also connect fabric to leather, webbing, or selected rigid objects where adhesive contact is too small or unpredictable.
The base fabric must be reinforced around concentrated loads. A rivet or snap through one thin layer may pull out even when the hardware itself remains intact. Add a backing patch, folded layer, washer, stitched tab, or interfacing suited to the project. Position holes far enough from a raw edge to reduce tearing, and inspect the reverse side for metal edges capable of scratching skin or abrading the fabric.
Removable construction can improve care. Decorations attached with snaps, ties, or hook-and-loop tape may be removed before washing, allowing the fabric portion to be cleaned without exposing paper, untreated metal, leather, rigid backing, or delicate ornaments to water and agitation. Designing for removal is often more realistic than searching for one bonding product expected to tolerate every component.
When Should You Combine Adhesive and Stitching?
A hybrid method gives separate jobs to separate joining systems. A small amount of adhesive or fusible web can keep an appliqué flat while sewing secures its perimeter. Ribbon may be lightly positioned along its length and reinforced with stitches at both ends. A fabric flower can be held by a broad flexible base while a concealed center stitch prevents complete detachment.
Plan the sequence before application. Mark the future stitch line and keep adhesive inside it. Avoid the needle path, bobbin area, zipper teeth, snap sockets, eyelet holes, and any place requiring later adjustment. If a positioning product remains wet or tacky, follow its instructions before machine sewing. Some residues can transfer to a needle, collect lint, or make the stitch line less consistent.
Hybrid construction is particularly useful for washable appliqué, banners, costumes, bags, and batch projects. It adds a little preparation but often reduces total rework. Adhesive helps control alignment, while thread or hardware manages peeling and repeated load. The result is not automatically stronger merely because two methods were used; both methods still need compatibility with the materials and final care routine.
3. How Do You Test Material Compatibility Before the Final Craft?
A meaningful test does more than answer whether two pieces remain together for a few minutes. It checks appearance, handling, flexibility, edge behavior, realistic force, and planned care after the joining system reaches full cure. Consistency is more important than complicated equipment. Use matching offcuts, keep the overlap and product amount similar, label every sample, and change only one variable at a time whenever possible.
How Do You Build a Material-Pair Test Matrix?
Begin by listing every distinct interface. A canvas tote decorated with felt letters, satin ribbon, plastic rhinestones, and a metal charm contains canvas-to-felt, canvas-to-ribbon, felt-to-rhinestone, and canvas-to-metal connections. If the felt letters overlap the ribbon, another pair exists. Each interface receives its own row because absorption, movement, contact area, and surface chemistry are different.
Treat different finishes as different materials. Raw wood and painted wood should not occupy one row. Plain fabric and water-repellent fabric may respond differently. An embroidered patch with a woven back is not equivalent to one with a smooth plastic coating or aged heat-seal layer. Record the side actually being joined, not merely the name visible on the front.
| Material A | Material B | Main risk to test | Suitable first method to compare |
|---|---|---|---|
| Cotton or canvas | Felt | Absorption, stiffness, color darkening, and edge lift | Flexible fabric adhesive, stitching, or hybrid |
| Fabric | Lace | Bleed-through, low contact area, residue, and accidental table bonding | Micro-dots on solid motifs plus optional hidden stitches |
| Fabric | Ribbon | Rippling, dye movement, loose ends, and alignment | Thin adhesive line with stitched or bonded endpoints |
| Fabric | Appliqué or patch | Backing type, fraying, bulk, and washing movement | Fusible web, flexible adhesive, perimeter stitching, or hybrid |
| Fabric | Leather, faux leather, or vinyl | Finish compatibility, needle marks, unequal feed, and flex mismatch | Suitable sewing setup, compatible adhesive, or hybrid |
| Fabric | Flat rhinestone | Small contact area, alignment, wash exposure, and hard edge | Precisely controlled adhesive deposit |
| Fabric or lace | Bead or sequin | Weight, holes, abrasion, movement, and detachment | Hand stitching, machine attachment, or tested adhesive |
| Fabric | Wood, metal, glass, or ceramic | Surface contamination, rigid-to-flexible movement, and finish | Adhesive listed for both materials or mechanical fixing |
| Fabric | Plastic | Resin type, low surface energy, release agent, and coating | Identified plastic plus a compatible specialty system |
| Fabric | Functional hardware | Concentrated force, repeated movement, and fabric tearing | Reinforced stitching, rivet, eyelet, snap, or structural tab |
How Do You Prepare a Consistent Test Coupon?
A practical household comparison can use equal strips from both materials. For many small crafts, two strips measuring approximately 2 by 4 inches with a 1-inch overlap are easy to label and store. Those dimensions are a workshop convenience, not a published strength-test standard. Consistency between samples matters more than the exact size.
Prepare every coupon as the final project will be prepared. Prewash the fabric if the finished craft uses prewashed material. Clean hard surfaces with the method permitted by their finish and the adhesive manufacturer. Use the planned stitch, adhesive pattern, pressing procedure, or fastener. Record the overlap dimensions, material orientation, application date, initial handling time, full-cure time, and any visible change.
Use at least two coupons for expensive, coated, dyed, vintage, highly porous, or unfamiliar materials. Keep one as an appearance reference and use the second for bending, pulling, and care checks. For batch projects, create an additional retained sample after finalizing the method. A retained sample makes it easier to compare a later fabric lot, decoration coating, or adhesive batch without relying on memory.
For greater consistency, photograph the wet application beside a ruler and weigh the adhesive container before and after a batch when a suitable scale is available. The difference can estimate total product used, although small household scales may not be accurate enough for a single tiny decoration. Record the limitation rather than presenting a rough measurement as laboratory data.
How Do You Test Peeling, Shear, Bending, and Failure Mode?
Start with appearance under normal room light, side lighting, and the type of light expected during use. Check for dark spots, halos, glossy outlines, wrinkling, bubbles, color transfer, melted texture, flattened pile, or visible adhesive through an open weave. Inspect the reverse side because penetration may be easier to see there. Run a clean finger near the joint to identify hard ridges or sharp edges.
Next, bend the sample in the direction expected during use. A wall hanging may need only a gentle roll, while a garment patch may receive repeated tight bending. For an informal comparison, perform the same number of controlled bends on each sample, such as 10 or 20 cycles, and record the count. This is not a standardized flex test, but it is more useful than bending one sample once and another sample repeatedly.
Apply a light shear load by pulling the materials parallel to the joint. Then check peel resistance by lifting an exposed edge at a consistent angle. Do not convert hand pulling into pounds or newtons without calibrated equipment. A safer household comparison uses the same person, grip position, direction, and approximate duration for every sample. Stop if a hard decoration could detach suddenly.
ASTM D903 describes comparative peel or stripping strength using standard-sized specimens, defined pretreatment, controlled temperature, and a power-driven test machine with a constant separation rate. The standard explains why a casual pull test cannot support a certified peel-strength number. Home testing remains useful for project screening, but the result should be described as pass, limited use, or fail rather than an engineering strength value.
- Testing evidence: ASTM D903-98(2025) — Peel or Stripping Strength of Adhesive Bonds outlines controlled specimen, conditioning, and machine requirements for comparative peel testing. Use this source beside the paragraph distinguishing household screening from certified laboratory rrch0″}}
After force testing, inspect where the joint failed. Adhesive failure means the bonding layer separated cleanly from one surface, often indicating contamination, poor wetting, or incompatibility. Cohesive failure means adhesive remains on both surfaces but tears within itself, suggesting the layer carried more stress than it could resist. Substrate failure means the fabric, felt, paper, coating, or decoration broke before the bond released. Substrate failure is not automatically desirable if the craft must remain repairable.
How Do You Test Washing and Care?
Allow the sample to reach the full cure stated by the adhesive or fusible manufacturer before exposing it to water, detergent, heat, or force. Record the exact waiting time. “Overnight” is vague because it could mean six hours or fourteen. For a product with a stated 24-hour cure, mark the application and earliest test time on a label or calendar.
Wash the coupon using the planned water temperature, detergent type, cycle, and drying method. Inspect it only after drying because a wet bond may feel or look different from its final condition. Record edge lift, color change, corrosion, clouding, stiffness, cracking, adhesive residue, and deformation. If the finished item will be washed frequently, several repeated cycles provide better evidence than one cycle.
The U.S. Federal Trade Commission’s care-labeling rule applies to covered textile apparel and certain piece goods, not ordinary personal crafts. Its evidence principle is still useful: care information should be supported by reliable evidence for the individual components and for the complete item. This principle discourages claims based only on the adhesive label while ignoring beads, coatings, paper inserts, metal parts, or the finished construction.
- Care evidence: FTC — Care Labeling of Textile Wearing Apparel and Certain Piece Goods explains the role of reliable evidence, component testing, whole-garment testing, technical literature, and successful careiew8″}}
How Do You Grade the Final Test Result?
Use a five-level workshop scale to keep decisions consistent. An A result remains visually acceptable, flexible enough, and stable during planned handling and care checks. A B result remains attached but shows a small cosmetic or hand-feel change. It may still be acceptable in a hidden area or a rigid display craft where the limitation has little effect.
A C result should be restricted to low-stress display use. A D result shows meaningful bleeding, discoloration, distortion, peeling, or insufficient support. An E result damages the material, releases quickly, or creates an unacceptable safety problem. This scale is a project-screening system rather than an industrial certification, so record the test conditions beside the grade.
Do not rescue a weak test simply by adding a much thicker layer. More adhesive may increase stiffness, drying time, visible residue, and peeling stress without solving poor surface compatibility. Compare a different application pattern, a wider safe contact area, an edge stitch, a reinforced backing, or a mechanical fastener. A failed adhesive test can still lead to a successful craft when the joint design is changed.
4. How Do You Join Fabric to Other Soft Materials?
Soft-to-soft construction is usually more forgiving than fabric joined to a rigid object, but it still requires control of stretch, drape, absorbency, and thickness. Two materials may both bend easily while responding differently to tension or moisture. Align them without stretching, support unstable edges, and keep the finished hand of the project in mind. A secure decoration which makes a scarf, garment, or bag unpleasantly stiff is not a successful connection.
How Do You Join Fabric to Fabric or Felt?
For construction seams, sewing is generally the dependable starting method. Select a needle and thread appropriate to the fabric weight, then test stitch length and tension on a folded offcut containing the same number of layers. Lightweight fabric may pucker when tension is too high, while heavy canvas may produce skipped stitches if the needle is too fine or the machine is forced to sew too quickly.
When joining stretch fabrics, compare extension and recovery before assembly. Mark a reference length on each material, stretch gently without forcing it, and observe how far it extends and whether it returns to its original length. Two knits with very different recovery can pull against each other after wear or washing. A stretch-compatible seam or smaller decorative area may behave better than full-surface bonding.
Seamwork recommends pairing reversible garment fabrics with similar weight and hand. Its guidance also proposes comparing stretch and recovery using 10-inch swatches. Although a reversible garment is not identical to every craft, the principle is useful whenever two fabric layers need to drape and move together.
- Practical material evidence: Seamwork — Make It Reversible discusses weight, drape, bulk, stretch, recovery, and the value of comparing fabrics before constrew3″]}}
Felt decorations can be sewn, glued, or attached by a hybrid method. Loosely made felt may absorb liquid quickly, leaving too little adhesive at the interface and a visible dark area on the front. Apply a small test dot, press a matching offcut over it, and inspect after full cure. For washable or frequently handled pieces, a blanket stitch, narrow zigzag, or several concealed stitches can protect the perimeter.
How Do You Join Fabric to Lace or Ribbon?
Lace should be attached through its strongest solid areas. Place micro-dots behind thick motifs, border threads, or intersections instead of filling the openings. Work over a suitable protective liner so wet adhesive cannot pass through and fasten the lace to the table. Lift the sample only after the product permits handling; early movement can pull thin lace away from its intended position.
For long lace borders, mark the center and endpoints first. Attach a short center section, confirm alignment, and continue toward both ends in stages. This approach prevents a small error at one end from becoming a large mismatch at the other. On clothing or washable décor, concealed stitches at the corners and endpoints provide useful peel resistance without changing the visible design.
Ribbon commonly develops ripples when it is stretched during placement or when an uneven wet layer contracts. Let both ribbon and base fabric relax before marking. Work in short sections while keeping the ribbon flat but not taut. Test the exact color because pale satin may reveal a dark line or glossy patch more easily than an opaque woven ribbon.
Finish or conceal raw ribbon ends according to the fiber and design. A bonded length can still peel from an unsecured endpoint, especially near a bag opening or garment edge. Folded-under ends, stitched endpoints, or placement beneath another layer can reduce this risk. For bows and dimensional trims, stitch or tie the central load-bearing point and reserve adhesive for lightweight tails or flat positioning.
How Do You Join Fabric to Patches and Appliqué?
Begin by identifying the patch backing. A plain woven back, embroidery mesh, heat-activated coating, plastic stabilizer, peel-and-stick layer, and hook-and-loop backing require different handling. An unknown shiny surface should not automatically be ironed. Check the manufacturer’s instructions or perform a low-risk test on an inconspicuous edge before exposing the complete patch or garment to heat.
For fusible appliqué, trace the design onto the paper side of the fusible material, rough-cut outside the line, and fuse it to the wrong side of the appliqué fabric. Cut the final shape only after the first fuse, remove the backing, position the design, and press according to the product directions. Let the area cool before checking the edge.
- Downloadable step-by-step file: Utah State University Extension — Machine Appliqué Techniques PDF explains fusible-web appliqué, stabilizers, temporary spray, stitching options, and the need to follow the specified fusing time because excessive heating can reduce adhesion for some prch66″}}
When machine stitching around appliqué, place a suitable stabilizer behind lightweight or stretchy base fabric. A zigzag, blanket, satin, or other edge stitch can cover the raw edge and connect both materials. Test stitch width, density, thread color, and corner handling before sewing the final shape. Dense stitching on an unstabilized thin fabric can cause puckering even when the adhesive layer is satisfactory.
- Video demonstration: Raw Edge Appliqué Tutorial shows tracing, rough cutting, fusing, final cutting, stabilizer placement, zigzag stitching, corner turning, and stabilizer removal in one continuous pbe72″}}
A small amount of temporary or permanent adhesive can also position a patch before stitching. Keep the product inside the future stitch line and away from the needle path. Do not flood the entire back when a narrower controlled area can hold the patch for sewing. Glue on the needle or in the bobbin area may collect lint or interfere with stitch formation.
- Video and equipment evidence: Brother — Sew Appliqué Stitching demonstrates positioning and edge stitching and specifically cautions against applying glue in areas where the machine wirch0″}}
How Do You Join Fabric to Leather, Faux Leather, or Vinyl?
Natural leather may contain oils from tanning, while faux leather and vinyl may contain plasticizers, surface coatings, or textile backings. These materials should not be grouped under one compatibility result. Test the actual face or reverse surface being joined. Clean it only with a method approved for the finish, and allow all cleaning moisture to evaporate before proceeding.
When sewing, use clips rather than unnecessary pins because holes in leather-like material may remain permanent. Select an appropriate needle, lengthen the stitch if the test indicates perforation, and avoid repeatedly sewing over the same line. Too many closely spaced holes can form a tear path. Check the reverse side for loops, skipped stitches, and damage before continuing.
A walking foot can help feed layers with different friction or thickness, reducing the tendency for the upper material to lag behind the lower one. It does not replace correct needle, thread, pressure, and machine settings, so run a sample containing the same layers and curves. If the presser foot leaves marks, protect or reconsider the surface before working on the final piece.
- Video demonstration: How to Sew on Leather Using a Walking Foot shows installation and use of a walking foot with leather, vinyl, suede, and unequal fabric thicknesses. It should be treated as a technique demonstration rather than a guarantee for every leather be66″}}
For adhesive joining, apply a thin layer only after confirming compatibility with both the fabric and leather-like surface. Support the joint in its intended shape while curing. A curved wrist cuff should not necessarily cure completely flat, and a bag corner should not be bent sharply before full cure. Handles, straps, footwear seams, and other high-movement areas usually need stitching or hardware as the primary structural connection.

5. How Do You Attach Embellishments and Hard Materials?
Small decorations and rigid components often fail through limited contact area rather than insufficient adhesive strength. A curved bead touching fabric along one narrow line has far less usable area than a flat-backed stone of similar diameter. Weight, leverage, abrasion, washing, and the direction of movement must therefore be considered together. Whenever a component contains holes, loops, channels, or mounting plates, use those features to create a safer and more repairable attachment.
How Do You Attach Rhinestones, Sequins, Beads, and Fabric Flowers?
For flat-backed rhinestones, practice adhesive dots on scrap until each deposit remains smaller than the stone’s base after pressing. Pick up the stone with fine tweezers, a wax tool, or another clean applicator, then lower it vertically. Sliding the stone can spread product beyond the contact area. Press lightly enough to seat the base without driving adhesive into the surrounding fibers.
Arrange repeated stones with centerlines and spacing marks before opening the adhesive. If the pattern contains 20 stones, prepare at least one or two spare pieces because dropped, scratched, or misaligned decorations are common during detailed work. Check the finished row from normal viewing distance and side lighting before cure proceeds too far for safe repositioning.
Sequins can be attached through the center, across an edge, or with a small bead acting as an anchor. Stitching preserves more movement than surrounding each sequin with a rigid adhesive patch. For strings of pearls or sequins, a compatible specialty foot can improve feeding and spacing, although the trim diameter, cord, machine, needle, and foot must match.
- Machine-sewing video: Brother — Pearls and Sequins Foot F028N demonstrates machine attachment of beaded and sequined trims. The related accessory information describes use with threaded beads up to approximately 4 mm in diameter, subject to the compatible machine specifibe53″}}
Individual beads are often better sewn because their curved surface gives adhesive little contact area. Pass thread through the bead and base fabric more than once when the material can tolerate it, then secure the thread on the reverse side. Add a small reinforcement patch behind thin fabric if a group of beads creates meaningful weight. Keep knots and thread ends away from areas contacting skin.
- Hand-sewing video: How to Sew on Beads and Sequins demonstrates seed beads, bugle beads, sequins anchored with small beads, and decorative embroidery-thread methods. The chapter markers make it easy for readers to locate the exact embellishment they arebe34″}}
Fabric flowers should be evaluated by construction. A flat flower with a broad felt base may accept a flexible adhesive, while a heavy layered flower creates leverage around its center. Sew through the center or base where possible, especially on clothing, bags, and accessories. Adhesive can keep petals or the mounting pad positioned, but a concealed stitch helps prevent complete loss if an edge catches.
How Do You Attach Buttons, Charms, Zippers, and Other Functional Parts?
A decorative button on a wall hanging and a closure button on a coat are different engineering tasks. A functional button transfers force every time it is opened, so it needs sufficient thread passes, a suitable shank or thread stem, and a base fabric capable of carrying the load. Add a small backing button or reinforcement layer when the main fabric is thin.
Zippers need consistent alignment, repeated bending, and freedom around the teeth and slider. A narrow positioning tape or compatible temporary adhesive can help hold zipper tape before sewing, but the permanent attachment is normally stitched. Keep wet product away from teeth, stops, slider paths, seam allowances requiring adjustment, and the machine needle.
Metal charms should hang from a sewn loop, jump ring, eyelet, or reinforced tab whenever movement is expected. A swinging charm creates repeated peeling and leverage if it is simply bonded flat. If the design requires a flat-mounted metal piece, inspect its reverse side for sharp points, maximize safe contact area, and prevent the rigid edge from rubbing directly against unprotected fabric.
Bag handles, hanging loops, and straps should always be assessed as structural components. Adhesive may hold layers during assembly, but the force should pass through reinforced stitching, suitable rivets, or hardware. A visually neat bond offers little value if the surrounding fabric tears, so reinforce the substrate rather than focusing only on the attachment material.
How Do You Join Fabric to Paper, Cardboard, or Wood?
Paper can wrinkle, darken, delaminate, or release printed ink when exposed to moisture. Test the exact printed or coated sheet before covering a large area. Apply a thin, uniform layer, align one edge to a guide, and smooth gradually from the center toward the outside. Avoid repeated lifting because damp paper fibers can stretch or separate.
Cardboard strength can fall as it absorbs moisture. For fabric-covered boxes, book covers, and display boards, test whether the board bows after one side is bonded. Applying similar layers to both sides may help balance some constructions, but the correct method depends on design. Allow enough fabric around corners to wrap without pulling the board out of shape.
Wood should be identified as raw, stained, painted, oiled, waxed, or sealed. Dust should be removed, and the surface must be dry. Do not sand a finished object automatically because sanding may remove a coating or alter the color permanently. For broad fabric panels, a thin even application is generally more controllable than isolated thick beads, which may form visible ridges.
- Material-specific process example: Loctite — Gluing Fabric to Wood with Spray Adhesive demonstrates ventilation, surface cleaning, an even coat, progressive smoothing, repositioning, and waiting for the named product to cure before trimming. Its spray distance and timing apply to the featured product rather than every adew13″}}
When bonding fabric to paperboard or wood, protect the visible face from overspray or transfer. Mask nearby areas if permitted, work in a ventilated space when required, and use a clean roller or covered smoothing tool. Practice the motion on scrap before applying product to a large decorative panel where one trapped bubble would be difficult to hide.
How Do You Join Fabric to Metal, Glass, Ceramic, or Plastic?
Metal, glass, glazed ceramic, and many plastics are nonporous, so fingerprints, polish, oil, release agents, oxidation, or dust can occupy a meaningful portion of the available bonding area. Clean and dry the surfaces using a method permitted for both the substrate and selected adhesive. Pre-fit everything before application because repositioning a large textile panel on a tacky hard surface can introduce wrinkles.
- Surface-preparation example: Loctite — Gluing Fabric to Metal emphasizes clean, dry surfaces, pre-fitting, product-specific holding and drying times, workspace protection, and ventilation for spray applicew12″}}
Metal edges should be rounded, covered, or positioned where they cannot cut the textile. A metal object expected to swing, support weight, or receive repeated pulling should use a mechanical connection. Glass and glazed ceramic are rigid, so the flexible textile moves differently around the joint. Keep the connection away from a frequent fold and provide enough contact area to distribute force.
Plastic requires more careful identification. Acrylic, ABS, PVC, polycarbonate, polypropylene, polyethylene, polystyrene, silicone, and coated recycled plastics do not behave as one material group. Some permit good wetting with common adhesive systems, while low-surface-energy plastics resist spreading and intimate contact. Release agents, plasticizers, paint, and protective coatings introduce additional uncertainty.
3M’s educational material describes surfaces below 36 dynes per centimeter as low surface energy and identifies polypropylene, polyethylene, and PTFE among materials which are difficult to bond. The numeric threshold is an industrial categorization rather than a household pass-or-fail test, but it explains why adhesive may bead up or release from some plastics even after cleaning.
- Surface-science evidence: 3M Science of Adhesion — Categorizing Surface Energy explains surface energy, wetting, the 36 dynes/cm low-energy category, and the bonding difficulty associated with polyolefin plrch2″}}
A consumer adhesive manufacturer also separates its fabric-to-fabric product from a product intended for fabric joined to hard surfaces and lists exclusions for polystyrene, polypropylene, and polyethylene in the featured system. This example does not establish compatibility for another brand. It shows why “works on plastic” should always be replaced with an exact material name and product-specific instructions.
- Compatibility-boundary example: Gorilla — How to Glue Fabric Without Sewing compares soft-to-soft and fabric-to-hard-surface uses and publishes plastic exclusions for the products discussed on thw11″]}}
Do not use flame treatment, aggressive solvent wiping, chemical etching, or industrial primers on unidentified household objects without proper instructions, controls, and safety information. For a normal craft, changing to a specialty adhesive, adding a fabric sleeve, drilling a permitted hole, using a clamp-style fastener, or redesigning the mounting tab may be safer and more practical.
6. What Is the Best Step-by-Step Assembly Workflow?
A disciplined workflow reduces wasted fabric, misplaced decoration, excess adhesive, and last-minute cure problems. It also separates hands-on time from waiting time. A craft may need only thirty minutes of active work while remaining unavailable for a day or longer. Planning both time categories is especially important for gifts, school projects, performances, workshops, batch decorations, and seasonal displays.
How Should You Plan the Layout and Material Quantities?
Start with the finished dimensions and intended use. List every component, quantity per craft, number of crafts, material pair, joining method, test status, and assembly order. Mark structural areas first because they determine where decoration can safely sit. Keep embellishments away from seam allowances, fold lines, zipper paths, snap locations, and positions requiring later trimming.
Use the following basic calculation for repeated components:
- Total required pieces = pieces per craft × number of crafts
- Prepared pieces = total required pieces × (1 + selected spare allowance)
A spare allowance of approximately 5–10 percent is a practical planning range for many repeated decorative parts, but it is not a universal rule. Increase it for directional prints, large motif repeats, unfamiliar cutting tools, fragile decorations, irregular natural materials, or a new bonding process. Reduce unnecessary waste after the method becomes stable and cutting consistency has been confirmed.
For two or more equal-width decorations arranged across a known span, calculate the clear internal gap with:
- Clear gap = (available span − both end margins − combined width of all pieces) ÷ (number of pieces − 1)
Measure every center position from one fixed reference edge rather than repeatedly adding the previous gap. Repeated addition allows small ruler errors to accumulate across a long banner or row of patches.
- External calculation tool: Equal Spacing Calculator accepts total span, item count, item width, and equal end margins, then calculates clear gaps, center spacing, and each center mark. It is useful for letters, rhinestone rows, repeated patches, and evenly positioneew14″}}
Calculate base-fabric requirements from finished dimensions, seam allowance, usable fabric width, piece quantity, and pattern direction. Pattern repeats and directional motifs may consume more material than area calculations suggest. When the project contains shaped panels, boxing, lining, bias pieces, or several fabrics, draw a scale layout instead of depending entirely on a rectangular yardage estimate.
- External material tool: Fabric Yardage Calculator estimates yardage for repeated rectangular pieces and accounts for usable width, quantity, seam allowance, pattern repeat, and an optional extra allowance. Its own guidance notes that shaped or complex projects require a more specialized ew15″}}
How Should You Cut, Label, and Dry-Fit the Materials?
Cut the main structural pieces first, then confirm the remaining material before cutting decoration. Use fabric-only scissors or a sharp rotary cutter on a protected mat. Paper dulls fabric blades, so separate cutting tools are useful. Label the wrong side of repeated components with a removable method already tested on matching scrap.
Place every major component without glue, heat, or final stitching. Check the design from the distance at which it will normally be viewed. A layout which looks balanced from six inches away may appear crowded on a wall. Photograph the arrangement and mark centers, baselines, endpoints, or registration corners before removing the pieces.
For garments and soft bags, assess the layout on the three-dimensional object or a mock-up. Fabric curves, stretches, and folds around the body or contents, changing the apparent spacing. Keep rigid embellishments away from elbows, waist folds, seating areas, shoulder pressure points, and other locations where movement or comfort becomes a problem.
Cricut Design Space templates can help visualize scale and background placement. They are guides rather than physical measurements of fabric behavior, so verify the final dimensions on the actual object. Stretch, seam shaping, drape, and usable surface area can differ from the flat digital preview.
- External layout tool: Cricut Design Space — Using Templates explains how to add, resize, recolor, and position template guides. The template is saved as a guide and is not sent to the machine when the user selects iew0″}}
In What Order Should You Join the Materials?
Complete structural construction before fragile decoration. Sew bag bodies, hems, linings, reinforcement tabs, and stabilizers before attaching raised beads or flowers. Position large flat decorative layers before small stones because later pressing, turning, or machine sewing can damage dimensional embellishments.
Within a layered design, work from the bottom upward and from the largest component toward the smallest. Center large motifs using reference marks, then place secondary trim, and finish with detail pieces. If several decorations overlap, confirm which edges must remain free before bonding. A fully glued lower layer may prevent a later ribbon or tab from sliding beneath it.
For a large bonded panel, align one reference edge and smooth progressively toward the opposite side. Work in controlled sections only when the adhesive instructions permit staged application. Keep both materials relaxed. Pulling fabric tight may create a smooth wet appearance followed by puckering when the textile returns to its natural dimensions.
Complete one fully tested sample before processing an entire batch. If each craft contains 12 decorations and 20 crafts are required, one application error could be repeated 240 times. A single finished pilot reveals assembly-order problems, hidden edges, cure-space requirements, and actual material usage before the remaining parts are committed.
How Should You Press, Support, Cure, and Inspect the Craft?
Pressure should create intimate contact without squeezing product through the textile or crushing texture. Flat pieces may be covered with a clean protective liner and lightly weighted. Curved pieces may need clips, elastic bands, shaped foam, or another support compatible with the surface. Confirm whether the joining product requires immediate assembly, an open time, contact drying, heat, or continuous clamping.
Cure the item in the position closest to its intended shape. A cuff, curved bag panel, or fabric-wrapped cylinder may not benefit from curing completely flat and being forced into a tight curve later. Prevent gravity from moving heavy decorations. Mark the earliest handling and full-use times so another person does not fold or wear the craft prematurely.
Distinguish initial set, handling strength, and full cure. These terms are not interchangeable. Initial set may hold alignment; handling strength may permit careful movement; full cure is the manufacturer’s stated point for intended performance under normal conditions. Washing, ironing, aggressive bending, or load testing should wait for the full period unless the instructions explicitly permit earlier use.
Inspect the finished craft under normal light and side lighting. Check the front, back, and every exposed edge. Look for residue, hard ridges, bubbles, shifted spacing, skipped stitches, sharp hardware, loose thread, and adhesive near moving parts. Perform realistic movement only within the project’s expected range, and use the sacrificial coupon for destructive or washing checks.
7. How Do You Fix Joining Problems and Care for the Craft?
Most failures can be traced to a mismatch among surface condition, adhesive amount, contact area, movement, pressure, and cure. Adding more product after an edge lifts may conceal the symptom while leaving the original cause unchanged. Diagnose where and how the joint failed, then decide whether to clean and reapply, reduce the bonded area, reinforce the edge, change the joining system, or redesign the load path.
| Problem | Most likely causes | Practical correction | Prevention on the next project |
|---|---|---|---|
| Dark patch, bleed-through, or glossy outline | Excess application, porous fabric, open lace, or product too close to the edge | Stop spreading the wet area; follow the named product’s cleanup instructions and test any cleaning method on scrap | Use smaller dots or a thinner line, leave a clean perimeter, and test the exact fabric color |
| Stiff or cracking bonded zone | Layer is too thick, bonded area is too broad, or joint lies on a major fold | Reduce the active bonded area where safe or replace part of the joint with stitching | Use the minimum effective amount and keep broad adhesive fields away from fold lines |
| Ripples, wrinkles, or bubbles | Uneven coating, stretched fabric, trapped air, or poor placement sequence | Reposition only if permitted; otherwise remake the affected layer after identifying the cause | Dry-fit, relax materials, use registration marks, and smooth from the center outward |
| Peeling after handling or washing | Contamination, poor wetting, incomplete cure, low contact area, or excessive peel force | Remove loose material carefully, retest the pair, and reinforce or change methods | Clean correctly, allow full cure, round vulnerable corners, and use stitches or hardware for load |
| Decoration slides during cure | Too much wet product, insufficient support, curved surface, or premature movement | Realign with a clean tool only if safe and add a compatible support | Reduce application, assemble in stages, and cure the object in its intended shape |
| Sticky needle or skipped stitches | Adhesive entered the needle path or sewing began under unsuitable conditions | Stop sewing, follow machine-cleaning guidance, and replace a damaged or contaminated needle | Keep positioning adhesive inside the stitch line and plan the hybrid sequence first |
| Hard component tears the fabric | Concentrated load, sharp edge, weak base, or adhesive-only structural attachment | Remove the load and add a backing patch, washer, stitched tab, eyelet, or other reinforcement | Spread force across a wider area and classify handles, loops, snaps, and charms by function |
How Can You Prevent Visible Glue Marks?
Begin with a practice application using the same applicator angle and hand pressure planned for the final craft. Make several dots and lines, cover them with matching offcuts, and inspect how far the product spreads. This reveals the final bond-line width more accurately than viewing an uncovered wet line.
Place adhesive slightly inside the visible edge. On lace, apply it behind solid motifs. On pale satin, test for darkening and shine. On felt, check whether absorption leaves a hard outline. Clean the nozzle before a dried fragment changes a fine line into an uncontrolled blob. Close the container during pauses to reduce drying at the tip.
If wet material escapes, do not rub immediately unless the manufacturer specifically instructs this approach for the substrate. Rubbing can push product deeper into fibers and enlarge the mark. Use the named cleanup method, work from the edge of the affected area inward when appropriate, and test any liquid cleaner on an offcut first.
How Can You Prevent Stiffness, Warping, and Edge Peeling?
A fabric craft remains comfortable when the bond line moves with the textile. Use the minimum effective layer and avoid broad solid coverage across a main fold. If a large decoration must remain flexible, consider a perimeter attachment, segmented adhesive pattern, stitching, or a softer backing rather than filling the entire area.
Warping often begins when one material is stretched during assembly or absorbs more moisture than the other. Let fabric and ribbon relax before measuring. Apply product evenly and support thin paperboard or wood during curing. Large panels should be smoothed progressively to avoid trapping air or moving wet product into ridges.
Peeling usually starts at an edge where force becomes concentrated. Rounded appliqué corners are less likely to catch than long sharp points. Secure ribbon ends, reinforce patch corners, and keep decorations away from high-friction garment and bag edges. If the adhesive repeatedly separates cleanly from a coated surface, stop adding layers and change the compatibility or fastening strategy.
How Should You Wash, Iron, Fold, and Store the Finished Project?
The least tolerant component sets the care limit. Washable fabric and washable adhesive cannot make untreated paper, a delicate bead coating, leather trim, heat-sensitive plastic, or corrodible hardware equally washable. Check each component, then select the gentlest method suitable for the complete assembly.
Allow full cure before washing, ironing, stretching, or folding tightly. For the fabric adhesive described earlier, the current instruction is approximately 24 hours before these higher-demand activities. Another formulation may require a different period. Use its label and record the actual curing environment because low temperature, limited airflow, thick application, or absorbent layers may influence practical drying.
Turn washable decorated clothing inside out when the garment instructions permit. Close zippers and hooks, protect delicate surfaces in a laundry bag, and use mild agitation when the complete combination has not been verified for a stronger cycle. Air drying often reduces heat and tumbling stress, but it should still be confirmed through a sample if a care statement will be published.
When ironing is allowed, use the reverse side or a clean pressing cloth and begin with the lowest temperature suitable for all materials. Avoid extended direct heat over plastic decorations, synthetic leather, unknown coatings, and dimensional embellishments. Store the item clean and dry, using soft support around raised flowers, beads, or hardware rather than folding directly across them.
What Safety Checks Apply to Adhesives, Heat, Tools, and Children?
Read the adhesive, fusible, cleaner, and equipment instructions before beginning. Provide ventilation where required, protect the work surface, keep food and drink away, and wash hands after use. Do not mix cleaners, solvents, primers, or adhesive systems unless their manufacturers explicitly approve the combination. A cleaning product safe for glass may damage a coating or plastic.
Adults should control hot irons, glue guns, sharp needles, rotary cutters, strong cleaners, and precision metal applicators during children’s crafts. Select larger decorations for young children and inspect the finished item for loose parts. A bead or sequin remains a small object even when originally glued to fabric; attachment failure can change it into an accessible hazard.
The U.S. Consumer Product Safety Commission uses a small-parts cylinder approximating the fully expanded throat of a child under three when evaluating relevant children’s toys and products. A personal craft is not automatically governed in the same manner, but the physical hazard provides a useful safety boundary for parents, teachers, and activity organizers.
- Safety evidence: CPSC — Small Parts Ban and Choking Hazard Labeling explains the cylinder method and how a whole object, separate component, or piece released during use or abuse testing may qualify as a smaliew9″}}
Conclusion
Successful mixed-material fabric crafts are built one joint at a time. Instead of asking one glue, stitch, or fastener to manage the entire project, separate every Material A + Material B interface. Classify its role, map the expected forces, check movement and care, and choose a method suited to the actual surfaces. This approach produces a cleaner result and makes future repairs easier to plan.
A labeled test coupon is one of the most useful tools available to a home crafter. It reveals absorption, wetting, stiffness, color change, edge behavior, flex response, and care compatibility before valuable materials are committed. The result should be described honestly as a household comparison unless standardized specimens, conditioning, equipment, and procedures have been used.
Flexible fabric adhesive can save time on hems, patches, felt shapes, ribbon, lace, and other low-stress decorations when it is applied precisely and allowed to cure fully. Structural seams, handles, straps, zippers, and heavy components still benefit from sewing or mechanical fastening. For project kits or customized adhesive requirements, GleamGlee can assess defined material pairs, application style, packaging format, and nozzle configuration without treating one fabric adhesive as a universal solution.
8. Frequently Asked Questions About Joining Mixed Materials
These questions cover the most common search concerns surrounding mixed-media fabric crafts. Each answer should be applied together with the instructions for the actual adhesive, fusible material, sewing equipment, and decoration. Material names alone are not enough because coatings, dyes, finishes, thickness, aging, and planned care can change the result.
Can one fabric glue join every material in a fabric craft?
No fabric adhesive should be assumed to join every material. A product suitable for cotton, felt, ribbon, or textile patches may not bond reliably to polypropylene, polyethylene, glazed ceramic, painted metal, treated leather, or coated paper. Divide the craft into separate material pairs, inspect the product’s stated compatibility, and test every unconfirmed combination. Use stitching or mechanical fastening for structural and concentrated-load connections.
Is sewing always stronger than fabric glue?
Sewing is often the more dependable starting point for load-bearing seams, handles, straps, zippers, and repeatedly stretched areas, but strength depends on the full joint design. Thread, stitch type, seam allowance, needle holes, fabric strength, adhesive chemistry, contact area, and load direction all matter. A needle may damage a delicate film or coating, while a properly selected adhesive may distribute low decorative loads over a wider area.
Can fusible web be used on every fabric?
Fusible web should be used only when all materials can tolerate its specified heat, pressure, and pressing time. Metallic finishes, coated textiles, raised pile, synthetic leather, plastic sequins, specialty printing, and some heat-sensitive fibers may flatten, melt, discolor, or lose surface quality. Test an offcut using the exact web and iron setting. Choose sewing or a compatible room-temperature positioning method when heat creates unacceptable risk.
How long should fabric glue cure before the craft is used?
Use the full-cure time stated for the selected product. Initial grab only indicates that the pieces may remain positioned under limited disturbance; it does not necessarily permit washing, ironing, stretching, wearing, or loading. The GleamGlee fabric adhesive discussed in this guide lists approximately 6–10 minutes for initial positioning and about 24 hours for full cure. Other adhesives can have different schedules, so their instructions take priority.
Can fabric be glued to leather, wood, metal, glass, or plastic?
It can be possible when the chosen adhesive explicitly supports both surfaces and the joint is suitable for adhesive construction. Clean and dry the materials using approved methods, pre-fit the parts, and test the exact finish. Plastic needs extra caution because resin types and surface energies differ. Handles, straps, moving charms, and other load-carrying components normally require reinforced stitching, hardware, or another structural attachment.
Can a mixed-material fabric craft be machine washed?
Machine washing is suitable only when the complete assembly can tolerate the selected water temperature, detergent, agitation, and drying method. One washable adhesive cannot make paper, untreated metal, leather, delicate bead finishes, or heat-sensitive plastic washable. Allow full cure, wash a sacrificial coupon first, and inspect it after drying for peeling, corrosion, stiffness, discoloration, clouding, and dimensional change.
When should glue and stitching be used together?
Use a hybrid method when accurate positioning is difficult but the joint also needs resistance to peeling, washing, bending, or repeated handling. Adhesive or fusible web can keep an appliqué, ribbon, patch, or trim flat while stitching secures vulnerable edges and endpoints. Keep adhesive away from the needle path, allow the required setting or cure period, and direct structural loads through thread or hardware rather than a decorative adhesive layer.





















