 Skip to content
A good fabric repair should solve the damage without changing how the garment feels every time you move. A repair can look neat on a table and still perform poorly once the fabric bends around a knee, stretches across a shoulder, folds inside a sleeve, or goes through a washing cycle. The most useful goal is therefore not simply to make two damaged edges stick together. The repair needs enough strength to remain secure while still allowing the surrounding textile to bend, drape, compress, and stretch in a way reasonably close to its original behavior.
After many years of working with adhesive applications, one lesson becomes especially clear: flexibility problems rarely come from one cause alone. A soft textile adhesive cannot compensate for a rigid patch, an oversized reinforcement, the wrong stretch direction, or a repair placed across a heavily loaded seam. In the same way, a perfectly selected patch can still become uncomfortable when it is saturated with too much adhesive. The best results come from treating the repair as a complete system made of fabric, patch or reinforcement, adhesive or stitches, repair geometry, curing conditions, and later washing or ironing.
For everyday users, this means the first question should not be, “Which glue is strongest?” A more useful question is, “How does this part of the fabric normally move, and what repair will move with it?” A cotton shirt hem, a stretch-legging knee, a denim seat, a polyester costume cuff, and a waterproof hiking jacket may all contain textile fibers, yet each location behaves differently under wear. Choosing the repair method according to movement usually produces a more comfortable and durable result than selecting a material only by advertised bond strength.
This guide is written for ordinary clothing owners, DIY repair users, people who do not sew, sewists handling stretch garments, parents fixing children’s clothing, costume and stage users, outdoor clothing owners, and anyone who has already experienced a repair becoming stiff, cracked, uncomfortable, or loose after washing. The practical approach follows a simple principle: low-stress repairs can often be managed with a flexible adhesive or lightweight patch, while structural or repeatedly stretched areas may need sewing, reinforced stitching, specialist patches, or professional repair instead. The user-group research supplied for this guide makes the same distinction rather than presenting fabric glue as a universal answer.
1. Why Do Fabric Repairs Become Stiff?
Fabric feels soft because thousands of fibers and yarns can shift, bend, compress, and slide slightly relative to one another. A repair changes this structure by joining an area more tightly than before. If the repair layer is small, thin, and mechanically compatible with the textile, the difference may be difficult to notice. If the repair adds excessive thickness, restricts yarn movement, or creates a rigid boundary, the repaired spot can behave like a small plate attached to a flexible sheet. The fabric may still hold together, yet movement becomes concentrated around the edge of the repaired zone.
A practical way to think about repair flexibility is to consider seven variables at the same time: the original fabric’s stretch, the reinforcement material, the adhesive or stitch system, the amount of added material, the size of the repair, the direction of movement, and the care conditions after repair. A problem in any one of these areas can noticeably change hand feel. When several problems occur together—for example, a thick patch, excessive adhesive, and a high-heat dryer cycle—the repaired section can become much firmer than users expected even if the initial bond appeared successful.
What Commonly Creates a Hard Repair?
The most frequent cause in adhesive repairs is excessive material. Users often assume a larger quantity of glue creates a stronger result, so they saturate the cloth until adhesive reaches deep into the weave or appears at the opposite surface. Once cured, the added polymer occupies spaces where yarns previously moved more freely. More adhesive can also increase drying time. Aleene’s Fabric Fusion, for example, publishes a dry-time estimate based on a defined coating thickness and specifically notes that thicker applications dry more slowly. Its manufacturer information also describes the cured bond as remaining flexible after washing, showing why both formulation and application thickness matter.
- reference content source – Aleene’s Fabric Fusion: Manufacturer instructions describe an even coating, flexible bond after washing, 2–4 hour full cure for this specific product, and a 48-hour wait before washing.
Another common cause is a mismatch between the patch and the garment. Imagine placing heavy denim over thin jersey. Even if both materials are technically “fabric,” their bending stiffness and stretch behavior are very different. Each time the wearer moves, the jersey wants to elongate while the denim reinforcement resists. The transition line around the patch then carries extra movement. Over time, discomfort, edge lifting, puckering, or new tearing beside the repair may develop. A better patch is usually close enough in structure, weight, and movement to work with the garment instead of controlling it.
Strength and Flexibility Need to Work Together
A fabric repair should not be judged only by how difficult it is to pull apart immediately after curing. Clothing experiences repeated low-level movement rather than one single laboratory pull. Knees bend hundreds of times during normal wear, hems fold during sitting, sleeves twist while dressing, and garments undergo repeated wetting, tumbling, drying, and storage. For this reason, a bond that is slightly less rigid but better able to move with the textile may perform more naturally than an extremely hard repair on the same area.
Research into stretchable adhesive systems also reflects this broader engineering principle. A 2025 materials study on adhesives for stretchable fabrics examined how adhesive networks can combine load-bearing strength with extensibility rather than maximizing stiffness alone. The research is far more technical than a household clothing repair requires, but the underlying principle is highly relevant: mechanical compatibility between an adhesive joint and a deformable substrate matters when both need to move together.
- Technical evidence: Architected Dual-Network Solvent-free Adhesives for Stretchable Fabrics discusses balancing strength and stretchability in adhesive joints used with deformable textile structures.
For an everyday repair, the practical takeaway is simple. Avoid making the repaired area dramatically stiffer than the surrounding textile. Use only the reinforcement needed, keep adhesive application controlled, and reserve rigid construction methods for fabric sections where stiffness is actually desirable. A handbag base or structured craft panel may tolerate additional firmness. A T-shirt chest, leggings knee, sleeve elbow, waistband, or soft curtain fold usually benefits from a repair that preserves movement.
2. Which Repair Method Will Keep Your Fabric Flexible?
There is no single repair method with the highest flexibility in every situation. Sewing leaves very little added adhesive material but can restrict stretch if a non-stretch stitch is used across elastic cloth. Flexible fabric glue can create a soft no-sew bond, yet too much adhesive or use on an unsuitable structural seam can cause problems. Self-adhesive patches can work extremely well on outdoor textiles, but a patch designed for stable woven nylon should not automatically be treated as the best option for highly elastic leggings. The repair method must fit the job.
The attachment describing real user difficulties makes an important distinction between low-stress repairs and structural failures. Loose hems, decorative patches, lace, ribbon edges, and other light textile problems can often be handled with fabric adhesive or simple hand sewing. Crotch seams, shoulders, armpits, load-bearing straps, major tears, and similar high-stress areas are better candidates for stitching, reinforcement, or professional repair. This distinction should come before brand or product selection because it prevents a convenient method from being used where the garment structure requires something stronger.
| Repair Situation | Practical First Choice | Flexibility Consideration | Main Caution |
|---|---|---|---|
| Loose hem or cuff | Flexible fabric glue or blind stitch | Keep the fold thin and soft | Avoid soaking the hem with adhesive |
| Decorative patch or trim | Flexible fabric adhesive | Patch should bend with garment | Large heavy decoration increases stiffness |
| Small tear in stable woven fabric | Light patch, stitching, or controlled adhesive | Match patch weight to fabric | Inspect weakened fibers around the tear |
| Jersey or knit garment | Stretch stitch or compatible stretch patch | Repair must elongate with fabric | Ordinary straight stitches may restrict movement |
| Leggings or activewear | High-stretch patch or stretch-compatible sewing | Stretch and recovery are critical | Rigid repair can create a stress boundary |
| Denim knee or thigh | Patch plus stitching, or controlled adhesive on suitable low-stress areas | Denim is heavier but still flexes | Avoid unnecessary multi-layer bulk |
| Crotch, shoulder, armpit seam | Structural stitching | Seam must repeatedly carry load | Glue alone is rarely the safest first choice |
| Technical waterproof garment | Manufacturer-compatible repair system | Coatings and membranes affect adhesion | General clothing methods may damage performance |
When Fabric Glue Makes Sense
Fabric adhesive is particularly useful when a user wants to avoid visible stitches, does not own a sewing machine, needs precise placement around a patch or trim, or is repairing a low- to moderate-stress textile area. The best candidates include hems, decorative appliqués, patch edges, ribbon, lace, lightweight trims, non-structural seam edges, craft textiles, curtains, and some small garment repairs. In these cases, a fabric-specific adhesive designed to remain flexible after curing is generally more appropriate than a rigid office glue or thick hot-glue deposit.
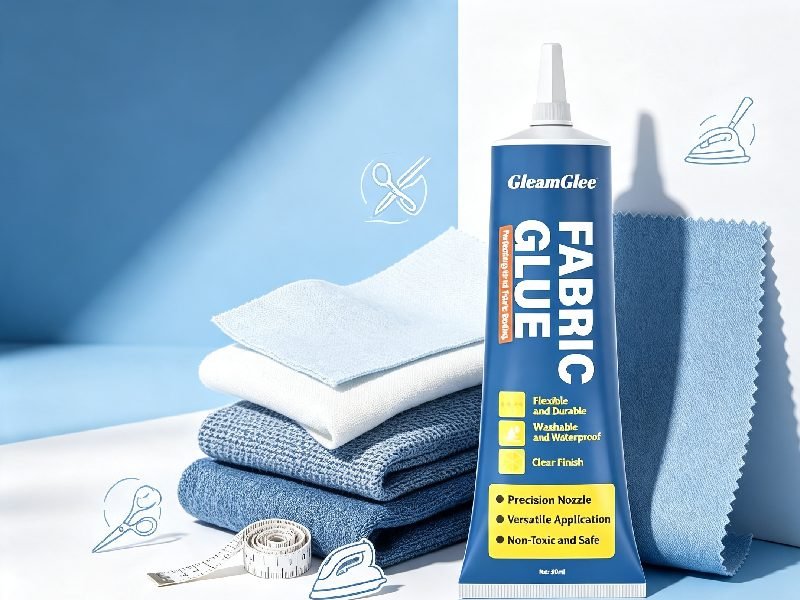
GleamGlee Fabric Glue fits this type of repair rather than every textile failure. The supplied product specifications describe a 50 ml no-sew fabric adhesive with a precision applicator, transparent finish, flexible cured layer, washability after full cure, and compatibility with common materials including cotton, denim, polyester, canvas, felt, lace, ribbon, patches, and related textile projects. Its internal product information lists approximately 6–10 minutes for initial positioning and about 24 hours for full cure. Those times belong to this specific formulation and should never be treated as universal fabric-glue standards.
From a formulation perspective, the precision tip is more important than it may appear in marketing photographs. Fine control helps the user place adhesive along a narrow edge rather than flooding a wide area. The product documentation also emphasizes staying soft after cure instead of creating the thick rigid deposit often associated with general craft glues or hot-melt glue. For people sourcing a textile adhesive for retail, repair kits, or private-label projects, similar properties—controlled application, flexible cured feel, clear appearance, realistic cure instructions, and verified wash compatibility—are more meaningful than an unsupported claim of “maximum strength.”
When Sewing Is the Better Answer
Sewing remains the more appropriate structural answer whenever the repair carries repeated pulling force. A crotch seam opens because the fabric and thread system experience tension every time the wearer walks, bends, or sits. A shoulder seam supports the weight and movement of a garment. Backpack straps, load-bearing loops, waistbands, and similar parts may experience repeated peak loads well beyond those of a decorative trim. Adhesive can sometimes assist positioning or reinforcement, but a structural stitch path usually deserves to carry the main load.
For users unsure which method to choose, the safest practical rule is to separate surface attachment from structural reconstruction. Surface attachment includes trims, appliqués, patch faces, folds, decorative edges, and other parts where most forces remain within the fabric plane. Structural reconstruction includes seams or components where the garment may pull apart if the connection fails. A flexible adhesive is excellent when used within its intended role; it becomes less helpful when asked to replace a mechanical structure designed around thread, seam allowance, or load distribution.
- Downloadable reference – JOANN Aleene’s Glue & Adhesive Guide: This guide provides a useful comparison of adhesive categories for different craft and textile applications and includes a downloadable project PDF on the page.
3. How Do You Match a Patch to the Fabric’s Stretch?
Patch selection is one of the most overlooked reasons a repair either disappears into the garment or feels like a foreign object. The easiest mistake is choosing only by color. A blue patch may look correct on blue leggings, yet if the patch stretches 5% while the leggings routinely extend much farther, the color match offers little mechanical benefit. A better selection considers weave or knit structure, fiber type, thickness, stretch amount, stretch direction, and the level of abrasion expected at the damaged location.
iFixit’s current fabric-patch guidance uses exactly this broader approach. Its patch-making guide recommends considering weave structure, fiber content, weight, and stretch when selecting a patch. Its self-adhesive repair guide also advises matching fabric qualities such as stretch, toughness, and texture, then aligning the stretchy direction of the patch with the stretchy direction of the garment. These practical details are especially useful because they move patch selection away from appearance alone.
- reference content source – iFixit self-adhesive patch repair: The guide explains patch selection for stretch, toughness, texture, wear location, pressure application, and matching stretch direction.
- reference content source – iFixit patch-making guide: This reference covers weave structure, fiber content, fabric weight, stretch direction, patch size, seam allowance, and reinforcement planning.
Measure Stretch Instead of Guessing
You do not need laboratory equipment to perform a useful home comparison. Mark or measure a short section of undamaged fabric, stretch it gently to the amount it would realistically experience during normal wear, and measure again. Stretch percentage can be calculated as:
Stretch % = [(stretched length − original length) ÷ original length] × 100
If a 10 cm section comfortably extends to 12 cm, the measured stretch under your chosen hand tension is 20%. If the same section reaches 15 cm, the result is 50%. Household measurements are not standardized textile laboratory tests because pulling force varies from person to person, but the method is still useful for comparing a garment and a candidate repair patch under similar conditions. Seamwork teaches the same basic calculation for selecting stretch fabrics for sewing projects.
Video evidence – How to Determine Stretch Percentage in Fabric, Seamwork: The demonstration shows how to use a ruler and small fabric sample to calculate stretch rather than relying on vague descriptions such as “a little stretchy.”
External calculation tool – Fabric Stretch Percentage Calculator: Enter original and stretched lengths to calculate elongation percentage. Use it as a quick comparison tool, not as a replacement for a standardized tensile test.
Stretch Direction Matters as Much as Stretch Amount
Many fabrics do not move equally in every direction. A jersey may stretch strongly across the body but much less along its length. Stretch denim may have a pronounced crosswise extension. Some activewear knits are designed for multi-directional movement. If a patch is installed with its firm direction crossing the garment’s main stretch direction, the repair can behave like a restraint even if the patch itself is labeled elastic. Before applying any reinforcement, gently pull both the garment and patch horizontally and vertically and note the direction of greatest movement.
This simple alignment step can prevent a surprising number of stiff repairs. Position the patch so its greatest stretch follows the same axis as the garment’s greatest stretch. For four-way stretch garments, a bi-elastic reinforcement is usually more appropriate than a stable woven patch. Prym’s FabPatch Stretch, for example, is marketed as a bi-elastic textile repair patch intended for jersey, leggings, nylon, polyamide, and performance textiles, illustrating how patch systems can be engineered specifically around movement rather than simply adhesive strength.
Video evidence – Prym x FabPatch Stretch: This short demonstration shows a flexible self-adhesive repair patch used on elastic garments such as jersey and leggings, making the concept of a movement-compatible patch easy to visualize.
Match More Than Elasticity
Stretch alone does not guarantee comfort. Patch weight and bending behavior matter as well. A very elastic but thick patch can still feel bulky on thin underwear or a lightweight shirt. A lightweight patch may feel perfect on a jersey top but wear through quickly on a knee exposed to repeated abrasion. Repair location therefore changes the priority. Elbows and knees usually need more abrasion resistance, while chest, sleeve, lining, or drape-sensitive areas benefit from lower bulk. Skin-contact areas should also be checked for edges or textures that may rub during movement.
| Fabric or Garment | Typical Repair Concern | Better Matching Approach | Avoid |
|---|---|---|---|
| Cotton T-shirt | Drape and softness | Lightweight patch or thin flexible adhesive | Heavy patch and saturated glue layer |
| Jersey knit | Directional stretch | Knit/stretch patch aligned with movement | Stable woven patch across stretch direction |
| Leggings / activewear | High stretch and recovery | Bi-elastic patch or stretch-compatible stitch | Rigid glue mound or heavy denim patch |
| Stretch denim | Moderate stretch plus abrasion | Denim/stretch patch with similar give | Extremely soft patch with poor wear resistance |
| Standard denim | Bulk and repeated bending | Similar-weight denim reinforcement | Several unnecessary heavy layers |
| Polyester costume | Appearance and movement | Hidden test plus lightweight flexible repair | Thick visible glue deposits |
| Canvas | Higher load and abrasion | Strong patch or stitched reinforcement | Delicate low-strength repair where load is high |
| Technical nylon | Coating compatibility | Technical-fabric patch made for substrate | Random general-purpose adhesive without testing |
A useful rule from practical repair work is to choose the lightest repair that can realistically survive the job, not the lightest material available and not the strongest material available. This distinction matters because a patch still needs enough area and toughness to bridge weakened fibers. The repair should extend beyond visible damage into healthier fabric, but excessive coverage adds stiffness and creates a larger transition zone. The correct size is therefore large enough to distribute load around damage while remaining as compact as practical.
4. How Do You Use Fabric Glue Without Making the Repair Stiff?
Flexible fabric glue performs best when users stop treating it like filler. Its job in most garment repairs is to create intimate contact between textile surfaces, not to build a thick external layer over the fabric. Adhesive strength develops at the interface where glue wets and bonds the fibers or textile surfaces. A puddle sitting above the cloth can add stiffness without improving the useful bonded area underneath. Controlled application is particularly important with thin cotton, polyester, lace, jersey, light costume fabrics, and other materials where excess liquid can penetrate to the visible face.
Start With a Hidden Compatibility Test
Before repairing the visible area, place a small amount of adhesive on an offcut or inconspicuous section and allow it to dry according to the product instructions. Do more than check whether it sticks. Look from the front under natural light for darkening, shine, bleeding, color change, or adhesive marks. Bend the test area repeatedly between your fingers and compare it with untreated fabric nearby. If the test spot already feels objectionably hard, adding a larger bonded zone on the visible garment will not improve the result.
The user guidance supplied for GleamGlee repair content recommends exactly this hidden test for unfamiliar fibers, dyes, and coated textiles, including checking whether adhesive penetrates to the front and whether the dried area keeps its original bending behavior. This habit becomes even more valuable for expensive clothing, very thin fabrics, printed textiles, or garments whose surface finish is more important than the convenience of a no-sew repair.
Use Enough Adhesive for Contact, Not Saturation
Application quantity varies by formulation, so a universal millimeter thickness should not be invented for every fabric glue. The useful principle is continuous coverage without unnecessary saturation. Apply a controlled amount where the two surfaces actually meet, spread it according to the manufacturer’s instructions, and avoid repeatedly adding glue just because some disappears into an absorbent weave. Highly absorbent textiles may need a different application technique from smooth polyester, and a porous fabric should never be flooded simply to make the surface look wet.
Gorilla Fabric Glue provides a useful example of manufacturer-specific application instructions. Its current guidance recommends testing fabric first, prewashing without fabric softener, applying adhesive to both surfaces, waiting briefly before joining, and allowing at least 24 hours for full cure. The manufacturer also gives a product-specific coverage reference of approximately one pea-size drop per square inch and advises spreading adhesive for more uniform coverage. These numbers are useful for understanding controlled application but should not be copied onto unrelated adhesives.
- reference content source – Gorilla Fabric Glue: Official instructions include application, working time, cure time, wash timing, low/no-heat drying, and product-specific coverage information.
Apply in a Controlled Sequence
For a small no-sew repair, place the garment flat and allow the textile to return to its natural relaxed shape. Do not stretch leggings, sleeves, or jersey while bonding unless the repair system specifically requires pre-tensioning. Align the edges or patch before glue touches the fabric so you are not dragging wet adhesive across the surface. Apply the smallest continuous amount appropriate to the product, join the materials accurately, then press uniformly so contact occurs across the full bonded zone.
A reliable household sequence is:
- Clean loose lint, dust, hair, and debris from the repair.
- Confirm the fabric is completely dry.
- Perform a hidden compatibility test.
- Arrange the repair without adhesive first.
- Mark alignment points when accuracy matters.
- Apply a thin, controlled adhesive layer.
- Join the materials without sliding them back and forth.
- Press evenly from the center toward the edges.
- Use clips, pins outside the glue path, or a clean flat support if needed.
- Leave the repair undisturbed for the product’s stated set and cure periods.
- Inspect hand feel, edges, and flexibility before normal wear.
Video evidence – Aleene’s Fabric Fusion: The Ultimate No-Sew Solution: This manufacturer video gives users a visual reference for applying a permanent fabric adhesive to no-sew projects while maintaining a clear and flexible repair.
Initial Set Is Not Full Cure
One of the most common repair failures begins when the user touches the bonded area after a few minutes, sees it no longer moving, and assumes the garment is finished. Initial set usually means the pieces have enough temporary holding power to stay aligned. Full cure means the adhesive has progressed much further toward its intended service properties. Wearing, stretching, washing, ironing, or heavily folding a repair during the early stage can disturb the joint even though the surfaces already appear attached.
Product instructions vary considerably, which is why one internet cure time should never be applied to an entire adhesive category. GleamGlee’s supplied product data gives approximately 6–10 minutes for initial positioning and around 24 hours for full cure. Aleene’s Fabric Fusion currently lists 2–4 hours for full cure but a 48-hour interval before washing. Gorilla specifies at least 24 hours for full cure and a minimum of three days before washing or ironing. These differences reflect formulation and test differences, not contradictions.
| Repair Product Example | Published or Supplied Timing | Before Washing | Practical Lesson |
|---|---|---|---|
| GleamGlee Fabric Glue | Approx. 6–10 min initial positioning; approx. 24 h full cure | Follow product and garment care guidance after full cure | Initial hold is not service-ready cure |
| Aleene’s Fabric Fusion | 2–4 h full cure according to current manufacturer page | Washable after 48 h | Thick application dries more slowly |
| Gorilla Fabric Glue | Minimum 24 h full cure | Wait at least 3 days | Manufacturer recommends delicate wash and low/no heat |
| Sewn repair | No adhesive cure period | Depends on garment and thread condition | Sewing removes cure time but not material compatibility concerns |
GleamGlee is relevant in this section because the product is specifically documented as a flexible, clear-drying no-sew textile adhesive rather than a rigid general craft glue. Its precision applicator is useful for narrow hems, patch edges, trims, lace, and small visible repairs where glue control directly affects appearance and flexibility. Still, structural seams and high-load areas should be treated according to the mechanical demands of the garment rather than using adhesive merely because a precise nozzle makes the repair easy to start.
The company information supplied for this article also describes an adhesive and materials R&D team of more than 25 chemists, materials specialists, and process engineers, with application testing capabilities covering adhesive performance and material compatibility. For customers developing a private-label fabric adhesive or a repair product around a specific textile, this kind of formulation and application testing is more useful than simply changing packaging around a generic glue because flexibility, viscosity, open time, wash performance, and applicator design can be evaluated as one user experience.
5. How Should You Repair Stretch Fabrics and High-Movement Areas?
Stretch fabrics reveal repair mistakes faster than stable woven textiles because the surrounding material continually asks the repair to elongate. Leggings may stretch across the knee and seat every time the wearer bends. Activewear can move in several directions during exercise. Jersey sleeves and fitted tops repeatedly expand over elbows, shoulders, and the torso. A repair that holds perfectly while the garment lies flat may restrict movement as soon as it is worn, so stretch garments deserve a different decision process from ordinary cotton shirts or canvas projects.
Check Movement Before Repairing
Put the garment in a natural position and observe how the damaged area moves during normal use. For a knee repair, gently bend the leg or imitate the fold while the garment is off the body. For an elbow, observe the fabric direction as the sleeve flexes. A tear at a fitted hip or seat experiences different forces from a tear near a loose lower hem. The key question is not simply how stretchy the fabric feels in your hands; it is how much deformation occurs at the damaged location during real wear.
If a repair crosses a high-extension zone, the reinforcement must either stretch with the textile or distribute movement over a sufficiently broad compatible area. Rigidly locking a tiny section of stretch fabric can move strain to the border of the repair. This is one reason flexible patches designed for stretch materials can perform more naturally than ordinary stable patches. Prym’s current product information, for example, describes a bi-elastic repair patch intended to adapt to movement in jersey, leggings, and performance textiles.
Sewing Stretch Fabric Requires the Right Needle and Stitch
If a stretch garment needs structural repair, sewing is often the stronger route, but sewing itself must also accommodate movement. A standard straight stitch has limited ability to elongate. If the textile stretches far beyond the thread path, stitches can pop or the fabric can become distorted. Zigzag, dedicated stretch stitches, overlock constructions, and other flexible seam structures create additional thread path that can extend as the fabric moves, depending on the garment and machine setup.
Needle selection matters as well. SINGER’s current needle guide distinguishes regular-point needles for woven fabrics from ball-point needles used on knits. The rounded point is designed to pass between knit loops rather than cutting aggressively through them, and the manufacturer notes that using the wrong needle type can contribute to skipped stitches and fabric damage.
reference content source – SINGER Machine Needle Guide: Useful for deciding between regular-point, ball-point, denim, and other needle styles based on textile structure and weight.
Video evidence – SINGER Stretch Stitches: This official demonstration shows how a stretch stitch is selected and used to finish seams that need more movement than a standard rigid stitch line.
For people without sewing experience, this does not mean every small hole in a stretch garment requires a sewing machine. Low-load damage can sometimes be managed with a purpose-made elastic patch, while small decorative or surface repairs may work with a flexible textile adhesive after careful testing. What matters is avoiding a mismatch. A highly elastic pair of leggings should not receive a rigid cardboard-like patch merely because the adhesive underneath is strong. The complete repair needs compatible movement.
High-Movement Is Not the Same as High-Stress
A flowing skirt hem moves constantly but usually carries little structural force. A crotch seam may not visibly move as dramatically, yet it can carry substantial repeated tension. A sleeve decoration can flex hundreds of times without being load-bearing, while a backpack shoulder strap may need to support kilograms of load. Separate these two concepts before choosing glue or stitching. Movement tells you how much flexibility is needed. Load tells you how much structural reinforcement is needed.
A low-load, high-movement repair may be an excellent candidate for a flexible adhesive or elastic patch. A high-load, high-movement repair usually benefits from structural stitching with compatible thread and seam design. A high-load, low-movement repair may require strong sewn reinforcement or another mechanical construction. This simple two-factor assessment prevents users from treating “flexible” as a synonym for “weak” or assuming a strong adhesive is automatically the safest solution for every loaded seam.
Technical Outdoor Fabrics Need Their Own Repair System
Waterproof shells, coated nylon, ripstop polyester, silnylon tents, insulated jackets, and membrane garments require additional caution. Their visible fabric may contain coatings or laminates that determine waterproofness, breathability, or adhesion. A general clothing adhesive that works beautifully on cotton may bond poorly to a silicone-treated shelter fabric. Heat that is harmless to a denim patch can damage another material or coating. When technical performance matters, use a repair system specifically recommended for the substrate or follow the garment manufacturer’s repair instructions.
GEAR AID’s Tenacious Tape is a useful example because the company differentiates products for technical textile repairs. Its standard repair tape is designed for materials such as nylon and polyester and becomes machine washable after the stated waiting period. The company also sells separate systems for specialized substrates, illustrating why outdoor textile repair should not be treated as one universal adhesive problem.
reference content source – GEAR AID Tenacious Tape: Manufacturer information covers technical fabric compatibility, patch use, pressure application, and waiting before washing.
Video evidence – GEAR AID No-Sew Technical Gear Repair: This manufacturer demonstration shows patching jackets, high-wear sleeve areas, sleeping bags, tents, and related gear with a purpose-designed textile repair patch.
If the item is a high-value waterproof shell, certified protective garment, industrial textile, or expensive technical product with a damaged membrane or seam-tape system, stop before applying a random glue. A professional or manufacturer-authorized repair may cost more than a quick DIY patch, but it can preserve the performance features that justified the garment’s original price. Flexible household repair remains valuable; it simply works best when users understand where the household category ends.
6. How Do You Test Whether a Repair Is Flexible Enough?
A repair should not move directly from “looks dry” to “back in service.” A short inspection after full cure can reveal stiffness, lifting, cracking, poor alignment, or uncomfortable bulk before a full day of wear makes the problem harder to correct. The test does not need laboratory equipment. Your hands, the undamaged fabric beside the repair, and a few controlled movements provide enough information for a practical household assessment.
The most important comparison is not between the repair and an imaginary perfect standard. Compare the repaired zone with nearby healthy fabric. A repaired knee does not need to feel completely identical to untouched cloth because reinforcement naturally adds some material. It should, however, avoid a dramatic change from soft fabric to a hard plate unless the garment design requires firmness. Comparing adjacent areas is also more useful than comparing two different garments because finishing treatments, fiber blends, weave density, and age can all affect hand feel.
The Five-Point Flexible Repair Check
1. Hand-Feel Test
- Rub the repaired area gently between your fingers.
- Compare thickness with nearby untreated fabric.
- Check for sharp hardened glue ridges.
- Feel the patch edges from the inside if they contact skin.
- Look for adhesive squeeze-out or tackiness.
2. Bend Test
- Fold the repaired area slowly in the direction it normally bends.
- Repeat several gentle cycles instead of forcing a tight crease immediately.
- Watch for whitening, cracking, separation, or a sharp hinge at the patch edge.
- Stop if the repair begins to split.
3. Gentle Stretch Test
- Begin below the garment’s maximum expected extension.
- Observe whether the patch and fabric elongate together.
- Watch the repair boundary rather than only the center.
- Increase stretch gradually only if the first movement looks stable.
4. Edge Test
- Inspect patch corners, tear tips, seam ends, and transitions.
- Run a finger lightly along the repair perimeter.
- Look for lifted corners or areas without full contact.
- Avoid picking at an edge merely to “see how strong it is.”
5. Movement Simulation
- Bend a knee repair.
- Flex an elbow repair.
- Fold a hem naturally.
- Raise an arm for a shoulder-area repair.
- Sit and stand carefully in a repaired garment after full cure.
The goal of this check is not destructive strength testing. Household users sometimes damage a perfectly adequate repair by pulling on it far harder than the garment would ever experience in normal service. A better test reproduces realistic movement gradually. If a trouser knee normally extends about 20–30% during wear, there is little value in trying to double the fabric length by hand. Service simulation gives more useful information than a dramatic pull test.
Check Recovery, Not Only Stretch
Stretch describes how far a textile can extend; recovery describes how well it returns toward its original shape. A repaired stretch garment can appear flexible during pulling yet remain distorted afterward if the patch or surrounding fabric loses recovery. After a gentle stretch test, release the material and lay it flat for a few moments. Look for permanent rippling, a stretched halo around the patch, puckering, or a repair that no longer lies naturally with the garment.
This is especially relevant for leggings, fitted knitwear, elastic cuffs, and activewear. The patch does not need to reproduce the fabric’s laboratory recovery value perfectly, but visible deformation after each movement is a warning sign. If a patch repeatedly leaves the surrounding fabric stretched out, the materials may not be mechanically compatible. Replacing the repair before extensive wear is often easier than waiting for the weakened boundary to tear again.
Use Repair Location as Part of the Test
The same repair result can be acceptable in one place and poor in another. A slightly firm patch on the lower leg of heavy work trousers may cause no practical discomfort. The same firmness behind the knee could be irritating because the fabric folds sharply with every step. A repair along the inside of a sleeve may rub skin, while a similar patch on an outer pocket may never be noticed. Evaluate comfort and movement where the repair actually sits rather than judging only appearance on a flat table.
For teams creating repair instructions, packaging, or private-label textile adhesives, this kind of location-based testing is also valuable during product development. Laboratory bond strength can show whether a joint holds, but practical evaluations such as folding, repeated flexing, wash exposure, edge inspection, and material-specific application reveal how the product behaves in a real garment. Internal GleamGlee company materials describe application laboratories used for adhesive performance and material-compatibility testing, which is the type of evaluation relevant to a flexible clothing adhesive rather than relying on one headline strength number alone.
7. How Do You Wash, Dry, and Iron a Flexible Fabric Repair?
A repair is not truly useful for everyday clothing if it performs only on the worktable. Water, detergent, agitation, spinning, heat, and repeated folding expose a textile bond to a much more demanding environment. The first wash is therefore part of repair life, not a separate topic. Users should combine two sets of instructions: the garment’s original care label and the repair material’s instructions. When the two disagree, use the more restrictive care condition unless the garment manufacturer or repair-product manufacturer provides specific guidance.
The U.S. Federal Trade Commission’s Care Labeling Rule illustrates how many variables garment care can involve. Care instructions consider washing method, drying method and temperature, ironing where relevant, bleaching limitations, and warnings needed to prevent harm. This is a useful reminder that “machine washable” does not mean every washable garment can tolerate the same water temperature, dryer setting, or iron temperature.
reference content source – FTC Clothes Captioning and Care Labeling Guidance: This official resource explains washing, drying, ironing, bleaching, and warning information used on garment care labels.
Wait for the Repair Product’s Actual Service Time
Do not build a universal rule such as “all fabric glue can be washed after 24 hours.” Different products publish different cure and laundering intervals. A 24-hour cure may describe one adhesive’s full cure while another product asks users to wait longer before laundering even after the adhesive has cured enough for handling. Temperature, humidity, application thickness, textile absorbency, and contact quality can also influence practical drying behavior, so the label for the exact product remains the primary timing reference.
For GleamGlee Fabric Glue, the supplied specification uses approximately 6–10 minutes for initial positioning and about 24 hours for full cure. The same product information describes the fully cured bond as washable and suitable for normal garment ironing within the textile’s care limitations. The important user lesson is not the number 24; it is the distinction between temporary set and full service readiness. Someone using a different adhesive should follow the timing printed for that formulation instead.
Reduce Unnecessary Mechanical Stress
When the garment and adhesive instructions allow machine washing, turning the garment inside out can reduce direct rubbing against exposed patch edges and decorations. Use an appropriate gentle setting if recommended for the textile or adhesive. Avoid stuffing an already delicate repaired garment into an overloaded washer where heavy towels, zippers, and rough items can repeatedly strike the repair. These habits do not guarantee indefinite repair life, but they remove avoidable mechanical stress during the first wash cycles.
Drying deserves equal attention. High dryer temperature can affect textile fibers, elastic yarns, heat-sensitive decorations, adhesive layers, and patch backings differently. Both Aleene’s and Gorilla publish low-temperature or low/no-heat drying guidance for their respective fabric adhesives, but these recommendations belong to those products and should not replace another adhesive’s label. Air drying is often a conservative option when compatible with the garment care label, particularly for a repair whose long-term heat resistance is uncertain.
Iron the Garment, Not the Glue Line
When ironing is permitted, consider both sides of the repair system. The original textile may tolerate medium heat while a patch backing, decoration, synthetic fiber, or adhesive has a lower safe range. A pressing cloth can reduce direct surface exposure for some projects, but it does not make an incompatible material heat-safe. Avoid repeatedly parking a hot iron directly on a repair simply because the surrounding garment can tolerate the temperature.
For newly repaired hems, pressing after the adhesive has reached its specified cure can help restore a neat appearance when both the garment and adhesive allow ironing. For technical fabrics, waterproof membranes, stretch patches, sequins, coated materials, or heat-sensitive synthetics, follow product-specific instructions instead of general household ironing habits. Heat is a processing variable; it is not automatically a strengthening step for every textile adhesive.
Inspect After the First Wash
After washing and drying, look closely at the repair before assuming the job is complete. Check for patch-edge lift, adhesive whitening, cracking, hardening, puckering, changes in hand feel, or new tearing beside the repair. Compare the repaired area with its condition before washing. A small corner beginning to lift is easier to address early than after several cycles have allowed water and abrasion to work farther underneath the patch.
If the repair remains flexible, lies flat, and moves normally after the first care cycle, continue following the same conservative washing routine. If it becomes noticeably harder, do not automatically add another layer of adhesive. First identify whether the problem came from excessive original glue, patch stiffness, washing temperature, dryer heat, or a repair system that was never compatible with the garment’s movement. Troubleshooting the cause gives a better chance of a clean second repair.
8. What Can You Do If a Fabric Repair Is Already Stiff, Cracking, or Peeling?
A failed repair should not immediately receive more glue. Adding adhesive on top of a stiff repair often increases the same problem, especially when the first failure came from excessive thickness or incompatible materials. Start by examining the symptoms. A hard center with secure edges suggests a different problem from flexible adhesive with lifting patch corners. A repair that cracks only during stretching points toward movement mismatch, while a patch that detaches after washing may involve surface contamination, incomplete cure, laundering too early, or incompatible care conditions.
| Symptom | Likely Causes to Check | Better Next Step | What Not to Do |
|---|---|---|---|
| Repair feels hard but stays attached | Excess glue, thick patch, rigid adhesive | Decide whether stiffness is tolerable; replace repair if comfort or movement is poor | Do not add more glue just for reassurance |
| Repair cracks during stretching | Insufficient adhesive flexibility, patch mismatch, rigid seam | Reassess stretch requirement and repair method | Do not repeatedly pull-test the crack |
| Patch corners lift | Poor cleaning, weak edge pressure, incompatible patch, early washing | Clean and repair according to patch system; consider rounded patch shape | Do not peel the whole patch off unnecessarily |
| Fabric tears beside repair | Repair too rigid, patch too small, surrounding fibers already weak | Extend reinforcement into healthy fabric or use structural sewing | Do not reinforce only the visible hole |
| Garment puckers around patch | Patch tension, misalignment, glue shrinkage, excessive rigidity | Remove or redo if possible with fabric relaxed | Do not stretch garment flat and add more adhesive |
| Repair fails repeatedly | Wrong repair category or high structural load | Switch method or use professional repair | Do not repeat the identical failed process |
If the Repair Is Hard
First decide whether the hardness is actually causing a service problem. A repair can feel somewhat firmer simply because extra material has been added. If it remains comfortable, bends adequately, and does not distort nearby cloth, leaving it alone may be safer than attempting removal. Removing fully cured adhesive can damage fibers, dyes, coatings, or surface finishes, especially on thin or delicate textiles.
If the hard spot prevents normal movement, rubs against skin, or creates a visible hinge, replacement may be preferable. Whether removal is possible depends entirely on the adhesive chemistry and textile. Do not use acetone, alcohol, heat, scraping tools, or other removal methods unless the adhesive manufacturer and textile care information support them. Solvents capable of attacking one glue may also attack dyes, synthetic fibers, coatings, or decorative finishes.
If the Repair Cracks During Stretching
Cracking usually means the repair cannot accommodate the strain being placed on it. Stop repeated stretching and inspect where the crack begins. If cracks form inside the adhesive layer, the adhesive may be too rigid or too thick for the application. If the adhesive remains intact but fabric pulls away at the edge, the repair may be concentrating load around the boundary. If a patch itself folds sharply or resists stretching, its movement may not match the garment.
The solution is often to change the repair system rather than simply repair the crack. A jersey or leggings project may need a stretch patch or stretch-compatible stitching. A heavy structural seam may need sewing. A light decorative attachment may need a thinner adhesive layer. The correct change depends on what the garment needs to do during wear, so returning to fabric movement and location is more productive than focusing only on the failed glue.
If Patch Edges Peel
Patch edges experience concentrated abrasion from washing, rubbing, folding, and handling. Square corners can also catch more easily than rounded corners on some repair systems. Before applying a new patch, make sure the fabric is clean and completely dry, remove loose fibers according to the repair instructions, and press firmly across the full patch, especially around the perimeter. iFixit’s self-adhesive patch guide, for example, emphasizes pressure around the edges and around the tear, reflecting how important perimeter contact is for long-term wear.
If the patch is appropriate but one corner lifted because of incomplete initial pressure, follow the patch manufacturer’s repair instructions. If the entire perimeter begins separating after one wash, reconsider compatibility rather than repeatedly sealing each edge with unrelated glue. Some technical patches use specialized adhesives selected for nylon, silicone-treated fabric, TPU, or other surfaces. Substituting a household adhesive at the perimeter can create a mixed system with unpredictable wash and flex behavior.
If the Fabric Tears Beside the Repair
A new tear next to an intact patch is one of the clearest signs that load may have moved from the repaired zone into weaker surrounding fabric. The original damage may also extend farther than the visible hole. Abraded yarns, thinning, or microscopic damage around the opening can create an area much larger than the tear you first saw. Repairing only the empty space may therefore leave weak fibers immediately outside a very strong patch.
When this occurs, consider a larger reinforcement made from compatible material, an underpatch, darning, stitching, or professional repair depending on the garment. iFixit’s patch guidance recommends accounting for fabric condition beyond the visible defect and matching patch characteristics to the original textile. The goal is to distribute load into healthy material without creating such a large rigid zone that the same problem simply moves outward again.
Know When to Stop DIY Repairing
Not every fabric should be a home adhesive experiment. Expensive silk, antique textiles, complex formalwear, highly engineered membrane garments, certified safety clothing, major tears through structural seams, load-bearing straps, large missing sections, and repeatedly failing repairs deserve more cautious treatment. The cost of professional sewing or manufacturer repair may be far lower than the cost of permanently staining, stiffening, or weakening an irreplaceable garment.
For ordinary cotton, denim, polyester, felt, decorative trims, patches, household textiles, craft fabrics, hems, and many small low-stress problems, a carefully selected DIY approach can work extremely well. The user research behind this article follows the same tiered logic: use fabric glue when it solves the actual problem, learn a basic stitch where thread provides the better structure, and refer high-risk repairs to someone with the tools and experience to rebuild them correctly.
Conclusion
Keeping a fabric repair flexible is less about finding one “softest” adhesive and more about building a repair that behaves like the textile around it. Start by understanding how the damaged area stretches, folds, and carries load. Match the patch to the fabric’s structure, thickness, and stretch direction. When adhesive is appropriate, use a fabric-specific flexible product in a controlled layer rather than saturating the cloth. When the area is structural, allow stitching or professional repair to carry the load instead of asking glue to replace a seam design.
The same discipline continues after the repair. Respect the product-specific cure period, test movement gradually, inspect patch edges, follow the garment care label, and avoid unnecessary heat or mechanical stress. A repair that survives because it is extremely rigid is not always a successful clothing repair; comfort, movement, appearance, and repeated care also matter. For low- to moderate-stress no-sew projects, GleamGlee Fabric Glue offers a clear-drying, flexible, washable option with a precision application format, while users with unusual textiles or commercial product requirements can also evaluate formulation and packaging options based on the intended fabric and repair conditions.
The most reliable principle to remember is simple: the repair should move with the fabric instead of forcing the fabric to move around the repair. If the adhesive, patch, stitches, repair size, and care routine all support this principle, clothing and household textiles have a much better chance of staying comfortable, usable, and visually natural after repair.
Frequently Asked Questions
1. Does fabric glue always make fabric stiff?
No. Fabric stiffness depends on the adhesive formulation, the quantity applied, the textile structure, and the size of the bonded zone. Fabric-specific adhesives can be formulated to remain flexible after curing, but even a flexible formulation can create an unnecessarily firm area when too much is applied. A hidden test is especially useful on thin or absorbent fabrics because it shows whether the adhesive penetrates deeply, changes color, creates shine, or noticeably alters hand feel before the visible repair is attempted.
2. How much fabric glue should I use to keep a repair flexible?
Use enough adhesive to create continuous contact between the surfaces, but avoid saturating the textile unless the product instructions specifically require a heavier application. There is no reliable universal thickness because viscosity, solids content, fabric absorbency, and adhesive chemistry vary between products. Apply the manufacturer’s recommended amount, spread it evenly where required, and test on scrap fabric first. If cured adhesive forms a thick ridge beyond the bonded area, the application was probably heavier than necessary for a soft garment repair.
3. Is fabric glue better than sewing for stretchy clothing?
Neither method is automatically better. Stretch clothing requires a repair system able to extend with the garment. Structural tears in leggings, jersey seams, waistbands, and highly loaded activewear are often better handled with stretch-compatible stitching or specialist patches. Flexible fabric adhesive can be useful for selected low-stress areas, decorations, lightweight patches, or no-sew projects if the cured adhesive and reinforcement can move with the textile. The repair location and actual strain during wear should determine the method rather than convenience alone.
4. Can I use a denim patch on stretchy leggings?
A conventional heavy denim patch is usually a poor mechanical match for lightweight, highly elastic leggings because denim may be significantly thicker and less extensible. The patch can restrict the repaired zone while the surrounding leggings continue to stretch, creating a visible stiff spot or concentrating strain around the patch edge. A lightweight bi-elastic patch, stretch-compatible fabric reinforcement, or properly sewn stretch repair generally produces more natural movement. Always compare patch stretch in both directions with the undamaged garment before application.
5. How long should I wait before stretching or washing a fabric-glue repair?
Follow the exact adhesive instructions rather than adopting one universal waiting period. Initial set and full cure are different stages, and some manufacturers specify an additional wait after curing before laundering. GleamGlee’s supplied information gives approximately 6–10 minutes for initial positioning and around 24 hours for full cure, while other brands publish different intervals. Waiting longer cannot correct an unsuitable patch or excessive glue, but stressing a repair too early can disturb an otherwise correctly prepared bond.
6. What should I do if a repaired area becomes stiff after washing?
First compare the repaired section with its condition before washing and identify whether the adhesive itself hardened, the patch changed shape, the surrounding fabric puckered, or heat affected the repair. Review both the garment care label and adhesive instructions before doing anything else. Avoid immediately adding more glue or applying more heat. If stiffness prevents normal movement or creates stress around the repair, replacing the repair with a thinner, lighter, more movement-compatible system may be safer than reinforcing the existing rigid layer.





















