 Skip to content
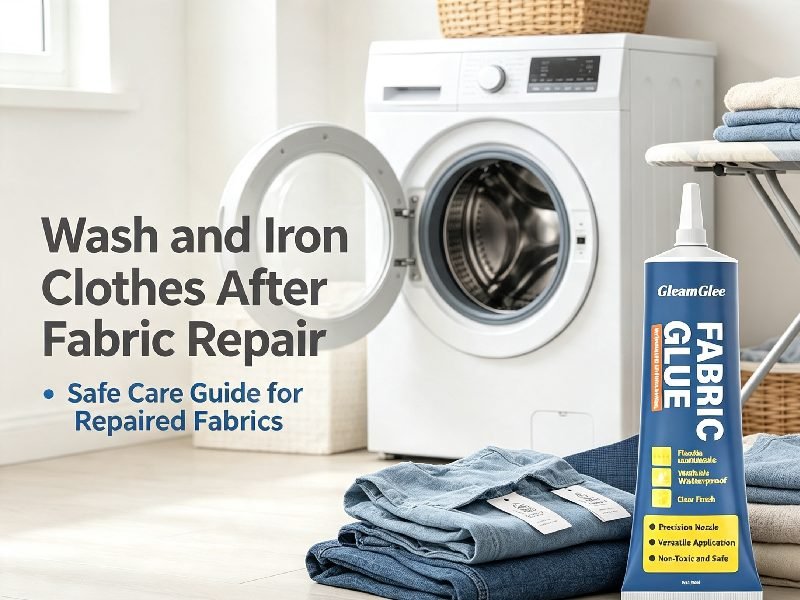
Repairing a loose hem, lifting patch, detached trim, small backed tear, or low-stress fabric opening can feel like the difficult part, yet the first wash and first ironing session often decide whether the repair stays neat. Water swells fibers, detergent changes surface conditions, a washing drum bends the repaired area repeatedly, and ironing adds both heat and pressure. A repair can look excellent on a worktable and still fail later if it is washed before the adhesive reaches its intended service condition, dried more aggressively than the garment allows, or pressed directly with excessive heat.
The most useful rule is also the simplest: the repaired garment must be cared for according to the most restrictive permanent material now present in it. Read the clothing care label, check the instructions for the adhesive, patch, fusible web, repair tape, thread, print, coating, embellishment, and any added trim, then follow the lowest-risk limit when the instructions differ. A machine-washable adhesive does not make a dry-clean-only jacket machine washable, and an iron-safe glue does not make a heat-sensitive synthetic fabric safe under a hot sole plate.
For a quick answer, most repaired garments can return to normal washing and ironing only after the repair system has reached its stated washable or full-cure stage and the original garment label permits those care methods. For adhesive repairs, “dry to the touch” is not a reliable substitute for the manufacturer’s cure instructions. Use gentle handling for the first wash, avoid unnecessary heat, let the garment dry fully before inspecting it, and iron only at a temperature allowed by both the fabric and the repair material.
This guide focuses on ordinary household repairs such as hems, patches, decorative edges, lining openings, trim, and other low-stress areas. Structural locations need a different standard. Crotches, underarms, shoulders, waistbands, zipper areas, load-bearing straps, tightly stretched sportswear seams, protective clothing, and large tears continue to carry force during wear. If movement repeatedly pulls the damaged area open, washing technique alone cannot make a surface-only repair structurally sound; sewing, reinforcement, or professional repair is often the more durable route.
1. How Long Should You Wait Before Washing Clothes After Fabric Repair?
Do not wash repaired clothing simply because the surface looks dry. Wait until the exact adhesive, patch, fusible product, or repair system reaches the washable or full-cure stage stated by its manufacturer, then check the garment care label before choosing the wash method. Published textile-adhesive instructions vary widely, so there is no responsible universal rule such as “all fabric glue is washable after 24 hours.”
Dry Time, Initial Set, Full Cure, and Washable Time Are Not the Same Thing
In adhesive work, four different moments can easily be confused. Dry time usually describes a loss of wet appearance or surface tack. Initial set means the pieces have started holding position and are less likely to slide. Full cure describes the point when the adhesive has developed the condition expected for normal service. Washable time is the point at which a manufacturer is prepared to say the bond can be laundered under its stated conditions. Depending on the formulation, full cure and washable time may be the same point or two different points.
This distinction matters in real clothing repair because the first few minutes can be misleading. A folded hem may stop moving quickly enough to look finished while the adhesive film inside is still developing. If the garment is pulled on, folded tightly, placed in a washer, or heated with an iron during this stage, the fabric can shift microscopically even when no dramatic failure is visible. The result may appear later as a lifted edge, a wrinkled bond line, a stiff ridge, or a patch that begins separating after one or two care cycles.
For GleamGlee Fabric Glue, the confirmed product information gives approximately 6-10 minutes for initial positioning and about 24 hours for full cure. The cured adhesive is described as flexible, machine washable, and suitable for everyday ironing when the garment itself allows those processes. Those numbers are product-specific. They should not be copied onto a different adhesive, and the 6-10 minute initial hold should never be interpreted as permission to wear, wash, stretch, or iron the repaired garment immediately.
| Repair system or example | Timing reference | What to do before the first wash | Important limit |
|---|---|---|---|
| GleamGlee Fabric Glue | About 6-10 minutes initial positioning; about 24 hours full cure | Keep the repair stable through full cure, then inspect edge contact and flexibility | Product-specific timing; clothing care label still controls washing conditions |
| Aleene’s Fabric Fusion | 2-4 hours full cure; washable after 48 hours | Wait for the stated laundering time; follow its gentle-care directions | Do not transfer the 48-hour rule to unrelated adhesives |
| Tear Mender | Manufacturer states wearable after about 3 minutes and machine washable after about 15 minutes | Follow its own directions and the garment label | A very fast adhesive does not prove other fabric glues are washable in 15 minutes |
| Iron-on or fusible repair | Manufacturer dependent | Complete the heating/cooling process and follow post-application laundering directions | Patch backing temperature and garment heat tolerance must both be compatible |
| Sewn repair | No adhesive cure period | Check thread ends, seam integrity, fabric damage, and care label | Sewing removes cure-time concerns but not fabric weakness or laundering stress |
The comparison above shows why an experienced repairer treats cure information as part of the product specification rather than as general fabric-glue knowledge. Two adhesives sold for clothing can differ by many hours in their stated washable timeline because their chemistry, solids content, film formation, substrate interaction, and test methods are different. Temperature, humidity, application thickness, absorbency, and how tightly the two surfaces contact each other can also change how quickly a bond stabilizes, so a rushed repair made with an unnecessarily thick layer deserves more caution, not less.
reference content source – Aleene’s Fabric Fusion manufacturer instructions:The product guidance provides a concrete comparison point: full cure is listed at 2-4 hours, while washing is delayed until 48 hours. It also advises turning the garment inside out, using a gentle cycle, and low-temperature drying. This is useful evidence for the principle that “full cure” and “washable time” may be different milestones for a specific adhesive.
reference content source – Tear Mender manufacturer FAQ:This source gives a much faster timeline for its own formulation, describing a fabric bond that becomes permanent and wash-proof in about 15 minutes. The value of this source is not the number itself; it is the contrast, which shows why users should read the exact adhesive instructions instead of adopting a generic 24- or 48-hour rule.
Downloadable application reference:Tear Mender also publishes a PDF application guide showing thin-coat application, pressing, the three-minute wearable reference, and the 15-minute machine-washable reference for its own product. It is a useful comparison document for understanding how manufacturer-specific directions are structured.
Record the Repair Time Instead of Guessing the Next Day
When a product needs 24 or 48 hours before a care step, record the actual completion time. “I repaired it yesterday” can mean 12 hours or 30 hours depending on when the work was done. A simple time calculation prevents an avoidable early wash, especially when a hem is repaired in the evening and the household normally runs laundry the following morning. The same habit helps when several garments have been repaired with different products, because each one can have a separate ready-for-care time instead of relying on memory.
External time tool:Timeanddate’s Date and Time Calculator can add a product-specific cure interval to the application time. For a 24-hour product, enter the exact repair completion time and add 24 hours; for a 48-hour product, add 48 hours. The result should be treated as the earliest inspection point, not an automatic command to wash if the repair still looks wet, distorted, or poorly bonded.
Video evidence – no-sew hem workflow:Aleene’s fabric-glue hemming video is useful for seeing the physical sequence of measuring, folding, applying adhesive, and holding a hem. Use the video to understand hand placement and workflow, while continuing to follow the cure time and laundry directions printed for the adhesive actually used on the garment.
2. How Should You Wash Clothes After Fabric Repair?
Once the repair reaches its specified washable stage, treat the first wash as a controlled durability check. Follow the garment care label, turn the item inside out when practical, reduce unnecessary friction, choose a cycle no harsher than the clothing requires, and avoid wringing or stretching the repaired area while wet. After drying, inspect the repair before returning the garment to its usual laundry routine.
Start With the Garment Care Label, Not With the Glue Bottle
A repaired garment is a system made of several materials. The outer fabric, lining, elastic, zipper tape, printed decoration, patch, thread, coating, and adhesive may all have different limitations. The U.S. Federal Trade Commission’s Care Labeling Rule requires covered garments to provide regular care instructions and warnings where a procedure consumers might reasonably use could cause harm. In practical terms, this means the clothing label remains an essential boundary after repair. Added materials can make care more restrictive, but they do not erase the original garment restrictions.
A useful household rule is “follow the stricter instruction.” If the clothing label allows machine washing at 30°C while the adhesive is comfortable at a higher temperature, stay at the clothing limit. If the adhesive instructions call for air drying while the garment normally allows tumble drying, use air drying for the repaired item. If a patch maker says hand wash but the shirt normally tolerates a standard machine cycle, the patch becomes the limiting component. This approach prevents the common mistake of using the most permissive instruction from several different components.
reference content source – U.S. Federal Trade Commission:The FTC explains that care instructions need to address washing, drying, ironing, bleaching, and relevant warnings. It also gives examples such as “Do not iron” when ironing would harm a garment. The source supports a central principle of repaired-clothing care: a new adhesive or patch should not be used as a reason to exceed the original garment’s documented limits.
Use a Conservative First-Wash Sequence
The first wash is different from the tenth wash because it is the first time the completed repair experiences a combination of water, chemistry, weight gain, flexing, and repeated motion. A cotton shirt can hold a surprising amount of water compared with its dry weight, and a wet patch or folded hem moves differently from dry fabric. For this reason, the first cycle should minimize avoidable stress while still cleaning the garment properly. There is no need to invent an ultra-delicate routine for every repair, but there is little value in choosing the harshest permitted setting for the first test.
- Confirm the repair has passed the exact product’s washable or full-cure time.
- Inspect the dry repair for edge lifting, tackiness, puckering, visible seepage, or a stiff ridge before laundering.
- Turn the garment inside out when the construction allows it, especially for patches, trims, printed areas, and decorative repairs.
- Close zippers, hooks, and snaps so hardware is less likely to catch the repaired area or another garment.
- Use a mesh laundry bag for small, delicate, or heavily decorated washable garments when appropriate.
- Select a cycle and water temperature within the garment label’s limits; a gentle cycle is a sensible first test for edge-sensitive repairs.
- Use the normal recommended detergent amount rather than adding extra detergent “for safety.”
- Keep chlorine bleach, aggressive stain removers, and unfamiliar pre-treatments away from the repaired zone unless all materials involved allow them.
- Do not wring, twist, or pull the repair while the fabric is saturated.
- Dry according to both the garment and the repair instructions, then inspect only after the item has dried and cooled.
A repair should not be judged while soaking wet. Water temporarily changes fabric weight, drape, stiffness, and friction. A knit may look elongated, a cotton hem may feel heavier, and a patch can seem softer or less stable until the garment returns to its dry dimensions. Pulling the bond to “test whether it survived” immediately out of the washer can create the very failure the user is trying to detect. Let the garment dry in the correct shape, then examine edge continuity, flexibility, and alignment under normal lighting.
reference content source – American Cleaning Institute Laundry Basics:The ACI resource covers sorting, care labels, wash settings, detergent use, and handling of delicate items. It is a useful independent laundering reference because it focuses on ordinary clothing care rather than adhesive marketing. Its guidance supports using the garment’s established care instructions, appropriate cycles, and suitable handling rather than creating a new laundry method based only on the repair material.
Video evidence – understanding washing labels:Tide’s care-label video provides a visual walk-through of common laundry symbols. It is useful for people who see symbols on the garment but do not immediately know whether they indicate machine washing, hand washing, drying limitations, or ironing restrictions. Watch it before the first post-repair wash if the label is unfamiliar.
Hand Wash or Machine Wash: Decide From Stress and Construction
Hand washing is not automatically superior, and machine washing is not automatically too harsh. A stable cotton hem with a fully cured flexible adhesive can be a simpler laundering problem than a hand-washed sequined top that is twisted aggressively during rinsing. Choose the method by the garment and repair construction. Machine washing can be appropriate when the clothing label permits it, the repair product is machine washable, the repaired area lies flat, and no large edges can catch. Hand washing is useful when mechanical action is the main concern and the user can rinse without rubbing, pulling, or wringing.
| Garment or repair situation | Safer first-wash choice | Main reason |
|---|---|---|
| Small low-stress hem on stable cotton or denim | Machine wash within care-label limits; gentle cycle is a cautious first test | Flat woven construction usually moves predictably |
| Large glued patch or thick appliqué | Inside out; mesh bag if suitable; gentle cycle or careful hand wash | Large edges can catch and the patch may bend differently from the garment |
| Stretch knit or athletic fabric with a decorative repair | Hand wash or very gentle permitted cycle | Repeated extension and recovery concentrates stress at the repair boundary |
| Sheer, loosely knitted, embellished, or delicate fabric | Follow hand-wash/delicate instructions; minimize rubbing | Snagging and deformation can damage the garment even if the adhesive remains intact |
| Sewn repair on ordinary washable clothing | Follow the garment label; inspect thread security after washing | No adhesive cure issue, but worn fabric and thread ends can still fail |
| Dry-clean-only garment | Do not machine wash simply because the added adhesive is washable | The original garment restriction remains controlling |
Cold water is often described online as the universal answer for repaired clothing, but the better principle is to use the lowest practical temperature that still complies with the garment’s care needs and all added materials. Some garments are designed for warm washing, while others require cool or cold conditions because of dye, elastane, print, coating, wool, silk, or shrinkage risk. There is no benefit in raising temperature merely because a cured adhesive can tolerate it, and there is no need to promise cold water as a magic protection against every type of repair failure.
3. How Should You Dry Clothes After Fabric Repair?
Drying deserves its own decision because heat and tumbling can stress a repair after the wash cycle has already softened and flexed the fabric. Air drying is the conservative option when repair instructions are unclear, but it is not universally required. Tumble dry only when both the garment and the repair system permit it, using the allowed temperature and avoiding unnecessary over-drying.
Drying Adds Heat and Mechanical Movement at the Same Time
A tumble dryer does more than remove water. The repaired area is repeatedly lifted, dropped, folded, and pressed against other fabric while warm air removes moisture. A large patch may act as a stiffer panel, a hem can be folded back on itself hundreds of times, and a decorative edge may catch on zippers or textured fabrics. If the adhesive product specifically permits low-temperature tumble drying and the garment label agrees, the method can be suitable. If either instruction is uncertain, air drying removes one major variable: continuous heated tumbling.
When air drying, follow the garment’s normal shape requirements. Sweaters and some knits may need to dry flat so water weight does not stretch them. Shirts and many woven garments may hang safely if the care label permits it. Do not suspend a wet garment in a way that places the entire weight across a newly repaired seam or patch edge. Smooth the item gently into shape without pulling the repaired area, then let it dry completely before performing any flexibility check or moving on to ironing.
Aleene’s Fabric Fusion offers a useful manufacturer example because its instructions explicitly say to turn the garment inside out, use a gentle cycle, and dry in a low-temperature dryer after the stated waiting period. Tear Mender gives a different example, saying its repaired garment can be tumble dried after its own rapid cure period. These examples show that dryer compatibility is a product property, not a universal characteristic of the words “fabric glue.” The safest choice is always the intersection of garment instructions and repair-product instructions.
reference content source – FTC Care Labeling Rule text:The full rule explains that a garment label must state whether drying is by machine or another method and must include a drying temperature when needed to prevent harm. It also defines alternatives such as drip dry, line dry, dry flat, and block to dry. This is especially useful when a repaired garment’s label contains a drying instruction that is less familiar than a simple tumble-dry symbol
Inspect After Drying, Not Halfway Through It
The most informative post-wash inspection happens when the garment is fully dry and at room temperature. Look at the repair from both sides. Check whether the patch edge remains flush, whether a hem line is still even, whether any adhesive has migrated through the fabric, and whether the repair boundary feels harder than it did before laundering. Bend the area gently through the movement it experiences in normal use. A hem should fold naturally, a patch should follow the garment rather than behaving like a rigid plate, and a lining repair should not pull the outer fabric into wrinkles.
If the repair passes this first cycle, record the wash and dry settings used. Household laundry habits are surprisingly easy to forget after several weeks, especially when different people share washing duties. A simple note such as “inside out, gentle 30°C, air dry” or “gentle cycle, low tumble dry” creates a repeatable routine. The purpose is not to create a permanent special-care burden, but to keep a repair that has already proven stable from being accidentally exposed to a much harsher cycle later.
4. Can You Iron Clothes After Fabric Repair?
Many repaired garments can be ironed after the repair has fully cured, but the correct temperature is set by the most heat-sensitive part of the repaired garment. Check the clothing label first, confirm the adhesive or patch allows ironing, use the lowest effective permitted setting, work from the reverse side when practical, and avoid leaving the iron stationary over the repair.
Use the Care Label as the Heat Ceiling
GINETEX’s current textile-care guidance uses ironing symbols tied to maximum sole-plate temperatures of roughly 120°C for low-temperature ironing, 160°C for moderate ironing, and 210°C for hot ironing, alongside a “do not iron” symbol. These figures are upper limits for textile care categories, not target temperatures for a newly repaired area. If a garment is marked for low heat, the fact that an adhesive can tolerate medium heat is irrelevant; the garment remains a low-heat item. If the label says “Do Not Iron,” no adhesive claim should be used to override it.
Heat is only one part of the risk. Pressure and dwell time matter as well. A thick patch changes how heat moves through layers. A folded hem places several fabric layers over an adhesive film. A printed logo, reflective transfer, vinyl-like decoration, sequin, coating, or waterproof membrane may soften or shine long before the surrounding textile is visibly damaged. For repaired clothing, controlled pressing is usually more sensible than long, repeated rubbing because it reduces unnecessary mechanical movement across the bond edge.
reference content source – GINETEX care symbols:The GINETEX care-symbol page explains washing, bleaching, drying, ironing, and professional-care symbols, including the modern ironing temperature categories and specific cautions. It is one of the most useful references for interpreting a garment label before adding heat to a repaired area.
Downloadable care-symbol reference:GINETEX provides a printable textile care-symbol table. Keeping a printed copy near a laundry or repair area is useful when the garment label has symbols but little text, and it gives staff or household members a consistent reference instead of relying on memory.
A Safer Ironing Sequence for Repaired Fabric
Before ironing, make sure the garment is completely dry. Moisture left inside a thick patch, fold, or adhesive layer can change heat transfer, and warm damp fabric may feel softer than it will after cooling. Inspect the repair for lifting, bubbling, or seepage first. If an edge has already opened, do not try to “iron it back down” unless the repair system is specifically heat-activated and its instructions tell you to do so. Ordinary cured fabric glue is not automatically reactivated or repaired by heating.
- Confirm full cure or the exact heat-safe stage specified for the repair product.
- Read the care label and identify the permitted ironing category before turning on the iron.
- Start at the lowest effective setting within the permitted range rather than jumping directly to the maximum.
- Turn the garment inside out when practical so the sole plate does not contact the visible repair directly.
- Place a clean press cloth between the iron and pressure-sensitive fabric when the garment construction allows it.
- Use short press-and-lift movements instead of dragging the iron repeatedly across patch edges or adhesive lines.
- Keep direct heat away from plastic details, reflective films, printed transfers, sequins, beads, waterproof coatings, and uncertain patch backings.
- Let the repaired area cool before bending, stretching, or judging flexibility.
For GleamGlee Fabric Glue, the product facts describe the adhesive as iron-safe after full curing and give about 24 hours as the full-cure reference. In practical household use, this makes the adhesive relevant to hems, patches, trims, curtains, and clothing adjustments that still need routine pressing. The correct interpretation is “the cured adhesive can participate in an ironable project when the garment permits ironing,” not “the repaired garment can now be ironed at any temperature.” Thin application remains important because a heavy adhesive ridge concentrates both stiffness and heat differently from a narrow bond line.
Video evidence – pressing versus continuous ironing:Professor Pincushion’s pressing and ironing demonstration is useful for seeing the physical difference between lifting/pressing and sliding the iron continuously across fabric. For repaired hems, patches, and trim, the video helps users understand how shorter, controlled contact can reduce unnecessary rubbing over a bond edge
Should You Use Steam on a Repaired Area?
Steam is neither universally required nor universally prohibited. It adds heat and moisture together, and the repaired assembly may contain materials with very different responses. A cotton shell might tolerate steam while a transfer print, waterproof laminate, reflective element, synthetic patch backing, or delicate decoration does not. If the care label includes “No steam” or an equivalent restriction, follow it. When no clear information exists for the repair material, avoiding concentrated steam directly on the repaired zone is the more conservative approach.
A press cloth can be useful for pressure-sensitive surfaces, but it is not a license to exceed the care label. Utah State University Extension includes a press cloth among useful sewing and pressing supplies and describes it as a barrier used during pressing. For a household repairer, the main advantage is controlled separation between the sole plate and the visible fabric. The press cloth should be clean, colorfast, and appropriate for the temperature being used; a dirty or dyed cloth can transfer marks to a light garment.
Downloadable evidence – Utah State University Basic Sewing Supplies PDF:This publication lists practical sewing and pressing tools, including a press cloth, measuring tools, hand needles, marking tools, and other basic supplies. It is useful as an independent checklist for a small repair station and supports the recommendation to prepare the pressing tools before heating a repaired garment.

5. Which Fabrics and Repair Methods Need Different Aftercare?
Fabric name alone is not enough. Aftercare depends on thickness, stretch, absorbency, weave or knit structure, surface coating, decoration, and the repair method itself. Stable cotton and denim usually tolerate ordinary handling more predictably than high-stretch knits, delicate silk, coated waterproof textiles, or heavily embellished garments. Always use the actual care label and hidden testing when the material is unfamiliar.
Cotton and Denim Are Forgiving, but Not Indestructible
Cotton and denim are common repair fabrics because their stable woven structure gives a clear surface to align and press. They can also be highly absorbent, which means too much liquid adhesive may travel into the fibers and create a visible dark spot or hard zone. Denim introduces another issue: many repairs sit at knees, pockets, hems, or thighs where the garment bends and rubs repeatedly. A decorative patch on a low-stress area is very different from a repair expected to bridge a structurally worn knee without additional reinforcement.
After a cotton or denim adhesive repair, the first wash should stay within the garment label and avoid unnecessary aggression. Inspect light-colored cotton for seep-through or a darkened bond line before washing, because laundering will not make an oversized adhesive application disappear. For denim hems, check whether the cloth itself is worn thin from dragging on the ground. Re-gluing a badly abraded edge can make the fold look tidy temporarily while leaving weakened fabric immediately beside the bond.
Polyester, Nylon, and Coated Fabrics Need More Heat Discipline
Synthetic fabrics often tolerate routine washing well but can be less forgiving under an iron. Polyester, nylon/polyamide, elastane blends, transfer prints, coated rainwear, and technical membranes each have their own limits. A fabric may appear normal for several seconds under heat and then develop shine, flattening, distortion, or coating damage. The repaired area may also contain an adhesive, patch backing, or trim with a different softening behavior. For these garments, the lowest permitted heat, brief contact, and a hidden test are more valuable than relying on the generic fiber name.
Waterproof and coated garments deserve special caution because the care problem is not limited to the visible fabric. A waterproof coating or membrane can be affected by heat, puncture, detergent chemistry, or solvent exposure even when the outer textile looks intact. If a repair is on technical outdoor apparel, check the garment manufacturer’s care information before assuming a household fabric-glue routine is suitable. When the original label or maker instructions are unclear, professional repair or a repair system made for the specific technical fabric is the safer choice.
Stretch Fabrics Need a Movement Test, Not a Hard Pull Test
High-stretch garments challenge repairs because the surrounding textile changes length every time the clothing is put on, bent, or washed. A glue layer can be flexible and still be unsuitable for a seam that repeatedly expands far beyond its resting length. Before laundering a repaired stretch garment, move the area gently through the range it experiences in ordinary wear. If the repair boundary forms a sharp fold, the fabric bunches, or the opening begins separating under light movement, the problem is structural and should be reinforced rather than “tested” more aggressively.
When a stretch seam fails, a stitch designed to move with the fabric is often a better long-term solution. This is an important limit for any no-sew product: flexibility after cure is valuable for hems, patches, trims, and many low-stress areas, but it does not automatically recreate the load path of a sewn seam. For a user who initially chose adhesive because sewing felt intimidating, learning one basic backstitch or stretch-compatible method can be more effective than repeatedly adding glue to a high-motion failure.
Video evidence – five useful hand stitches:Professor Pincushion demonstrates running stitch, backstitch, slip stitch, blind hem, and catch stitch in one tutorial. The video is especially useful after a repaired garment reveals that the damaged location carries more load than expected. Practicing on scrap fabric first helps users understand stitch spacing and tension before moving to a real seam.
Patches, Fusible Web, Sewing, and Adhesive Repairs Age Differently
A glued fabric patch has a bonded interface across some or all of its area. An iron-on patch relies on a heat-activated backing. A self-adhesive patch uses pressure-sensitive tack. A sewn patch is mechanically attached around its edge or through selected points. These systems can all look similar from the front, but their weak points are different. A glued patch may lift at an under-coated edge, an iron-on patch may soften under excess dryer heat, a pressure-sensitive patch may creep, and a sewn patch may remain attached while the worn garment fabric tears beside the stitches.
For high-frequency washing, patch edges deserve special attention because they experience both bending and snagging. If a decorative or uniform patch repeatedly lifts at the perimeter, adhesive can still be useful for positioning, but perimeter stitching may provide the mechanical continuity needed for long-term laundering. The same principle applies to thick embroidered patches on elbows, knees, bags, and workwear. The repair method should distribute the actual force rather than relying on a larger volume of glue at the point already failing.
reference content source – iFixit hand-sewn patch guide:This visual repair guide shows the logic of positioning and hand-sewing patches onto a garment. It is useful when a frequently washed patch needs mechanical edge reinforcement after adhesive or heat-only attachment proves insufficient
Video evidence – machine-sewn patch reinforcement:Singer’s patch demonstration shows how a patch can be secured mechanically around its edge. It gives users a practical comparison between glue-only positioning and a stitched perimeter for garments that face repeated washing or higher movement.
6. What Washing and Ironing Mistakes Damage Repairs, and What Should You Do If One Fails?
Most early failures can be traced to a small group of causes: washing before the repair is ready, using too much adhesive, poor surface preparation, stretching the garment during cure, choosing an unsuitable repair method for a high-stress location, over-heating during drying or ironing, or re-gluing over a dirty or partially detached surface. Let a failed repair dry completely, diagnose the cause, then decide whether local re-bonding, stitching, reinforcement, or professional repair is appropriate.
The Most Common Preventable Mistakes
A lifted edge is often blamed on “weak glue,” but the adhesive is only one part of the system. If lint or oil remained on the surface, if the repair was moved during cure, if the glue layer was so thick that the fabric never contacted evenly, or if a patch was placed over a knee that flexes thousands of times during wear, adding a stronger adhesive may not solve the real problem. Experienced repair work starts with failure diagnosis because the pattern of the failure usually tells you more than the size of the opening.
- **Washing too early:**the bond may look dry while internal film formation is incomplete.
- **Using excess adhesive:**thick layers can seep through porous fabric, cure more slowly, create stiffness, and squeeze onto visible edges.
- **Skipping a hidden test:**dyes, coatings, prints, absorbency, and surface finish can change how a glue or iron affects the garment.
- **Stretching during cure:**fabric held under tension can contract after release, leaving puckering or concentrated stress beside the repair.
- **Using a surface bond on a structural seam:**crotch, shoulder, underarm, waistband, zipper, and high-stretch seams need mechanical continuity.
- **Using dryer heat by default:**heat plus tumbling can accelerate edge fatigue even after a wash itself appears successful.
- **Holding the iron stationary:**long dwell time can heat a patch backing, print, adhesive ridge, or synthetic fiber far more than a brief controlled press.
- **Re-gluing over residue:**detergent, lint, weakened old adhesive, and moisture interfere with clean new contact.
The amount of adhesive deserves special attention because users often equate quantity with security. On fabric, more is not automatically stronger. A thick bead can create a hard transition between repaired and unrepaired cloth, especially on cotton, lightweight polyester, lace, or a narrow hem. During washing, this stiffness difference makes the cloth bend at the edge of the adhesive instead of distributing movement gradually. A thin, controlled layer on clean compatible fabric usually gives a flatter profile, cures more predictably, and reduces visible squeeze-out.
This is one place where GleamGlee’s precision application structure is relevant without turning the page into a sales pitch. A fine applicator can help place narrow lines along hems, patch edges, trim, lace, or small openings while reducing excess material. The product facts also describe clear drying and flexibility after cure. Those characteristics are useful only when the application remains thin and the location is appropriate; no flexible formulation can compensate for a flooded bond line, an oily surface, damaged coating, or a structurally overloaded seam.
Diagnose the Failure Before Repairing It Again
| What you see after washing or ironing | Cause to investigate first | Better next step |
|---|---|---|
| One patch corner lifts while the rest remains secure | Missed edge coverage, contamination, snagging, or local bending | Let dry, clean the loose zone, and re-bond only if materials remain compatible |
| Most of the patch shifts or peels | Wrong backing, poor preparation, insufficient cure, or incompatible movement | Remove only loose material carefully and reconsider the installation method |
| Repair feels hard or forms a ridge | Excess adhesive or repeated over-application | Stop adding glue; assess whether the old layer can be removed safely or whether the area needs reconstruction |
| Seam reopens at crotch, shoulder, underarm, waistband, or zipper | Structural load exceeds a surface-only repair | Use stitching, reinforcement, or professional seam repair |
| Fabric puckers around the repair | Fabric was stretched during bonding, adhesive area is too stiff, or grain/knit direction was distorted | Reassess alignment, repair width, and need for a more flexible structural method |
| Shine, melting, color change, bubbling, or coating damage after ironing | Heat, pressure, or steam exceeded material tolerance | Stop heating, allow cooling, and seek material-specific guidance before any further work |
A small clean failure can sometimes be re-bonded successfully. Let the garment dry completely, lift only the section already detached, remove loose lint and fully detached debris, and avoid strong solvents unless the garment and adhesive maker specifically approve them. Re-test compatibility if the surface has changed. Apply a thin amount only where new contact is needed, align the layers without stretching, keep them stable through the full cure period, and treat the next wash as another cautious first cycle.
A repeated failure at the same location is a signal to change the repair design. If the patch edge lifts after every wash, perimeter stitching may be more effective than a third layer of adhesive. If a hem repeatedly opens because the fabric is dragging on the floor, the garment may need to be shortened rather than re-glued at the worn line. If a seam opens whenever the body moves, the issue is structural and should be stitched along the original load path. Durable repair comes from removing the cause, not simply increasing material at the visible failure.
Video evidence – hand-sewn blind hem:Professor Pincushion’s blind-hem demonstration shows a low-visibility stitched alternative for trousers and skirts. It is particularly useful when a repeatedly repaired hem needs mechanical support but the user still wants the front of the garment to remain visually clean.
Video evidence – hand versus machine patch attachment:This comparison video shows two stitched approaches to patch installation. It is useful after a patch repeatedly peels in laundering because it demonstrates how mechanical edge attachment can supplement or replace a purely bonded perimeter.
reference content source – iFixit broken-seam repair:This guide is useful when a “glue failure” is actually a failed seam. It shows the logic of locating the original seam line, controlling loose thread, and rebuilding the opening instead of simply placing material over the center of the gap.
7. How Can You Make a Fabric Repair Last Through Repeated Washing and Ironing?
Long-term durability comes from matching the repair method to the garment, controlling adhesive thickness, allowing full cure, staying inside the clothing care limits, and checking small changes before they become large failures. A repair that survives one wash is encouraging, but repeated care is where edge design, flexibility, fabric condition, and heat discipline become more important than the initial appearance.

Use the First Care Cycle as a Baseline
After the first complete wash, dry, and permitted ironing cycle, compare the repaired area with its condition before laundering. Look at patch corners, hem continuity, seam ends, stiffness, color, surface shine, and how naturally the fabric bends. If there is no change, record the successful settings and use them as the baseline for future care. If a small change appears, correct the cause early. Waiting until half of a patch has peeled or a seam has opened several centimeters usually makes the next repair more difficult and more visible.
Repeated washing introduces cumulative mechanical fatigue. Even when the adhesive itself is water-resistant, the fabric around the bond can wear, patch edges can abrade, thread can loosen, and a previously flat repair can begin catching on other items. This is why a high-frequency school uniform, work garment, children’s clothing, or everyday jeans may benefit from a slightly more conservative laundry routine than a decorative jacket washed only occasionally. Durability is a relationship between the bond and the garment’s real service life, not a single laboratory-style “pass/fail” moment.
Keep a Static Aftercare Checklist Near the Laundry Area
A static checklist is more useful for this topic than a conversational diagnosis tool because the same sequence applies every time: identify the repair, verify the cure, read the care label, select the allowed wash and dry method, inspect after drying, and use controlled heat only if permitted. A household can print the checklist, write the product-specific cure time on it, and keep it with special-care laundry. The same format is useful for a small alteration studio or costume room because it standardizes care without requiring staff to remember every adhesive or patch instruction.
- **Suggested downloadable site resource – “Fabric Repair Aftercare Checklist.pdf”:**The site’s operations team can create a one-page printable file with fields for garment, repair method, product name, application date/time, full-cure time, first wash setting, drying method, ironing limit, and post-wash inspection. Keep it static and printable rather than turning it into a dialogue-based generator. A companion “24-Hour Repair Care Timeline.pdf” can be used specifically for GleamGlee projects with the confirmed approximately 24-hour full-cure reference.
Choose a Clothing-Specific Adhesive by Aftercare Requirements, Not Just Initial Tack
For users shopping for a textile adhesive, the important questions are practical: Does the bond remain flexible after cure? Does the product clearly state when it becomes washable? Is ironing permitted after cure, and under what conditions? Can the applicator place a thin line without flooding the fabric? Does the adhesive dry in a way compatible with visible clothing? Is the intended repair a low-stress fabric application rather than a load-bearing seam? These questions are more useful than choosing a product solely because it grabs quickly in the first few minutes.
GleamGlee Fabric Glue is positioned around this clothing-specific use case: clear drying, flexibility after full cure, precision application, machine-washable performance after full curing, and iron-safe use after the confirmed cure period. The product is intended for common fabrics and projects including cotton, denim, polyester, canvas, felt, patches, lace, ribbon, trims, clothing alterations, and everyday textile repair. As with any adhesive, a hidden test is still appropriate on delicate, light-colored, coated, highly elastic, or high-value garments because fiber structure, dye, absorbency, and surface treatment vary.
For organizations developing or sourcing a fabric-repair product, aftercare should be defined before the formula is finalized. A washable claim is meaningful only when test conditions, substrate types, cure interval, flexibility, and heat exposure are understood. GleamGlee’s company materials describe a formulation and testing organization with more than 25 chemists, material scientists, and process engineers, plus application-laboratory work around adhesion, compatibility, humidity, temperature variation, and repeated wear. That capability is relevant for customized textile-adhesive projects, but the consumer-facing care instructions still need to remain clear, product-specific, and conservative enough for ordinary users to follow correctly.
Final Aftercare Checklist
- Identify the repair method: adhesive, iron-on, self-adhesive patch, fusible web, sewing, or a combination.
- Record the product-specific cure or washable time instead of relying on a universal rule.
- Before washing, confirm the repair is dry, stable, aligned, and free from lifting edges.
- Read the garment care label again and follow the more restrictive instruction when materials disagree.
- Turn repaired clothing inside out when practical to reduce direct abrasion on visible repair areas.
- Use gentle handling for the first care cycle when the repair is edge-sensitive, delicate, stretchy, or heavily decorated.
- Avoid unnecessary bleach, high heat, wringing, strong stain treatments, and rough mixed loads unless every component permits them.
- Dry by the method permitted by both the garment and repair system; do not assume every washable adhesive is automatically high-heat dryer safe.
- Iron only after full cure and complete drying, using the lowest effective permitted temperature.
- Use reverse-side pressing and a clean press cloth when appropriate; keep direct heat away from heat-sensitive decoration and coatings.
- Let the garment cool before judging bond flexibility.
- Inspect after the first wash and periodically thereafter for lifting, cracking, puckering, stiffness, or seam reopening.
- Re-bond only small compatible failures; switch to stitching, reinforcement, or professional repair when the location carries structural load.
- Record successful wash, dry, and iron settings so future care remains consistent.
8. Conclusion
Washing and ironing clothes after fabric repair becomes much less confusing once the decisions are made in the right order. First identify the repair system, then allow it to reach the exact cure or washable stage stated for the product. Next, read the garment care label and treat it as the upper limit for washing, drying, and heat. Use a controlled first wash, dry the item without unnecessary stress, inspect only after it is fully dry, and iron with brief, appropriate heat rather than assuming every repaired area can tolerate direct high-temperature contact.
From a textile-adhesive perspective, durability is rarely improved by simply adding more glue or choosing a hotter “setting” process. Thin application, clean surfaces, compatible materials, full curing, flexible movement, and correct aftercare matter more. A clear and flexible no-sew adhesive can be very useful for suitable hems, patches, trims, and other low-stress projects, while structural seams and technical garments often need stitches or specialized repair. The best repair is one that restores normal use without forcing the garment into a care routine its fabric, construction, or added materials cannot safely tolerate.
Frequently Asked Questions
How long should fabric glue dry before washing clothes?
Use the washable or full-cure time stated for the exact adhesive rather than assuming every fabric glue follows one schedule. Some textile adhesives publish a rapid washable time, while others require one or two days. GleamGlee Fabric Glue has a product-specific reference of about 6-10 minutes for initial positioning and about 24 hours for full cure. Aleene’s Fabric Fusion provides a different example with washing after 48 hours. The correct approach is to follow the specific product instructions, then check the garment label before choosing the first wash settings.
Can I machine wash clothes repaired with fabric glue?
Yes, when the adhesive is specifically described as machine washable after cure and the garment care label also permits machine washing. For the first cycle, turn the garment inside out when practical, secure hardware, use a mesh bag for suitable delicate items, and choose a cycle no harsher than the clothing needs. Machine-washable glue does not make every repaired garment suitable for hot water, a heavy-duty cycle, bleach, or aggressive tumble drying, because fabric, patches, prints, trims, elastic, and coatings may impose stricter limits.
Can I iron directly over fabric glue?
Direct contact should not be the default approach. Confirm the adhesive has reached its iron-safe cured stage and the clothing label allows ironing. Work from the reverse side when practical, use a clean press cloth on pressure-sensitive material, start at the lowest effective permitted temperature, and avoid keeping the iron stationary over a glue line or patch edge. If the garment is marked “Do Not Iron,” the instruction remains controlling even when the cured adhesive itself is described as iron-safe.
Is cold water always best for repaired clothes?
Cold or cool water can reduce thermal stress, but it is not a universal requirement. The correct wash temperature comes from the clothing care label and the repair-system instructions. Stable cotton may permit warmer washing, while nylon, elastane blends, delicate dyes, coatings, prints, or embellished fabrics may need more conservative care. A sensible rule is to use the lowest practical temperature that still meets the garment’s cleaning needs without exceeding any stated restriction. Do not raise the temperature simply because the adhesive is washable.
Can repaired clothes go in a tumble dryer?
They can when both the garment and the repair product permit tumble drying at the selected temperature. Some fabric adhesives specifically allow low-temperature tumble drying, while other repair systems or garments require air drying. Dryer heat is only part of the issue; repeated tumbling also bends the repaired area and can catch patch edges or trim. When instructions are unclear, air drying is a conservative choice, but even air drying should follow the garment’s normal requirements because some knits need to dry flat rather than hang.
What should I do if a patch starts peeling after washing?
Let the garment dry completely before attempting a repair. Determine whether only one edge has lifted or whether most of the patch has shifted, then inspect for lint, detergent residue, hardened old adhesive, fabric wear, or an incompatible backing. A small, clean, flexible edge may be suitable for thin local re-bonding followed by another full cure period. If the patch repeatedly peels, sits on a knee or elbow, or is washed frequently, perimeter stitching or a different attachment method is usually more reliable than repeated thick layers of glue.
Does a repaired garment need special care forever?
Not necessarily. Once a repair has fully cured and successfully completed its first wash, dry, and permitted ironing cycle, the successful settings can become the normal care routine for the garment. The repair should still be checked periodically, especially around patch corners, hem ends, stretch zones, and frequently washed work or children’s clothing. Long-term special care is mainly needed when the added repair material has stricter limits than the original garment. If every permanent component shares the same normal care conditions, routine laundering can usually continue within those limits.





















