 Skip to content
A tent can appear perfectly waterproof in a dry garage and begin dripping within minutes of steady rain. The fabric panels may still repel water, yet hundreds of small needle holes can create hidden paths through stitched joints. Many campers respond by spraying the entire rainfly, but a broad waterproofing treatment will not reliably close exposed stitching, lifted seam tape, or gaps around heavily loaded attachment points.
To seal tent seams using glue, identify the leaking stitches, confirm whether the fabric is silicone-, polyurethane-, PVC-, or acrylic-coated, clean and dry the area, then brush on a thin, continuous layer of compatible flexible waterproof adhesive. Keep the seam open while the glue cures fully, inspect for gaps or tackiness, and perform a controlled water test before packing the shelter.
The word “glue” can be misleading because a tent does not need the hard bond used for wood, ceramics, or household crafts. It needs a waterproof seal that bends whenever the shelter is folded, stretched, shaken by wind, or compressed into a storage sack. Imagine arriving at a remote campsite just before dark and seeing a drop form above your sleeping bag. A careful inspection and one controlled afternoon of sealing at home can prevent that entire experience.
What Tent Seams Need Sealing?
Tent seams need sealing when water can pass through exposed stitching, enlarged needle holes, lifted seam tape, worn joint coatings, or stressed attachment points. Inspect rainfly ridgelines, floor corners, zipper stitching, guy-out points, stake loops, vents, and seams above sleeping areas first. Do not coat every visible seam automatically; confirm where water is entering before applying adhesive.
Factory-Sealed or Exposed?
Many modern tents leave the factory with heat-bonded seam tape covering the underside of critical stitched joints. Factory tape usually appears as a smooth, narrow strip positioned directly over the thread. Other shelters use a brushed liquid seal that leaves a slightly glossy band rather than a separate tape layer. Firmly attached factory treatment usually needs inspection, not immediate recoating.
A new tent should not be covered with extra adhesive simply because the stitching remains visible from the outside. Unnecessary glue adds weight, attracts dust, creates stiff folding lines, and may complicate later repairs. Sound tape should lie flat without bubbles, brittle edges, cloudy separation, or loose sections. Liquid sealing should remain continuous rather than cracked, powdery, or peeling.
Not every shelter arrives fully sealed. Some ultralight tents, silicone-coated shelters, tarps, and specialist expedition models require selected seams to be sealed by the owner. Complex areas such as pull-outs, vents, pole sleeves, zipper covers, and reinforcement patches may also receive different factory treatment from long panel seams. Always check the tent manual before assuming that high price, new condition, or premium fabric means every seam is ready for heavy rain.
Leak or Condensation?
Moisture inside a tent does not always indicate seam failure. Condensation develops when warm, humid air from breathing, wet clothing, damp ground, or cooking meets a cooler rainfly or tent wall. Droplets can run downward and collect beside stitched joints, making the seam appear responsible even though the water formed inside the shelter.
A genuine seam leak usually follows a defined route. Moisture may emerge directly along a thread line, beneath a reinforcement patch, or around a floor corner while water strikes the corresponding exterior area. Condensation is generally spread across a wider panel and often becomes worse when doors and vents remain closed overnight.
Pitching also affects diagnosis. A loose rainfly may touch the inner tent and transfer condensation. A groundsheet extending beyond the floor can catch rain and funnel it underneath the shelter. Water may also enter through a puncture, damaged zipper cover, worn floor coating, or poorly tensioned corner. Before reaching for glue, test one small zone with gentle water spray while another person watches from inside with a flashlight and dry cloth.
High-Risk Seams
Seams exposed to both water and repeated mechanical loading deserve the closest inspection. Roof ridgelines receive prolonged rainfall, while guy-out points and stake loops experience constant pulling. Bathtub-floor corners flex whenever someone enters the shelter, and zipper intersections combine several layers of fabric, thread, reinforcement, and folded edges.
| Seam location | Why it is vulnerable | What to inspect |
|---|---|---|
| Rainfly ridgeline | Receives prolonged direct rain | Exposed thread, gaps, lifted tape |
| Guy-out points | Repeated tension enlarges needle holes | Cracks around reinforcement patches |
| Floor corners | Flexing, pressure, and occasional pooling | Worn folds and tape separation |
| Zipper stitching | Several layers create complex water paths | Pinholes near zipper ends and covers |
| Stake loops | High tension during pitching | Loose thread and stretched fabric |
| Pole sleeves | Friction and movement wear coatings | Abrasion beside the stitched line |
| Vent attachments | Interrupted seams are harder to seal evenly | Gaps around corners and overlaps |
A short seam under heavy load may be more vulnerable than several feet of straight stitching. Pay close attention where thread passes through webbing, hook-and-loop material, windows, buckles, or reinforcement patches. These areas contain more needle holes and may not lie flat enough for factory tape to bond uniformly.
Older tents commonly fail along repeated fold lines. When a shelter is packed the same way after every trip, those creases can become brittle before surrounding fabric shows obvious wear. Salt, dust, sunscreen, insect repellent, cooking residue, and body oils near entrances may also reduce the life of existing sealing materials.
Repair Boundaries
Seam adhesive is intended to block water paths through stitching and joined fabric. It cannot solve every tent problem. A structural seam with broken thread should usually be sewn before sealing. A large rip needs a compatible patch, while widespread sticky, flaky, or powdery coating indicates broader material deterioration rather than one isolated leak.
Mesh requires a different approach. Filling an open mesh tear with liquid glue alone can reduce ventilation, distort the netting, and leave a hard edge that catches during packing. A lightweight mesh patch generally provides better support, with flexible adhesive used only to hold or seal the patch perimeter.
When one seam begins leaking, inspect connected seams of similar age. Waterproof treatments often deteriorate gradually across the shelter rather than failing in one isolated inch. Finding two or three small lifted edges during a home inspection is far easier to manage than discovering several active leaks during an overnight storm.
Which Glue Works for Your Tent Fabric?
The correct glue must bond to the tent’s waterproof coating, not merely to the underlying nylon, polyester, vinyl, or canvas. Silicone-coated fabrics generally require silicone-compatible sealers, while polyurethane-coated fabrics need PU-compatible products. Select a waterproof adhesive that remains flexible after curing and test a hidden area whenever the coating cannot be identified confidently.
Identify the Coating
Tent descriptions often identify the base textile without clearly explaining the surface that adhesive will contact. “Nylon tent” is therefore incomplete information. Nylon may be silicone-impregnated, polyurethane-coated, treated with both systems, or combined with another finish. Polyester, canvas, and vinyl shelters can also use several coatings with very different bonding behavior.
Silicone-treated fabric has low surface energy, helping it resist water but also making it difficult for many ordinary adhesives to grip. A glue that performs well on untreated nylon may bead up, peel away, or remain only weakly attached to silnylon. Polyurethane coatings accept different sealers but may gradually become sticky, flaky, or powdery as they age.
Look for terms such as silnylon, silpoly, silicone-coated, PU-coated, polyurethane-backed, PVC-coated, vinyl-laminated, waxed canvas, or acrylic-coated canvas. The original manual, sewn-in care label, manufacturer listing, or customer-support department is more reliable than judging the surface by sight. Clear silicone and polyurethane coatings can appear almost identical under normal lighting.
Match Glue to Material
The base fabric influences strength and flexibility, while the coating usually determines adhesion. The following comparison provides a useful starting point, although instructions for the exact tent and adhesive should always control the final decision.
| Tent material | Common surface treatment | Required adhesive behavior | Main concern |
|---|---|---|---|
| Nylon | Silicone or PU coating | Flexible sealer matched to coating | “Nylon compatible” may be too vague |
| Polyester | PU, silicone, or acrylic treatment | Waterproof, low-stiffness bond | Some finishes resist general glue |
| Vinyl | Smooth plastic surface | Adhesive approved for repeated vinyl flexing | Rigid glue may crack when folded |
| PVC-coated fabric | Plasticized waterproof layer | PVC-compatible flexible seal | Solvent sensitivity varies |
| Canvas | Waxed, acrylic-coated, or untreated weave | Flexible seal with controlled penetration | Darkening and stiffness |
| Mesh | Open synthetic netting | Lightweight patch adhesive | Thick glue can block ventilation |
| Factory seam tape | Heat-bonded film | Spot repair only when tape remains stable | Loose tape creates a weak foundation |
Canvas can absorb much more adhesive than smooth coated nylon. A heavy first coat may darken the fibers, stiffen the joint, and reduce coverage. A controlled initial layer followed by a second light pass is usually easier to manage than one thick application.
Vinyl and PVC-coated equipment require an adhesive that tolerates repeated bending. A glue can feel extremely strong when tested on a flat sample and still crack after the shelter has been folded, rolled, compressed, and exposed to changing temperatures.
Flexible Performance
Tent adhesive should not be evaluated by hardness alone. The strongest rigid bond is rarely the most suitable choice for moving fabric. A sealed seam must bend whenever the tent is pitched, shaken by wind, stepped on, rolled, stuffed, transported, and stored.
Useful performance characteristics include:
- Waterproof sealing after full cure
- Flexibility during folding and stretching
- Adhesion to the specified coating
- Resistance to peeling at thin edges
- Abrasion resistance near floors and attachment points
- Controlled flow into thread and needle holes
- Clear or low-visibility curing on exposed areas
- Enough working time for even spreading
- Resistance to cracking during repeated movement
A rubber-like cured film usually serves outdoor textiles better than a glass-hard finish. The seal should move with the fabric instead of forcing every bend into a narrow line beside the repair. Hard adhesive edges can concentrate stress and eventually create a fresh crack next to an otherwise waterproof patch.
Outdoor exposure also matters. Rain, dirt, abrasion, temperature changes, and ultraviolet light place greater demands on adhesive than an indoor craft project. A product developed for outdoor gear offers more predictable performance than one intended only for paper, rigid plastic, decoration, or temporary household work.
Avoid the Wrong Glue
Cyanoacrylate super glue cures quickly but usually becomes too hard for long flexible seams. It may wick into the weave farther than intended, producing a stiff area that cracks beside moving fabric. Hot-melt glue creates bulky ridges, adheres inconsistently to waterproof coatings, and may soften inside a hot vehicle or under strong summer sunlight.
White craft glue and school glue are not intended for prolonged rain exposure. General contact adhesive may stay flexible but can discolor fabric, release strong solvent odors, or react poorly with certain coatings. Construction adhesive is generally too heavy and rigid for lightweight shelters.
Ordinary silicone caulk may resemble specialist seam sealer, but viscosity, additives, curing rate, and surface adhesion can vary. Experienced users sometimes adapt silicone products for a known fabric, yet an unsuitable mixture can leave thick ridges, uncured areas, or poor bonding. A ready-to-use outdoor fabric adhesive is usually more predictable for home repairs.
The useful question is not whether a glue can stick to a fabric sample for several minutes. The real test is whether the bond remains flexible, waterproof, and attached after rain, folding, temperature changes, abrasion, and repeated camping trips.
What Do You Need Before Sealing?
Before sealing, gather compatible adhesive, disposable gloves, lint-free cloths, gentle cleaning supplies, a small applicator, paper towels, good lighting, and enough space to keep the tent open during curing. The fabric should be clean, completely dry, and lightly tensioned. Schedule the work early enough to allow curing, water testing, drying, and possible touch-up before the next trip.
Essential Tools
A small, organized repair kit makes application cleaner and reduces the risk of damaging nearby fabric. The adhesive itself is only one part of the job. Surface condition, lighting, access to the seam, and control of the wet film often have a greater influence on the result than the total amount of glue used.
Useful tools include:
- Flexible waterproof tent adhesive
- Suitable disposable gloves
- Clean lint-free cloths
- Mild soap and clean water
- Isopropyl alcohol only when approved
- Small disposable brush
- Precision nozzle or narrow applicator
- Absorbent paper towels
- Masking tape for nearby protection
- Drop sheet or cardboard
- Flashlight
- Compatible repair patch material
A flashlight placed behind or beneath the fabric can reveal enlarged needle holes, thin spots, and tiny punctures. Masking tape can help create neat margins on visible repairs, but it should not be pressed aggressively onto old or delicate coatings. Remove the tape before the adhesive becomes difficult to separate from its edge.
Avoid wire brushes, metal scrapers, sharp blades, high heat, and aggressive solvents. A tool that removes old adhesive quickly may also remove the waterproof coating underneath, turning a small repair into a much larger restoration job.
Coverage Planning
Coverage claims normally assume a thin, controlled film over relatively smooth material. Rough canvas, layered corners, wide joints, porous webbing, previous repairs, and heavy application all reduce the seam length that one tube can treat.
A 2.12 fl oz, or 60 ml, tube of GleamGlee tent glue is specified to cover up to approximately 60 feet of seams or fabric under suitable application conditions. That manufacturer-stated figure should be treated as an upper planning reference rather than a guaranteed result for every shelter.
| Project type | Typical treatment scope | Material-planning approach |
|---|---|---|
| Isolated needle-hole leak | Approximately 2–6 inches | Apply only enough to bridge the stitch line |
| Corner or guy-out repair | Approximately 3–12 inches | Allow extra for layered webbing and reinforcement |
| Rainfly spot sealing | Several short seams | Mark every target before opening the adhesive |
| Full small-tent reseal | Multiple panel and perimeter seams | Estimate total seam length and retain a small reserve |
| Canvas seam repair | Variable | Expect greater absorption than coated nylon |
| Tear with a patch | Patch face and perimeter | Reserve adhesive for bonding and edge sealing |
Measure or estimate the target seams before opening the tube. Include rainfly panel joints, the floor perimeter, roof seams, zipper covers, corners, attachment points, and previous repair zones. Marking each location with removable tape prevents missed areas and discourages unnecessary coating.
Using more glue does not automatically produce a stronger seal. A continuous narrow film generally performs better than a heavy mound that cures slowly, sticks to adjacent fabric, or creates a stiff folding line.
Work Area
A suitable workspace should be dry, ventilated, well lit, and protected from dust. Pitching the tent keeps fabric lightly tensioned and makes many seams easier to reach. A rainfly can often be mounted inside out, exposing its coated side without leaving large wrinkles on the work surface.
When a full setup is impossible, spread the tent on a clean floor or large table. Support the seam so it remains flat and accessible without sharp folds. Place cardboard or a protective sheet underneath because liquid adhesive may pass through enlarged needle holes or drip from raised sections.
Ventilation remains important even with low-odor products. Keep the repair away from flames, heaters, food preparation, children, and pets. Outdoor application can work, but wind may blow dust, leaves, pollen, or insects into the wet seal. Direct sunlight can also heat dark fabric and shorten working time.
A covered porch, ventilated garage, workshop, or clean utility room usually provides a practical balance between airflow and environmental control. Make sure the tent can remain undisturbed in the same location for the entire curing period.
Timing and Conditions
Curing recommendations vary by formula, coating, film thickness, temperature, airflow, and humidity. Some thin seam treatments become usable within several hours, while complete sealing jobs often need an overnight cure. Thick corner repairs, bonded patches, or absorbent fabric may require 24 hours or longer.
Plan the repair several days before travel. That schedule leaves time for full curing, a controlled leak test, drying after the test, and any necessary touch-up. Sealing the tent on the evening before departure encourages rushed preparation and premature packing.
The fabric panels must remain separated while the adhesive cures. Do not roll the rainfly, close the tent tightly, place equipment over the treated area, or assume the seal is ready merely because its surface feels dry. Surface dryness and full internal curing are not the same.
Temperature guidance on the product label should take priority over general advice. Extremely cold conditions may slow curing, while excessive heat can shorten working time and affect old fabric coatings. Moderate indoor or sheltered conditions generally make controlled application easier.

How Do You Prepare Tent Seams?
Prepare tent seams by removing loose dirt, oils, unstable tape, and failing adhesive without damaging sound waterproof coating. Clean the area gently, let it dry completely, and keep the seam slightly tensioned. Fresh glue must contact stable fabric or coating rather than soap residue, damp material, brittle seam tape, powdery polyurethane, or old sealant that is already separating.
Clean Without Damage
Begin with the least aggressive cleaning method. Shake out sand, brush away dry debris, and wipe the seam with a soft cloth. When grime remains, use a small amount of mild soap and clean water unless the tent manufacturer specifies a different method. Avoid soaking an entire shelter when only a narrow joint requires treatment.
Remove all soap residue before applying adhesive. An invisible cleaning film can reduce bonding even when the surface appears clean. Give extra attention to entrances, floor corners, cooking areas, and places handled frequently during pitching. Sunscreen, insect repellent, skin oils, smoke residue, grease, tree sap, and soil can interfere with adhesion.
Some repair products permit a light wipe with isopropyl alcohol after ordinary dirt has been removed. Apply alcohol to the cloth rather than pouring it directly onto the fabric, and test a hidden area first. Printed graphics, transparent vinyl, aged polyurethane, and laminated ultralight materials may react differently.
Do not use acetone, gasoline, paint thinner, or strong adhesive remover unless both the tent and adhesive manufacturers explicitly approve them. Aggressive solvent can dissolve a coating, spread residue across the panel, discolor the fabric, or weaken the textile before the repair begins.
Handle Old Seam Tape
Factory seam tape that remains flat, flexible, and firmly bonded should usually stay in place. It continues to provide a useful waterproof barrier and may perform well for years. Remove only sections that are clearly detached, brittle, curling, bubbling, or breaking into flakes.
For a short lifted edge, clean the exposed area carefully and inspect the coating underneath. Depending on the adhesive instructions, the tape may be reattached or the uncovered stitch line may be sealed with a thin liquid film. Do not force large quantities of glue beneath tape that is still firmly attached.
When tape is failing along most of a seam, repeated spot repairs are unlikely to last. Remove loose material gradually without pulling hard enough to strip the coating from the fabric. Fingers, a soft cloth, and patient rolling motions are generally safer than blades or metal scrapers.
Fresh adhesive is only as secure as the layer beneath it. A neat-looking seal applied over powdery coating, loose tape, dirt, or peeling old glue may lift as one complete strip because the unstable material underneath remains the weakest part of the repair.
Check Older Fabric
An older tent should be evaluated as a complete material system rather than a collection of individual leaks. Seam problems may appear at the same time as ultraviolet damage, weak thread, sticky coatings, delamination, abrasion, mildew, or repeated folding damage.
Watch for:
- Flaking or powdery waterproof coating
- Persistent tackiness after gentle cleaning
- Brittle or broken thread
- Enlarged needle holes
- Cracks along repeated fold lines
- Broad cloudy areas beneath a laminate
- Fabric that tears easily beside the seam
- Widespread seam-tape separation
- Strong unusual odor from deteriorating coating
Localized wear can often be repaired successfully. Widespread coating breakdown is different. Seam adhesive may block water at one joint, but it cannot restore a large failing floor or rainfly panel. A complete recoating process, professional repair, replacement panel, or new shelter may be more appropriate.
Gently tension the material beside the seam. Sound fabric should resist tearing and return to shape. If the thread has failed or the panel begins splitting around a load-bearing loop, restore structural strength through sewing or patching before adding a waterproof seal.
Final Preparation
Before opening the adhesive, inspect the entire target line again. The seam should be clean, dry, stable, accessible, and lightly tensioned. Use a flashlight from the opposite side to locate enlarged needle holes, small gaps, and punctures that are difficult to see under ordinary room lighting.
Mark the beginning and end of every treatment area. Protect nearby mesh, zippers, windows, buckles, and hook-and-loop closures from accidental drips. Paper towels and the permitted cleanup material should remain within reach before application starts.
The surface should not feel greasy, damp, powdery, or unusually sticky. When any of those conditions remain after careful cleaning, stop and investigate the coating instead of hiding the problem beneath new glue.
Preparation often takes longer than application, but it prevents the most common repair failures. Ten careful minutes spent diagnosing, cleaning, and arranging one seam can save hours of peeling away an incompatible or contaminated repair later.

How Do You Apply Glue to Tent Seams?
Apply a narrow, continuous adhesive film directly over clean stitching and needle holes while the seam remains lightly tensioned. Work in manageable sections, spread the glue evenly, and avoid thick ridges, uncovered gaps, or uncontrolled drips. The correct application side depends on coating chemistry and tent construction, so follow model-specific and adhesive-specific instructions instead of assuming every seam should be treated inside.
Choose the Application Side
Many polyurethane-coated rainflies are sealed on their coated underside. Turning the fly inside out exposes the stitching while the tent frame keeps the material lightly tensioned. Floors are also commonly treated on the interior coated side, where the floor-to-wall seam and bathtub corners remain easy to reach.
Some silicone-coated shelters use exterior sealing, particularly along roof seams, panel joints, pull-outs, and other areas where sealant must contact exposed stitching. Mixed-material tents can require different approaches in different zones, especially when vinyl windows, mesh doors, PU floors, and silicone rainflies appear in the same shelter.
Use a clear decision order:
- Read the tent manufacturer’s instructions.
- Identify the waterproof coating.
- Confirm the adhesive’s compatible surface and application side.
- Trace where water is entering.
- Test a hidden area when information remains uncertain.
Applying sealant to both sides is rarely necessary. Double coating adds weight, changes appearance, increases stiffness, and can make later removal difficult. The adhesive should reach the real water pathway and bond to the surface for which it was formulated.
Apply a Thin Film
Hold the nozzle close to the seam and dispense a narrow bead. Spread the adhesive with a small brush, controlled applicator, or suitable gloved tool so it covers the thread and extends slightly beyond both sides of the stitching. The goal is to fill needle holes without saturating a wide area of fabric.
Work in short sections that remain easy to inspect before the adhesive begins setting. Straight seams may be handled in one- or two-foot lengths, while corners, webbing, vertical sections, and zipper intersections are easier to manage in shorter stages.
A well-applied film should have:
- No uncovered needle holes
- No breaks between brush strokes
- No large pools or hanging drips
- No glue inside zipper teeth
- No folded panels bonded together
- No thick edge likely to become rigid
- No loose thread left outside the seal
Excess adhesive can reduce reliability. Thick layers cure slowly, remain tacky beneath the surface, and create hard ridges that receive concentrated stress during folding. On porous canvas or layered webbing, allow a controlled first layer to settle and add a second thin pass only when the product instructions permit it.
Seal Rainflies and Floors
For a rainfly, pitch the shelter tightly enough to remove major wrinkles without overstretching the seam. Begin with ridgelines and upper panel joins, then move toward vents, zipper covers, lower edges, and attachment points. Working from top to bottom makes accidental drips easier to find and remove.
Floor seams require careful cleaning because sand and grit can become trapped permanently in wet adhesive. Concentrate on bathtub corners, stake loops, floor-to-wall junctions, and visible stitching. Place cardboard or another protective layer beneath the seam when adhesive might pass through enlarged needle holes.
Do not coat an entire tent floor when only the perimeter seam leaks. Widespread coating deterioration is a different repair task and may require another product or full replacement.
A tiny puncture near a seam may close with adhesive, but a cut that opens under tension needs a patch. Position compatible repair fabric over sound material beyond the damaged fibers, bond it evenly, and seal the patch perimeter without leaving thick adhesive beyond the reinforced area.
Reinforce Stress Points
Guy-out loops, stake webbing, pole sleeves, roof apexes, vent supports, and zipper ends contain several fabric layers and many needle holes. Water can follow the thread, pass beneath folded webbing, or emerge where a reinforcement patch changes thickness.
Apply adhesive around the base of the attachment and work it into visible stitching. Seal the fabric-to-webbing boundary without covering adjustment hardware, buckle mechanisms, zipper sliders, or flexible cords. A small brush gives better control than squeezing a heavy mound directly from the tube.
Damage near a high-load point should not be treated only as a leak. Restore strength first with appropriate stitching or a properly sized patch. Extend reinforcement onto sound fabric so movement is distributed over a wider area, then seal the new stitch line and patch edges.
A successful repair remains flexible and spreads stress gradually. A thick lump placed directly over the weakest point may stop water temporarily, but it creates a hard transition that can cause the surrounding material to crack during future pitching and folding.
How Do You Cure and Test the Seal?
Leave the treated tent open and undisturbed until the adhesive has cured through its full thickness, not merely dried on the surface. Keep sealed panels separated, then inspect for gaps, tackiness, peeling, or soft areas. Test the shelter with gentle water spray under normal pitching tension, checking one zone at a time before drying it completely and returning it to storage.
Allow a Full Cure
Curing starts immediately after application, but the surface and deeper adhesive do not harden at the same rate. A thin straight seam may feel dry while a corner, webbing attachment, patch edge, or accidental drip remains soft underneath.
Follow the cure time stated for the exact product and extend it when conditions are cool, humid, or poorly ventilated. Leaving a completely sealed tent overnight is a practical approach for many flexible adhesives, while thick repairs may need 24 hours or longer before folding, stretching, or water exposure.
Keep doors, rainfly sections, and floor panels positioned so wet adhesive cannot touch another coated surface. When two layers bond together before curing is complete, pulling them apart may remove both the repair and the original waterproof coating.
Avoid using intense heat to speed the process. Heat guns, hair dryers at close range, and powerful heaters can distort synthetic fabric, damage existing seam tape, or cause uneven curing. Gentle airflow is safer.
Before testing, examine the thickest repair rather than only the thin brush marks. The seal should feel stable and should not transfer, form strings, slide under pressure, or stick firmly to a clean gloved finger.
Run a Water Test
Pitch the tent exactly as it would be used outdoors. Correct tension matters because slack fabric may create unnatural pooling, while excessive tension may enlarge weakened needle holes. Close the normal openings while leaving enough ventilation to avoid confusing condensation with leakage.
Use a hose with a gentle shower attachment or a watering nozzle. Avoid pressure washers and concentrated jets, which can force water through areas that would remain dry during ordinary rainfall. Start at lower sections and move upward so the source of any leak remains easier to identify.
Test these zones separately:
- Floor corners
- Floor perimeter
- Zipper covers
- Rainfly panel joins
- Roof ridgeline
- Guy-out points
- Previous repair areas
Spray each area for several minutes while another person watches from inside with a flashlight and clean cloth. A brief splash may not reveal slow wicking through thread, so allow water enough time to follow the same route it would take during steady rain.
After testing, mark any damp point and let the tent dry fully before adding another thin coat. Never apply fresh adhesive over a wet test area.
Diagnose a Failed Seal
When a repair fails, adding more glue without identifying the cause often makes later correction more difficult. The pattern of failure can reveal whether the problem is incomplete coverage, contamination, incompatible chemistry, unstable tape, excessive thickness, or damage beyond the seam.
| Test result | Likely reason | Practical response |
|---|---|---|
| Water follows the stitching | Missed needle holes or a break in the film | Dry and apply a controlled spot seal |
| Seal peels away cleanly | Incompatible chemistry or contamination | Remove unstable material and confirm coating |
| Adhesive cracks after folding | Formula is too rigid or layer is too thick | Replace with a thinner, more flexible repair |
| Surface remains sticky | Incomplete cure or excessive application | Extend curing and check label guidance |
| Broad panel becomes damp | Fabric coating is failing | Evaluate recoating, professional repair, or replacement |
| Moisture appears away from sprayed seam | Condensation or water migration | Improve ventilation and repeat the test |
| Tape lifts beneath new adhesive | Old tape was not stable | Remove loose tape before resealing |
| Leak moves beside the repaired line | Seal did not cover the full water path | Extend the film slightly beyond the stitching |
Repeated peeling after correct cleaning generally indicates that the adhesive does not match the coating. Adding another layer rarely changes the underlying chemistry. Remove only unstable material, identify the surface correctly, and switch to a more compatible formula.
When the fabric itself tears during flexing or water testing, stop applying sealant. The problem has become structural and requires stitching, patch reinforcement, professional repair, or replacement.
Maintain the Repair
Inspect the tent at the beginning and end of the camping season, after long expeditions, and before trips where repair supplies will be difficult to obtain. Look closely at fold lines, corners, webbing, zipper ends, and pull-outs instead of checking only the longest visible seams.
Store the tent completely dry in a cool location. Moisture, long-term compression, dirt, and heat can shorten the life of both factory treatments and repair adhesive. Avoid leaving a tightly packed tent in a hot car, damp basement, or sealed storage bin after a wet trip.
Clean repaired areas gently. Strong solvents, aggressive brushes, and repeated scraping can damage the seal. When folding or rolling, vary the fold pattern where practical so one repaired seam is not sharply creased in exactly the same place after every use.
Small flexible spot repairs are generally easier than full resealing. Regular inspection allows pinholes, lifted edges, and worn corners to be corrected before water reaches sleeping equipment or a weakened area spreads across a larger section of the shelter.
Conclusion
Reliable tent seam sealing depends on five connected decisions: locating the real water path, identifying the coating, preparing a stable surface, applying a thin flexible adhesive film, and allowing enough time for curing and testing. Skipping any one of those steps can turn a simple repair into peeling glue, stiff fabric, persistent leakage, or damage that becomes harder to correct later.
A Reliable Repair Routine
Begin by confirming that the moisture is a seam leak rather than condensation, coating failure, groundsheet pooling, or a fabric puncture. Inspect factory tape, high-stress attachments, floor corners, and seams above sleeping areas. Once the problem is understood, choose an adhesive according to the waterproof coating rather than relying only on the fabric name.
Clean gently, remove only unstable material, and let the seam dry fully. Apply a narrow film that covers the thread and needle holes without creating heavy ridges. Keep treated surfaces separated during curing, then run a controlled water test before trusting the tent in remote or prolonged rain.
These steps take longer than simply squeezing glue across every visible seam, but they produce a cleaner and more durable result. A repair that remains flexible after rolling and pitching is more useful than one that only feels strong while the fabric lies flat on a workbench.
Tent Repair Product Options
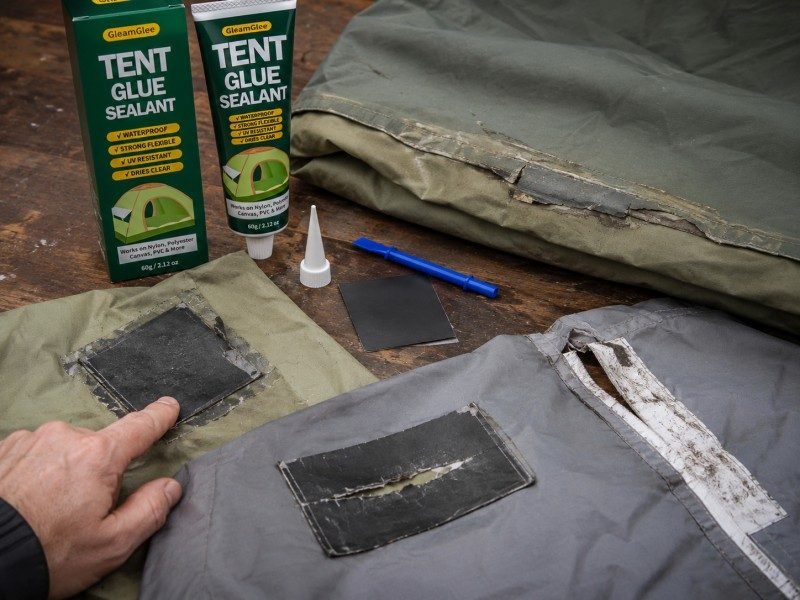
GleamGlee tent glue is designed for outdoor fabric repair and surface sealing. The adhesive can be used on compatible nylon, vinyl, canvas, PVC-coated fabric, and other outdoor materials after surface suitability has been confirmed. Once cured, it forms a clear, flexible, waterproof, rubber-like seal intended to move with equipment rather than harden into a brittle ridge.
Each tube contains 2.12 fl oz, or 60 ml. Under suitable thin-film application conditions, one tube is specified to cover up to approximately 60 feet of seams or fabric. Actual coverage depends on seam width, fabric absorbency, repair condition, application thickness, and the number of reinforced areas.
Suitable projects include tent seams, rainflies, ground cloths, tarps, awnings, pop-up shelters, rooftop tents, dry bags, sleeping equipment, picnic mats, outdoor covers, and selected emergency shelters. Silicone-treated surfaces should always be compatibility-tested because the underlying nylon or polyester name does not confirm that a general fabric adhesive will bond to the coating.
Custom Products and Quotations
Outdoor equipment brands, retailers, distributors, Amazon sellers, repair-kit suppliers, rental companies, and institutional purchasers may require more than an existing retail formula. Packaging size, working time, cured flexibility, application nozzle, viscosity, color, odor, labeling language, and target fabric can all influence customer experience and commercial performance.
GleamGlee supports private-label and custom adhesive projects with a starting order quantity as low as 200 units for selected specifications. Available services include formula adjustment, fabric compatibility testing, tube and bottle selection, precision applicators, multilingual instructions, label design, retail packaging, compliance support, and FBA-ready shipment preparation.
Printable design concepts may be completed in as little as two days after the required information is confirmed. Sample preparation generally takes approximately 7–14 days, while standard bulk production commonly requires around 20 days. Selected urgent production projects may be completed in approximately 15 days, subject to packaging, raw-material, testing, and order requirements.
For a more accurate quotation, provide the target tent materials, known coating type, preferred package volume, destination market, expected order quantity, reference product, required certifications, and desired performance. Those details allow the technical, packaging, and production teams to recommend a suitable test plan and product configuration rather than offering a generic adhesive that may not fit the final application.





















