 Skip to content
A patch of sticky residue can look like a minor cleaning problem until the paint underneath becomes shiny, soft, scratched, or completely detached. Most damage happens because people concentrate only on dissolving the glue and overlook the condition of the coating. Stronger chemicals, longer soaking, harder scrubbing, and sharper tools may remove residue faster, but they also reduce the margin for error.
To remove glue from a painted surface safely, identify the adhesive, inspect the paint, test a hidden area, remove loose material, and begin with the mildest effective treatment. Use short heat or cleaner applications, soft cloths, and low-angle plastic tools. Move to a suitable adhesive remover only when gentle rolling, mild moisture, or controlled warmth cannot release the residue.
Two painted surfaces that appear identical may react very differently. A factory-finished cabinet may tolerate a treatment that leaves a polished patch on a matte wall, while an original automotive clear coat may respond differently from a recently repainted panel. Safe glue removal works more like careful troubleshooting than ordinary scrubbing: observe the surface, test one variable, inspect the result, and increase treatment strength only when the coating remains stable.
What Should You Check Before Removing Glue?
Before removing glue, identify the adhesive, examine the paint for weakness, confirm whether the coating is fully cured, and test the cleaning method in an inconspicuous location. These checks help predict whether moisture, heat, rubbing, or solvent contact could cause color transfer, gloss changes, swelling, scratches, or peeling.
Identify the Adhesive
“Glue” is a broad description that can refer to several chemically different materials. Pressure-sensitive adhesive from labels, decals, removable hooks, and tape often remains soft or tacky, while craft glue may dry into a thin brittle film. Instant adhesive can become hard and glass-like, silicone remains flexible and rubbery, and construction adhesive usually forms a thick, highly tenacious deposit.
The original object often gives the clearest clue. A paper label usually leaves a thin pressure-sensitive layer, while foam mounting tape leaves both a compressible carrier and a sticky film. Vehicle badges and outdoor decals may leave weathered acrylic adhesive that has hardened after months of sunlight and temperature cycling. Renovation work may leave caulk, panel adhesive, or sealant that cannot be treated like ordinary sticker glue.
| Residue Type | Common Source | Typical Appearance | Sensible First Step |
|---|---|---|---|
| Pressure-sensitive adhesive | Labels, stickers, decals | Soft, tacky, sometimes yellowed | Low heat and gentle rolling |
| Foam tape residue | Hooks, mounting strips | Foam layer over sticky film | Remove foam before treating glue |
| Water-based craft glue | School and DIY projects | Clear, cloudy, or brittle | Warm damp cloth |
| Silicone residue | Sealing and repair work | Flexible and rubbery | Lift the thick layer first |
| Instant adhesive | Small household repairs | Hard and glass-like | Avoid force and test specialist methods |
| Construction adhesive | Trim, panels, fixtures | Thick, firm, and uneven | Reduce mechanically with caution |
Unknown residue should be treated as a potentially strong adhesive rather than ordinary dirt. Short, controlled tests are safer than immediately reaching for acetone, concentrated alcohol, a blade, or prolonged soaking. The cleaner must weaken the adhesive before it weakens the coating underneath.
Check the Paint Condition
Paint condition can be more important than paint category. A properly cured factory coating may withstand careful cleaning, while a recently painted wall may soften under light friction. Paint often feels dry well before it reaches its final hardness, and curing varies with the resin system, applied thickness, air circulation, temperature, and humidity.
Inspect the area for lifting edges, chips, blisters, cracks, chalking, fading, or previous touch-ups. Adhesive can bond more securely than a poorly prepared topcoat, so peeling may occur even when the cleaning product itself is relatively mild. This situation is common on rental walls, rapidly repainted furniture, outdoor metal, and localized automotive repairs.
A clean white cloth provides a useful preliminary check. Rub a hidden painted area gently without cleaner. Visible pigment on the cloth can indicate chalking, incomplete curing, weak adhesion, or surface degradation. When the coating already shows instability, limit moisture and chemicals and consider accepting a small remaining mark rather than creating a much larger repair.
Test a Hidden Area
A valid compatibility test should reproduce the intended cleaning process on a very small area. Use the same product amount, cloth material, contact time, temperature, and wiping pressure planned for the visible residue. Suitable test locations include the underside of a shelf, an inside cabinet edge, the wall behind furniture, or an automotive area hidden by trim.
Inspect the spot immediately and again after it dries. Temporary moisture darkening may disappear, while persistent gloss loss, whitening, color transfer, swelling, wrinkling, or tackiness indicates that the method is too aggressive. Viewing the area from the side often reveals polished patches and fine scratches that are difficult to see under direct frontal light.
Testing should not be treated as proof that unlimited use is safe. It confirms only that a particular application method was tolerated for a particular period. Increasing the product quantity, heat, rubbing pressure, or dwell time can still change the outcome, so the main treatment should remain as controlled as the original test.
Assess Nearby Materials
The material beneath and surrounding the coating affects risk. Drywall can absorb liquid through torn paint, wood can swell through exposed grain, metal can corrode where scratches reach the substrate, and painted plastic may soften or distort. Automotive cleaner can also flow behind badges, vinyl graphics, seals, and trim.
Protect the work area before treatment. Place an absorbent cloth beneath vertical surfaces, cover sensitive seams, and avoid spraying toward switches, vents, or electrical controls. Working in sections only slightly larger than the residue prevents runoff and makes it easier to stop immediately when the coating begins to change.
Which Paint Types Need Extra Care?
Matte paint, newly applied coatings, waxed furniture finishes, decorative paint, aged outdoor coatings, painted plastic, and repaired automotive panels generally require the most caution. Gloss and factory finishes may tolerate cleaning better, but their reflective surfaces can still reveal scratches, haze, dull patches, and lost protective coatings.
Matte and Flat Paint
Flat and matte paints scatter light and conceal small wall imperfections, but their low-sheen texture makes cleaning marks more visible. Repeated rubbing can polish the surface and produce a permanent shiny area, even when very little pigment is removed. A residue-free wall can therefore look worse after cleaning if its texture no longer matches the surrounding paint.
Mechanical friction is often the greatest threat. Melamine foam, rough towels, stiff brushes, and repeated circular wiping can change the microscopic surface profile. Use a clean white microfiber cloth and blot, press, or gently roll softened adhesive rather than scrubbing across a wide area.
Rental-property walls deserve additional caution because a newer coat may have been applied over dust, grease, damaged paint, or an incompatible older finish. Removable mounting strips can then lift the paint layer before any cleaner is used. Following the strip manufacturer’s pull direction is essential, particularly when the strip is designed to stretch slowly parallel to the wall.
Satin, Semi-Gloss, and Gloss Paint
Higher-sheen coatings usually form a smoother, more washable film and are frequently used on trim, cabinets, kitchens, bathrooms, and doors. Their increased resistance to routine wiping does not make them immune to chemical softening or scratching. Reflective surfaces can make fine tool marks and localized dullness especially noticeable.
Use straight, controlled wiping passes rather than broad circles. Before using a plastic scraper, soften the adhesive enough that the tool can slide beneath it with minimal pressure. Hold the scraper almost parallel to the surface because a steep angle concentrates force and can cut into the coating.
Cleaner residue can also produce uneven shine after the adhesive is gone. Remove softened glue with a clean section of cloth and complete the recommended after-cleaning procedure. Allow the area to dry fully before judging its appearance, since moisture and remaining cleaner may temporarily change the way the coating reflects light.
Painted Wood and Decorative Finishes
Painted wood can be finished with enamel, lacquer, polyurethane, wax, chalk-paint sealer, or another protective system. Furniture pieces with the same color may therefore have very different moisture and chemical resistance. Hand-painted and distressed finishes can be particularly vulnerable because their appearance may depend on deliberately thin or layered coatings.
Inspect joints, cracks, chips, edges, and exposed grain before applying liquid. Cleaner that enters unfinished wood can cause swelling, staining, or raised fibers. Applying product to a cloth rather than directly onto the object gives better control and reduces the chance of runoff entering seams.
Antique furniture, chalk-painted pieces, waxed finishes, and valuable decorative objects may not tolerate ordinary household methods. When the coating history is unknown and the item is difficult to replace, professional restoration is often more economical than testing several improvised chemicals and eventually refinishing a much larger area.
Automotive Paint and Painted Plastic
Automotive panels may have a factory finish, localized touch-up, full body-shop repaint, vinyl wrap, wax, sealant, or ceramic coating. An adhesive remover can affect the protective layer before visibly harming the colored paint. Work on a clean, cool panel out of direct sunlight and avoid allowing any cleaner to dry.
Painted plastic is often less predictable because both the coating and the underlying plastic may react. Certain solvents can cause softening, whitening, fine surface cracks, distortion, or a sticky texture. Common examples include vehicle trim, appliance controls, storage products, decorative housings, and painted toys.
| Finish Type | Main Vulnerability | Practical Precaution |
|---|---|---|
| Flat wall paint | Polished or shiny spots | Blot gently and avoid abrasives |
| Semi-gloss enamel | Fine scratches and dulling | Use soft cloths and low tool angles |
| Waxed furniture paint | Finish removal or staining | Minimize liquid and test carefully |
| Automotive clear coat | Haze, scratches, protection loss | Work cool, clean, and in shade |
| Repainted vehicle panel | Increased solvent sensitivity | Use the shortest possible contact |
| Painted plastic | Softening, whitening, distortion | Test both coating and substrate |
How Can You Remove Glue Safely?
Safe removal begins with loose material and progresses from mild treatment to stronger treatment only when needed. Use controlled warmth, limited moisture, a tested adhesive remover, soft cloths, and smooth plastic tools. Frequent inspection is more valuable than speed because early surface changes are easier to manage than fully lifted or dissolved paint.
Remove Loose Material
Reducing residue thickness lowers the amount of cleaner and rubbing required. Peel labels slowly while pulling them back over themselves at a low angle. Pulling outward places greater force on the paint film and increases the risk that weak coating layers will lift with the adhesive.
Soft residue can sometimes be rolled with a clean fingertip or soft rubber eraser. Foam tape should be separated from its adhesive base before chemical treatment because cleaner applied to intact foam cannot efficiently reach the sticky layer underneath. Gum, wax, paper, and brittle material should also be reduced before treating the remaining film.
A smooth plastic card, silicone tool, or plastic scraper can help with thicker deposits. Inspect the tool edge for chips and keep it nearly flat. The tool should move under softened glue rather than dig into the coating. When significant force is required, stop and soften the residue instead of increasing pressure.
Use Mild Water or Low Heat
Warm water containing a small amount of mild dish soap can soften some fresh craft glues, paper-label adhesives, and sticky residue mixed with household grime. Apply it with a damp cloth rather than saturating the surface. Hold the cloth briefly against the spot, then test whether the softened residue can be rolled away.
Low heat is effective on many pressure-sensitive adhesives because it increases flexibility. A hair dryer provides better control than a heat gun for most household tasks. Begin at a distance, keep the airflow moving, and warm the residue for approximately five to ten seconds before checking the edge.
The coating should become slightly warm rather than hot. Stop when the paint feels soft, tacky, unusually glossy, or uncomfortable to touch. Heat requires particular caution around painted plastic, decorative furniture, vinyl graphics, poorly bonded coatings, and recently repaired automotive panels.
Apply Adhesive Remover Carefully
A purpose-formulated adhesive remover can reduce aggressive scraping, especially on labels, sticker residue, tape lines, wax, grease, gum, and similar sticky deposits. Surface claims remain general guidance rather than a guarantee for every painted coating, so a hidden-area test is necessary before treating a visible area.
Apply the cleaner only to the residue. On walls, furniture, and vertical objects, applying a small quantity to a cloth or cotton pad often provides better control than direct spraying. A fast-acting formula may soften light residue within seconds, while thick, aged, or weathered deposits may require several short applications.
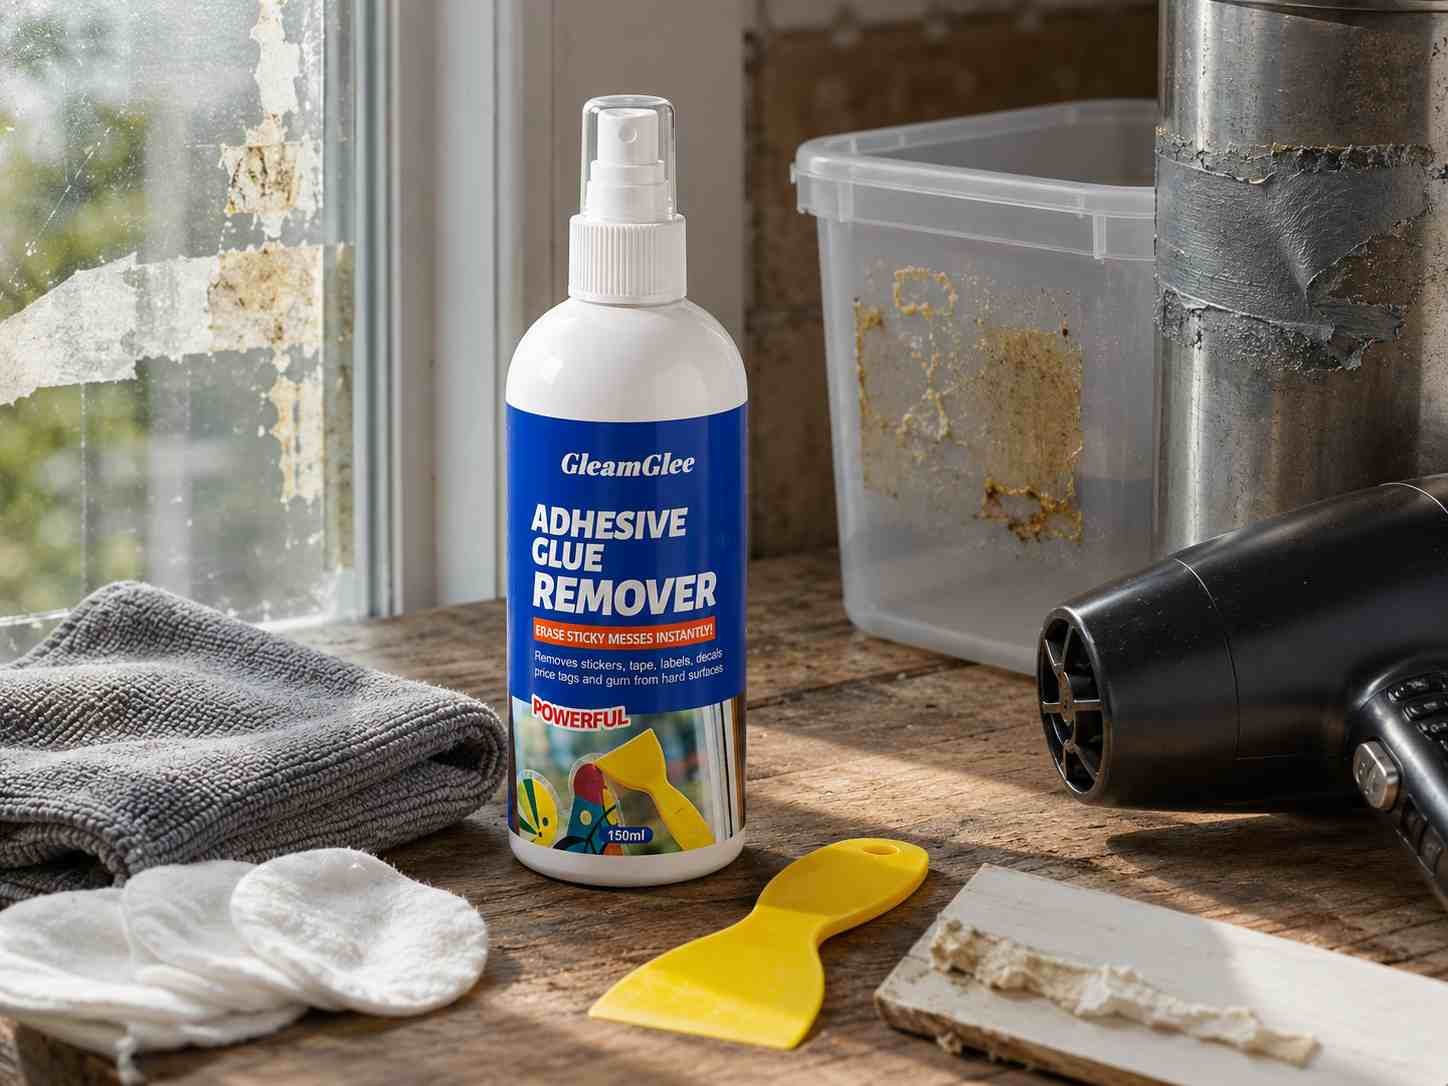
GleamGlee Adhesive Remover is designed to soften common sticky buildup with an approximate waiting period of fifteen seconds under normal product directions. Actual performance depends on adhesive chemistry, thickness, age, temperature, and surface condition. Following the label is safer than extending contact time based on guesswork.
Clean and Inspect
Dissolved adhesive should be lifted away with a clean section of cloth. Continuing to wipe with a cloth already loaded with residue can spread glue over a wider area and create a thin sticky haze. Fold or replace the cloth frequently, particularly when treating long tape lines or thick buildup.
After the residue is removed, clean the area according to the product directions and the moisture tolerance of the surface. Dry it with a soft cloth and inspect the finish after several minutes. Look for color transfer, scratches, tackiness, unusual shine, dullness, or remaining adhesive.
| Treatment Step | Practical Working Range | Stop Immediately When |
|---|---|---|
| Low heat | 5–10 seconds per cycle | Paint softens or the surface becomes hot |
| Mild damp cloth | 15–30 seconds initially | Color transfers or coating darkens |
| Adhesive remover | Follow label directions | Gloss, color, or texture changes |
| Plastic scraping | Light pressure at a low angle | Tool catches or paint begins lifting |
| Repeated treatment | Small controlled sections | Improvement stops or damage appears |

Which Method Works for Each Surface?
Painted walls need low friction, painted wood needs controlled moisture, coated metal needs scratch prevention, automotive paint needs clear-coat protection, and painted plastic needs strict solvent testing. Surface-specific treatment is safer than using the same household remedy on every painted object.
Painted Walls
Wall residue commonly comes from mounting strips, command hooks, posters, decals, children’s decorations, cable clips, and seasonal displays. Check whether the original mounting system has a release tab or stretching method before applying liquid. Removing the product incorrectly can lift paint before the cleaning process even begins.
After removing the object, roll light residue gently with a clean finger. Brief low heat may help soften a pressure-sensitive adhesive. Washable satin or semi-gloss paint may tolerate a lightly damp cloth, while matte paint requires less water and almost no rubbing.
When an adhesive remover is necessary, apply a small amount directly to the glue with a cloth or cotton swab. Prevent liquid from running down the wall, since streaks may create a larger visible area than the original residue. Stop when the coating becomes shiny, soft, sticky, or transfers to the cloth.
Painted Wood
Painted cabinets, doors, desks, trim, shelves, and furniture require protection from both solvent and moisture. Inspect the area for joints, chipped edges, cracks, and exposed grain. Liquid entering these areas can cause swelling or staining even when the painted face remains visually unchanged.
Factory-coated cabinetry often handles controlled wiping better than hand-painted furniture, although compatibility testing remains necessary. Work with product applied to a cloth, treat small sections, and dry the surface promptly. Avoid flooding hardware openings and panel seams.
Oils are sometimes suggested for sticker residue, but they can darken porous areas, remain trapped in damaged paint, attract dust, and interfere with later refinishing. A cleaner that can be removed completely is generally easier to control than an oily household remedy on painted wood.
Painted Metal
Painted metal appears on appliances, shelving, doors, tools, storage systems, and outdoor fixtures. The substrate may tolerate moisture and solvents, but the coating can still scratch, chip, soften, or separate. Baked enamel and powder coating may be durable, while aerosol paint and localized repairs can be considerably more sensitive.
Remove loose dirt before wiping because trapped grit can scratch glossy enamel. Use a smooth plastic tool instead of a razor blade or metal scraper. When paint is already chipped, keep liquid away from exposed edges and dry the area thoroughly after treatment.
A scratch that reaches bare metal can become a corrosion point, especially outdoors, in kitchens, or in humid storage areas. Successful glue removal should preserve not only the appearance of the coating but also its protective function.
Car Paint and Painted Plastic
Wash automotive paint before treating residue because dust under a microfiber cloth can produce fine scratches. Work in shade on a cool panel, warm decals gently, and peel them back at a low angle. Use clean cloth sections throughout the process to avoid spreading dissolved adhesive.
Apply remover to a small test spot and do not allow it to dry. After cleaning, wash the area and inspect it under even lighting. Dullness may result from removed wax or sealant rather than damaged clear coat, but deeper haze, color transfer, or soft paint should be assessed by an automotive professional.
Painted plastic requires the shortest practical contact time. A remover that is compatible with bare plastic may still affect the coating applied over it. Whitening, wrinkling, distortion, or a sticky texture are clear signals to stop treatment immediately.
| Surface | Common Residue | Preferred Starting Method | Main Risk |
|---|---|---|---|
| Interior wall | Hooks, tape, decals | Low heat and gentle rolling | Sheen change or peeling |
| Painted cabinet | Labels and mixed grease | Damp cloth, then tested remover | Moisture entering edges |
| Painted appliance | Stickers and protective film | Plastic tool and controlled cleaner | Fine scratches |
| Car body panel | Decals, badges, tape lines | Wash, warm, and use microfiber | Clear-coat or wax damage |
| Painted plastic trim | Labels and film adhesive | Very short hidden test | Softening or whitening |
What Should You Avoid on Painted Surfaces?
Avoid untested strong solvents, abrasive sponges, metal blades, excessive heat, prolonged soaking, and forceful scrubbing. These methods can remove adhesive quickly while also softening paint, changing its sheen, exposing the underlying material, or creating permanent scratches that are more noticeable than the original residue.
Strong Solvents
Acetone and nail polish remover can soften or dissolve many lacquers, acrylic coatings, decorative paints, and touch-up finishes. They should not be considered universal glue removers. Damage may appear as pigment transfer, haze, a softened patch, or a dull ring that becomes visible only after the liquid dries.
Rubbing alcohol also requires caution. Its effect depends on concentration, exposure time, coating chemistry, paint age, and existing surface protection. A quick wipe with a diluted solution may produce a different result from a concentrated solution allowed to remain on the surface.
Vinegar, citrus cleaners, lubricants, oils, and degreasers are not automatically paint-safe because they are common household products. Some fail to dissolve pressure-sensitive adhesive efficiently, encouraging harder scrubbing. Others can leave oily residue, stains, odors, or uneven shine that creates an additional cleaning problem.
Abrasive Tools
Melamine foam cleans partly through fine abrasion. It can remove marks effectively but may polish flat wall paint, dull satin finishes, or alter the texture of gloss coatings. The damage often becomes more visible when daylight or an interior lamp strikes the surface from the side.
Metal blades, utility knives, razor scrapers, and putty knives can cut through paint very quickly. A blade considered safe for glass should never be assumed safe for a painted surface. Steel wool, stiff brushes, rough towels, and scouring pads can also create visible lines and swirl marks.
Use white microfiber cloths, flexible silicone tools, cotton swabs, and smooth plastic scrapers instead. Soft material alone does not eliminate risk, so pressure and angle still matter. When the tool catches rather than sliding, stop and soften the adhesive again.
Excessive Heat
Heat guns can reach temperatures high enough to blister paint, warp plastic, soften caulk, damage vinyl, and release repaired coatings. A hair dryer is easier to control but can still cause problems when held too close or directed at one spot for an extended period.
Use heat in short cycles and check the surface after each cycle. Slight warmth is normally sufficient to make pressure-sensitive adhesive more flexible. A surface that feels hot, tacky, or unusually soft has already received more heat than necessary.
Thin painted plastic, unknown furniture finishes, recently repainted panels, vinyl graphics, and poorly bonded coatings should receive especially conservative heat treatment. Work carefully near glass edges, trim, electrical parts, and sealed joints where heat can affect adjacent materials.
Excess Liquid and Pressure
Flooding a painted area can push liquid under coating edges, into drywall paper, through wooden joints, behind automotive trim, or around appliance controls. Vertical runoff may leave streaks that are more difficult to correct than the original spot.
Apply remover to a cloth when direct spraying cannot be precisely controlled. Catch drips beneath vertical areas and treat only a small section at a time. More product does not always increase effectiveness, particularly when the cleaner has already reached the adhesive layer.
When residue remains firmly attached, pressing harder usually increases coating damage faster than it improves removal. Reapply a small amount of controlled heat or cleaner and allow it to work briefly. Adhesive should release with light pressure; otherwise, the method may be unsuitable.
How Do You Handle Stubborn Glue or Paint Damage?
Stubborn adhesive should be removed in layers and small sections. Reduce thick material, soften a limited area, lift loosened residue, clean the surface, and repeat only when the paint remains stable. Dullness, discoloration, softening, or peeling signals that treatment must stop and repair options should be considered.
Remove Old Glue in Layers
Aged adhesive can harden, darken, collect dirt, and lose the flexibility it had when first applied. Large deposits often contain several components, including paper or foam, a thicker adhesive layer, and a thin film bonded directly to the coating. Treating every layer at once usually increases rubbing and spreads residue.
Remove loose paper, foam, gum, wax, or brittle material before applying cleaner. Warm only a small area when heat is suitable, then treat the exposed adhesive with a tested remover. Wipe away softened material before beginning the next section.
Long tape lines and large decals are easier to control when divided into sections approximately five to ten centimeters wide. Several short applications are generally safer than one heavy application because the coating is inspected between cycles and the cleaner is less likely to spread beyond the residue.
Choose the Right Remover
A useful adhesive remover should match the target residue and surface rather than relying only on a claim of strong cleaning power. Consider whether the formula is intended for sticker adhesive, tape, decals, wax, gum, grease, silicone residue, or mixed household deposits.
Application format also affects control. A spray can cover broad areas evenly, while a cloth application is easier to manage on walls and vertical surfaces. Gel formats may remain in place longer, and wipes can be convenient for light residue. The appropriate choice depends on the adhesive thickness, surface orientation, cleanup requirements, and expected frequency of use.
Businesses developing an adhesive remover should define the exact test surfaces and residues behind any performance claim. “Suitable for painted surfaces” should never be treated as an unlimited promise across every resin type, curing condition, substrate, age, or previous repair.
Respond to Dullness or Discoloration
Stop cleaning as soon as the coating changes. Remove remaining cleaner according to the label and allow the area to dry completely before assessing it. Wet paint can appear darker temporarily, while persistent haze, unusual shine, color transfer, or tackiness usually indicates surface alteration.
On a vehicle, a dull area may mean that wax or sealant was removed rather than the clear coat itself. Wash the panel and inspect it under bright, even lighting. Appropriate protective treatment may restore appearance, but deeper haze or softened paint should be evaluated by a professional detailer.
On walls and furniture, further rubbing usually makes sheen differences more visible. A small paint touch-up may be necessary, but color alone is not enough. The sheen, roller texture, brush method, paint age, and surrounding cleanliness all influence whether the repaired area blends successfully.
Repair Peeling Paint
When adhesive pulls away paint, remove only coating edges that are already loose. Expanding the damaged area unnecessarily makes blending more difficult. Smooth the boundary gently, remove dust, and apply an appropriate primer when drywall paper, bare wood, metal, or another substrate has been exposed.
Use a topcoat that matches both color and sheen. A matte repair applied over satin paint, or a satin repair applied over flat paint, remains visible even when the color is accurate. Larger wall damage may need repainting from corner to corner to achieve a uniform appearance.
Professional help is sensible for possible lead paint, valuable furniture, historic finishes, large automotive graphics, repainted vehicle panels, widespread coating failure, or thick construction adhesive. Preserving the original finish can be more important than achieving complete residue removal in a single attempt.

Conclusion
Removing glue from painted surfaces is a compatibility task rather than a competition to find the strongest solvent. The safest process identifies the adhesive, checks the coating, tests a hidden area, removes loose material, and progresses from gentle treatment to a suitable adhesive remover only when necessary. Short contact times, soft tools, limited moisture, low heat, and frequent inspection provide the best control.
For everyday household, office, automotive, and DIY use, GleamGlee Adhesive Remover is designed to soften common sticker residue, labels, tape marks, decals, wax, grease, gum, and selected sticky deposits on suitable tested hard surfaces. Its spray application and included scraper help users target the affected area and reduce repeated forceful scraping. Painted areas should always be tested before wider application because finish chemistry and condition vary considerably.
GleamGlee also works with distributors, retail chains, Amazon sellers, Shopify brands, cleaning companies, and private-label businesses developing adhesive-removal products for regional markets. Available support includes established formulas, performance adjustments, packaging selection, custom branding, multilingual artwork, sample development, compatibility testing, production, and regulatory documentation coordination.
Private-label projects can begin with an existing formula and customized label, or proceed through a more detailed development process based on a benchmark product and target residue. Qualifying projects may begin from approximately 200 units, depending on packaging, formula, market, and compliance requirements. Design drafts can be prepared in as little as two days for suitable projects, while sample preparation commonly requires seven to fourteen days.
Businesses requesting a quotation should provide the target adhesive, expected surfaces, preferred container, required volume, benchmark product, sales country, and estimated order quantity. These details allow the technical and packaging teams to recommend an appropriate formula, testing plan, label structure, production route, and realistic quotation for branded, OEM, or private-label adhesive remover products.





















