 Skip to content
Leather Glue for DIY Leather Crafts - Wallets, Bags, Accessories
Clear, flexible leather glue for handmade wallets, bag trims, patches, small repairs and leather accessory projects.
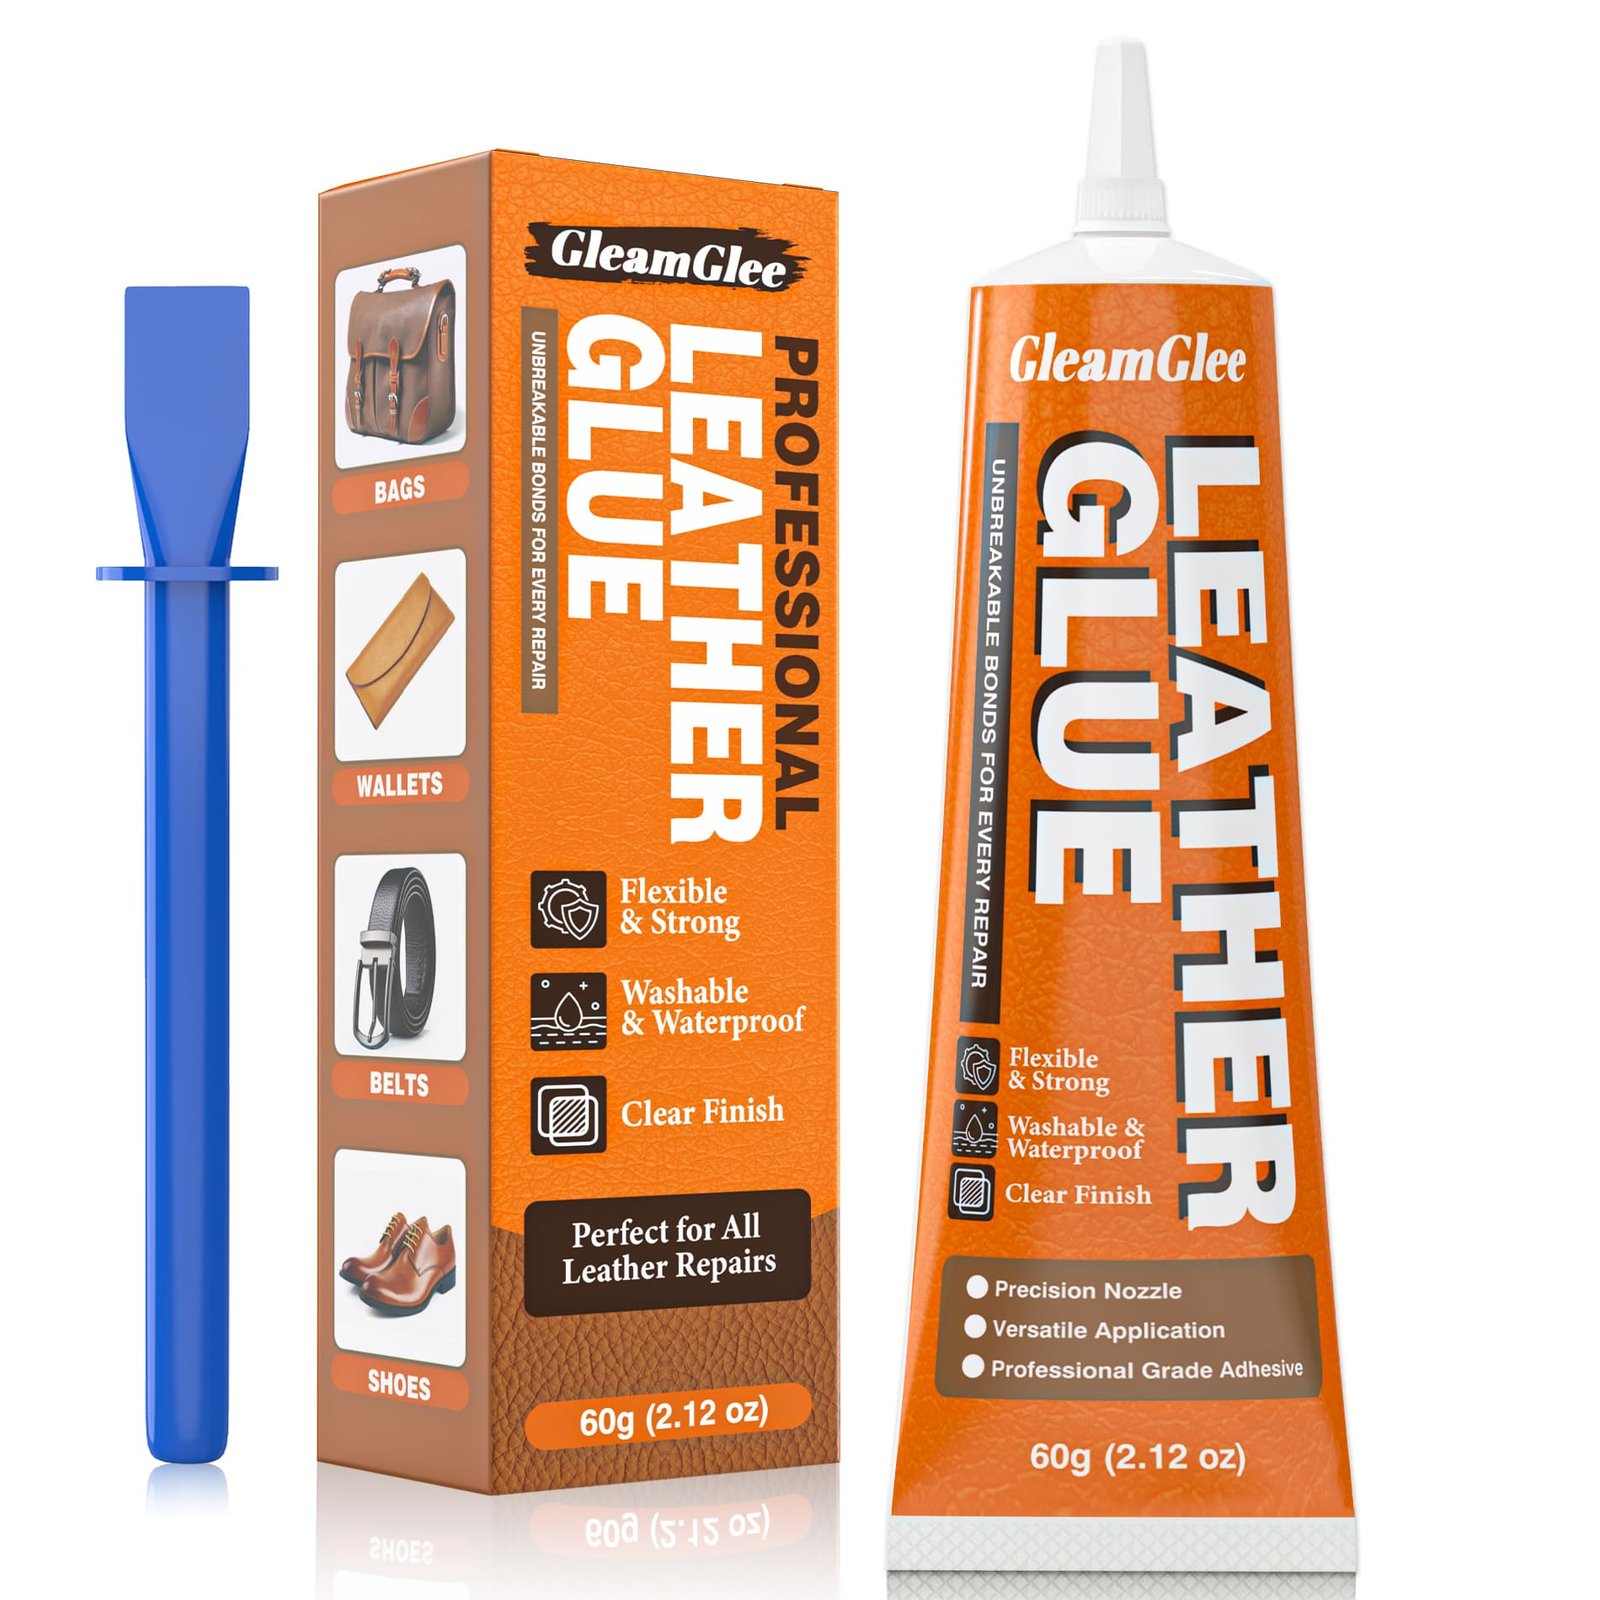
GleamGlee Leather Glue is made for crafters who need clean placement, steady bonding and a finish suited for visible leather work.
- 60ml / 2.1 fl oz clear liquid adhesive for repeated small craft jobs.
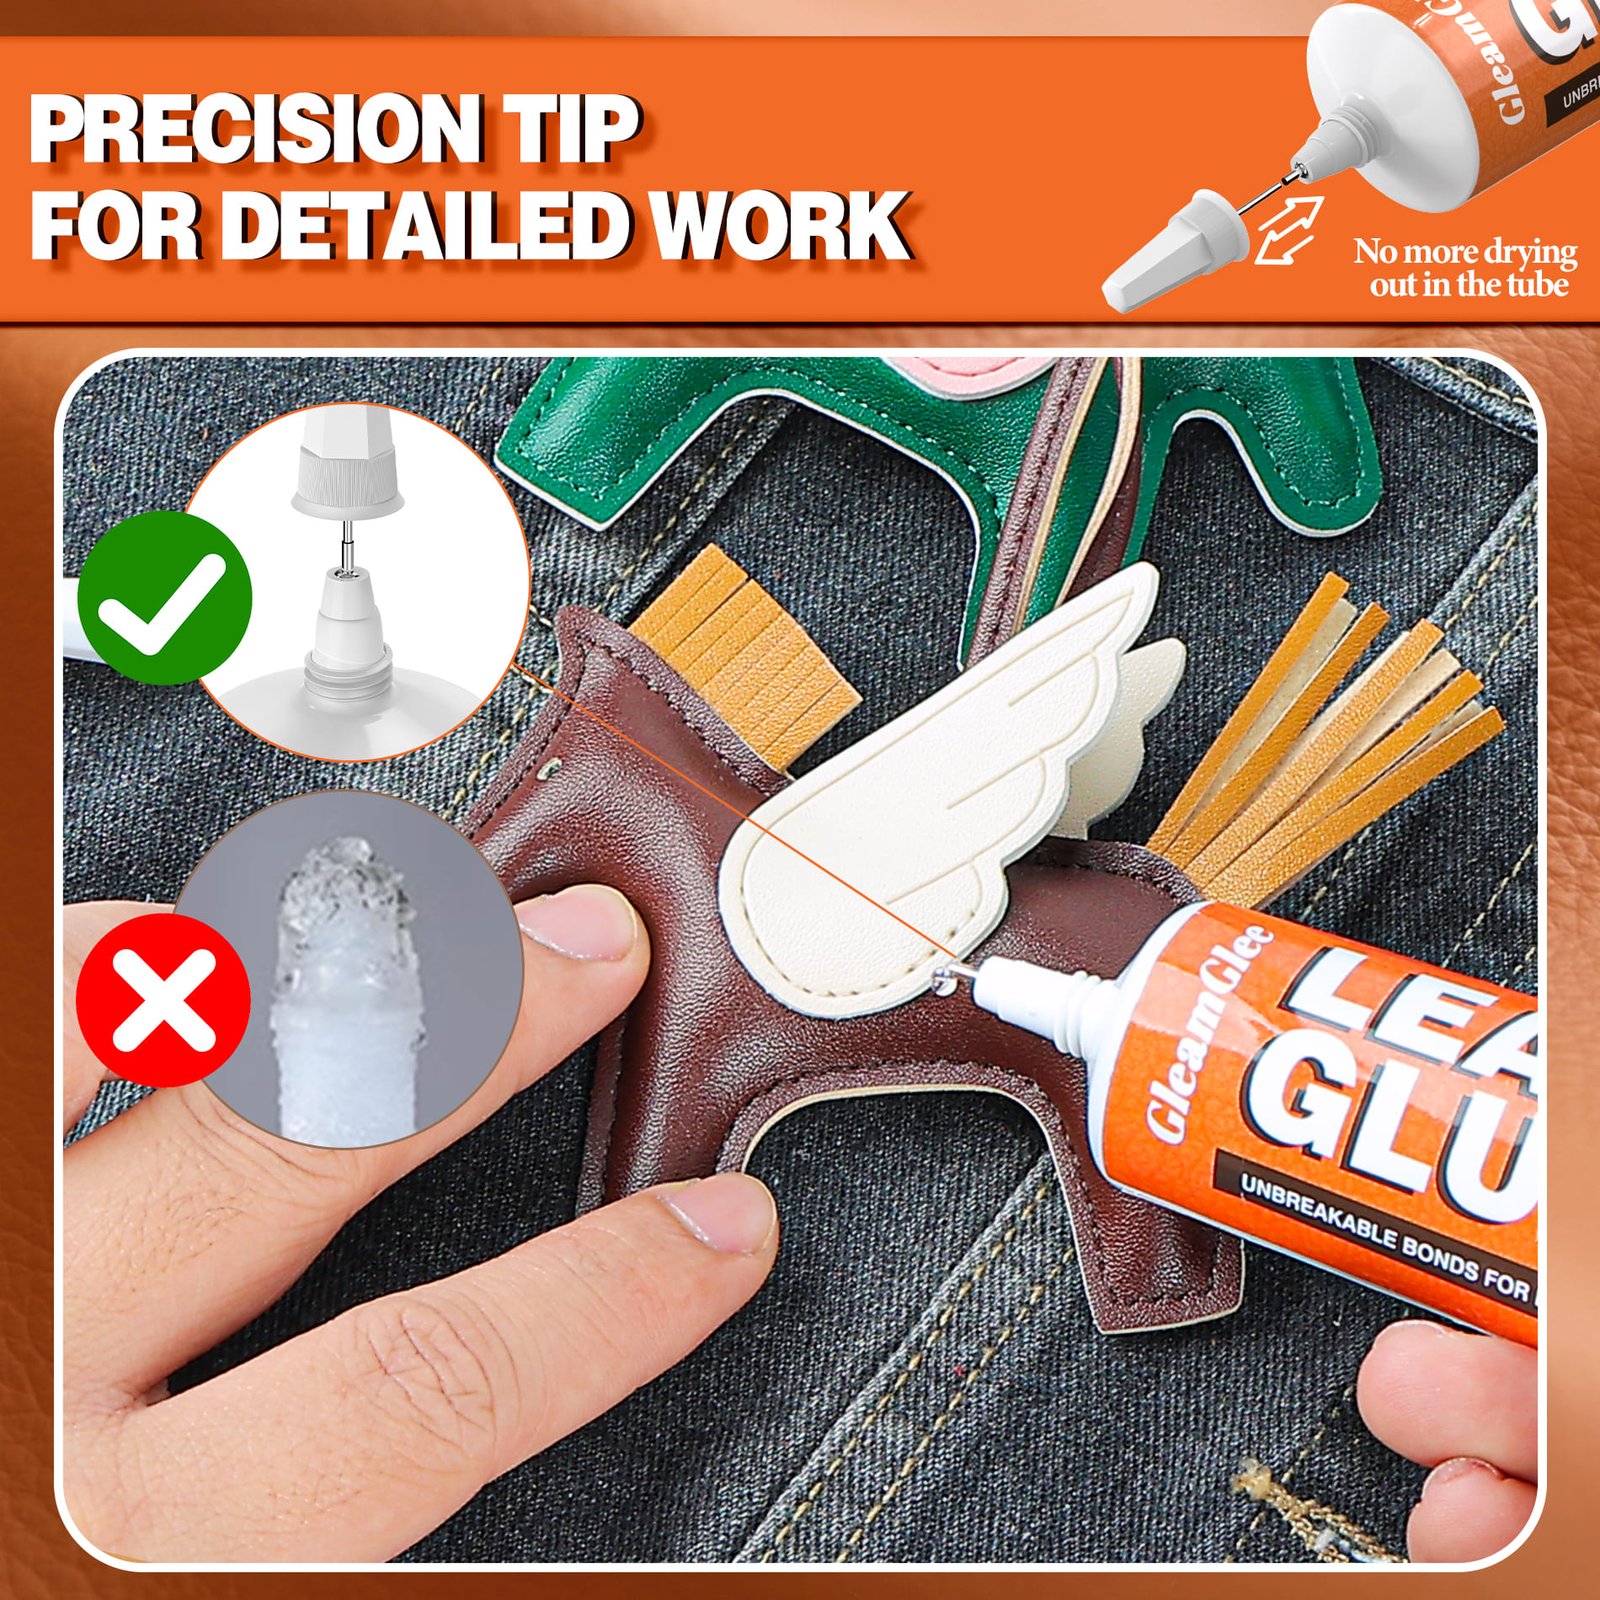
- Fine-tip nozzles help place glue into wallet edges, bag corners, seams and trim gaps.
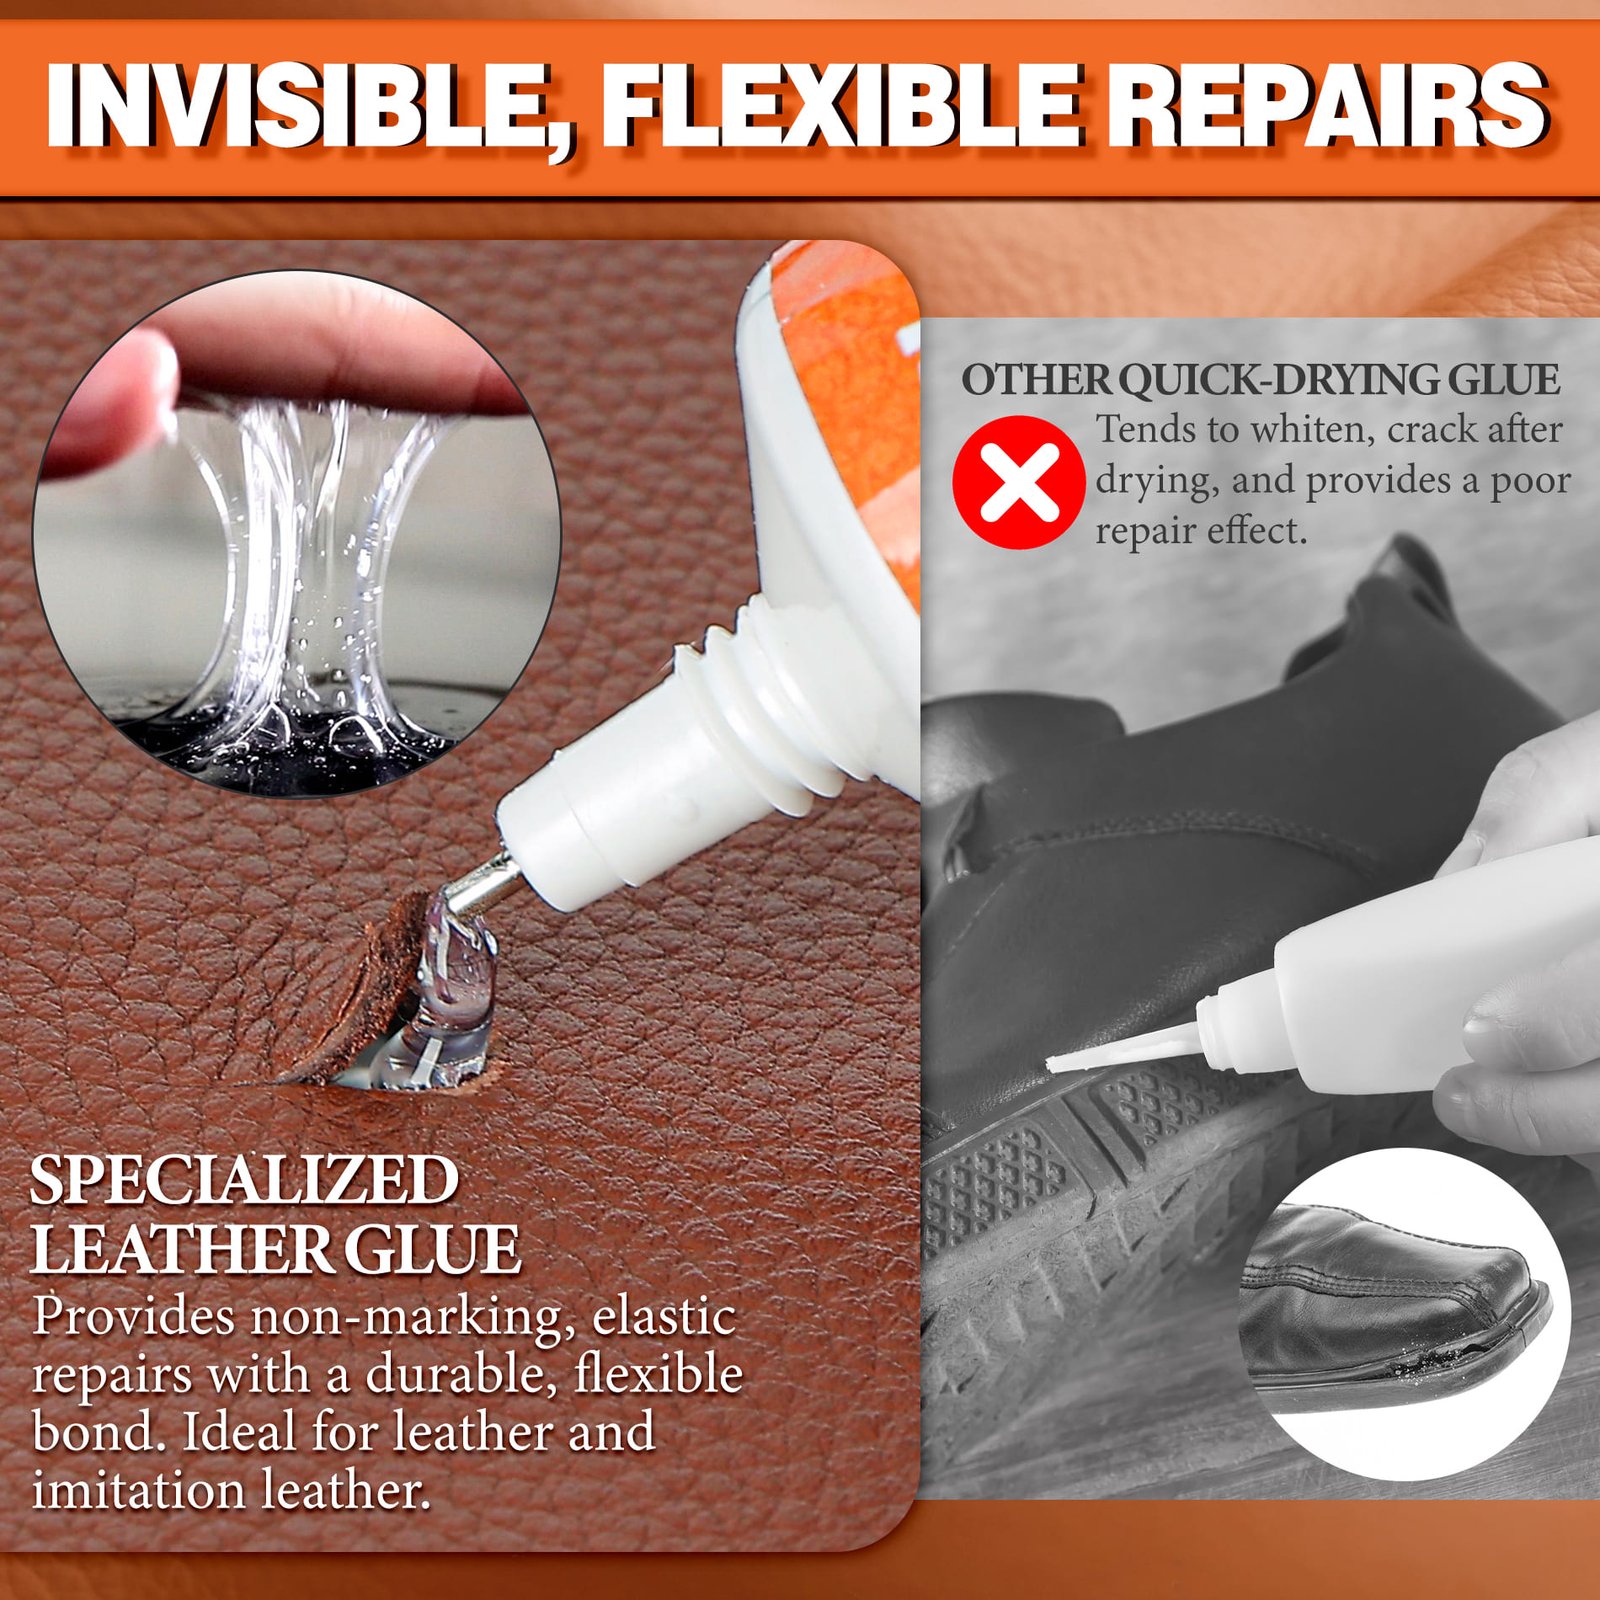
- Flexible, waterproof bond after curing suits leather, faux leather and vinyl projects.

Trusted Leather Glue Available on Amazon
Amazon shoppers can review rating, purchase activity, delivery details and return options before ordering GleamGlee Leather Glue.
Amazon Listing Signals
Amazon listing information currently shows 4.4 out of 5 stars, 219 ratings, Amazon’s Choice status and 300+ bought in the past month. For a craft adhesive used on visible pieces, those signals help reduce doubt before a wallet, bag corner or leather patch project begins.
Purchase Convenience
The listing shows In Stock, sold by LINGWANG TECH and shipped from Amazon Fulfillment, with FREE Returns displayed. For U.S. shoppers, the buying path stays familiar: product details, reviews, shipping and return information are checked in one place before ordering.

Right Fit for Wallets, Bags and Accessories
Use GleamGlee when the repair or craft job needs clean placement, clear finish and controlled bonding on small leather parts.

Wallet Makers
Wallets and card holders have narrow edges, layered leather and visible seams. GleamGlee helps apply a thin glue line along card slots, folded edges, inner linings and small separated layers without flooding the surface. The clear finish suits black, brown, tan and colored leather when excess glue is wiped before curing. Use clips or a flat weight for aligned pressure.

Bag Repair Users
Handbags, purses and small travel bags often fail at corners, trims, handle wraps and strap layers. GleamGlee is useful for loose leather edging, peeling faux leather corners and narrow trim gaps because the nozzle reaches under lifted areas. For expensive designer bags or delicate finishes, test on a hidden area first.

Accessory Crafters
Keychains, bracelets, bookmarks, leather labels, patches and costume details need a glue line small enough for clean craft work. GleamGlee supports leather-to-leather and many leather-to-vinyl craft jobs. Press pieces together while aligned and allow full curing before bending or wearing any accessory.
GleamGlee Leather Glue Product Facts
Key product details help match the adhesive to wallets, bag trims, patches, vinyl accents and small leather craft jobs.
| Product Detail | GleamGlee Leather Glue Information |
|---|---|
| Brand | GleamGlee |
| Product Name | GleamGlee Leather Glue |
| Capacity | 60ml / 2.1 fl oz |
| Color | Clear / transparent finish |
| Form | Liquid adhesive in tube packaging |
| Main Materials | Leather and vinyl as core materials |
| Added Materials | Faux leather, PU leather, fabric, rubber and plastic in suitable small projects |
| Key Features | Extra strong, waterproof, flexible, fast-drying |
| Applicator | Fine-tip nozzles for cracks, seams, corners and peeling edges |
| Best Craft Uses | Wallets, bags, card holders, patches, trims and accessories |
| Purchase Path | Available on Amazon, ASIN B0FCRTMFGJ |
Why Leather Crafts Need the Right Glue
Craft pieces are small, visible and often flexible, so glue choice affects appearance, handling and long-term use.
Craft Work Needs Clean Control
Wallet edges, card pockets, bag corners and leather patches leave little room for thick glue. A wide bottle opening may place too much adhesive, causing squeeze-out along seams or darkened spots on pale leather. GleamGlee’s fine-tip nozzles help guide glue into tight gaps and under lifted layers. Start with a thin line, spread only where bonding is needed, then wipe any excess before curing.
Finished Pieces Need Movement
Leather craft items are handled, opened, carried and worn. Wallets fold several times per day, purse straps move under weight, bracelets bend around the wrist and bag trims rub against clothing. A rigid glue layer can make the bonded area feel unnatural. GleamGlee is positioned as a flexible leather adhesive, helping the bonded area move more naturally after the repair has fully cured.

DIY Leather Craft Project Ideas
Use one 60ml tube across many small leather jobs, from simple trim bonding to accessory customization.
| Craft Project | Common Glue Need | How GleamGlee Helps | Use Note |
|---|---|---|---|
| Wallets | Edge layers and card slots | Places a thin glue line along narrow seams | Clip flat until set |
| Card Holders | Small folded panels | Bonds leather layers without bulky glue | Use light pressure |
| Handbags | Loose trims and corners | Reaches under lifted leather or vinyl edges | Test hidden area first |
| Purse Straps | Split wraps and peeling layers | Flexible bond supports daily movement | Cure before carrying weight |
| Bag Corners | Peeling faux leather or vinyl | Clear finish supports cleaner visible repair | Remove loose flakes first |
| Keychains | Small leather layers | Controlled drops suit small parts | Press between flat surfaces |
| Bracelets | Curved wearable parts | Flexible bond suits gentle bending | Cure before wearing |
| Leather Patches | Patch edges and labels | Helps attach decorative or repair patches | Use thin even coverage |
| Decorative Trims | Narrow strips and accents | Nozzle supports line placement | Avoid over-application |
| Linings | Leather to fabric edges | Helps bond suitable lining edges | Keep surfaces dry |
Six Benefits for DIY Leather Crafters
GleamGlee focuses on the craft details people notice: edge neatness, movement, finish, moisture resistance and easy handling.
Fine-Tip Control
The included fine-tip nozzles are useful when glue must enter a wallet edge, purse corner, trim gap, seam or small crack. Instead of spreading glue across a large surface, crafters can place a controlled amount where bonding is needed. For better results, touch the nozzle to the inner gap, apply a thin line, then press both surfaces together. Small placement control is especially helpful on colored leather and visible bag details.
Clear Finish
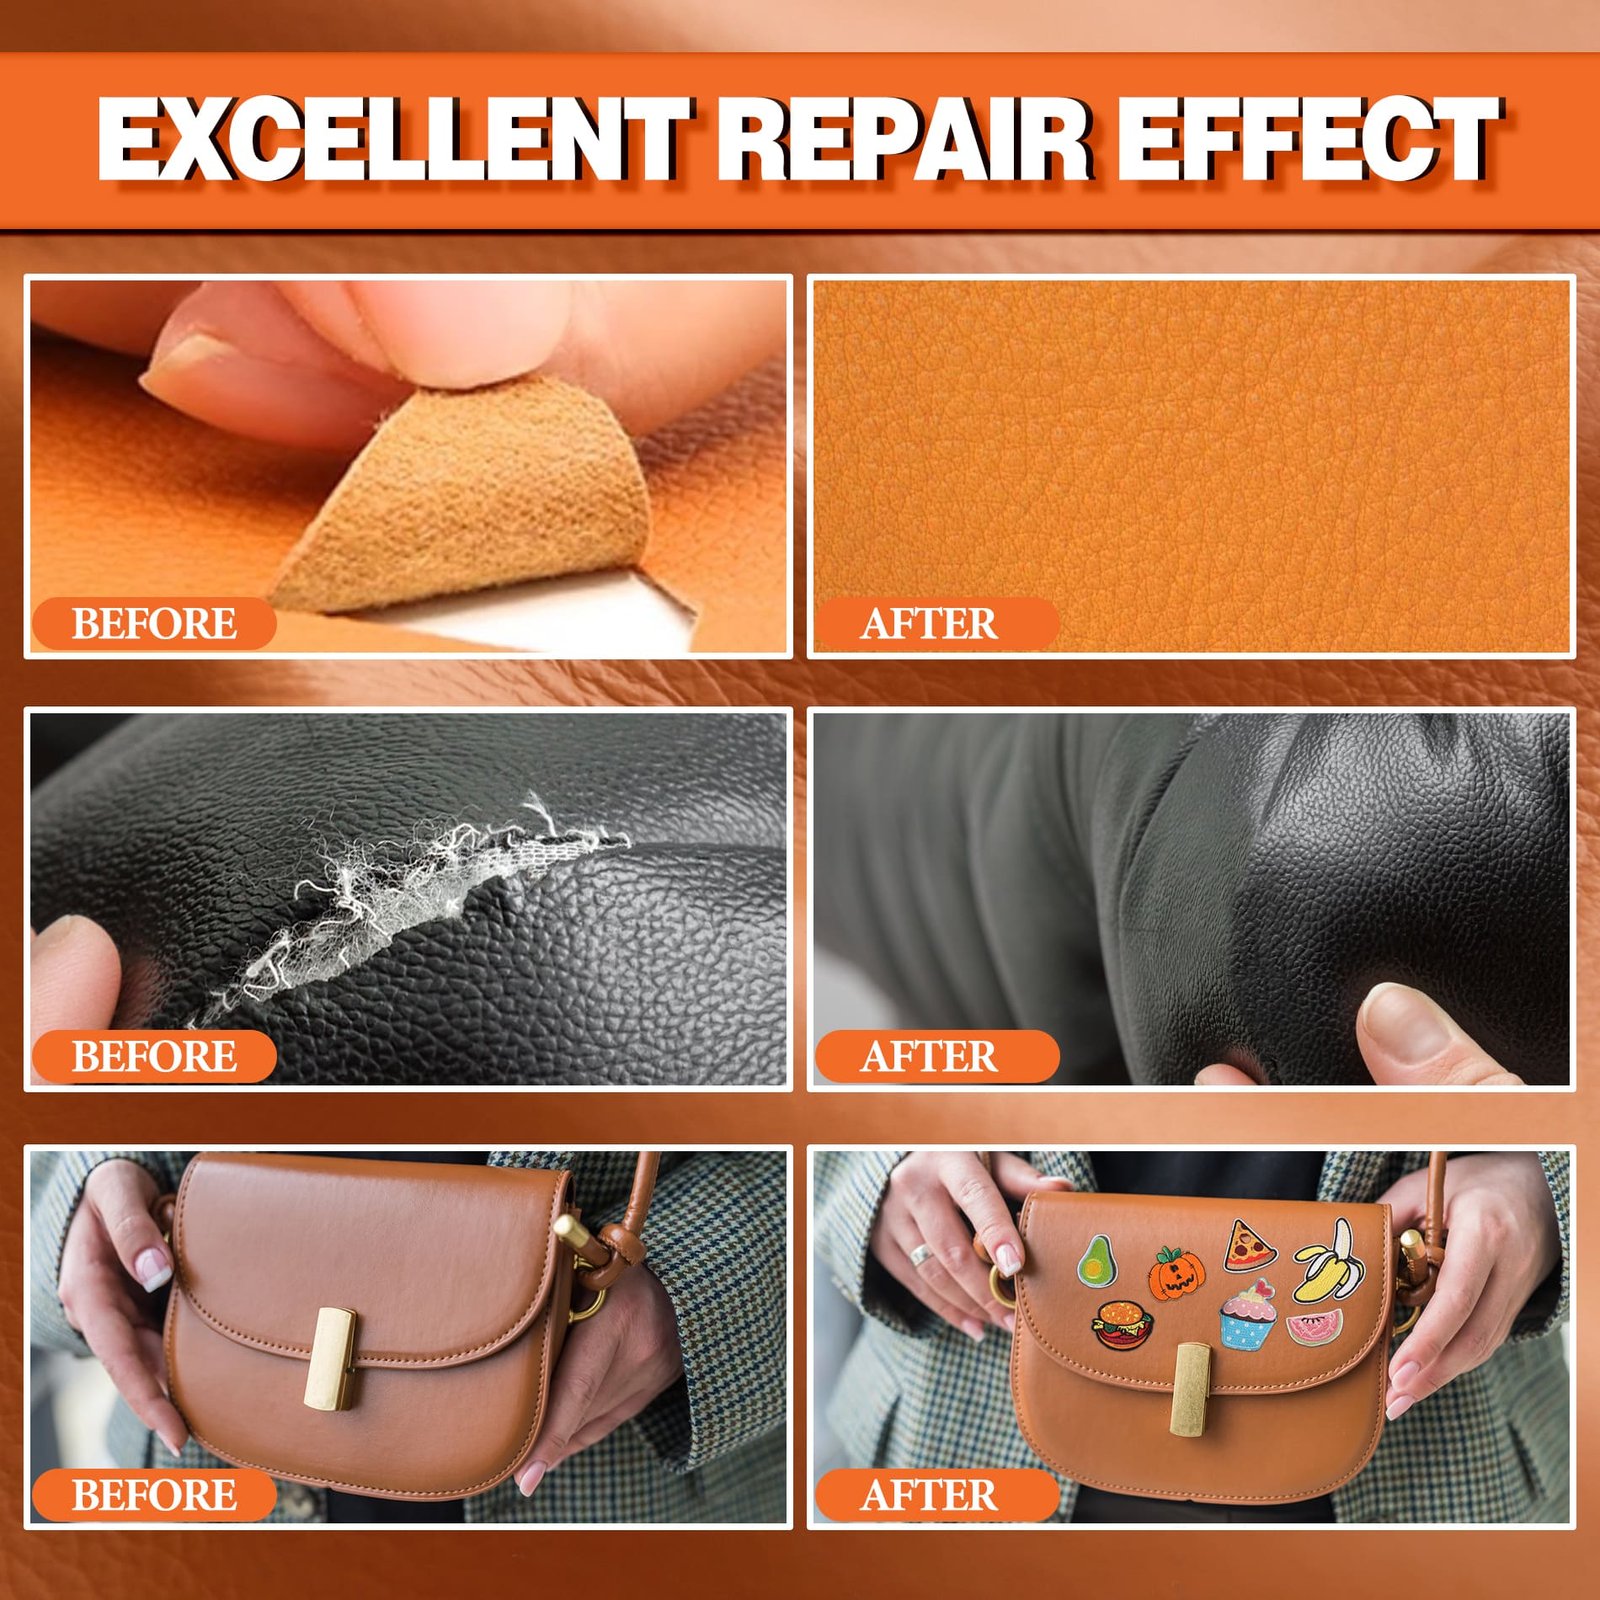
Many leather craft pieces are made to be seen, not hidden inside a repair. GleamGlee dries clear, helping repairs look cleaner on wallets, bags, patches and accessories. Clear drying does not remove the need for careful use. Apply a small amount, avoid thick ridges and clean extra glue before curing. The result is a neater visible bond on black, brown, tan or colored leather surfaces.
Flexible Bond
Wallets fold, straps bend and bracelets move. GleamGlee is designed as a flexible adhesive for leather and vinyl repairs, helping the bonded area handle everyday movement after curing. Flexible bonding is useful for layered leather, faux leather corners, purse strap wraps and accessory pieces. Allow full curing time before bending the project hard, carrying weight or wearing a curved accessory.
Waterproof Hold
After curing, GleamGlee creates a waterproof bond suitable for normal moisture exposure. Bags may face humidity, wallets meet hand contact, accessories may meet light sweat and leather trims may be wiped during cleaning. For best performance, keep the glued area dry until fully cured. Waterproof hold should be understood as everyday moisture resistance, not unlimited soaking or underwater use.
Fast-Drying Formula
Fast-drying behavior helps the project hold position sooner, which matters when aligning wallet layers, trims and small patches. It reduces slipping while a clip, tape strip or flat weight keeps pressure on the glued area. Fast drying is not the same as full cure. For stress points, straps and folded items, allow extended curing before normal use.
60ml Craft Size
A 60ml / 2.1 fl oz tube gives enough adhesive for repeated small jobs around a craft bench. One tube can support wallet edges, card slots, bag corners, patch attachment, leather labels and accessory repairs over multiple sessions. Tube packaging also stores easily beside clips, cutting tools and leather scraps, making it useful for ongoing DIY work.
Fine-Tip Nozzles for Narrow Leather Details
Precision matters most when the project is small, visible or shaped around tight seams.
Better Placement Around Edges
Leather wallets, card holders and small accessories often fail along edges where a normal bottle opening is too wide. GleamGlee’s fine-tip nozzles help guide adhesive into narrow folds, layered corners and lifted trims. The goal is not to flood the surface. A clean line along the inside edge gives better control, limits squeeze-out and makes alignment easier before pressing. Crafters can use toothpicks, mini spreaders or the nozzle tip for small adjustments before the glue starts setting.
Cleaner Work on Bags
Bag corners and purse trims are high-visibility areas. A large drop of glue can leave a shiny ridge, especially on dark or smooth faux leather. Fine-tip application helps put glue under a peeling layer instead of on top of the visible face. After pressing, wipe extra glue from the edge before curing. Use painter’s tape nearby when working close to fabric lining, metal hardware or decorative stitching.

Leather Glue vs Other Craft Adhesives
Different adhesives serve different jobs. Pick by material, visible finish, flexibility and application control.
| Adhesive Type | Best For | Strengths | Watchouts |
|---|---|---|---|
| GleamGlee Leather Glue | Small leather and vinyl craft repairs | Clear, flexible, waterproof after curing, fine-tip placement | Not meant for heavy structural load alone |
| Contact Cement | Larger leather panels and professional bonding | Strong instant grab after proper tack time | Requires careful alignment, ventilation and surface coverage |
| Craft Glue | Light paper, felt, beads or simple decor | Easy for casual craft projects | May dry too soft or weak for moving leather parts |
| Fabric Glue | Fabric patches, linings and textiles | Good on porous textile surfaces | Not always ideal for smooth leather or vinyl faces |
| Multi-Purpose Glue | Mixed material decoration | Bonds many surfaces including metal or plastic | May feel bulky or less leather-specific |
Wallets and Card Holders Made Cleaner
Small leather goods need thin glue lines, even pressure and a finish suited for close-up inspection.
Wallet Edge Bonding
Wallets and card holders are built from stacked layers. Edges can separate near fold lines, card slots or corners after daily pocket use. GleamGlee helps apply a narrow glue line into separated layers without soaking the whole panel. Clean dust and oil first, apply a small amount, align the edge and press flat with clips or a weighted book. Let the bond cure before filling card slots or folding the wallet hard.
Card Slot Reinforcement
Card slots need clean control because the repair sits close to fingers and cards. Thick glue can squeeze into the slot and make insertion difficult. Use the nozzle to place adhesive only along the loose seam, then slide a thin protective card wrapped in wax paper inside the slot while pressing. The clear finish helps keep the repair neat, while flexible bonding supports repeated opening and closing after curing.


Bags, Purse Straps and Corners
Bag repairs need clean appearance, flexible bonding and cautious handling around high-contact areas.
Bag Corners and Trims
Corners, piping and decorative trims often lift first because they rub against tables, clothing and hands. GleamGlee helps place glue beneath loose leather, faux leather or vinyl edges without coating the outer face. Trim away loose flakes, clean the area, apply a thin line and press the corner back into shape. For smooth faux leather, extra cleaning and pressure improve contact. Test first on a hidden spot for delicate finishes.
Purse Strap Layers
Purse straps and handle wraps move under weight. GleamGlee can help bond small split layers, loose wraps and peeling leather accents when the strap is still structurally sound. Apply glue inside the split, align the layers and secure with clips, rubber bands or soft tape. Allow full curing before carrying weight. If the strap is torn through, cracked across a load-bearing point or attached near hardware failure, professional repair or replacement is safer.
Accessories, Patches and Decorative Trims
Small leather projects reward careful glue placement and patient curing more than heavy coating.
Leather Accessories
Keychains, bookmarks, bracelets, tags and small cases often use tiny leather pieces where glue marks are easy to see. GleamGlee supports clean placement along strips, loops and layered shapes. Use dots or thin lines rather than broad puddles. For curved accessories such as bracelets, shape and clamp gently, then wait until the bond has cured before wearing.
Patches and Labels
Leather patches, brand labels, costume accents and decorative panels often need an adhesive before sewing or as a no-sew hold for low-stress areas. GleamGlee can help position patches on leather, vinyl or suitable fabric bases. For larger patches, apply a thin perimeter line plus small inner dots instead of covering the entire back heavily. Press from the center outward to avoid trapped air and raised glue ridges.
Material Compatibility for Craft Projects
Leather craft pieces often combine smooth, porous and coated materials, so testing and preparation matter.
Leather, Faux Leather and Vinyl
GleamGlee is best matched with leather and vinyl repairs. It can also support many faux leather and PU leather craft jobs, including wallets, bag corners, trims and decorative panels. Smooth coated surfaces should be dry and free from oil, wax and loose flakes before glue touches the project. On pale or delicate leather, test a hidden area and use a thin layer for cleaner results.
Fabric, Rubber and Plastic Details
Many craft projects mix leather with fabric linings, rubber accents or plastic backing pieces. GleamGlee can be used for suitable small mixed-material jobs, especially trim edges, lining repairs and decorative parts. Results may vary by coating, texture and flexibility. Rough, dusty or oily materials reduce bonding quality. Clean both sides, apply thinly, press firmly and avoid heavy stress until fully cured.
Leather to Fabric Bonding for Linings
Bag linings, patches and costume pieces often combine leather with textile layers.
Linings and Fabric Bases
Leather-to-fabric bonding appears in handbag linings, wallet interiors, jacket patches, craft appliques and canvas bag trims. Fabric can absorb adhesive differently from smooth leather, so glue placement should stay controlled. Apply a small amount to the leather side or along the edge, press the fabric into place and keep the layers flat while setting. Avoid saturating thin fabric because excess glue may bleed through or stiffen the area.
Patch and Trim Projects
When attaching leather patches or trims to fabric, plan the stress level first. Decorative patches, labels, costume details and low-stress trims are good candidates for adhesive placement. High-tension seams, load-bearing bag straps and safety gear need sewing, rivets or professional construction. GleamGlee can help position and reinforce many small leather-to-fabric craft areas, especially when used with pressure and enough curing time.

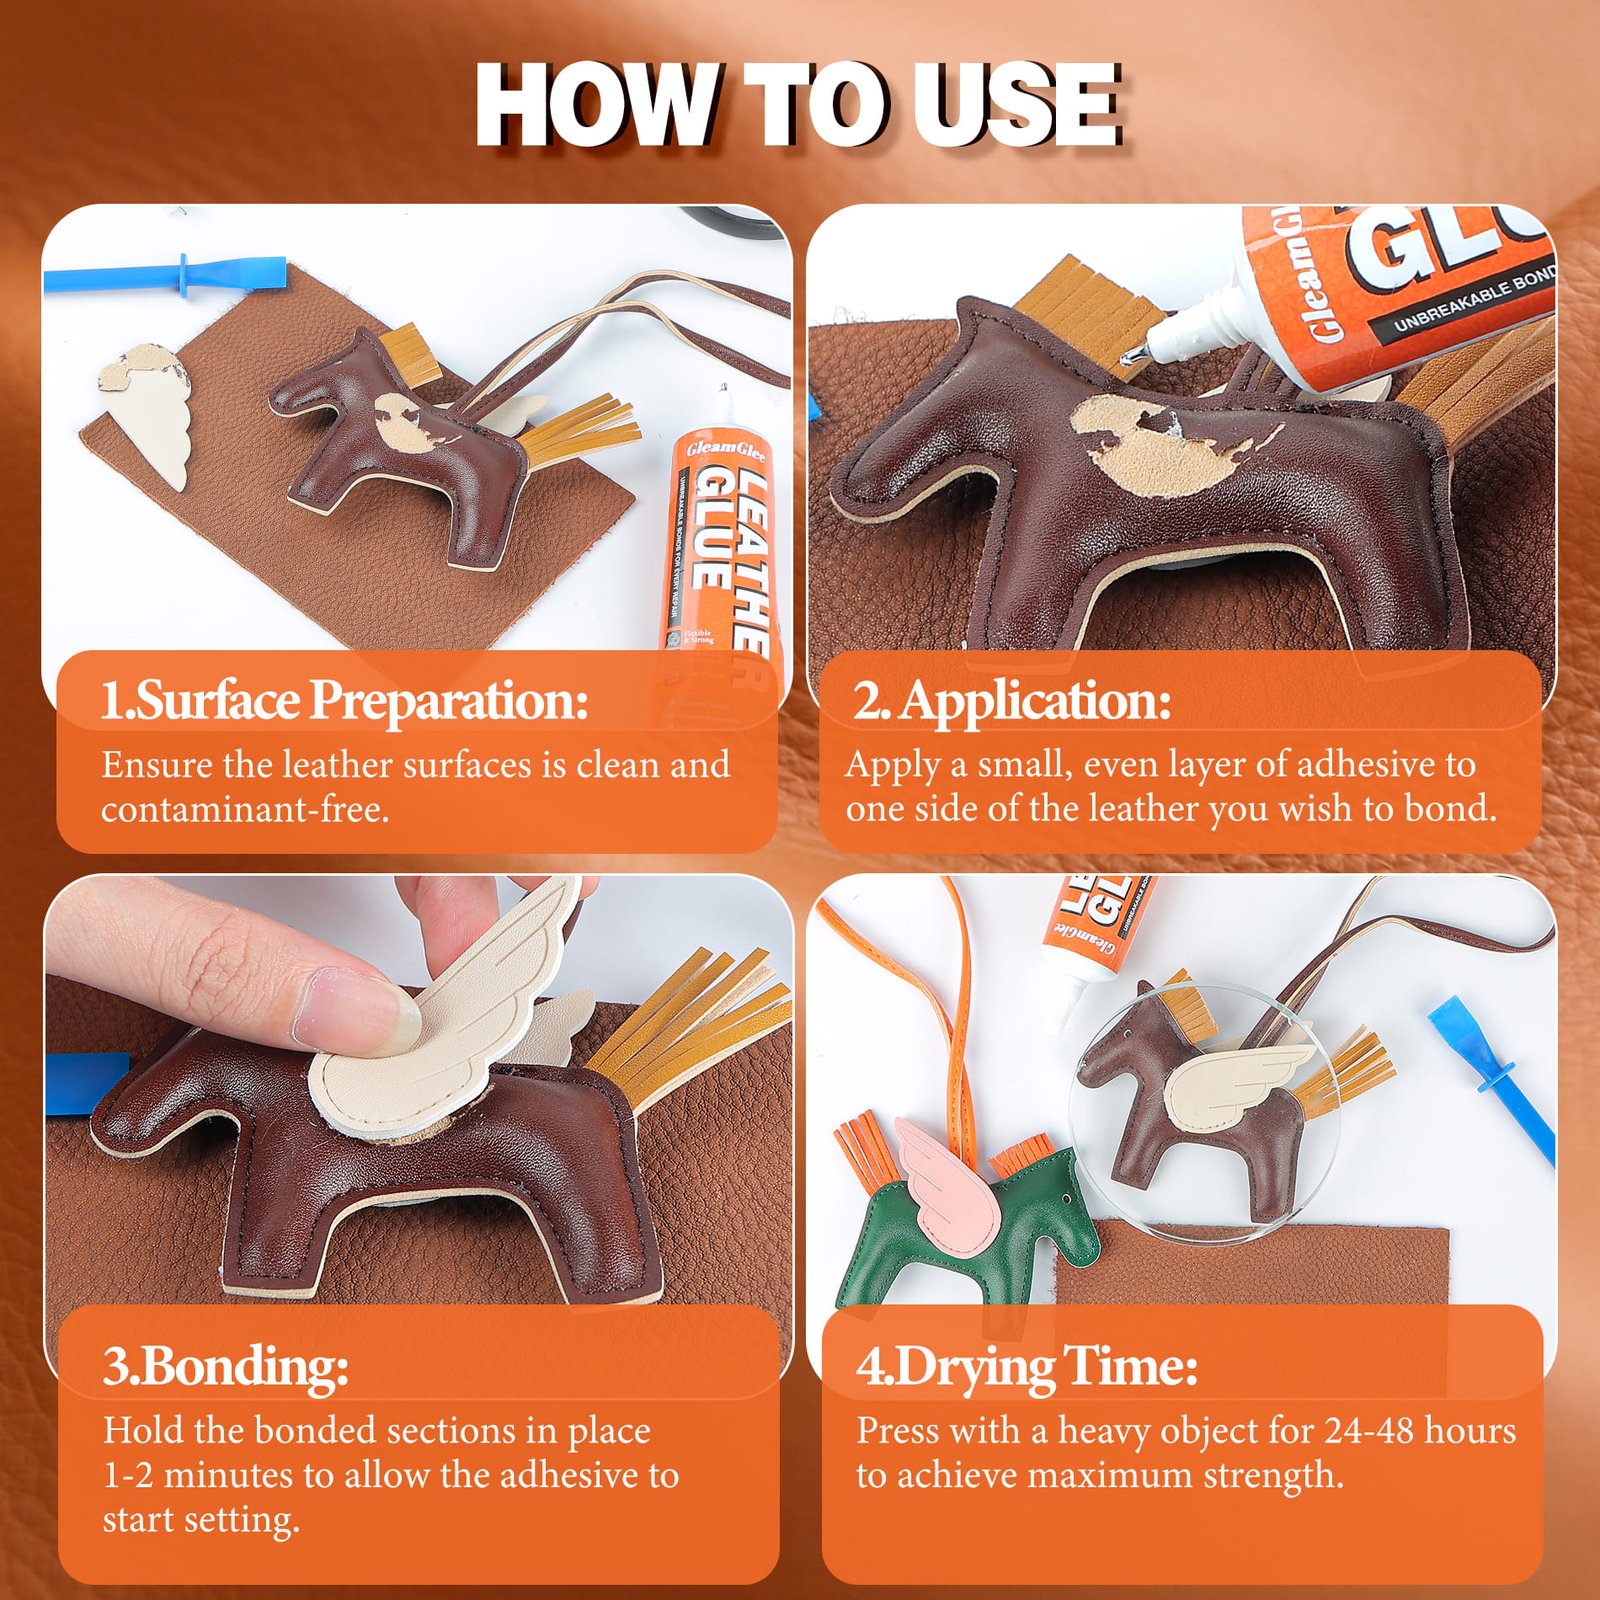
Four Steps for Clean Craft Repairs
A neat result starts before the glue touches leather: clean, apply, press and cure.

Step 1 - Clean
Remove dust, loose flakes, wax, oil, conditioner residue and fabric fibers from both bonding surfaces. Wallets may carry pocket lint, bag corners may have skin oil and faux leather may have peeling film. Use a dry cloth or suitable cleaner, then let the area dry fully. A stable, dry surface gives adhesive better contact and helps prevent weak spots under the glued layer.

Step 2 - Apply Thinly
Use the fine-tip nozzle to place a thin line inside the separated edge, seam or patch area. Less glue is often better on visible leather craft work. For a wider patch, use small dots or a thin perimeter line. Avoid heavy puddles. Excess glue can squeeze out, delay drying and leave raised edges. Add a small amount later if needed.

Step 3 - Press
Align both pieces before final pressure. Use clips, rubber bands, painter’s tape, wax paper, a flat weight or a small clamp depending on the item. For wallets and card holders, keep the edge flat. For bag corners, preserve the original shape. For straps, avoid twisting while the glue sets.

Step 4 - Cure
Fast-drying glue helps the project hold position, but full cure gives a more stable bond. Keep the repair dry and avoid bending, loading, wearing or pulling until enough curing time has passed. For purse straps, bracelets and folded wallets, waiting longer helps protect the work from early movement stress.
Thin Layer Rule for Visible Leather Work
Heavy glue rarely improves a small craft repair. Thin, even placement usually creates a cleaner result.
Why Less Glue Works Better
Wallet edges, bag corners and leather trims are small bonding areas. Too much glue can create shiny ridges, thick seams, slow drying and visible squeeze-out. A thin layer gives both surfaces contact while keeping the repair cleaner. GleamGlee’s fine-tip nozzles help apply adhesive in a narrow path instead of a wide smear. Start with a modest amount, press the pieces together and check for overflow before curing.
How to Control Excess Glue
Keep a clean cloth, cotton swab or small scraper nearby before applying glue. If extra glue appears at the edge after pressing, remove it while still wet. Work in short sections on wallet edges, curved trims or strap wraps. On light leather, mask nearby surfaces with low-tack tape. For delicate leather goods, test hidden areas first and avoid thick coating near visible grain.
Fast-Drying Start, Full-Cure Strength
Fast setting helps alignment, while full curing helps the bond handle movement and use.
Fast-Drying Helps Positioning
Fast-drying adhesive is helpful when small leather pieces slide during assembly. Wallet corners, card slots, trim strips and patches need enough early hold to stay aligned while clips or weights do the rest. GleamGlee helps the repair begin setting without complicated mixing. During early setup, keep surfaces pressed together and avoid checking the bond too often, because repeated lifting can weaken contact.
Full Cure Helps Durability
Full cure is more important for items under bending, friction or weight. Wallets fold, purse straps pull, bracelets curve and bag corners rub during daily use. Let the glue cure before placing cards, carrying the bag or wearing an accessory. Moisture exposure should also wait until curing is complete. Better curing habits reduce edge lift, tacky residue and early separation.
Common Leather Craft Glue Mistakes
Avoid a few common errors and the finished wallet, bag or accessory will look cleaner.
Skipping Surface Prep
Dust, oils, leather conditioner and loose faux leather film can block the adhesive from reaching stable material. Before applying glue, clean both surfaces and remove unstable flakes. A few extra minutes of preparation can make the difference between a clean bond and a repair lifting again after first use.
Applying Too Much
Large drops may seem stronger, but thick glue can squeeze out, cure slowly and leave a raised ridge. For visible craft work, apply a thin line first. The fine-tip nozzle helps reduce waste and mess on corners, slots and trims.
Moving Too Soon
Many repairs fail because the item is bent, carried or worn before curing. Leave wallets open and flat, keep bag straps unloaded and wait before placing pressure on patches or accessories. Fast setting helps alignment; full cure helps with use.
Ignoring Material Differences
Genuine leather, PU leather, vinyl, fabric and plastic do not behave the same. Smooth coated surfaces need cleaning and pressure. Porous fabric may absorb glue. Delicate leather may need hidden testing before visible work begins.
Frequently Asked Questions
Answers below cover wallets, bags, accessories, materials, curing, visible repairs and safe use limits.
1. Can I use GleamGlee Leather Glue for wallets?
Yes. It works well for wallet edges, card slot seams, small separated layers and leather trims. Clean the area, apply a thin line, press flat and let the bond cure before folding or loading the wallet with cards.
2. Does it dry clear on leather crafts?
GleamGlee dries clear, helping visible repairs look cleaner on wallets, bags, patches and small accessories. Clear drying still needs careful application. Use a small amount and wipe extra glue before curing.
3. Is it flexible after drying?
It is designed as a flexible leather adhesive. That matters for wallets, straps, bracelets and bag trims because those parts bend or move during use. Allow full cure before heavy bending.
4. Can it repair purse straps?
It can help with small split layers, loose wraps and peeling strap accents when the strap remains structurally sound. Torn load-bearing areas near hardware may need sewing, rivets or professional repair.
5. Can it bond leather to fabric?
It can support suitable leather-to-fabric craft jobs such as linings, patches and trims. Avoid saturating thin fabric. Press firmly and let the project cure before pulling or wearing.
6. Is it better than contact cement?
For small visible repairs, GleamGlee is easier to place with fine-tip control. Contact cement is often preferred for large leather panels and professional construction, but it requires more careful alignment and handling.
7. Can I use it on faux leather or vinyl?
Yes, it is suitable for many faux leather and vinyl repair projects. Remove loose flakes, clean smooth surfaces and apply a thin layer under peeling edges or trims.
8. How long should I wait before using the item?
Wait until the repair has fully cured before folding wallets, carrying bags or wearing accessories. Stress points need more patience than decorative pieces.
9. Will it work on luxury bags?
Use caution. For expensive or delicate bags, test on a hidden spot first or consult a professional repair service. GleamGlee is better suited for everyday handbags, trims and small visible repairs.
10. How do I clean excess glue?
Wipe extra glue before it cures using a clean cloth, cotton swab or small scraper. Work in small sections and protect nearby leather with low-tack tape when needed.
Need Glue for Craft Kits or Retail Projects?
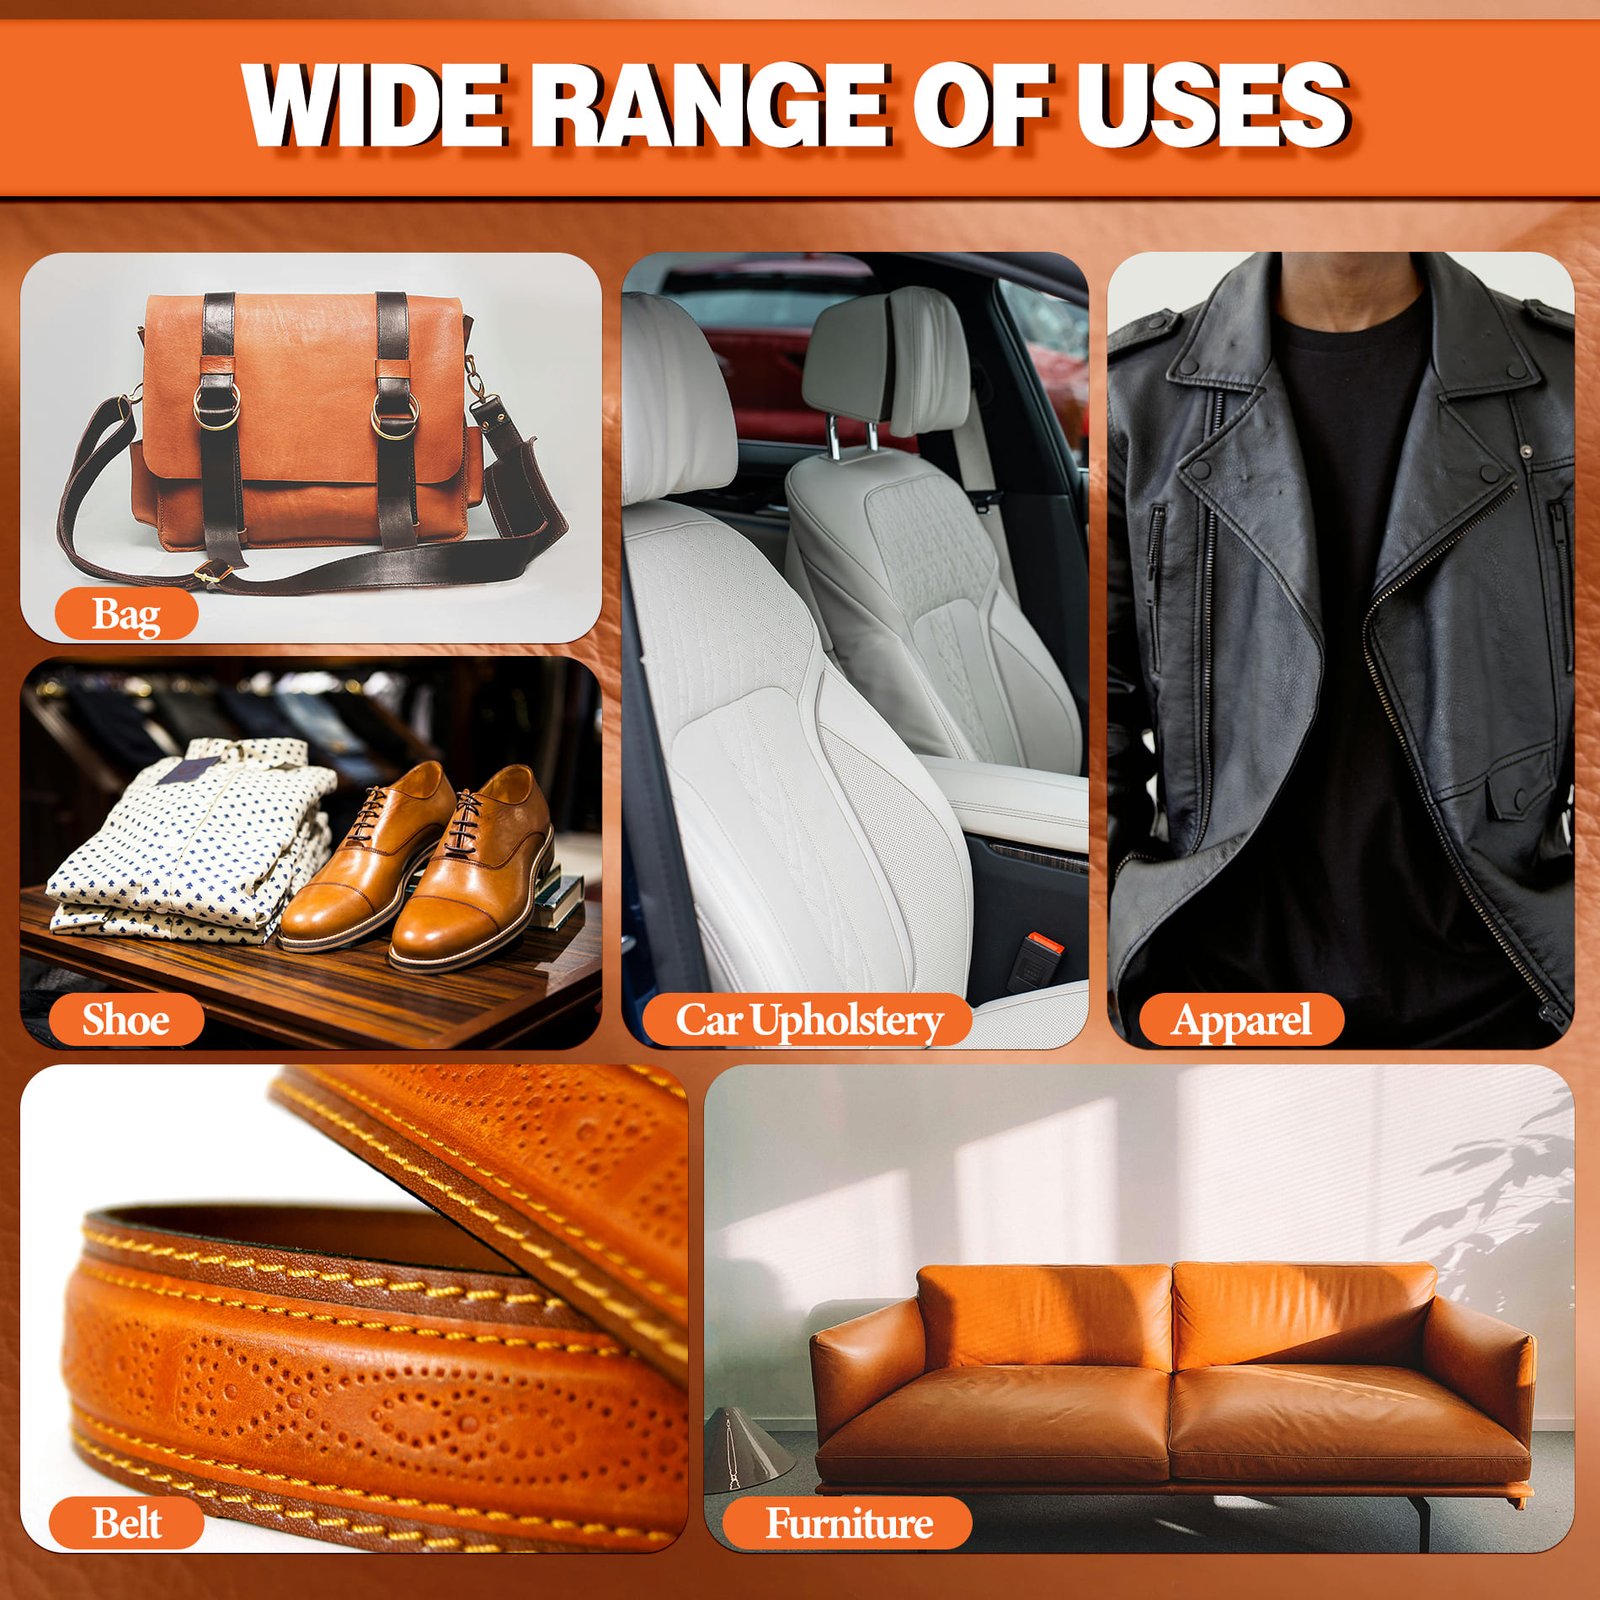
A clean repair comes from the right method and the right glue. Clean the surface, use a thin layer, apply with control, press the repair flat, and let it cure before daily use. For shoes, bags, sofas, jackets, car seats, wallets, belts, and vinyl trims, GleamGlee Leather Glue gives home users a clear, flexible, waterproof, fast-drying repair option in a 60ml tube.
Use it for small tears, peeling edges, loose trims, seams, corners, and backing patches where a clean glue line matters. Avoid heavy over-application and do not expect glue alone to replace missing leather or rebuild severe structural damage.





















