 Skip to content
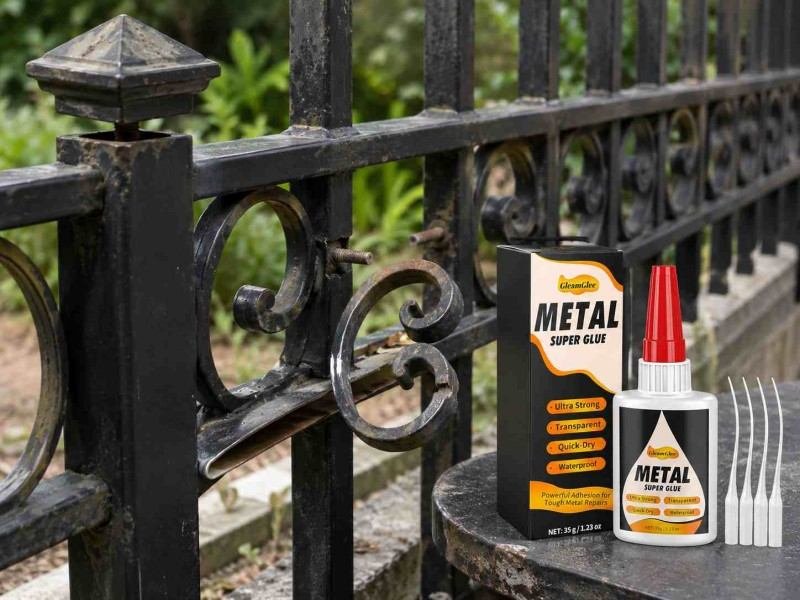
A tiny broken metal part can be more annoying than a large repair. A loose watch clasp, a cracked metal photo frame, a detached appliance trim, a broken eyeglass nose piece, or a small metal handle often looks too minor for professional repair but too useful to throw away. This is where metal glue becomes practical. It helps repair small metal parts quickly, especially when screws, welding, soldering, or replacement parts are not convenient. The real value is not only strength. It is control. A tiny repair needs the glue to go exactly where it belongs, dry cleanly, and hold the parts without creating a bulky mess. That is why surface cleaning, thin application, firm pressing, and full curing matter so much.
Metal glue is used for tiny repairs by cleaning and drying the metal, lightly roughening smooth surfaces when needed, applying a thin layer of glue, pressing the parts together for 5–10 seconds, wiping excess glue, and allowing enough curing time before use. It works best on small, close-fitting, non-structural metal repairs.
Most failed metal glue repairs do not fail because the glue is “not strong.” They fail because the surface was oily, the glue layer was too thick, the parts moved too soon, or the repair was used for the wrong job. A bracelet clasp and a loose cabinet badge are good repair targets. A broken ladder rung, pressure pipe, or hot engine part is not. Once this difference is clear, metal glue becomes a simple and reliable repair tool for homes, workshops, craft tables, garages, and retail repair kits.
What Can Metal Glue Fix?
Metal glue can fix small metal parts that still fit closely together, especially when the repair area is light-duty, dry, clean, and easy to press. Good examples include jewelry clasps, metal trims, small tool parts, appliance edges, photo frames, candle holders, model parts, buckles, and mixed-material crafts. The best repair usually has a contact area of at least several millimeters, not just one sharp point.
A strong metal glue repair depends more on contact quality than glue quantity. If two broken surfaces touch tightly, a thin adhesive layer can form a cleaner and stronger bond. If there is a wide gap, missing metal, heavy pressure, repeated twisting, or direct heat, the repair becomes less suitable. In tiny repairs, using too much glue often creates a weaker result because the glue forms a thick layer instead of letting both surfaces sit close together.
For everyday use, metal glue is most practical on items that are annoying to replace but not dangerous if the repair fails. A loose bracelet clasp, detached appliance badge, small metal décor crack, or cabinet trim can often be repaired well. A cracked ladder step, brake part, pressure pipe, engine housing, or flame-exposed cookware area should not be repaired with ordinary small-repair metal glue.
| Repair Type | Suitable for Metal Glue | Better Repair Condition | Risk Level |
|---|---|---|---|
| Jewelry clasp | Yes | Clean, close-fitting, low weight | Low |
| Watchband detail | Yes | Small decorative or non-load part | Low |
| Appliance trim | Yes | Flat surface, no heat contact | Low |
| Metal photo frame | Yes | Decorative, easy to press | Low |
| Small tool cap | Sometimes | Low-force part only | Medium |
| Garden tool joint | Sometimes | No impact or heavy leverage | Medium |
| Pipe pinhole | Temporary only | Non-pressurized area | High |
| Cookware flame area | No | Direct heat exposure | High |
| Bicycle frame crack | No | Load-bearing and safety-related | High |
| Ladder or railing | No | Structural support required | High |
Metal Glue for Jewelry
Jewelry is one of the most suitable uses for metal glue because the repair area is usually small, detailed, and light in weight. A necklace clasp, bracelet end, brooch pin, charm, watchband decoration, or ring ornament often needs a tiny amount of adhesive placed exactly at the broken point. These repairs are usually not about filling a large gap. They are about reconnecting two small metal surfaces neatly without ruining the look of the piece. A clear-drying glue is important because jewelry sits close to skin and clothing, and any cloudy glue mark can be easy to notice. Precision nozzles also matter because one extra drop can spread across polished metal.
Best jewelry repair targets:
| Jewelry Part | Good Repair Method | Practical Tip |
|---|---|---|
| Necklace clasp | Tiny dot of glue | Hold with tweezers for better control |
| Bracelet link | Thin layer on contact point | Avoid wearing before full cure |
| Brooch pin | Small line along base | Press flat and support while curing |
| Watchband trim | Tiny dot or thin line | Keep glue away from moving joints |
| Metal charm | Dot inside hidden contact area | Wipe excess immediately |
Use metal glue on jewelry when:
- The broken parts still align neatly.
- The part is decorative or light-duty.
- The repair does not need to carry heavy pulling force.
- The surface can be cleaned before gluing.
- The item can rest flat during curing.
Avoid using metal glue on jewelry when the part is under constant tension, such as a thin chain that carries the full weight of a heavy pendant. For valuable jewelry, antique pieces, gemstones, or items with high resale value, professional repair may be safer. Metal glue works best as a practical home repair for everyday accessories, not as a replacement for soldering on high-value pieces.
Metal Glue for Small Tools
Metal glue can help repair small tool parts, but the repair must be chosen carefully. Tools face more stress than jewelry or décor because they are handled, pressed, twisted, dropped, and sometimes exposed to oil, water, dust, and outdoor conditions. Metal glue can work well on low-force tool parts such as loose handle caps, small casing covers, measuring tool ends, clamp pads, non-load brackets, garden tool labels, and light hardware pieces. It is not suitable for parts that take direct impact, cutting pressure, heavy leverage, or safety-related force. A screwdriver handle cap may be a reasonable repair. A cracked hammer head connection is not.
Useful tool repair examples:
| Tool Item | Suitable Area | Not Suitable Area |
|---|---|---|
| Screwdriver | Handle cap or small trim | Shaft or torque-bearing tip |
| Pliers | Grip trim or cover | Jaw, hinge, cutting edge |
| Hammer | Decorative or handle end cap | Head connection |
| Rake | Small label or cap | Main load joint |
| Clamp | Pad or cover | Main pressure arm |
| Tape measure | Metal end reinforcement | Spring-loaded inner mechanism |
For better tool repairs:
- Remove grease, soil, rust powder, and oil before gluing.
- Lightly roughen smooth metal contact surfaces.
- Apply a thin layer instead of filling the joint with glue.
- Press the parts firmly for 5–10 seconds.
- Leave the tool unused until the bond has cured.
The key question is how the repaired part will be used afterward. If it only needs to stay attached, metal glue may work well. If it needs to absorb striking, bending, twisting, or heavy pressure, the repair should use screws, replacement parts, welding, or a professional method. Tools are practical objects, so safety and function are more important than saving a few minutes.
Metal Glue for Home Décor
Home décor repairs are a strong fit for metal glue because many decorative items are light-duty and visually important. Metal photo frames, candle holders, curtain finials, display stands, small sculptures, cabinet badges, wall ornaments, lampshade frames, and decorative trays often break at small joints. In these cases, the repair needs to hold the item together and keep the surface looking clean. A visible yellow glue line or thick residue can make a repaired item look cheap, even if the bond is strong. Clear metal glue and a precision nozzle help keep the repair neat, especially on polished, painted, or mixed-material décor.
Common décor repairs:
| Home Décor Item | Repair Area | Best Method |
|---|---|---|
| Metal photo frame | Corner joint or backing tab | Thin line, tape while curing |
| Candle holder | Small broken leg or ring | Dot glue, support upright |
| Small sculpture | Detached detail | Fine nozzle into joint |
| Curtain finial | Loose metal end | Thin ring of glue |
| Decorative tray | Loose handle or trim | Clean, press, support |
| Wall ornament | Detached metal piece | Apply glue away from outer edge |
For cleaner décor repairs:
- Test the position before applying glue.
- Use tape to hold parts in place while curing.
- Apply glue slightly inside the edge to reduce squeeze-out.
- Remove fresh excess glue before it dries.
- Let the item rest longer if it stands upright or carries small weight.
Home décor often has uneven shapes, curved parts, and decorative coatings. If the broken surface is painted, remove only loose coating from the hidden bonding area. If the décor combines metal with glass, ceramic, wood, or plastic, use a minimal amount and test in a less visible area when possible. The best repair is one that holds securely without drawing attention to the glued spot.
Metal Glue Repair Limits
Metal glue is useful, but it has clear limits. It should not be used as a replacement for welding, soldering, bolts, clamps, pipe fittings, or professional structural repair. Small-repair metal glue is best for light-duty fixes where the parts fit closely and the repaired item is not exposed to dangerous force. If the repair must hold body weight, contain pressure, handle direct flame, support moving machinery, or protect people from injury, glue alone is not the right solution. This limit is not a weakness. It is the difference between a smart repair and a risky shortcut.
Repairs that should not rely on ordinary metal glue:
| Repair Area | Why It Is Risky | Better Choice |
|---|---|---|
| Ladder step | Carries body weight | Replace or professional repair |
| Bicycle frame | Load and vibration | Frame specialist |
| Brake part | Safety-critical | Mechanic replacement |
| Engine block | Heat and pressure | Industrial repair or replacement |
| Pressurized pipe | Water pressure risk | Pipe fitting or plumber |
| Cookware flame area | Direct heat exposure | Heat-rated part replacement |
| Heavy gate hinge | Load and movement | Bolts, welding, or bracket repair |
A simple safety check helps:
- If failure only makes the item look broken again, metal glue may be suitable.
- If failure could cause injury, leakage, fire, or equipment damage, do not rely on metal glue.
- If the item becomes very hot, carries heavy weight, or moves constantly, choose another repair method.
- If the break has a wide gap or missing metal, glue may need support from filler, screws, or a replacement part.
For tiny household repairs, metal glue can save money and reduce waste. For structural or high-risk repairs, the safer solution is a proper mechanical or professional repair.
How Should Metal Glue Start?
Metal glue should start with four steps: inspect the break, clean the surface, dry the metal fully, and test-fit the parts before applying glue. A tiny repair usually needs only 1–3 minutes of preparation, but that short prep time can decide whether the bond holds cleanly or fails after light use.
Metal is smooth and non-porous, so glue cannot soak in the way it does with fabric, paper, or raw wood. The bond depends on direct contact between the adhesive and the metal surface. If there is oil, dust, rust powder, water, old glue, wax, or loose paint in the way, the glue may attach to that weak layer instead of the real metal. This is why a necklace clasp, tool cap, appliance trim, or metal frame corner may fall off quickly when the surface is not prepared well.
Before opening the tube, place the parts together without glue. Check whether the broken edges touch closely, whether the angle looks right, and whether the item can stay still while curing. Prepare tweezers, tape, cotton swabs, fine sandpaper, a clean cloth, or a small clamp in advance. Once glue is applied, there is less time to adjust, so the repair should already be planned.
| Start Step | What to Check | Good Sign | Warning Sign |
|---|---|---|---|
| Inspect | Do the parts fit together? | Edges touch closely | Large gap or missing piece |
| Clean | Is the surface free from oil and dust? | Surface feels dry and clean | Greasy, waxy, rusty, dirty |
| Dry | Is all moisture gone? | No damp spots or trapped water | Wet seam or water in crack |
| Test-fit | Can the part stay aligned? | Holds position with light pressure | Slips, tilts, or rocks |
| Support | Can it rest while curing? | Tape or clamp can hold it | Must be held by hand only |
Metal Glue Needs Cleaning
Cleaning is the first real step in a metal glue repair because even a thin layer of oil can weaken the bond. Metal items often look clean while still carrying fingerprints, hand lotion, cooking grease, machine oil, polish residue, rust powder, or dust. Jewelry usually has skin oil and cosmetic residue. Tools may have grease, soil, or rust. Kitchen hardware may have cooking oil. Outdoor metal décor may have moisture, dirt, and oxidation. If glue is applied over these layers, the repair may feel strong at first but separate later because the adhesive is not bonded directly to the metal.
For small repairs, cleaning does not need to be complicated:
- Wipe the repair area with a clean dry cloth first.
- If the part feels greasy, use an alcohol wipe or suitable surface cleaner.
- Remove loose rust powder with fine sandpaper or a small brush.
- Scrape away loose paint only from the hidden bonding area.
- Do not touch the cleaned area repeatedly with bare fingers before gluing.
| Item Type | Common Surface Problem | Cleaning Focus |
|---|---|---|
| Jewelry | Skin oil, lotion, perfume | Wipe the exact contact point |
| Tools | Grease, soil, rust dust | Degrease and remove loose particles |
| Kitchen metal | Cooking oil, soap residue | Clean and dry longer |
| Appliance trim | Dust, fingerprints, cleaner residue | Wipe both surfaces |
| Outdoor décor | Dirt, oxidation, moisture | Brush, wipe, and dry fully |
A clean surface gives the glue more real contact area. For tiny repairs, every millimeter matters because the bonding area is already small.
Metal Glue Needs Grip
Smooth metal can be harder to bond because the surface gives the adhesive very little texture to hold. Stainless steel, aluminum, chrome-like trim, polished jewelry, and glossy coated metal are common examples. Light roughening can improve grip, especially when the repair will be touched often or exposed to slight movement. The goal is not to scratch the visible surface or change the shape of the part. The goal is to create a slightly textured hidden contact area so the glue can lock in more securely.
A simple sanding approach works for many tiny repairs:
- Use fine sandpaper rather than a coarse file.
- Sand only the hidden area that will touch the other surface.
- Use 5–10 gentle passes, not deep grinding.
- Wipe away sanding dust before applying glue.
- Avoid sanding decorative front surfaces unless appearance does not matter.
| Metal Surface | Should It Be Roughened? | Best Method |
|---|---|---|
| Polished stainless steel | Yes, hidden area only | Fine sandpaper |
| Aluminum trim | Often yes | Light sanding and wipe |
| Painted metal | Only loose paint area | Remove weak coating |
| Rusty metal | Yes | Remove rust powder first |
| Jewelry front surface | Usually no | Roughen only hidden contact point |
| Tool cap or bracket | Yes | Sand both contact faces lightly |
If the surface is too smooth, the glue may still bond, but the repair can be easier to peel or twist apart. Light texture gives the bond a better chance, especially on small parts with limited contact area.
Metal Glue Needs Drying
Drying is important because moisture can block adhesion and weaken the repair area. Metal parts from bathrooms, kitchens, gardens, outdoor décor, camping gear, plumbing areas, and appliances may hold water in seams or cracks even when the surface looks dry. A quick wipe removes visible water, but it may not remove moisture trapped inside a narrow joint. If glue is added too soon, the repaired part may appear fixed but fail after handling, washing, or temperature changes.
Drying should be handled based on the item:
- After cleaning with liquid, let the surface air-dry fully.
- For narrow cracks, wait longer because water can stay inside.
- For outdoor items, bring the part indoors before repair when possible.
- Do not use direct flame to dry metal.
- Avoid applying glue to cold metal with condensation on the surface.
| Repair Scene | Drying Time Suggestion | Extra Care |
|---|---|---|
| Dry indoor jewelry | 1–2 minutes after wiping | Keep fingers off contact point |
| Kitchen trim | 5–10 minutes after cleaning | Check for grease and moisture |
| Bathroom fixture | 10–20 minutes if recently wet | Dry seams carefully |
| Outdoor décor | 20–30 minutes indoors if damp | Remove dirt first |
| Pipe area | Longer if water is present | Avoid pressure-related repairs |
A dry repair area helps the glue form a cleaner bond. After gluing, the item should also stay dry during curing. Avoid washing, soaking, or placing the item outdoors too soon.
Metal Glue Needs Tools
Metal glue repairs are easier and cleaner when small tools are prepared before the tube is opened. Tiny repairs often fail because the user applies glue first and then starts looking for tape, a cloth, tweezers, or a clamp. By that time, the glue may already be spreading, drying, or pulling the part out of position. A simple setup helps keep the repair controlled from the first drop to the final cure.
Useful tools for tiny metal glue repairs include:
- Tweezers for jewelry, eyeglass parts, model pieces, and small screws.
- Cotton swabs for fresh glue cleanup around edges.
- Fine sandpaper for lightly roughening smooth metal.
- Painter’s tape for holding trim, badges, and frame parts.
- Small clamps or rubber bands for steady pressure.
- Disposable gloves for cleaner handling.
- Toothpicks for spreading a tiny amount in hidden areas.
| Tool | Best Use | When It Helps Most |
|---|---|---|
| Tweezers | Holding tiny parts | Jewelry, eyeglasses, models |
| Painter’s tape | Temporary support | Trim, badges, décor |
| Cotton swab | Edge cleanup | Visible repairs |
| Fine sandpaper | Surface grip | Stainless steel, aluminum |
| Small clamp | Steady pressure | Flat parts and brackets |
| Rubber band | Curved pressure | Handles, round parts |
| Toothpick | Micro-spreading | Hidden contact points |
GleamGlee Metal Glue includes precision nozzles, which are useful for narrow cracks and hard-to-reach areas. The nozzle reduces the need to spread glue manually and helps place a thin line exactly where it is needed. A tidy setup saves time, reduces waste, and helps the finished repair look cleaner.
How Should Metal Glue Be Used?
Metal glue should be used in a thin, controlled layer. Clean and dry the repair area first, apply a small amount to one surface, press both parts together for 5–10 seconds, remove fresh excess glue, and leave the item still while it cures. For tiny repairs, accuracy is more important than using more adhesive.
The best metal glue repair looks simple from the outside, but the method matters. A small metal clasp, appliance trim, tool cap, frame corner, or décor detail usually has limited contact area. If the glue is placed too thickly, the parts may not sit flush. If the parts slide during pressing, the bond line becomes uneven. If the item is moved too early, the first bond may break before it develops strength. A stable table, good lighting, a fine nozzle, and a calm 30-second repair plan can prevent most mistakes.
A good working rule is: place less glue than you think, press more steadily than you expect, and wait longer than you want. Most tiny repairs need only a dot, short line, or thin film. The glue should stay inside the joint, not spread across the visible surface. Once the parts touch, avoid twisting or dragging them. After pressing, support the repaired item with tape, a clamp, rubber band, or weight if needed.
| Repair Step | Correct Method | Common Mistake | Better Result |
|---|---|---|---|
| Apply glue | Small dot or thin line | Thick blob | Cleaner bond line |
| Join parts | Align once, then press | Sliding back and forth | Better surface contact |
| Press | Hold firmly for 5–10 seconds | Light touch only | Faster initial hold |
| Clean edges | Wipe fresh excess | Wait until fully dry | Neater appearance |
| Cure | Keep item still | Test by pulling early | Stronger final bond |
Metal Glue Thin Coat
A thin coat is the safest method for most tiny metal repairs because it keeps the two surfaces close together. Metal glue is not meant to create a thick cushion between parts. When the glue layer is too thick, the adhesive may take longer to cure, squeeze out around the edges, or leave the parts slightly raised. This is especially noticeable on jewelry, eyeglass parts, appliance trim, metal badges, and decorative frames. A thin layer also reduces waste and makes the repair look cleaner. For small repairs, the right amount may be much less than expected. If the broken surfaces already match closely, one tiny dot or a narrow line is often enough to cover the contact point.
Use this simple amount guide:
| Repair Area | Recommended Amount | Application Style |
|---|---|---|
| Small charm or clasp | Pinhead-sized dot | Touch nozzle once |
| Eyeglass nose piece | Very tiny dot | Apply with fine tip |
| Metal badge | 2–4 small dots | Keep away from edges |
| Frame corner | Thin short line | Apply on hidden contact area |
| Tool cap | Thin ring or short bead | Avoid outer edge flooding |
| Trim strip | Narrow continuous line | Press evenly along length |
Better thin-coat habits:
- Apply glue to one surface first, not both, unless the repair area is larger.
- Keep the glue slightly inside the edge so pressure does not push it out.
- Do not use glue to fill large missing gaps.
- Add a second small amount only if the test fit shows poor contact.
- Stop squeezing before the glue reaches visible edges.
A thin coat should look almost too little before pressing. Once the parts are pressed together, the adhesive spreads across the contact area. That controlled spread is usually enough for small metal repairs.
Metal Glue Fine Tip
A fine tip helps place metal glue exactly where the repair needs it. Tiny metal repairs often involve narrow cracks, curved edges, small brackets, hidden contact points, or parts that are hard to hold by hand. Without a fine tip, too much glue may come out at once and spread onto polished metal, painted finishes, glass, plastic, or skin-facing jewelry parts. GleamGlee Metal Glue includes 4 precision nozzles per tube, and the 2-pack includes 8 nozzles. These nozzles help guide a small amount of adhesive into tight spaces and reduce the need for spreading tools. They are especially useful when the repair area is smaller than a fingernail.
Where a fine tip helps most:
| Repair Scene | Why Fine Tip Helps |
|---|---|
| Jewelry clasp | Places glue only on the contact point |
| Watchband detail | Avoids glue near moving links |
| Metal model part | Protects small surface details |
| Appliance trim | Creates a neat line under the edge |
| Eyeglass frame | Reaches tight corners |
| Décor crack | Guides glue into the gap |
| Cabinet badge | Prevents glue from squeezing out |
How to use the fine tip better:
- Attach the nozzle only when ready to apply.
- Hold the nozzle close to the repair, not high above it.
- Squeeze gently and stop early.
- Do not drag the nozzle across visible surfaces.
- Wipe the tip after use before closing the cap.
The fine tip is not just a convenience. It directly affects the finished look. A clean repair usually starts with a controlled first drop.
Metal Glue Firm Press
Firm pressing helps the glue spread into a thin layer and keeps the two metal surfaces in close contact. For GleamGlee Metal Glue, the parts should be pressed together for 5–10 seconds after application. The pressure should be steady and direct. Do not slide the pieces around after they touch, because sliding can push glue away from the bonding area and make the repair crooked. Small parts can be difficult to hold with fingers, so tweezers, tape, rubber bands, clamps, or a light weight may be needed. The goal is not to crush the item. The goal is to hold the surfaces in the right position until the adhesive starts to grip.
Useful holding methods:
| Item Shape | Best Holding Method | Practical Tip |
|---|---|---|
| Tiny jewelry part | Tweezers | Hold from a non-glued edge |
| Flat metal badge | Painter’s tape | Tape across the full piece |
| Curved handle cap | Rubber band | Wrap evenly, not too tight |
| Frame corner | Small clamp | Add cloth to prevent scratches |
| Trim strip | Tape plus finger pressure | Press along the strip evenly |
| Small décor detail | Support block | Keep the part from leaning |
Firm pressing tips:
- Align the parts before they touch.
- Press straight down or straight together.
- Keep pressure steady for 5–10 seconds.
- Use a clamp or tape if the part wants to move.
- Do not pull, twist, or “test” the repair right away.
A repair can feel attached after a short press, but it still needs curing time. Treat the first hold as the beginning of the bond, not the final strength.
Metal Glue Clean Edges
Clean edges are important because tiny repairs are often visible. A repair on jewelry, home décor, appliance trim, a metal frame, or a model part should not leave thick glue marks around the joint. Excess glue should be removed while it is still fresh, before it hardens into a raised ridge. The easiest way to avoid messy edges is to use less glue from the beginning. Apply the adhesive slightly inside the contact area, then press firmly and watch where the glue moves. If a small amount squeezes out, remove it carefully with a cotton swab, toothpick, or clean cloth. Do not smear it across polished or painted surfaces.
Edge-control guide:
| Problem | Likely Cause | Better Method |
|---|---|---|
| Glue squeezes out heavily | Too much glue | Use smaller dots or thinner line |
| Shiny glue mark on surface | Glue placed too close to edge | Apply slightly inside the joint |
| Uneven bond line | Parts slid during pressing | Align first, then press straight |
| Dried ridge around repair | Excess not cleaned early | Wipe fresh glue immediately |
| Cloudy repair area | Glue spread across finish | Use fine nozzle and less pressure |
| Sticky fingers near joint | Holding too close | Use tweezers or gloves |
Clean-edge habits:
- Work under bright light so excess glue is visible.
- Keep cotton swabs ready before applying glue.
- Remove only fresh excess; do not scrape aggressively on delicate finishes.
- For visible décor, apply glue from the hidden side if possible.
- Let the repair cure without wiping it repeatedly.
A neat edge makes the repair feel more professional. The strongest repair can still feel disappointing if dried glue marks are obvious, so edge control should be treated as part of the repair, not cleanup after the repair.

Does Metal Glue Hold Well?
Metal glue can hold well when the repair is small, clean, close-fitting, and not exposed to heavy load, constant twisting, direct flame, high pressure, or strong impact. Bond strength depends on surface preparation, glue thickness, contact area, pressing time, curing time, and how the repaired item is used afterward.
A strong repair is not created by using more glue. It is created by good contact between both surfaces. For tiny repairs, the best result usually comes from a thin glue layer, firm pressure for 5–10 seconds, and enough resting time before the item is handled normally. If the repair area is oily, wet, dusty, rusty, or poorly aligned, even a strong glue may fail early.
Metal glue performs best on decorative, light-duty, and close-fitting repairs such as jewelry clasps, small trim, appliance edges, frames, model parts, and non-load hardware. It becomes less reliable when the item bends, pulls, vibrates, heats up, carries weight, or touches water too soon after repair.
| Factor | Better Holding Result | Weak Holding Result |
|---|---|---|
| Surface | Clean, dry, lightly roughened | Oily, wet, dusty, rusty |
| Glue layer | Thin and even | Thick blob or uneven puddle |
| Contact area | Wide enough to press flat | Tiny point contact only |
| Pressing | Firm 5–10 second hold | Loose touch or sliding movement |
| Cure time | Rested before use | Pulled, washed, or twisted early |
| Stress | Light-duty use | Impact, load, vibration, heat |
| Repair type | Close-fitting parts | Wide gaps or missing material |
Metal Glue Strength
Metal glue strength depends on how much real contact area the repair has and how the force moves through the joint. A flat metal badge bonded to a clean appliance panel can hold better than a tiny hook carrying the same weight because the flat badge spreads stress across a larger surface. A thin joint that is pulled straight across the surface is easier for glue to hold than a joint that is peeled from one edge or twisted every day. GleamGlee Metal Glue is designed for fast high-strength bonding on small metal repairs, but the repair still needs clean contact, a thin layer, and enough curing time.
| Repair Shape | Holding Potential | Reason |
|---|---|---|
| Flat overlap | High | Stress spreads across more surface |
| Small tab | Medium | Force concentrates on one area |
| Point contact | Low | Very limited bonding area |
| Curved joint | Medium | Needs steady pressure while curing |
| Wide gap | Low | Glue must fill space instead of bonding surfaces |
For stronger metal glue repairs:
- Keep the glue layer thin, not thick.
- Press both sides together firmly for 5–10 seconds.
- Avoid peeling or twisting the part during early curing.
- Use tape, a clamp, or a rubber band if the item moves.
- Do not test strength by pulling immediately after bonding.
A good strength test is not “Can I pull it now?” A better test is whether the item can rest fully, cure properly, and then handle its normal light-duty use without movement.
Metal Glue Water Resistance
Metal glue can handle moisture better when the repair is fully cured and the surfaces were dry before bonding. Water resistance is useful for small bathroom fixtures, kitchen trim, outdoor décor, garden tool parts, camping gear, and appliance edges. The important point is timing. If the repair is exposed to water too soon, moisture may weaken the bond before it has developed enough strength. Even when a glue is designed for durable use, the repair should be kept dry during curing. A repaired item that touches water occasionally is very different from one that is soaked, pressurized, boiled, or washed repeatedly.
| Water Exposure | Suitable for Metal Glue? | Practical Advice |
|---|---|---|
| Light splashes after cure | Usually yes | Let the repair cure first |
| Bathroom humidity | Usually yes | Clean and dry before gluing |
| Outdoor rain | Sometimes | Cure indoors before exposure |
| Repeated soaking | Risky | Use only when repair is non-critical |
| Pressurized pipe leak | No, except temporary emergency | Use proper pipe repair |
| Hot water line | No | Heat and pressure increase risk |
For better water-related repairs:
- Dry the metal fully before applying glue.
- Let the repair rest before washing or outdoor exposure.
- Avoid repairing wet seams or water-filled cracks.
- Do not use ordinary metal glue as a permanent plumbing fix.
- Seal only light-duty parts, not pressure-bearing systems.
Water resistance improves repair durability, but it does not remove the need for clean prep, full curing, and safe repair selection.
Metal Glue Heat Resistance
Heat resistance has limits because metal transfers heat quickly. A repaired metal part may feel fine at room temperature but face extra stress when exposed to heat, cooling, and expansion. Normal indoor temperatures, mild outdoor warmth, or small household temperature changes are much easier for glue to handle than direct flame, engine heat, brake heat, boiling water, or high-temperature machinery. GleamGlee Metal Glue is suitable for many everyday small repairs, but it should not be used on flame-contact cookware areas, engine blocks, exhaust parts, brake components, or parts that become too hot to touch during use.
| Heat Situation | Risk Level | Repair Advice |
|---|---|---|
| Indoor décor | Low | Usually suitable if light-duty |
| Sunny outdoor metal | Medium | Cure fully before use |
| Lamp frame away from bulb heat | Medium | Keep away from hot contact points |
| Kettle or pan handle near steam | High | Use caution and check stress |
| Direct flame area | Very high | Do not use |
| Engine or exhaust part | Very high | Use professional repair |
| Brake or safety part | Very high | Replace or service properly |
For heat-related repairs:
- Avoid any part exposed to flame or extreme heat.
- Check whether the item becomes hot during normal use.
- Keep repaired parts away from direct heating elements.
- Allow longer curing time before warm environments.
- Use mechanical repair when heat and force appear together.
Heat does not only soften adhesives. It can also make metal expand, contract, and move against the bond line. That movement can weaken a repair over time.
Metal Glue Full Cure
Full cure matters because the first hold is not the same as final strength. A fast metal glue can grip in seconds, which helps keep small parts aligned, but the repair should still rest before normal handling. Pulling, twisting, washing, bending, or using the item too early can damage the bond before it becomes stable. For tiny repairs, waiting longer is one of the simplest ways to improve durability. A practical habit is to repair the item at night and use it the next day, especially for jewelry, appliance trim, tools, bathroom parts, or outdoor items.
| After Gluing | Safer Action | Avoid |
|---|---|---|
| First 5–10 seconds | Press firmly | Sliding the parts |
| First few minutes | Keep aligned | Touching or adjusting often |
| Early resting period | Support with tape or clamp | Pull-testing the repair |
| Before normal use | Allow full cure | Washing, twisting, loading |
| Before water exposure | Wait longer | Rinsing too soon |
Better curing habits:
- Place the repaired item on a flat, stable surface.
- Use tape or a clamp if gravity can move the part.
- Keep the repair dry while curing.
- Avoid wearing repaired jewelry too soon.
- Avoid using repaired tools until the bond has rested properly.
- Give extra resting time if the repair will face moisture, vibration, or outdoor use.
A repair that feels fixed after a short press may still need time. Letting the bond cure quietly often makes the difference between a repair that holds and one that fails during the first real use.
Is GleamGlee Metal Glue Better?
GleamGlee Metal Glue is better suited for tiny repairs when the repair needs three things at once: fast bonding, clean control, and a neat finish. It is designed for small metal parts such as jewelry clasps, stainless steel trims, aluminum details, appliance edges, small tools, décor, model parts, and mixed-material repairs. The glue dries clear, forms a quick bond in seconds, and uses fine-tip nozzles to place adhesive exactly where it is needed.
For tiny metal repairs, the difference is often not only the adhesive strength. It is whether the glue can be applied without flooding the surface, whether the cap keeps the tube usable after opening, and whether the dried repair looks clean on visible metal. GleamGlee Metal Glue includes 4 precision nozzles per tube, while the 2-pack includes 8 nozzles. The anti-clog cap helps reduce dried glue buildup between uses, which is important because most small repairs use only a little glue each time.
GleamGlee also supports larger product needs with mature manufacturing and packaging capability. The company has 25+ chemists and engineers, 18+ design specialists, integrated production and packaging facilities, annual production capacity above 12 million pieces, and experience with adhesive, repair, and cleaning products for international markets. For private-label or customized metal glue projects, MOQ can start from 200 pieces, artwork can be prepared as fast as 2 days, samples usually take 7–14 days, and bulk production is usually around 20 days.
| Feature | GleamGlee Metal Glue Detail | Real Repair Benefit |
|---|---|---|
| Clear drying | Dries transparent after curing | Cleaner look on jewelry, trims, frames, décor |
| Fast bonding | Press parts for 5–10 seconds | Helps small parts stay aligned quickly |
| Precision nozzles | 4 nozzles per tube, 8 in 2-pack | Better control in cracks and tiny gaps |
| Anti-clog cap | Helps keep tube usable after opening | Less waste between small repairs |
| Multi-material use | Bonds metal with plastic, rubber, wood, PVC, concrete, wall surfaces | One tube covers more daily repair scenes |
| OEM support | MOQ from 200 pieces | Easier to test new product lines |
Metal Glue Clear Bond
A clear bond matters because many tiny metal repairs happen on visible items. A repaired bracelet clasp, metal photo frame, eyeglass part, cabinet trim, appliance badge, watchband detail, or small sculpture should not look like it has been covered with glue. A yellow, cloudy, thick, or uneven glue line can make a repaired item feel cheap even when the bond is strong. GleamGlee Metal Glue dries clear, so it fits repairs where appearance matters as much as holding power. The clean result still depends on how the glue is used. A clear adhesive can become visible if too much is applied, so a thin layer and quick edge cleanup remain important.
| Repair Scene | Why Clear Bond Helps | Better Use Tip |
|---|---|---|
| Jewelry clasp | Keeps the repair less noticeable near skin-facing parts | Apply a tiny dot with tweezers |
| Metal photo frame | Keeps corners and front edges neat | Apply glue on the hidden contact side |
| Appliance trim | Avoids yellow or cloudy marks on visible panels | Keep glue slightly inside the edge |
| Watchband detail | Keeps small decorative parts clean | Avoid moving links during curing |
| Metal model part | Preserves fine details | Use the smallest nozzle opening |
| Home décor | Keeps the original look closer | Remove fresh excess before drying |
Clear-bond repair tips:
- Use the smallest amount that can cover the contact point.
- Apply glue slightly away from the visible edge.
- Press firmly without sliding the parts.
- Remove fresh excess before it hardens.
- Let the item cure in one position to avoid a smeared glue line.
A clean-looking repair is especially important for items people see or touch often. When the glue dries clear and the edge is controlled, the repaired item feels more natural to keep using instead of replacing.
Metal Glue Tiny Cracks
Tiny cracks need a different glue experience from larger repairs. A narrow gap in a metal ornament, a small split in a frame corner, a loose stainless-steel trim, a broken model detail, or a separated eyeglass part does not need a large amount of adhesive. It needs controlled placement. Too much glue can sit on the surface instead of entering the crack. Too little glue may not reach the contact point. GleamGlee Metal Glue is designed with precision nozzles to help guide adhesive into small areas, especially where fingers or ordinary applicators cannot reach. This makes the repair easier to control and reduces cleanup around delicate surfaces.
| Crack Type | Glue Amount | Best Holding Method | Practical Note |
|---|---|---|---|
| Hairline décor crack | Very thin bead | Tape or support block | Keep crack closed while curing |
| Small frame corner | Thin short line | Small clamp | Add soft cloth under clamp |
| Eyeglass metal detail | Tiny dot | Tweezers | Keep glue away from lenses |
| Model metal part | Pinpoint dot | Fine tweezers | Avoid covering details |
| Appliance trim gap | Narrow line | Painter’s tape | Press evenly along the strip |
| Small sculpture break | Thin bead inside joint | Support from both sides | Check balance before curing |
Tiny crack repair tips:
- Clean inside and around the crack before applying glue.
- Dry the crack fully, especially on bathroom or outdoor items.
- Test whether the crack can close tightly before gluing.
- Use the fine nozzle close to the gap, not high above it.
- Press or tape the part so the crack stays closed while curing.
Small cracks often fail when the part moves during curing. The glue may grab quickly, but the repair still needs stillness. Tape, a clamp, or a support block can make the final result cleaner and stronger.
Metal Glue Mixed Materials
Many real repairs are not metal-to-metal only. A cabinet fitting may bond metal to wood. A badge may attach metal to plastic. A craft piece may combine metal with glass, stone, ceramic, or painted board. A small handle may include metal and rubber. GleamGlee Metal Glue can bond metal with several common materials, including plastic, rubber, wood, concrete, PVC, and wall surfaces. This makes it useful for everyday repair kits because one tube can handle more than one type of small fix. The repair still needs surface preparation because each material behaves differently. Smooth plastic, dusty concrete, flexible rubber, and absorbent wood all need slightly different handling.
| Material Pair | Good Repair Example | Prep Focus | Use Caution |
|---|---|---|---|
| Metal + metal | Jewelry, trim, small hardware | Clean and lightly roughen | Avoid wide gaps |
| Metal + wood | Cabinet fitting, craft décor | Remove dust and loose finish | Do not glue over weak paint |
| Metal + plastic | Appliance badge, cover part | Clean oil and test hidden area | Some plastics are difficult to bond |
| Metal + rubber | Grip pad, small handle part | Remove grease and avoid stretched areas | Flexing can weaken the bond |
| Metal + PVC | Small non-pressure fitting | Clean and dry fully | Avoid pressurized repairs |
| Metal + concrete | Small decorative fixing | Brush away loose powder | Needs firm contact |
| Metal + glass | Display or décor detail | Use very little glue | Visible glue marks show easily |
Mixed-material repair tips:
- Clean both surfaces, not only the metal side.
- Check whether the second material is painted, coated, dusty, or flexible.
- Apply less glue on non-porous surfaces like glass and plastic.
- Use firm pressure so both materials stay in contact.
- Avoid repairs where one side bends constantly.
Mixed-material use is practical because homes, workshops, and craft spaces rarely have only one material. A single tube that handles metal plus common household materials can reduce the need to buy several different adhesives for small repairs.
Metal Glue Custom Orders
GleamGlee Metal Glue can also be supplied as a finished branded product or developed into a customized adhesive line with private-label packaging. This is useful for hardware stores, DIY product sellers, repair kit companies, e-commerce operators, distributors, craft supply businesses, and cleaning or repair product ranges that want a ready-to-sell metal glue item. The product can be matched with different tube sizes, nozzle sets, boxed kits, multilingual labels, and instruction designs. Practical packaging is important because metal glue is a hands-on product. Clear steps, visible repair examples, safety notes, surface compatibility, and cure-time guidance can reduce misuse and improve repeat purchase.
| Custom Area | GleamGlee Support | Practical Value |
|---|---|---|
| Product formula | Mature adhesive formulas and testing support | Stable product performance |
| MOQ | Customization from 200 pieces | Easier small market test |
| Nozzle options | Fine-tip nozzle kits | Better tiny repair control |
| Packaging design | 18+ design specialists | Faster retail-ready appearance |
| Artwork speed | As fast as 2 days | Shorter launch preparation |
| Sample time | Usually 7–14 days | Product can be checked before bulk order |
| Bulk production | Around 20 days | Suitable for planned inventory |
| Rush production | Around 15 days when feasible | Helps urgent restocking |
| Compliance support | SDS, CLP, REACH, UKCA, GHS-related documents | Easier market entry |
| Production scale | 12M+ annual capacity | Supports larger order growth |
Custom order points to prepare:
- Expected first order quantity.
- Target market, such as US, UK, EU, Canada, or Japan.
- Tube size and nozzle preference.
- Single pack or multi-pack format.
- Box, blister card, or repair kit packaging.
- Label language and compliance requirements.
- Amazon FBA, overseas warehouse, or bulk shipment needs.
For small repair products, packaging and instructions directly affect how well the glue is used. A strong formula needs a clear label, a good nozzle, and repair examples that match real use. GleamGlee can support formula, design, packaging, sample preparation, production, and shipment, making the metal glue product easier to launch and easier to scale.

How Can You Get Better Metal Glue Results?
Better metal glue results come from choosing the right repair, preparing the surface carefully, using a thin layer, pressing the parts firmly, and giving the bond enough time to cure. A clean repair should hold under normal light-duty use without thick glue marks, crooked alignment, or early peeling.
Most poor metal glue results come from small mistakes that are easy to avoid. The surface may look clean but still carry oil, dust, rust powder, wax, water, or old adhesive. The user may apply too much glue, move the parts while pressing, or test the repair too early by pulling it. Tiny repairs are less forgiving than large repairs because the contact area is small. One drop too much, one wet seam, or one crooked press can affect the final result.
The best habit is to treat metal glue like a precision repair tool, not a filler. It works best when the parts already fit closely and only need a clean bond to stay together. GleamGlee Metal Glue is designed for this kind of work, with fast bonding, clear drying, fine-tip nozzles, and an anti-clog cap for repeat use. Better results come from matching those features with the right repair method.
| Result Factor | Better Method | Poor Method | What Usually Happens |
|---|---|---|---|
| Repair choice | Small, close-fitting, light-duty part | Heavy, hot, pressurized, or structural part | Safer and longer-lasting repair |
| Surface prep | Clean, dry, lightly roughened | Oily, wet, rusty, dusty | Stronger surface contact |
| Glue amount | Thin dot or narrow line | Thick blob | Less mess, better fit |
| Pressing | Firm 5–10 second hold | Sliding or loose touch | Cleaner alignment |
| Curing | Rest before use | Pulling or washing early | Better final strength |
| Storage | Wipe tip, close cap | Leave nozzle dirty or open | Better repeat use |
Metal Glue Dos
Good metal glue results start with small, careful habits. Before applying glue, check whether the repair is actually suitable. The two pieces should touch closely, the repair should not carry heavy force, and the surface should be clean enough for glue to reach the real metal. For tiny repairs such as jewelry clasps, metal badges, appliance trim, model parts, décor, and small tool caps, a few minutes of preparation can make the repair look much cleaner. GleamGlee Metal Glue only needs a thin application, so the goal is not to cover the whole item. The goal is to place adhesive exactly where both surfaces meet, press firmly, and let the bond settle without movement.
Best habits for better results:
- Clean both surfaces before gluing, even if they look clean.
- Apply a thin dot, short line, or narrow bead instead of a thick layer.
- Press the parts together firmly for 5–10 seconds.
- Use tape, tweezers, or a small clamp when fingers cannot hold the part steadily.
- Let the repair cure before washing, wearing, pulling, or using the item.
| Good Habit | Best Repair Scene | Practical Detail |
|---|---|---|
| Test-fit first | Jewelry, frames, trim | Check alignment before opening glue |
| Use a fine nozzle | Tiny cracks, model parts | Place glue inside the joint |
| Keep edges clean | Décor, appliance panels | Wipe fresh excess immediately |
| Support while curing | Curved or vertical parts | Use tape, clamp, or rubber band |
| Wait before use | Tools, jewelry, outdoor items | Rest longer if the item faces stress |
A good repair should feel controlled from start to finish. If the part slips during test-fitting, prepare support before applying glue. If the surface feels greasy, clean it again. If the glue reaches the visible edge before pressing, too much has been used.
Metal Glue Don’ts
Metal glue should not be used as a shortcut for dangerous or high-stress repairs. Even a strong adhesive has limits when the item carries body weight, handles pressure, faces direct flame, vibrates heavily, or protects safety. Ordinary small-repair metal glue is not meant for ladder steps, brake parts, bicycle frames, engine cracks, structural railings, flame-exposed cookware, or pressurized plumbing. Another common mistake is using glue to fill missing metal or wide gaps. Metal glue performs best when two surfaces touch closely. If the broken area has missing material, a loose shape, or a gap that cannot close, the repair may need screws, soldering, welding, filler, or replacement parts.
Repairs to avoid with ordinary metal glue:
| Avoided Repair | Main Risk | Better Choice |
|---|---|---|
| Ladder step | Carries body weight | Replace or professional repair |
| Bicycle frame | Load and vibration | Frame specialist |
| Brake part | Safety-critical force | Mechanic replacement |
| Engine or exhaust part | Heat and pressure | Industrial repair method |
| Pressurized pipe | Leakage and water damage | Pipe fitting or plumber |
| Cookware flame zone | Direct flame exposure | Heat-rated replacement |
| Heavy gate hinge | Load and movement | Bolts, welding, bracket repair |
Common mistakes to avoid:
- Do not glue over oil, water, dust, rust powder, or loose paint.
- Do not use a thick blob to fill a wide gap.
- Do not slide the parts around after they touch.
- Do not pull-test the repair immediately.
- Do not expose the repair to water before it cures.
A simple safety rule works well: if failure only makes the item look broken again, metal glue may be suitable. If failure could cause injury, leakage, fire risk, or equipment damage, choose a stronger mechanical or professional repair.
Metal Glue Storage
Storage affects how well the glue performs the next time it is needed. Many small glue tubes are used once and then thrown into a drawer, where the tip dries, the cap sticks, or the nozzle becomes blocked. Since tiny repairs usually need only a small amount of glue, repeat use is important. GleamGlee Metal Glue includes an anti-clog cap to help reduce drying between uses, but the tube still needs proper care after each repair. A few seconds of cleanup can keep the nozzle clearer and reduce wasted adhesive. This is especially useful for home repair kits, craft drawers, garages, workshops, and toolboxes where the next small repair may not happen for weeks.
Better storage routine:
- Wipe fresh glue from the nozzle after use.
- Close the anti-clog cap tightly.
- Store the tube upright when possible.
- Keep it in a cool, dry place.
- Avoid direct sunlight, heaters, damp cabinets, and dusty workbenches.
| Storage Problem | Likely Cause | Better Habit |
|---|---|---|
| Nozzle blocked | Glue left on tip | Wipe before closing |
| Cap stuck | Excess glue around opening | Keep cap thread clean |
| Glue thickens | Heat or loose cap | Store cool and sealed |
| Tube leaks | Stored sideways with loose cap | Keep upright |
| Glue hardens quickly | Air exposure | Close immediately after use |
| Tip gets dirty | Workbench dust or metal powder | Cap before sanding or cleaning |
Do not leave the tube open while adjusting the repair. Prepare the item first, then open the glue only when ready to apply. After use, close it before moving to cleanup or alignment checks. Small storage habits make the product more reliable for the next repair.
Metal Glue Troubleshooting
If a metal glue repair fails, the first step is to look at how it failed. A clean separation can tell a lot. If the glue stayed on dirt, paint, rust powder, or old adhesive, the surface was not prepared well enough. If the glue formed a thick lump between parts, too much was used. If one side lifted from the edge, the repair may have faced peeling force. If the part shifted while curing, it needed tape, a clamp, or a support. Troubleshooting helps avoid repeating the same mistake. Most small repairs can be improved by cleaning better, using less glue, pressing more steadily, and waiting longer before use.
Common repair problems:
| Problem | Likely Cause | Better Next Step |
|---|---|---|
| Part falls off quickly | Oil, dust, water, or rust | Clean and dry more carefully |
| Thick glue mark appears | Too much glue | Use tiny dots or a thin line |
| Part dries crooked | Movement during pressing | Test-fit and support first |
| Bond peels from one edge | Peeling force or poor contact | Increase contact area if possible |
| Repair breaks after use | Too much load or vibration | Use mechanical repair |
| Glue will not flow well | Clogged tip | Clean nozzle and recap properly |
| Surface looks cloudy | Glue smeared across finish | Apply inside the edge next time |
Quick checks before trying again:
- Did both parts touch closely before gluing?
- Was the surface fully clean and dry?
- Was the glue layer thin enough?
- Did the repair stay still while curing?
- Was the item used too soon?
- Was the repair too heavy, hot, wet, or stressed for glue alone?
If the same repair fails twice after careful cleaning and curing, the item may not be suitable for regular metal glue. In that case, use screws, clamps, soldering, welding, filler, replacement parts, or a professional repair service.
Conclusion
Metal glue is one of the easiest ways to handle tiny metal repairs when the broken parts are small, clean, close-fitting, and not under heavy stress. It works well for jewelry clasps, appliance trim, metal décor, small tool parts, model details, cabinet fittings, and mixed-material home repairs. The best results come from careful preparation: clean away oil and dust, dry the surface fully, apply only a thin layer, press firmly for 5–10 seconds, and let the repair cure before normal use. A neat repair does not need a large amount of glue. It needs accurate placement, steady pressure, and enough time to set properly.
GleamGlee Metal Glue is designed for these everyday small repairs, with fast bonding, a clear finish, precision nozzles, and an anti-clog cap for repeat use. It helps make tiny repairs cleaner, easier, and less wasteful for home users, DIY repair kits, craft projects, and retail adhesive product lines. For companies looking to order branded metal glue or develop a private-label adhesive product, GleamGlee can support formula selection, packaging design, nozzle options, multilingual labels, samples, bulk production, and custom orders. Contact GleamGlee to request samples, product details, packaging options, or a quotation for customized metal glue products.





















