 Skip to content
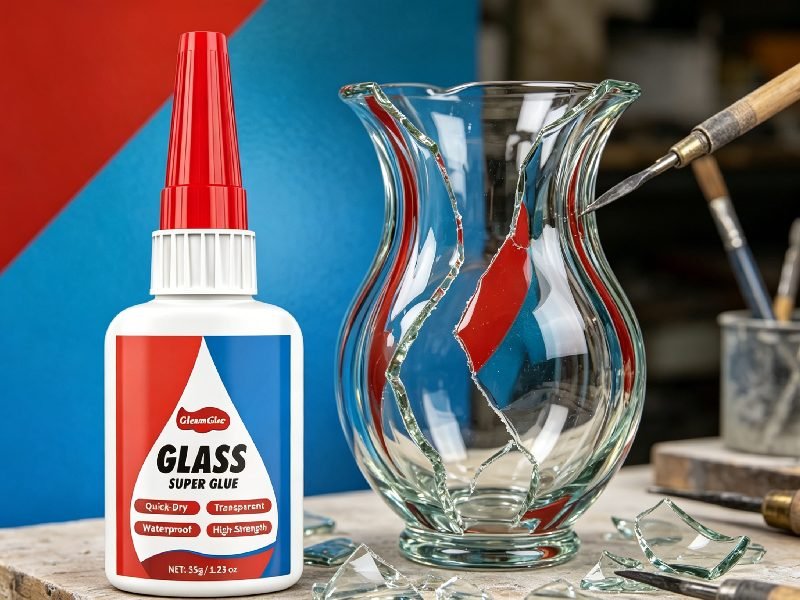
A fragile glass item rarely breaks at a convenient time. It may be a vase that matched the living room for years, a crystal ornament from a holiday box, a perfume bottle that still looks beautiful on a dressing table, or a small glass decoration that belongs to a set. The first reaction is often simple: can this still be saved? The second question is harder: can it be repaired without leaving an ugly glue mark?
Glass is one of the most unforgiving materials to repair at home. It is smooth, non-porous, transparent, and easy to mark. A repair that looks acceptable on wood, leather, or ceramic may look messy on glass because light passes through the joint and exposes every mistake. Too much adhesive can create a raised ridge. Dirty edges can leave a cloudy line. Weak alignment can make the broken area look twisted. A repair that is strong but visible may still feel disappointing, especially when the item is decorative or sentimental.
To use glass glue for fragile items, clean and dry the broken edges first, test whether the pieces fit tightly, apply a very thin layer of glass glue with a precision nozzle, press the parts together gently, and keep the item still while the bond cures. For delicate glass, the best results come from clear-drying glue, controlled application, fast initial setting, and careful handling after repair.
The important point is this: successful glass repair is not about using more glue. It is about using less glue with better control. A small drop in the right place can look cleaner and hold better than a thick bead spread across the surface. This is why glass glue repairs often reward patience. The repair may take only a few minutes to apply, but the result depends on preparation, alignment, and knowing when not to touch the item again.
What Is Glass Glue?
Glass glue is a clear adhesive made to bond smooth, non-porous glass surfaces. It is mainly used for repairing cracked, chipped, broken, or detached glass parts where a clean appearance matters. Unlike general craft glue, glass glue needs to grip a surface that does not absorb liquid. For fragile items such as vases, ornaments, crystal figures, perfume bottles, glass beads, and mirror details, the best result usually comes from a thin glue layer, clean edges, accurate alignment, and enough curing time.
Glass repair is not only about strength. On transparent or reflective surfaces, appearance is just as important. A thick glue line, cloudy residue, or crooked joint can make a repaired item look worse than before. Good glass glue should dry clear, flow smoothly through a fine tip, set quickly enough to reduce slipping, and stay controlled during application. For small fragile repairs, a 1–2 mm wide glue line is often already enough. More glue does not always mean a stronger repair; excess adhesive may squeeze out, slow curing, and leave visible marks.
GleamGlee Glass Glue is designed for these daily glass repair needs. It dries transparent and colorless, works on clear, colored, stained, and tinted glass, and sets in about 15 seconds. Each tube includes 4 precision nozzles, while a 2-pack includes 8 nozzles. The cap has a built-in metal pin to help reduce clogging after opening. These details make it useful for small home repairs, delicate décor, craft work, and visible glass items where neat application matters.
What Glass Glue Does
Glass glue bonds broken glass pieces by creating a thin adhesive layer between two clean contact surfaces. It is useful when the broken parts still fit together closely and the repair area does not need to carry heavy load, heat, food contact, or water pressure. On fragile items, the main job of glass glue is not to cover the damage with a thick layer. It should reconnect the broken edges while keeping the repair line as narrow and clear as possible. This matters most on transparent vases, crystal ornaments, light shades, glass jars, and decorative glassware, where the repaired area can be seen from several angles under natural light or indoor lighting.
Glass glue is commonly used for these repair tasks:
- Reattaching small broken glass pieces on ornaments, figurines, and decorations.
- Fixing clean chips or cracks on glass vases, bowls, candleholders, and display jars.
- Bonding glass parts to certain metal or plastic fittings, such as decorative caps, knobs, or trim.
- Supporting craft projects such as stained glass, mosaics, glass beads, charms, and DIY décor.
The repair result depends strongly on the break type. Clean breaks are easier to repair than crushed edges or missing pieces. A small detached ornament wing may need only one tiny drop, while a vase rim may need a thin line along the contact edge. If the broken area has gaps over 1–2 mm, the repair may become more visible because glass glue is better at bonding close surfaces than filling missing glass.
| Repair Type | Glass Glue Fit | Practical Note |
|---|---|---|
| Clean two-piece break | High | Best when edges match closely |
| Small chip with saved piece | High | Thin glue layer gives cleaner finish |
| Hairline crack | Medium | Works better if crack is dry and stable |
| Missing glass section | Low to medium | Glue cannot rebuild lost glass invisibly |
| Crushed edge | Low | Uneven contact weakens the repair |
| Decorative loose part | High | Good fit for ornaments, caps, beads, and trim |
For best visual results, the glue should sit inside the joint, not spread across the front surface. A clean repair should look narrow, smooth, and controlled after curing.
Why Glass Glue Works
Glass glue works because it is made for hard, smooth, non-porous materials. Glass does not have fibers, pores, or grain for adhesive to soak into, so the bond forms on the surface. This means surface preparation is not optional. Fingerprints, dust, water, soap film, candle wax, perfume oil, old glue, or glass powder can weaken the bond because they block direct contact between the adhesive and the glass. Before applying glue, the broken edges should be dry, clean, and checked under strong light. Even a thin layer of invisible oil from fingertips can affect a small repair, especially on crystal, mirrors, perfume bottles, and clear decorative glass.
A strong glass glue repair usually depends on four conditions:
- Clean surface: no dust, grease, moisture, old adhesive, or loose particles.
- Tight contact: broken edges fit naturally without large gaps.
- Thin application: enough glue to wet the joint, but not enough to flood it.
- Still curing: the item is not moved, twisted, washed, or loaded too early.
Fast setting helps because many fragile glass parts are difficult to clamp. GleamGlee Glass Glue sets in about 15 seconds, which is useful when repairing tiny parts that may slide out of position. However, setting is not the same as full curing. The early set helps the pieces stay aligned, while curing allows the bond to develop more stability. Picking up the item too soon, testing the repair with fingers, or washing it right after gluing can reduce the final result.
| Repair Factor | Good Practice | What Can Go Wrong |
|---|---|---|
| Cleaning | Wipe and dry the bonding edge | Dust or oil creates weak spots |
| Glue amount | Use a thin, controlled line | Excess glue squeezes out |
| Alignment | Dry-fit before gluing | Crooked repair becomes permanent |
| Pressure | Press gently and evenly | Too much force cracks fragile glass |
| Setting | Hold still during first seconds | Sliding creates visible misalignment |
| Curing | Rest the item before use | Early handling weakens the bond |
A simple test helps before gluing: place the broken pieces together without adhesive and check whether the repair line almost disappears. If the dry fit looks clean, the glued repair has a better chance of looking clean too.
Where Glass Glue Fits
Glass glue fits best in small household repairs, decorative glass restoration, craft assembly, and light mixed-material fixes. It is especially useful when the item still has its broken pieces and the repair area is visible. Common examples include glass vases, crystal ornaments, perfume bottles, candleholders, picture frames, small mirror decorations, glass beads, stained glass crafts, and glass mosaic pieces. These items usually need a repair that looks neat rather than bulky. A clear, fast-setting glue with a fine nozzle is useful because the repaired area is often small, curved, shiny, or hard to hold by hand.
Good use cases for glass glue include:
- Home décor: vases, bowls, candleholders, ornaments, light shades, lantern panes.
- Personal items: perfume bottles, cosmetic jars, glass charms, pendants, beads.
- Craft work: stained glass, mosaics, school projects, glass gems, resin and glass pieces.
- Light household repair: picture frame glass, mirror decorations, glass lids, cabinet glass accents.
Glass glue should be used carefully on items that carry weight, heat, food, mouth contact, or water pressure. A repaired display vase is different from a repaired drinking rim. A mirror decoration is different from a large wall mirror. A terrarium ornament is different from an aquarium seam under pressure. The safest repair choice depends on what will happen if the bond fails.
| Item | Suitable Use | Caution Level |
|---|---|---|
| Crystal ornament | Display repair | Low |
| Glass vase rim | Decorative or light use | Low to medium |
| Perfume bottle cap | Reattachment or decoration | Low |
| Picture frame glass | Small chip or corner repair | Medium |
| Glassware for display | Decoration only | Medium |
| Drinking rim | Avoid normal drinking use | High |
| Aquarium seam | Needs rated waterproof/pressure-safe solution | High |
| Glass shelf | Do not rely on glue alone | High |
| Car windshield | Use proper automotive repair | High |
Glass glue is most useful when the repair is small, visible, and non-structural. If the repaired area supports weight, touches food, faces heat, or protects people from injury, it should not be treated like a normal home decoration repair.
Which Glass Glue Works Best?
The best glass glue for fragile items should dry clear, set quickly, apply precisely, and bond smooth glass without leaving a thick repair line. A good choice should handle small visible repairs such as vases, crystal ornaments, mirror corners, perfume bottles, glass beads, and decorative glassware. The glue should also be easy to control, because fragile glass usually needs a thin layer rather than a heavy amount.
Glass repair has two main goals: the item needs to hold, and the repair should not ruin the look of the glass. A glue that is strong but cloudy may be fine for a hidden joint, but it is not ideal for a clear vase or crystal ornament. A glue that flows too quickly may flood a crack and leave residue. A glue that takes too long to set may allow small parts to slide out of place. For fragile items, strength, clarity, speed, and control should be judged together.
GleamGlee Glass Glue fits these needs because it is designed for glass bonding, dries transparent and colorless, sets in about 15 seconds, and includes fine-tip nozzles for narrow cracks and delicate parts. It works on clear, colored, stained, and tinted glass, and can also bond certain metals and plastics. For small home repairs and visible glass items, these features help reduce mess, improve alignment, and make the repair look cleaner.
Which Glass Glue Dries Clear
Clear drying is one of the most important features when choosing glass glue. Glass is transparent, reflective, and often placed under light, so even a small cloudy mark can stand out. A white, yellow, or foggy glue line may make a repaired vase, crystal ornament, perfume bottle, or glass decoration look poorly repaired. The repair may hold, but the item may no longer look good enough to display. A clear-drying glass glue should become transparent and colorless after curing, especially on clear glass, tinted glass, stained glass, and crystal. The goal is not to hide a large broken area with glue; the goal is to bond the broken edges with the thinnest visible line possible.
Important points when checking clarity:
- Choose glue that dries transparent and colorless, not milky or yellow.
- Use a thin layer; even clear glue can look thick if overapplied.
- Avoid touching the glued edge with oily fingers.
- Keep the repair away from dust while curing.
- Clean overflow before it hardens, without disturbing the joint.
| Glass Item | Why Clear Drying Matters | Better Glue Choice |
|---|---|---|
| Crystal ornament | Light exposes cloudy repair lines | Transparent glass glue |
| Clear vase | Repair line can be seen from many angles | Colorless thin-bond glue |
| Perfume bottle | Surface is decorative and highly visible | Clear precision glue |
| Stained glass | Colored panels need clean seams | Clear glue with controlled flow |
| Glass candleholder | Light can highlight excess glue | Thin, invisible finish |
GleamGlee Glass Glue dries transparent and colorless, making it suitable for visible repairs on clear, colored, stained, and tinted glass. For best appearance, apply less glue than seems necessary at first. A narrow adhesive line usually looks cleaner than a wide wet area.
Which Glass Glue Sets Fast
Fast setting matters because fragile glass parts are often small, slippery, curved, or hard to clamp. A broken ornament hook, vase chip, glass bead, perfume bottle cap, or crystal figurine arm may move before a slow adhesive begins to hold. Even a tiny shift can make the repair look uneven. A fast-setting glass glue helps the parts stay aligned during the first moments after pressing. GleamGlee Glass Glue sets in about 15 seconds, which is useful for repairs where the piece must be held by hand instead of clamped. The short setting time helps reduce sliding, but the item should still be left undisturbed while the bond develops.
Fast-setting glue is especially useful for:
- Small glass parts that cannot stand upright by themselves.
- Curved items that roll or shift during repair.
- Decorative pieces that must align exactly.
- Narrow joints where clamps may crack the glass.
- Quick fixes where the user can hold the piece steady for a short time.
| Repair Situation | Problem with Slow Glue | Benefit of Fast Setting |
|---|---|---|
| Crystal figurine part | Piece may slide before holding | Better alignment control |
| Vase rim chip | Edge may shift under hand pressure | Cleaner repair line |
| Glass bead | Tiny part may roll or rotate | Easier fixed position |
| Perfume bottle cap | Cap may tilt while drying | Straighter reattachment |
| Mirror accent | Part may slip on smooth backing | Faster initial grip |
Fast setting should not be confused with full curing. The first set helps the parts stay together, but the repaired item should not be pulled, washed, twisted, hung, or loaded right away. A repaired ornament should not be hung immediately. A repaired vase should not be filled with water too soon. A repaired glass cap should not be twisted repeatedly after a few seconds. The early hold is only the beginning of the repair.
Which Glass Glue Has Control
Control is often more important than people expect. Fragile glass repairs usually need a very small amount of glue in a narrow space. If the tube opening is too wide or the glue comes out too quickly, excess adhesive can spread onto the glass surface. Once it dries, it may leave a shiny ridge, cloudy patch, or raised edge. A controlled glass glue should allow the user to place the adhesive only where the broken surfaces meet. This is especially useful for thin cracks, vase rims, crystal points, glass beads, mirror corners, and tiny decorative fittings. GleamGlee Glass Glue includes 4 precision nozzles per tube, and the 2-pack includes 8 nozzles, giving better control for repeated repairs.
Good control means the glue can be used in small repair zones such as:
- 1–2 mm cracks or narrow contact edges.
- Tiny detached ornament parts.
- Glass beads, charms, and jewelry details.
- Small mirror chips and decorative frame pieces.
- Hard-to-reach inner corners on glass objects.
| Control Feature | Practical Benefit | Repair Example |
|---|---|---|
| Fine-tip nozzle | Places glue in narrow joints | Vase crack, ornament wing |
| Slow squeeze control | Reduces overflow | Glass bead, small charm |
| Thin glue line | Keeps repair less visible | Clear glass vase |
| Anti-clog cap | Helps keep tube usable | Multiple small repairs |
| Built-in metal pin | Reduces dried glue blockage | Reopening after storage |
Better application control also saves product. Many fragile repairs need only one drop or a thin line. Too much glue can make the bond look messy and may prevent the broken glass edges from fitting tightly. Before applying glue to the item, test the flow on scrap material. Hold the nozzle close to the joint, squeeze slowly, and stop before the glue line looks full. When the pieces are pressed together, the glue will spread naturally.
Which Glass Glue Fits Fragile Items
The right glass glue for fragile items should match the item’s size, surface, stress level, and final use. A decorative ornament does not need the same repair strength as a glass shelf. A display vase does not have the same safety concern as a drinking glass rim. A mirror accent is different from a large wall mirror. The best glue choice is not only about whether it can bond glass; it is about whether it can make a clean, safe, realistic repair for that specific object. GleamGlee Glass Glue is suitable for many small and delicate glass repairs because it dries clear, sets quickly, and applies with precision. It is best used where the broken pieces fit closely and the repaired item will be displayed or handled gently.
Good-fit fragile glass repairs include:
- Glass vases, bowls, and candleholders.
- Crystal figurines, ornaments, and collectibles.
- Perfume bottles and cosmetic jars.
- Glass beads, charms, pendants, and craft pieces.
- Picture frames, small mirror decorations, and light shades.
Use caution with:
- Drinking rims, plates, or food-contact glass.
- Hot cookware, oven glass, or microwave glassware.
- Aquarium seams or pressure cracks.
- Load-bearing shelves, railings, and large wall mirrors.
- Car windshields, windows, and safety glass.
| Item Type | Glue Fit | Best Use Advice |
|---|---|---|
| Glass vase | High | Best for clean chips, cracks, and decorative breaks |
| Crystal ornament | High | Use tiny drops and cure before display |
| Perfume bottle | High | Good for caps and decorative parts |
| Glass bead jewelry | High | Use fine nozzle and tweezers |
| Mirror decoration | Medium to high | Best for small accents, not heavy mirrors |
| Display glassware | Medium | Better for decoration than eating or drinking |
| Aquarium seam | Low | Needs rated waterproof and pressure-safe repair |
| Glass shelf | Low | Do not rely on glue alone for weight support |
| Drinking rim | Low | Avoid normal drinking use after repair |
A practical rule is to think about the consequence of failure. If a repaired ornament loosens, the item may need another repair. If a repaired glass shelf fails, it may cause injury. Small, clean, non-structural glass repairs are usually the best match for glass glue. High-pressure, high-heat, food-contact, or safety-related glass should be handled with much more care.

How to Use Glass Glue?
Glass glue should be used in a clean, slow, and controlled way. The best repair starts before the glue touches the glass: check the break, clean the edges, test the fit, prepare the position, then apply only a thin layer. Fragile glass usually needs less glue than expected. Too much adhesive can squeeze out, leave a shiny edge, slow the cure, or make the repair line more visible.
For small fragile items, the working time is short because a fast-setting glass glue starts to hold quickly. GleamGlee Glass Glue sets in about 15 seconds, so the broken pieces should already be aligned and ready before application. This fast set is useful for small ornaments, vase chips, glass caps, and crystal pieces because it reduces sliding. Still, the repair should not be rushed. Fast setting helps position the item; curing gives the repair more stability.
The main rule is simple: clean first, dry-fit second, glue third, cure last. Most messy repairs happen when one of these steps is skipped. A repair may look easy, but glass shows every small mistake under light. A controlled process helps keep the joint narrow, the surface clean, and the repaired item stable enough for display or gentle use.
Step 1: Check the Glass Glue Repair
Before using glass glue, check whether the broken item is suitable for a home repair. Not every glass break should be glued. A clean two-piece break, small chip, detached ornament part, loose glass cap, or narrow vase crack is usually easier to repair than crushed glass, missing pieces, load-bearing glass, or food-contact damage. Look at the item under strong light and check the broken edge from several angles. If the pieces still fit together closely without force, the repair has a better chance of looking clean. If the glass has gaps, powdery crushed edges, or missing sections, the glue line may become thicker and more visible.
Check these points before opening the glue:
- Are all broken pieces still available?
- Do the pieces fit tightly without rocking?
- Is the damaged area decorative or structural?
- Will the repaired part touch food, mouth, heat, water pressure, or heavy weight?
- Can the item rest safely while curing?
| Damage Type | Repair Difficulty | Glass Glue Advice |
|---|---|---|
| Clean two-piece break | Low | Good repair candidate |
| Small vase rim chip | Low to medium | Use a thin glue line |
| Detached ornament part | Low | Use a tiny drop and steady pressure |
| Long crack in thin glass | Medium | Repair only if the glass is stable |
| Missing glass piece | High | Glue cannot rebuild the missing area invisibly |
| Load-bearing glass | Very high | Do not rely on simple glue repair |
| Drinking rim or plate edge | High | Avoid normal food or mouth-contact use |
This first check prevents the most disappointing repairs. A strong glue cannot fully fix a poor fit, missing material, or unsafe use. If the repaired area is only decorative, glass glue is often a practical option. If failure could cause injury, leakage, or contamination, the item needs stricter handling.
Step 2: Clean the Glass Glue Surface
Glass glue needs a clean surface to bond well. Glass may look clean, but the broken edge can hold fingerprints, dust, soap film, wax, mineral residue, perfume oil, cosmetic cream, candle soot, old glue, or tiny glass powder. These thin layers can block the adhesive from touching the glass directly. On a small repair, even a little oil from fingertips can weaken the bond or create a cloudy-looking line. Clean the bonding area carefully, then let it dry fully before applying glue. Moisture trapped inside the joint can reduce strength and affect the finish.
For fragile items, cleaning should be gentle. Do not scrape aggressively on thin glass, crystal, mirror backing, or decorative coatings. Use a lint-free cloth and handle the item by areas away from the break. If the item is dusty, remove loose particles first. If there is oily residue, clean only the repair area and allow it to dry completely. Avoid using fluffy tissues because loose fibers can stick to the glass edge and become trapped in the glue.
A simple cleaning guide:
- Remove loose shards and glass dust carefully.
- Wipe the bonding edge with a clean lint-free cloth.
- Keep fingers away from the cleaned edge.
- Let the area dry completely before gluing.
- Do not apply glue over old adhesive unless it cannot be safely removed.
| Surface Problem | What It Can Cause | Better Handling |
|---|---|---|
| Fingerprints | Weak bond or cloudy line | Hold glass by clean outer areas |
| Dust or fibers | Rough repair line | Use lint-free cloth |
| Water or humidity | Poor bonding | Dry fully before gluing |
| Old adhesive | Uneven contact | Remove loose residue carefully |
| Wax or oil | Glue may not grip | Clean the contact edge first |
Clean glass gives the adhesive a better chance to form a thin, stable bond. This step may take longer than the actual gluing, but it often decides whether the repair looks neat or messy.
Step 3: Dry-Fit the Glass Glue Joint
Dry-fitting means placing the broken pieces together before adding glue. This step is very important for fragile glass because GleamGlee Glass Glue sets in about 15 seconds. Once the adhesive is applied, there is little time to figure out the angle, direction, or pressure. A dry fit shows whether the pieces match properly and whether the repaired item can rest in a stable position. If the item rolls, tilts, or shifts during the dry fit, it will likely move during gluing unless it is supported.
A good dry fit should look close, narrow, and natural. The broken edges should meet without needing strong pressure. If the user has to squeeze hard to close the gap, the glass may crack again. If the piece rocks back and forth, the joint may dry unevenly. If the repair line looks wide before gluing, the finished repair will probably be visible after gluing.
Dry-fit checklist:
- Place the pieces together without adhesive.
- Check the joint from the front, side, and back.
- Make sure the item can rest without rolling.
- Prepare a towel, foam pad, or small support before gluing.
- Decide where the glue will be applied before opening the tube.
| Item Shape | Common Problem | Support Method |
|---|---|---|
| Round ornament | Rolls during repair | Place in a padded bowl |
| Tall vase | Crack shifts when standing | Lay on a folded towel if possible |
| Small crystal part | Hard to hold by fingers | Use tweezers |
| Glass bead | Rotates easily | Hold with tweezers or soft putty support |
| Mirror accent | Slides on flat glass | Cure flat and press gently |
Dry-fitting also helps avoid overapplication. When the pieces fit tightly, only a small amount of glue is needed. If the joint does not close during the dry fit, adding more adhesive usually creates a thicker and less attractive repair.
Step 4: Apply the Glass Glue Thinly
Glass glue should be applied in a thin, controlled layer. Fragile glass repairs usually fail visually when too much glue is used. A thick line may squeeze out, dry unevenly, or catch light around the repair. GleamGlee Glass Glue includes precision nozzles, which help place adhesive into narrow cracks, small chips, and tiny contact points. The nozzle should be held close to the repair area, and the tube should be squeezed slowly. For many small repairs, one tiny drop or one thin line is enough.
The glue should usually be applied to one contact edge rather than covering both sides heavily. When the pieces are pressed together, the adhesive spreads across the joint. If glue is applied to both sides in a thick layer, excess adhesive will likely push outward. On clear glass, that extra glue can become a visible ridge after drying.
Application tips:
- Attach the fine-tip nozzle firmly before use.
- Test the glue flow on scrap material first.
- Apply a thin bead, not a puddle.
- Keep glue inside the joint area.
- Stop before the glue line looks full.
- Do not touch the wet glue with fingers.
- Clean fresh overflow carefully without moving the joint.
| Repair Size | Suggested Glue Amount | Notes |
|---|---|---|
| Tiny ornament point | 1 small drop | Use tweezers and light pressure |
| Glass bead or charm | 1 small drop | Avoid blocking holes or details |
| Vase rim chip | Thin line on contact edge | Press gently and remove fresh overflow |
| Mirror accent | Thin dots or short line | Cure flat to reduce sliding |
| Perfume bottle cap | Small ring or thin line | Avoid twisting after contact |
| Light shade edge | Thin controlled bead | Support curved glass during setting |
The goal is to make the adhesive almost disappear inside the joint. More glue does not always mean more strength. On glass, closer edge contact and cleaner application often matter more.
Step 5: Press the Glass Glue Joint
After applying glass glue, press the pieces together gently and accurately. The pressure should be steady, not forceful. Fragile glass can crack if squeezed too hard, especially on thin stems, crystal points, vase rims, and ornament hooks. The broken edges should meet naturally. Once they touch, avoid sliding, twisting, or rotating the pieces unless they are clearly misaligned and the glue has not started setting yet.
GleamGlee Glass Glue sets in about 15 seconds, so hold the joint still during the first moments. For a small ornament or crystal part, light finger pressure may be enough. For a vase chip, support both sides so the piece does not shift. For a glass cap or knob, press straight down rather than twisting. For a mirror accent, press gently and keep the item flat while the initial hold forms.
Pressing mistakes to avoid:
- Twisting the parts after contact
- Pressing so hard that the glass chips again
- Lifting the item to inspect the repair too soon
- Adding extra glue after the pieces are already pressed
- Using clips that create uneven pressure
- Letting curved glass roll during setting
| Repair Item | Best Pressure Style | Common Mistake |
|---|---|---|
| Crystal ornament | Light straight pressure | Twisting tiny parts |
| Vase chip | Gentle edge-to-edge pressure | Pressing too hard |
| Perfume bottle cap | Straight downward pressure | Rotating the cap immediately |
| Glass bead | Hold with tweezers | Touching wet glue |
| Mirror piece | Even flat pressure | Letting it slide |
If a small amount of glue squeezes out, remove it while fresh, but do not disturb the joint. If the glue has already started to set, aggressive wiping may smear the surface or pull the repair out of alignment.
Step 6: Cure the Glass Glue Repair
Curing is the part that many people rush, but it has a big effect on repair strength. Initial setting means the glass pieces begin to hold their position. Curing means the bond continues to develop stability. A repair can feel fixed after a short time but still be vulnerable to twisting, washing, hanging, pulling, or weight. For fragile items, early handling is one of the most common reasons a repair fails later.
Place the repaired item in a stable position and leave it alone. A vase should not be filled with water too soon. An ornament should not be hung immediately. A repaired glass cap should not be opened and closed repeatedly. A mirror decoration should not be mounted while the joint is still fresh. If the repaired area is supporting weight or tension, allow more resting time and handle it gently afterward.
Curing habits that improve results:
- Keep the item still after the initial set.
- Place curved items on a soft support.
- Avoid washing, soaking, or heating the repaired area too soon.
- Do not test strength by pulling or twisting.
- Keep the repair away from dust, lint, children, and pets.
- Use the item gently after curing, especially near the repaired joint.
| Time Stage | Repair Condition | Handling Advice |
|---|---|---|
| First 15 seconds | Initial set begins | Hold pieces aligned |
| First few minutes | Joint is still delicate | Do not test strength |
| First several hours | Bond continues building | Keep item supported and still |
| After curing | Repair is more stable | Use gently based on item type |
| Long-term use | Stress can affect repair | Avoid impact, heat shock, and heavy load |
A repaired fragile glass item should be treated with care even after curing. Glass glue can restore many items for display or light use, but the repaired joint should not be treated as if the glass had never broken. Gentle use keeps the repair cleaner and more durable.

What Can Glass Glue Fix?
Glass glue can fix many small fragile items, including vases, crystal ornaments, mirrors, perfume bottles, candleholders, picture frames, glass beads, decorative glassware, light shades, stained glass pieces, and craft projects. It works best when the broken pieces are still available, the edges fit closely, and the repaired area will not carry heavy weight, heat, food contact, or water pressure.
Most successful glass glue repairs have one thing in common: the damage is small and the glass still keeps its original shape. A clean rim chip, a detached ornament part, a loose mirror accent, or a broken glass cap can often be repaired neatly because the contact surface is clear and easy to align. Crushed glass, missing corners, wide gaps, and pressure cracks are harder because the glue has to fill space instead of simply bonding two matching surfaces.
A practical way to judge a repair is to look at how the item will be used after gluing. Display items, decorative pieces, and light-use glass are usually better candidates. Drinking rims, hot cookware, aquarium seams, large shelves, car glass, and load-bearing glass need much more caution. Glass glue is excellent for many visible repairs, but it should not be used as a shortcut where safety depends on the glass staying strong under pressure.
| Item Type | Glass Glue Fit | Best Repair Area | Caution Point |
|---|---|---|---|
| Glass vase | High | Rim chips, decorative breaks, small cracks | Avoid filling with water too soon |
| Crystal ornament | High | Detached small parts, wings, hooks, details | Cure before hanging |
| Perfume bottle | High | Glass caps, decorative pieces, small chips | Avoid twisting repaired caps early |
| Mirror decoration | Medium to high | Frame accents, small corners, craft mirrors | Large mirrors need stronger support |
| Candleholder | Medium to high | Decorative glass edges, loose parts | Keep away from heat until fully cured |
| Glass beads | High | Charms, pendants, craft details | Use tiny drops only |
| Display glassware | Medium | Decorative bowls, jars, shelf pieces | Avoid food or mouth contact |
| Aquarium seam | Low | Not recommended for pressure seams | Needs rated water-pressure repair |
| Glass shelf | Low | Small non-load chips only | Do not rely on glue for weight support |
Glass Glue for Vases
Glass glue is very useful for vase repairs because many vases are decorative, sentimental, or hard to replace. Common vase damage includes chipped rims, small side cracks, detached decorative pieces, broken glass handles, and loose applied ornaments. A vase repair needs both strength and a clean look because the damaged area is often visible under daylight, table lamps, or shelf lighting. A transparent glue line matters more on vases than on many other materials because the repair can be seen from the front, side, and sometimes through the glass itself. GleamGlee Glass Glue dries transparent and colorless, which helps keep the repaired area less noticeable when the glue is applied in a thin, controlled line.
Vase repairs work best when the broken edge fits tightly. If the missing piece is still available, the repair can be much cleaner than trying to fill a hole or cover a missing section. The glue should be applied with a fine-tip nozzle along the contact edge, not smeared across the outer surface. For a small rim chip, one thin bead is usually enough. For a decorative piece, a tiny drop may be enough.
Good vase repair uses:
- Rim chips where the broken piece is still available.
- Decorative glass flowers, handles, feet, or raised details.
- Small cracks on dry display vases.
- Loose glass sections that fit back into place cleanly.
| Vase Damage | Repair Chance | Suggested Method |
|---|---|---|
| Small rim chip | High | Thin glue line on the chip edge |
| Detached decorative piece | High | One small drop, press gently |
| Side crack on display vase | Medium | Stabilize only if crack is clean and dry |
| Base crack | Medium to low | Avoid water use after repair |
| Missing glass piece | Low | Repair will likely stay visible |
| Long pressure crack | Low | Do not rely on glue if vase holds water |
After gluing, the vase should rest in a stable position. If the repair is near the bottom or side wall, do not fill it with water too soon. A repaired vase is safest when used as a dry display piece or handled gently after curing.
Glass Glue for Ornaments
Glass glue is a strong fit for ornaments because ornament damage is usually small, detailed, and decorative. Holiday ornaments, crystal animals, glass angels, hanging stars, collectible figures, and small display pieces often break at narrow points such as hooks, wings, arms, stems, ears, tails, or decorative tips. These areas need precise glue placement rather than a heavy amount of adhesive. A thick bead can cover detail, change the shape of the ornament, or leave a visible shine around the joint. GleamGlee Glass Glue includes precision nozzles, making it easier to place a tiny amount on small contact points without flooding the surrounding surface.
Many ornament repairs are successful because the repaired item does not need to carry much force after it is placed back on display. The main exception is the hanging loop. If the repaired part carries the full weight of the ornament, the repair should cure fully before hanging. Heavier ornaments should be displayed on a shelf or stand if the broken area is near the hook.
Useful ornament repair tips:
- Use tweezers for tiny broken parts.
- Work over a soft towel so pieces do not roll away.
- Apply one tiny drop first; add more only if needed.
- Press straight into place without twisting.
- Let the ornament cure flat before hanging or storing.
| Ornament Part | Glue Amount | Handling Advice |
|---|---|---|
| Tiny wing or arm | 1 small drop | Hold with tweezers, press lightly |
| Hanging loop | Thin controlled bead | Cure fully before hanging |
| Decorative tip | 1 small drop | Avoid covering surface detail |
| Glass base | Thin line | Rest flat while curing |
| Crystal figure joint | Tiny bead | Keep fingerprints away from edge |
For collectible ornaments, the repair should focus on appearance as much as hold. Clean edges, light pressure, and a dust-free curing area help keep the piece display-ready.
Glass Glue for Mirrors
Glass glue can fix small mirror-related repairs, especially decorative mirror accents, mirror tiles, chipped corners, vanity mirror parts, and frame details. Mirror repairs need more care than ordinary clear glass because a mirror has a reflective backing. If glue spreads behind the reflective layer or seeps into the wrong area, it can affect the appearance. Small mirror decorations are usually easier to repair than large wall mirrors because they are lighter and carry less risk. A large mirror should not rely only on glue if it is heavy, hanging, or positioned where falling glass could cause injury.
For small mirror repairs, the glue should be applied only where bonding is needed. The mirror should be cured flat whenever possible to prevent sliding. If a decorative mirror piece is being attached to a frame, the frame material should also be clean and dry. If the repair is on the back of the mirror, use a controlled amount so adhesive does not spread into unwanted areas.
Good mirror repair uses:
- Small mirror tiles in craft projects.
- Decorative mirror pieces on frames.
- Small corner chips on non-load areas.
- Cosmetic mirror parts.
- Light mirror accents on home décor.
| Mirror Repair | Glass Glue Fit | Important Note |
|---|---|---|
| Small mirror tile | High | Cure flat to stop sliding |
| Decorative mirror accent | High | Use thin dots or short lines |
| Vanity mirror part | Medium to high | Avoid glue on visible reflective area |
| Corner chip | Medium | Best if piece fits closely |
| Large wall mirror | Low | Needs mechanical support |
| Bathroom mirror edge | Medium | Moisture exposure needs caution |
Mirror glue repair is safest when the piece is small and decorative. For larger mirrors, glue can sometimes help with minor details, but weight and mounting support should be handled separately.
Glass Glue for Glassware
Glass glue can repair some glassware, but glassware needs careful judgment because it may touch the mouth, food, hot liquid, dishwashing water, or repeated handling. A decorative glass bowl on a shelf is very different from a drinking glass used every day. A repaired candleholder is very different from a cup handle holding hot tea. The safer use of glass glue on glassware is usually for display pieces, decorative parts, lids, knobs, dry jars, and non-food areas. If the repaired part touches food or drink, the item should not return to normal eating or drinking use unless the adhesive is clearly suitable for that purpose.
Glassware repairs look best when the damage is away from the rim or contact surface. For example, a glass lid knob, decorative pitcher accent, display jar ornament, or candleholder edge may be a better candidate than a cracked drinking rim. GleamGlee Glass Glue dries clear, which helps on visible glassware, but safe use still depends on where the break is located.
Better glassware repair uses:
- Glass lids with loose knobs.
- Decorative jars for dry display.
- Candleholders and table decorations.
- Display bowls or cups not used for food.
- Glass pitchers with non-contact decorative damage.
| Glassware Area | Repair Suitability | Use After Repair |
|---|---|---|
| Decorative outer accent | High | Display or light handling |
| Glass lid knob | Medium to high | Gentle hand use |
| Candleholder edge | Medium | Keep away from strong heat until cured |
| Display bowl | Medium | Decoration only |
| Drinking rim | Low | Avoid drinking use |
| Plate edge | Low | Avoid food use |
| Hot cup handle | Low | Heat and weight create risk |
A simple rule helps: if the repaired area touches the mouth, food, hot liquid, or dishwasher water, keep the item for display instead of daily use. For glassware that will still be handled, gentle cleaning by hand is safer than soaking, scrubbing, or using a dishwasher.
Glass Glue for Crafts
Glass glue is also useful for craft projects because many crafts involve small glass pieces, mixed surfaces, and visible design details. It can be used for stained glass-style projects, mosaics, glass gems, beads, charms, resin-and-glass art, school projects, handmade candleholders, decorative jars, and small home décor pieces. Craft repairs and craft assembly usually need controlled placement, because glue marks can affect the finished look. A precision nozzle helps place adhesive exactly where the glass touches the base material.
Craft glass can be bonded to certain materials such as glass, metal, plastic, ceramic, stone, or wood, depending on the project and surface condition. Smooth materials should be clean and dry before gluing. Porous bases such as unfinished wood or stone may absorb liquid differently, so a small test area is useful. For mosaics and flat glass gems, spacing and glue amount matter. Too much glue can rise between pieces and affect the design.
Good craft uses:
- Glass gems on frames, boxes, and boards.
- Glass beads and charms for handmade accessories.
- Stained glass pieces before display.
- Mosaic glass on trays, planters, or décor panels.
- Resin art with small embedded glass pieces.
| Craft Project | Glue Use | Practical Tip |
|---|---|---|
| Glass gems | Dot application | Use equal spacing before pressing |
| Mosaic pieces | Thin dots or short lines | Avoid glue rising between pieces |
| Glass charms | Tiny drop | Use tweezers for placement |
| Stained glass craft | Narrow seam bonding | Keep edges clean before joining |
| Resin and glass art | Small positioning drops | Let glue set before resin work |
| Decorative jars | Thin bead on trim | Wipe overflow before curing |
Glass glue works best in crafts when it is used with intention. Place the pieces first, check the layout, then glue one section at a time. This keeps the project cleaner and prevents mistakes that become hard to correct after the adhesive sets.
Is Glass Glue Safe?
Glass glue can be safe for home repair, décor repair, and craft use when it is applied to the right item and handled with care. It is best suited for small, non-structural glass repairs such as vases, ornaments, mirror accents, perfume bottles, candleholders, glass beads, and display glassware. Safety depends on surface preparation, glue amount, curing time, and how the repaired item will be used afterward.
The main safety question is not only whether glass glue can bond the material. The more important question is what the repaired part will face after curing. A crystal ornament sitting on a shelf is low risk. A repaired glass shelf holding weight is high risk. A decorative glass bowl is different from a plate used for food. A small terrarium accessory is different from an aquarium seam holding water pressure. Fragile glass can be repaired neatly, but the repaired area should not be treated as if the item were never broken.
Before using glass glue, the work area should be clean, stable, and away from children, pets, food, and open drinks. Broken glass edges may cut skin, and tiny shards can hide inside cracks or under the item. Apply only a small amount of adhesive, keep the glue away from eyes and skin, and let the repair cure fully before handling. A careful repair protects both the appearance of the glass and the person using it.
| Safety Factor | Safer Condition | Higher-Risk Condition |
|---|---|---|
| Repair size | Small chip, clean break, detached piece | Large crack, crushed edge, missing glass |
| Item use | Display, décor, light handling | Weight-bearing, heat, food, pressure |
| Contact area | Tight-fitting edges | Wide gaps or uneven surfaces |
| Glue amount | Thin controlled layer | Thick bead or overflow |
| Handling time | Left still while curing | Tested, washed, or pulled too early |
| Failure result | Cosmetic damage only | Injury, leakage, falling glass |
Is Glass Glue Safe for Home Use
Glass glue is generally suitable for many home repairs when the item is small, the repair is non-structural, and the adhesive is used in a controlled amount. Common home uses include fixing a glass vase rim, reattaching a perfume bottle cap, repairing a crystal ornament, securing a mirror decoration, or bonding a small glass lid knob. The first safety step is checking the broken glass itself. Sharp edges, loose chips, and hidden shards should be handled carefully before glue is applied. A soft towel or silicone mat helps keep pieces from sliding, while bright lighting makes small fragments easier to see.
Good home-use habits:
- Work on a clean, flat, well-lit surface.
- Keep children, pets, food, and drinks away from the repair area.
- Handle glass by the safe edges, not by the broken joint.
- Use a thin layer of glue instead of flooding the crack.
- Close the cap after use to reduce drying and accidental spills.
- Let the repaired item cure before touching, washing, or displaying it.
| Home Repair Item | Safe Use Level | Practical Advice |
|---|---|---|
| Glass ornament | High | Cure flat before hanging |
| Perfume bottle cap | High | Avoid twisting too soon |
| Glass vase rim | Medium to high | Use gently after curing |
| Mirror accent | Medium | Cure flat to prevent sliding |
| Glass handle | Medium to low | Avoid heavy lifting by repaired part |
| Large wall mirror | Low | Needs proper support, not glue alone |
For home use, less glue is often safer and cleaner. Excess adhesive can run onto fingers, drip across the surface, or form a raised edge that catches dust. GleamGlee Glass Glue includes precision nozzles, helping place the adhesive only where the surfaces meet. The built-in metal pin in the cap also helps reduce clogging, which prevents sudden glue bursts when reopening the tube.
Is Glass Glue Safe for Delicate Glass
Glass glue can be used on delicate glass, but the repair must be handled with light pressure and careful positioning. Thin glass, crystal details, ornament hooks, glass beads, small vase chips, and perfume bottle decorations can crack further if squeezed too hard. Delicate glass does not need heavy force. It needs clean contact, accurate alignment, and steady support while the adhesive sets. GleamGlee Glass Glue sets in about 15 seconds, which helps small parts stay in place without long clamping. Even so, the repaired piece should rest undisturbed while it cures.
For delicate glass, the repair quality depends on control:
- Use tweezers for tiny pieces instead of fingers.
- Support curved items with a folded towel or padded bowl.
- Apply one small drop first, then add more only if needed.
- Press straight into place; do not twist or slide the part.
- Avoid using clips or clamps that create uneven pressure.
- Do not hang or lift the item by the repaired area right away.
| Delicate Item | Main Risk | Safer Repair Method |
|---|---|---|
| Crystal figurine arm | Snapping from pressure | Use tweezers and light contact |
| Ornament hook | Weight pulling on joint | Cure fully before hanging |
| Thin vase edge | New chips from squeezing | Press gently along the edge |
| Glass bead | Glue blocking small holes | Use one tiny drop |
| Perfume bottle decoration | Misalignment while setting | Hold straight for initial set |
| Light shade edge | Curved glass shifting | Support evenly while curing |
Delicate glass should also be judged by future use. A repaired crystal ornament can often return to display, but a repaired hanging point should not carry weight until fully cured. A repaired bead can be used in a craft project, but it should not be pulled strongly. A repaired vase edge may look clean, but sudden bumps or hard cleaning can still damage it again.
Is Glass Glue Safe for Food Areas
Glass glue should be used carefully around food-contact areas. Many people want to repair wine glasses, bowls, plates, pitchers, mugs, or serving dishes because the item still looks usable. The risk is that food, drink, heat, mouth contact, washing, and repeated handling create conditions that are very different from display repair. A repaired glass rim may touch the mouth. A repaired plate edge may touch food. A repaired cup handle may carry hot liquid. These uses need much more caution than repairing a vase or ornament.
Safer glassware repair uses include:
- Display-only cups, bowls, and jars.
- Decorative glassware kept on shelves.
- Glass lids with loose knobs.
- Candleholders and table décor.
- Glass jars used for dry decoration.
- Serving pieces repaired only on non-food decorative areas.
| Glassware Area | Repair Safety | Recommended Use After Repair |
|---|---|---|
| Decorative outer accent | Medium to high | Display or light handling |
| Glass lid knob | Medium | Gentle use, avoid heat shock |
| Candleholder edge | Medium | Keep away from direct flame contact |
| Display bowl | Medium | Decoration only |
| Drinking rim | Low | Do not use for drinking |
| Plate eating surface | Low | Do not use for food |
| Hot cup handle | Low | Avoid carrying hot liquids |
A simple rule is useful: if the repaired area touches the mouth, food, hot liquid, or dishwasher water, keep the item for display instead of daily use. Even when the repair looks clean, the repaired area may not be suitable for eating, drinking, soaking, or machine washing. For glassware repaired with glass glue, gentle hand cleaning and decorative use are safer than regular kitchen use.
Is Glass Glue Safe for Aquariums
Glass glue should be used with extra caution around aquariums. Aquarium glass faces constant water pressure, long-term moisture, vibration, temperature changes, and the safety needs of fish, plants, or reptiles. A small glass ornament outside the tank is one thing. A seam, side crack, base crack, or pressure-bearing panel is very different. If a repair fails, the result may be water leakage, property damage, broken glass, or harm to living things inside the tank.
Glass glue may be suitable for some low-risk aquarium or terrarium-related uses:
- Dry glass décor outside the tank.
- Non-pressure terrarium accessories.
- External glass accents.
- Small decorative glass covers.
- Craft pieces not exposed to constant water.
- Display glass used near, but not inside, the water area.
| Aquarium or Terrarium Area | Risk Level | Repair Advice |
|---|---|---|
| External decorative glass | Low to medium | Good if dry and non-structural |
| Terrarium glass décor | Medium | Use only after full curing |
| Aquarium top cover chip | Medium | Depends on stress and position |
| Side panel crack | High | Do not rely on simple glue repair |
| Bottom crack | Very high | Replace or use proper professional repair |
| Interior seam | Very high | Needs rated aquarium-safe sealing system |
| Active water area | Very high | Avoid unless product is clearly suitable |
For aquarium use, the safest approach is to avoid using ordinary glass glue on any area that holds water pressure or touches the living environment unless the adhesive is clearly rated for that purpose. Small decorative repairs are one thing; pressure seams are another. If the glass supports water, weight, or animals, safety should come before saving the object.
Are Glass Glue Repairs Long-Lasting
Glass glue repairs can last well when the break is small, the surfaces are clean, the pieces fit tightly, and the repaired area is not exposed to heavy stress. Long-lasting repair depends less on the amount of glue and more on how the item is prepared, aligned, cured, and used afterward. A crystal ornament repaired on a display shelf may stay stable for a long time. A cup handle pulled every day, a vase base holding water, or a glass shelf carrying weight will face much higher stress.
Factors that improve durability:
- Clean, dry glass before gluing.
- Tight edge contact with little or no gap.
- Thin adhesive layer.
- No movement during the first setting period.
- Enough curing time before use.
- Gentle cleaning after repair.
- No heavy pulling, twisting, soaking, or heat shock.
| Condition | Effect on Repair Life | Better Practice |
|---|---|---|
| Clean break | Stronger contact | Dry-fit before gluing |
| Thick glue layer | More visible, may cure unevenly | Use a thin bead |
| Early handling | Weakens the bond | Let the item rest |
| Water exposure | Can stress the joint | Avoid soaking unless suitable |
| Heat shock | Can expand glass and adhesive differently | Keep repaired items away from sudden heat |
| Heavy load | May reopen the joint | Do not use repaired parts as handles or supports |
A repaired glass item should be treated as restored, not brand new. Glass glue can bring many fragile items back to display or light use, but the repaired joint still deserves care. The best long-term results come from matching the repair to the item’s real use: display pieces can be repaired confidently, while food, heat, pressure, and load-bearing repairs need more caution.
Why Choose GleamGlee Glass Glue?
GleamGlee Glass Glue is made for small, visible, and delicate glass repairs where both strength and appearance matter. It dries transparent and colorless, sets in about 15 seconds, and comes with fine-tip nozzles for narrow cracks, chips, tiny joints, and hard-to-reach areas. It is suitable for clear glass, colored glass, stained glass, tinted glass, crystal decorations, glass craft pieces, and certain mixed-material repairs involving glass with metal or plastic.
Fragile glass repair often fails because the glue is too thick, too slow, too cloudy, or too hard to control. A vase chip, perfume bottle cap, ornament hook, mirror corner, or crystal figurine arm usually needs a small amount of adhesive in a very exact spot. GleamGlee Glass Glue is designed around that kind of repair. The fast set helps hold small parts before they slide. The clear finish helps keep the repair less visible. The precision nozzles help reduce overuse and messy overflow.
The product is also practical after the first repair. Each tube includes 4 precision nozzles, and a 2-pack includes 8 nozzles. The resealable cap has a built-in metal pin to help reduce clogging and drying, so the glue stays easier to use for future repairs. This matters because glass repair is rarely a one-time need. After fixing a vase, the same tube may later be used for an ornament, candleholder, glass jar, mirror accent, bead, charm, or craft project.
GleamGlee Glass Glue Strength
GleamGlee Glass Glue is specially formulated for glass bonding, which is important because glass is smooth, hard, and non-porous. Ordinary craft glue may work on paper, fabric, or wood, but it often struggles on glass because there are no fibers or pores for the adhesive to grip. GleamGlee Glass Glue is designed to create a strong hold between clean glass contact surfaces, especially when the broken pieces fit closely. The bond works best on small, non-structural repairs where the item will be displayed or handled gently after curing. For fragile items, good strength is not about applying a large amount of glue. It comes from clean edges, tight contact, thin application, and still curing.
Good strength use cases include:
- Reattaching crystal figurine parts, glass ornaments, and small decorative pieces.
- Repairing vase rim chips, candleholder edges, and glass jar decorations.
- Bonding glass to certain metal or plastic fittings, such as caps, knobs, and trim.
- Fixing light-use household glass items where the repaired area does not carry heavy weight.
| Repair Condition | Strength Result | Better Practice |
|---|---|---|
| Clean, dry edges | Stronger contact | Wipe and dry before gluing |
| Tight-fitting break | Cleaner, stronger joint | Dry-fit before applying glue |
| Thin glue layer | Better edge contact | Use a small bead, not a thick blob |
| No movement while curing | More stable repair | Let the item rest after setting |
| Heavy load or pressure | Higher failure risk | Avoid using repaired joint as support |
GleamGlee Glass Glue works best when used for the right repair type. It is a good fit for vases, ornaments, mirror details, glass caps, beads, charms, decorative glassware, and craft pieces. It should not be used as the only support for shelves, railings, large mirrors, car windshields, or pressure-bearing aquarium seams.
GleamGlee Glass Glue Clarity
GleamGlee Glass Glue dries transparent and colorless, which is one of the most important features for glass repair. Glass shows adhesive marks more easily than many other materials because it reflects light and often allows light to pass through the repaired area. A cloudy glue line can make a crystal ornament look dull. A yellowish repair can make a clear vase look old. A thick shiny edge can make a perfume bottle or candleholder look poorly repaired. Clear drying helps the repair blend more naturally with the original glass, especially when the glue is applied in a thin, controlled layer.
Clear finish matters most for:
- Clear glass vases, bowls, candleholders, and decorative jars.
- Crystal ornaments, figurines, glass animals, and collectible pieces.
- Perfume bottles, cosmetic jars, and display containers.
- Stained glass, tinted glass, colored glass, and glass craft projects.
| Glass Type | Appearance Need | GleamGlee Glass Glue Benefit |
|---|---|---|
| Clear glass | Repair line should stay less visible | Transparent, colorless finish |
| Colored glass | Glue should not create pale marks | Clear bond line |
| Stained glass | Seams should stay neat | Thin controlled application |
| Crystal | Light should not expose cloudy residue | Clear drying with small glue amount |
| Tinted glass | Repair should not change surface color | Colorless finish |
For the cleanest result, use less glue than expected. Even a clear adhesive can look messy if too much is applied. A thin line inside the joint is better than a wet layer spread across the surface. Keep fingers away from the cleaned edge, remove fresh overflow carefully, and let the repair cure away from dust and loose fibers.
GleamGlee Glass Glue Nozzles
GleamGlee Glass Glue includes precision nozzles because fragile glass repair usually happens in small spaces. Each tube comes with 4 fine-tip nozzles, and the 2-pack comes with 8 nozzles. These nozzles help place glue into narrow cracks, small chips, tiny broken points, and hard-to-reach joints without flooding the surface. A fine nozzle is especially useful when repairing crystal details, glass beads, ornament hooks, perfume bottle caps, mirror corners, light shade edges, and stained glass craft pieces. Without a controlled tip, too much glue may come out at once and create a raised, shiny, or cloudy mark around the repair.
Precision nozzles help with:
- 1–2 mm cracks, narrow seams, and small glass contact edges.
- Tiny ornament parts that need only one small drop.
- Curved or hard-to-hold glass surfaces where overflow is easy.
- Craft projects where neat placement affects the final look.
| Nozzle Feature | Practical Value | Repair Example |
|---|---|---|
| Fine tip | Places glue into small joints | Crystal ornament, glass bead |
| Controlled flow | Reduces overflow | Vase rim chip, mirror corner |
| Replaceable nozzles | Useful for repeated repairs | Multiple household glass items |
| Narrow reach | Helps inside tight areas | Perfume cap, light shade edge |
| Less waste | Uses only the needed amount | Small cracks and craft pieces |
The cap also has a built-in metal pin to help reduce clogging and drying after use. This is helpful because many glass repairs use only a small amount of glue. A tube may still have plenty left after fixing one item. Better sealing means the product is easier to reopen for the next repair instead of becoming blocked or wasted.
GleamGlee Glass Glue Uses
GleamGlee Glass Glue is useful across many everyday glass repair and craft situations. It works on clear, colored, stained, and tinted glass, and can also bond certain metals and plastics. This makes it practical for household items that are not always pure glass. A perfume bottle may have a glass cap with a plastic insert. A decorative jar may have a metal knob. A glass ornament may include metal hanging parts. A craft project may combine glass with ceramic, stone, resin, wood, or plastic. The glue is most suitable for small, clean, non-structural repairs where the repaired item will be displayed or handled gently.
Common use areas include:
- Home décor: vases, bowls, candleholders, ornaments, light shades, and lantern panes.
- Personal items: perfume bottles, cosmetic jars, glass charms, pendants, and beads.
- Display repairs: crystal figurines, collectible glass pieces, picture frames, and mirror accents.
- Craft projects: stained glass pieces, mosaics, glass gems, resin art, and handmade decorations.
| Use Area | Example Items | Repair Advice |
|---|---|---|
| Vases and bowls | Rim chips, decorative pieces | Use a thin line and cure before water use |
| Ornaments | Hooks, wings, small details | Use tiny drops and cure before hanging |
| Perfume bottles | Caps, glass decorations | Press straight, avoid twisting early |
| Mirrors | Small accents, frame pieces | Cure flat and avoid heavy weight |
| Glass crafts | Beads, mosaics, stained glass | Plan layout before gluing |
| Light fixtures | Shades, glass panels | Avoid heat exposure before full curing |
GleamGlee Glass Glue is best for repairs where neat appearance matters. It helps save small fragile items that might otherwise be thrown away, especially when the broken pieces still fit together closely. For high-risk repairs such as drinking rims, hot cookware, aquarium seams, shelves, railings, or automotive glass, the repaired area should be judged carefully and not treated like a simple decoration repair.
Conclusion
Using glass glue for fragile items is less about rushing a quick fix and more about controlling every small detail. Clean edges, a dry surface, a close dry fit, a thin glue line, and steady pressure all affect how the final repair looks and holds. For clear glass, crystal, vases, ornaments, mirrors, perfume bottles, and delicate craft pieces, the repair line should stay as narrow and clean as possible. Too much glue can leave marks, while poor alignment can make even a strong repair look unfinished. A careful process gives broken glass a better chance to return to display, light use, or everyday decoration without looking heavily repaired.
GleamGlee Glass Glue is a practical choice for small, visible glass repairs because it dries transparent and colorless, sets in about 15 seconds, and includes precision nozzles for narrow cracks, chips, and tiny joints. It works well for many home décor pieces, collectibles, glass crafts, and mixed-material details where clean application matters. The best results come when the repaired item is used within reasonable limits: display pieces, decorative glass, and light-use items are better matches than food-contact, heat-exposed, pressure-bearing, or load-supporting glass. With the right repair judgment and careful handling, many fragile glass items can be saved instead of replaced.





















