 Skip to content
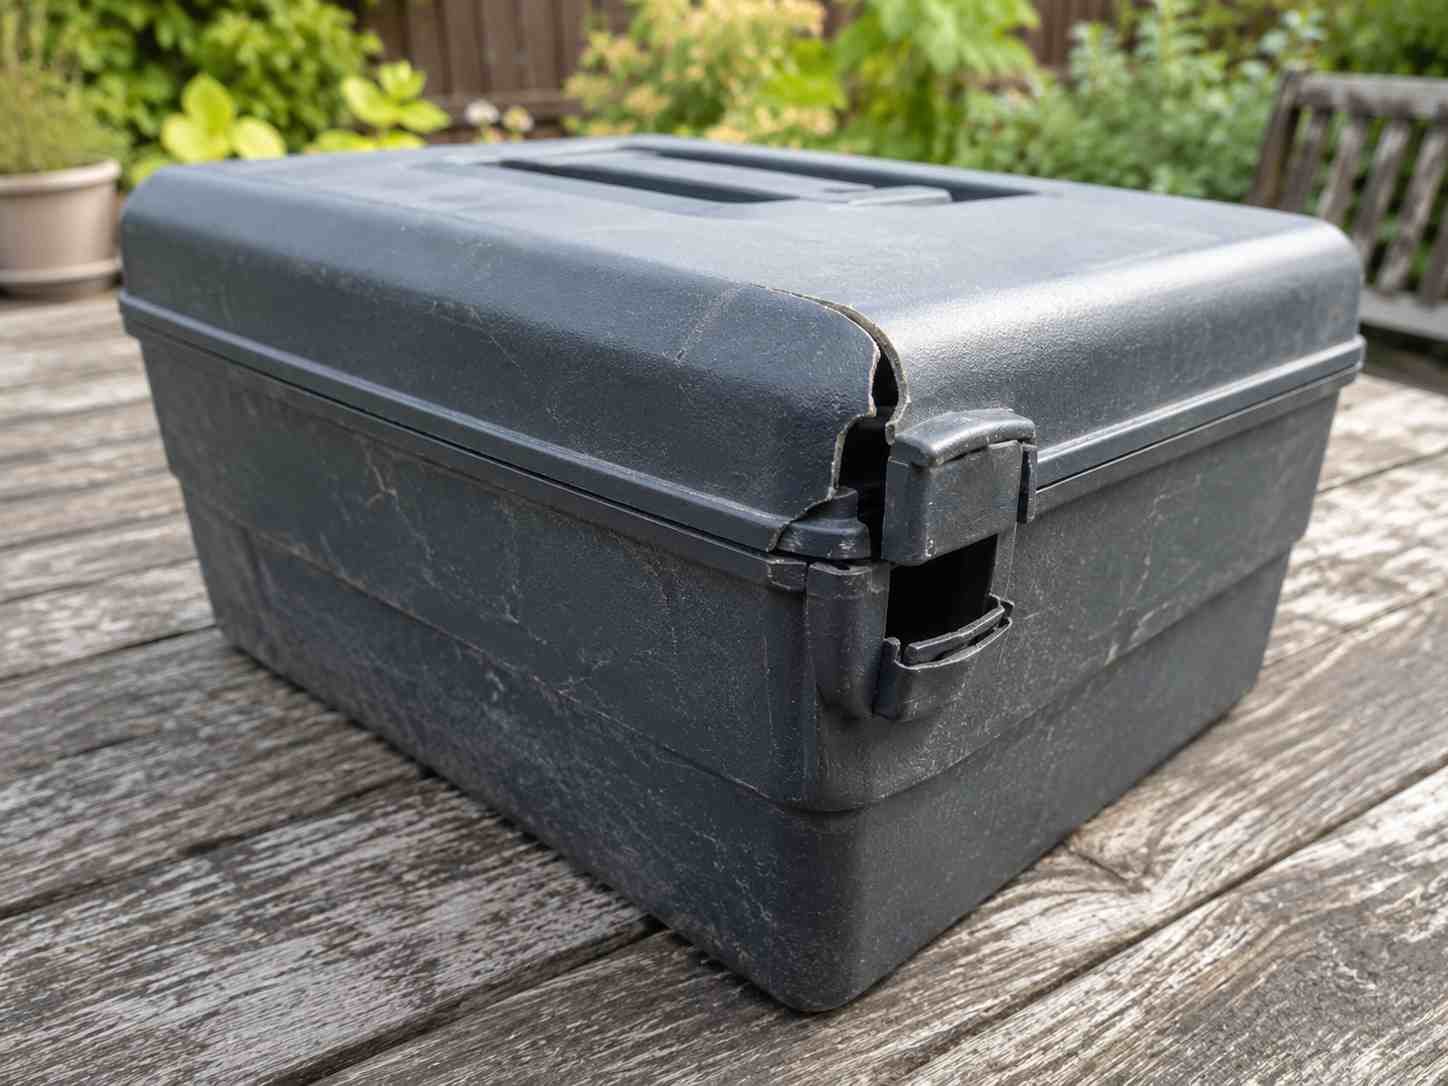
A broken plastic item often looks too small to worry about, but too useful to throw away. A cracked storage box, a snapped toy part, a loose remote-control cover, a broken acrylic frame, or a damaged vacuum attachment can quickly become an everyday annoyance. Many people try tape first, then general glue, then finally give up when the part breaks again. The real problem is not always the damage itself. It is usually the wrong glue, a dirty surface, too much adhesive, or no pressure during setting.
Plastic glue repairs household items by bonding clean, dry, close-fitting plastic surfaces with an adhesive made for plastics such as PVC, ABS, acrylic, and similar materials. For a stronger repair, identify the plastic type, clean the surface, test the fit, apply a thin glue line, press firmly, and let the repaired part rest before daily use.
That simple process can save more items than most people expect. A plastic drawer handle can go back into service. A child’s toy can avoid the trash bin. A clear acrylic stand can look neat again instead of cloudy and messy. The difference between a repair that lasts and one that fails often comes down to a few small choices made before the glue even touches the plastic.
What Is Plastic Glue?
Plastic glue is an adhesive made for bonding plastic surfaces that ordinary craft glue, tape, or general household glue often cannot hold well. It is commonly used for small repairs around the home, such as cracked storage bins, broken toy parts, loose remote-control covers, plastic appliance knobs, acrylic frames, bathroom accessories, model pieces, and garden items. A good plastic glue should create a firm bond, apply neatly, dry cleanly, and work on common plastics such as PVC, ABS, acrylic, and similar hard plastic materials.
The most important thing to understand is that plastic is not one single material. A hard ABS remote-control cover is easier to repair than a soft, flexible food container lid. A clear acrylic frame needs a glue that dries transparent. A PVC organizer may need a strong bond plus extra pressure while setting. If the surface feels waxy, oily, or bendable, the repair may be harder. Many plastic glue failures happen because the wrong plastic was repaired, the surface was dirty, or the user applied too much glue instead of a thin controlled layer.
For daily household use, plastic glue is most useful when the broken parts still fit together closely. It works well on small cracks, snapped tabs, broken corners, loose clips, and visible plastic details that need a clean finish. It is not the best choice for high-heat parts, food-contact surfaces, safety parts, or items that support body weight. Before applying glue, always ask three simple questions: does the plastic fit back together, will the repaired part face heavy stress, and does the repair need to look clear or invisible?
What Can Plastic Glue Fix?
Plastic glue can fix many small household problems when the plastic surface is clean, dry, and not under heavy load. Most people use it for items that are still useful but have one broken part, such as a cracked organizer, a loose plastic clip, a toy wheel, a snapped battery cover, a clear acrylic stand, or a damaged appliance knob. These repairs are worth doing because the item usually does not need full replacement. The best results happen when the broken edges still match closely and the repaired area will not bend, carry heavy weight, or get pulled every day. Plastic glue is especially helpful for hard plastic items because the adhesive can grip the surface more firmly and form a cleaner repair line.
Common plastic glue repair uses:
- Home storage: cracked bins, drawer organizers, plastic boxes, lid corners
- Bathroom items: toothbrush holders, soap dispensers, shower caddies, wall hooks
- Toys and models: action figures, small wheels, miniatures, model cars, building parts
- Electronics casings: remote covers, keyboard parts, mouse shells, headphone frames
- Appliance parts: vacuum attachments, fan bases, blender lids, control knobs
- Decor and crafts: acrylic frames, ornaments, plastic figurines, 3D printed pieces
| Repair Item | Common Damage | Repair Value | Difficulty |
|---|---|---|---|
| Remote-control cover | Broken tab | Saves replacement cover | Easy |
| Acrylic frame | Corner crack | Keeps display usable | Easy |
| Toy figure | Detached arm or part | Restores play value | Easy |
| Storage bin | Side crack | Extends daily use | Medium |
| Vacuum attachment | Cracked nozzle | Restores function | Medium |
| Garden planter | Rim split | Avoids throwing away | Medium |
| Plastic chair leg | Structural crack | Safety risk | Not ideal |
What Makes Plastic Glue Strong?
Plastic glue becomes stronger when the repair has close contact, clean surfaces, thin application, and steady pressure. A common mistake is thinking more glue means more strength. In many plastic repairs, too much glue actually makes the joint weaker because it keeps the broken edges apart and creates a thick, uneven layer. A thin glue line allows the plastic pieces to sit closer together, which helps the adhesive bond more evenly. The surface also needs to be clean because oil from hands, soap film, dust, old glue, or outdoor dirt can block direct contact between the adhesive and the plastic. A strong repair is usually the result of careful preparation, not just the glue itself.
Main factors that improve plastic glue strength:
- Clean surface: remove grease, dust, soap film, and loose plastic pieces
- Tight fit: broken edges should touch closely before glue is applied
- Thin glue line: use only enough glue to cover the contact area
- Steady pressure: hold the pieces still while the glue sets
- Enough rest time: avoid pulling, bending, washing, or loading too soon
- Better support: use tape, rubber bands, or a hidden backing strip for long cracks
| Strength Factor | Good Repair Habit | What Goes Wrong If Ignored |
|---|---|---|
| Surface cleaning | Wipe and dry before gluing | Glue bonds to dirt instead of plastic |
| Glue amount | Apply a thin controlled line | Thick glue creates weak gaps |
| Alignment | Test fit before applying glue | Parts dry in the wrong position |
| Pressure | Press firmly without sliding | Air gaps reduce bond strength |
| Rest time | Let functional parts sit longer | Repair breaks during early use |
| Support | Reinforce stressed cracks | Long cracks reopen later |
What Plastic Glue Cannot Fix?
Plastic glue cannot safely fix every broken plastic item. Some repairs are too risky because the damaged part carries weight, handles heat, holds pressure, touches food, or protects someone from injury. For example, a cracked step stool, broken helmet part, damaged child safety product, hot appliance housing, or food container surface should usually be replaced instead of glued. Plastic glue is also less reliable when the broken area is missing material, crushed into small fragments, or made from very flexible plastic that bends every time it is used. In these cases, the repair may look fine at first but fail quickly under real daily pressure.
Repairs that need caution:
- Load-bearing parts: chair legs, step stools, support brackets, heavy-duty handles
- Safety items: helmets, child seats, protective guards, medical support parts
- Food-contact items: lunch boxes, cups, blender jars used for food contact
- Hot areas: kettle parts, heater housings, high-temperature appliance parts
- Pressure parts: sprayers, sealed tanks, pressurized plastic containers
- Very flexible plastics: soft lids, bendable buckets, thin folding parts
| Problem Type | Repair Risk | Better Decision |
|---|---|---|
| Clean small crack | Low | Use plastic glue |
| Broken decorative part | Low | Use clear plastic glue |
| Long crack on storage box | Medium | Glue with inside support |
| Flexible lid split | Medium to high | Test first or replace |
| Missing plastic piece | High | Patch or replace |
| Chair or stool crack | High | Replace for safety |
| Food-contact crack | High | Replace |
| High-heat plastic part | High | Use rated replacement part |
Plastic glue works best when it reconnects pieces that still belong together. It is not meant to rebuild a missing structure from nothing or make unsafe items safe again. A good rule is simple: if the item only needs light everyday use, repair may be practical; if failure could cause injury, leakage, heat damage, or food contamination, replacement is the smarter choice.
Which Plastic Glue Fits?
The right plastic glue depends on the type of plastic, the size of the break, the visibility of the repair, and the stress the item will face after fixing. A glue that works well on a hard ABS remote-control cover may not work the same way on a soft food container lid. A clear acrylic frame needs a transparent finish, while a cracked storage bin may need stronger support behind the crack.
For most household repairs, PVC, ABS, and acrylic are easier starting points because they are common in hard plastic items and can often form a reliable bond when cleaned and aligned correctly. Flexible, waxy, or oily-feeling plastics are more difficult because many adhesives cannot grip their surface well. If the glue dries but peels off like a film, the material may need special treatment or may not be suitable for a simple glue repair.
Before choosing plastic glue, check the item with a practical repair mindset. Is the surface hard or bendable? Is the crack narrow or wide? Will the part carry weight, snap into place, or stay still on a shelf? Does the repair need to look invisible? These questions help avoid wasted glue, messy marks, and weak bonds. A small visible repair usually needs clear glue and a fine nozzle. A stressed repair may need glue plus hidden support.
| Plastic Type | Common Items | Repair Match | What to Watch |
|---|---|---|---|
| PVC | Bathroom racks, organizers, garden parts | Good for hard utility repairs | Soap film, moisture, outdoor stress |
| ABS | Remote covers, toys, appliance casings | Good for small strong repairs | Alignment, tabs, clips, thin edges |
| Acrylic | Frames, displays, clear covers | Good for neat visible repairs | Glue smears, fingerprints, cloudy marks |
| Polystyrene | Models, craft parts, light plastic items | Good for precision repairs | Fragile edges, excess glue |
| PP / PE | Buckets, flexible lids, some bins | Harder to bond | Waxy surface, peeling, flexing |
Which Plastic Glue for PVC?
PVC is common in household items that need practical strength rather than a perfect decorative finish. You may find it in bathroom accessories, storage dividers, garden pieces, craft boards, cable covers, organizers, and some utility parts. PVC usually repairs better when it is rigid and the damaged edges still meet closely. The biggest problem with PVC repair is surface contamination. Bathroom PVC often has soap film, moisture, shampoo residue, or cleaning spray on it. Outdoor PVC may have soil, sunscreen, rainwater marks, or dust. If these layers stay on the surface, the glue may bond to the residue instead of the plastic. A good PVC repair should start with cleaning, drying, test-fitting, and then applying a thin glue line with steady pressure.
Key points for PVC plastic glue repairs:
- Clean away soap film, dust, grease, and outdoor dirt before gluing.
- Dry the crack fully, especially on bathroom and garden items.
- Use a thin glue line; too much glue can push the edges apart.
- Add inside support for long cracks, wide splits, or loaded parts.
- Wait longer before using the item if it will hold weight or face water.
| PVC Item | Common Damage | Better Repair Method | Use After Repair |
|---|---|---|---|
| Shower caddy | Corner crack | Clean soap film, glue thinly, tape while setting | Avoid loading too soon |
| Toothbrush holder | Broken base | Dry fully, press flat, let rest | Light use first |
| Storage organizer | Split divider | Align edges, apply fine glue line | Let sit before filling |
| Garden planter | Rim crack | Glue from inside, add backing strip | Wait before outdoor use |
| Plastic hook | Snapped base | Apply glue to full contact area | Do not hang weight too soon |
Which Plastic Glue for ABS?
ABS is one of the most common hard plastics used in household products. It is often found in remote controls, toy parts, vacuum cleaner attachments, fan bases, appliance panels, electronic housings, dashboard trim, plastic clips, and small repairable parts. ABS can bond well with plastic glue, but the repair often fails when the broken part is not aligned correctly. Many ABS parts are designed with tiny clips, tabs, screw posts, and snap-fit edges. These pieces must sit at the correct angle after repair, or the item may no longer close, click, or move properly. Before applying glue, dry-fit the broken part several times and decide how to hold it still. For small ABS repairs, a precision nozzle is important because one misplaced drop can block a clip, screw hole, or moving joint.
Key points for ABS plastic glue repairs:
- Test the fit before applying glue, especially on clips and tabs.
- Use a very small amount for tiny parts, toy joints, and battery covers.
- Avoid sliding the pieces after contact; press straight and steady.
- Keep glue away from screw holes, button gaps, and moving parts.
- Give frequently handled parts more rest time before daily use.
| ABS Item | Common Damage | Main Repair Risk | Better Repair Habit |
|---|---|---|---|
| Remote cover | Broken locking tab | Wrong angle | Dry-fit first, then use one small drop |
| Toy figure | Detached arm or accessory | Glue overflow | Use precision nozzle or tweezers |
| Vacuum attachment | Cracked nozzle | Crack reopens under handling | Tape the shape while setting |
| Appliance knob | Split grip | Early pulling | Let rest longer before use |
| Fan base | Small casing crack | Vibration | Glue thinly and avoid movement |
| Plastic clip | Snapped edge | Blocked snap area | Keep glue only on contact point |
Which Plastic Glue for Acrylic?
Acrylic repairs need more attention because the repaired area is often visible. Acrylic is used in picture frames, display stands, clear boxes, protective covers, craft sheets, ornaments, signs, and decorative household pieces. A strong repair is not enough if the glue leaves a white stain, cloudy edge, thick line, or smeared surface. For acrylic, a crystal-clear plastic glue is the better choice, but the application still needs to be careful. Even clear glue can look messy if too much is used. The best acrylic repair usually uses a very thin glue line, clean edges, and steady pressure without sliding. Fingerprints also matter because clear surfaces show oil and dust easily. Handle acrylic by the edges, and test on a hidden area if the finished look is important.
Key points for acrylic plastic glue repairs:
- Choose clear-drying plastic glue for visible acrylic repairs.
- Use the smallest effective amount to avoid thick glue lines.
- Keep fingerprints, dust, and lint away from the repair edge.
- Do not wipe wet glue across the clear face of the item.
- Press evenly so the crack closes without shifting or smearing.
| Acrylic Item | Common Damage | Appearance Risk | Better Repair Habit |
|---|---|---|---|
| Picture frame | Corner crack | Visible glue line | Apply a tiny bead on the edge |
| Display stand | Loose support | Smear marks | Press without sliding |
| Clear box | Split edge | Cloudy residue | Clean first, use minimal glue |
| Ornament | Broken hook or detail | Glue blob | Use one controlled drop |
| Acrylic sheet | Edge chip | Uneven shine | Keep glue inside the joint |
| Craft project | Small crack | Fingerprint marks | Handle by edges or use gloves |
For acrylic, the goal is a clean repair that does not draw attention. Strength still matters, but the finish matters just as much. A fine-tip nozzle helps keep glue inside the joint instead of spreading across the surface.

How to Use Plastic Glue?
Using plastic glue correctly starts before the glue touches the item. The repair area should be clean, dry, and able to fit back together closely. The best process is simple: check the plastic, clean the surface, test the fit, apply a thin controlled glue line, press the parts together, and let the repair rest before daily use.
Most plastic glue failures come from small mistakes. The surface may still have oil, soap film, dust, sunscreen, or old glue on it. The broken edges may not be aligned before application. The user may squeeze out too much glue, causing a thick layer that keeps the plastic from touching properly. Sometimes the repair looks dry after a few seconds, but it breaks because the item is pulled, bent, washed, or loaded too soon.
For household repairs, patience gives better results than using more glue. A toy part, acrylic frame, remote-control cover, storage bin crack, or appliance knob all need slightly different handling, but the same repair logic applies. Keep the bond line thin, keep the parts still, and give functional items extra rest time. A fast-drying plastic glue helps the repair start quickly, but careful handling helps it last.
| Step | What to Do | Why It Matters | Common Mistake |
|---|---|---|---|
| 1 | Check the item | Confirms whether repair is safe | Gluing unsafe load-bearing parts |
| 2 | Clean the surface | Removes oil, dust, soap, and dirt | Gluing over residue |
| 3 | Dry the area | Improves direct bonding | Trapping moisture in the crack |
| 4 | Test the fit | Prevents wrong alignment | Discovering gaps after gluing |
| 5 | Apply thin glue | Creates a cleaner, tighter joint | Using a thick glue blob |
| 6 | Press steadily | Closes gaps and spreads glue evenly | Sliding parts after contact |
| 7 | Let it rest | Helps the repair handle use later | Testing the repair too soon |
How to Clean Before Plastic Glue?
Cleaning before plastic glue is one of the most important steps because plastic surfaces often carry invisible residue. A bathroom caddy may have soap film. A storage bin may have dust and hand oil. A toy may have skin oil, dirt, or food residue. A garden planter may have soil, water marks, or sunscreen from handling. If these layers stay on the repair area, the glue may bond to the dirt instead of the plastic. The repair can look fine at first, but later peel, crack, or separate under light pressure. Cleaning does not need to be complicated, but it should be careful. The surface should feel dry, solid, and free from loose particles before glue is applied.
Key cleaning steps:
- Wipe away loose dust, crumbs, and plastic flakes with a dry cloth.
- Remove grease, soap film, or oily marks with a suitable mild cleaner.
- Dry the repair area fully before applying plastic glue.
- Remove loose old glue if it flakes off easily.
- Handle clear plastic by the edges to avoid fingerprints near the bond line.
| Item Surface | Common Residue | Cleaning Focus |
|---|---|---|
| Bathroom plastic | Soap film, shampoo, moisture | Clean and dry completely |
| Toy plastic | Hand oil, dust, food marks | Wipe carefully before gluing |
| Outdoor plastic | Soil, rain marks, sunscreen | Remove dirt from the crack |
| Appliance plastic | Grease, dust, cleaning spray | Clean around knobs and edges |
| Acrylic plastic | Fingerprints, lint, dust | Use gentle cleaning and avoid smears |
| Storage bins | Dust, label residue, hand oil | Wipe inside and outside the crack |
For clear acrylic or decorative plastic, avoid harsh rubbing on the visible surface. If the plastic scratches easily, test cleaning on a hidden area first. Do not apply plastic glue while the surface is damp. Even a small amount of trapped moisture inside a crack can weaken the repair and make the glue line look cloudy.
How to Apply Plastic Glue?
Plastic glue should be applied in a thin, controlled layer, not squeezed heavily over the damaged area. Many people assume a larger amount creates a stronger repair, but plastic repairs often work better with less glue. A thick bead can push the broken edges apart, leave visible residue, block small clips, or make the repaired part sit at the wrong angle. A thin glue line allows the plastic surfaces to meet closely, which improves contact and keeps the repair cleaner. This is especially important for remote-control tabs, toy parts, model pieces, acrylic corners, appliance knobs, and narrow cracks. A precision nozzle helps place the glue exactly where it is needed instead of spreading it over the surrounding surface.
Better application habits:
- Test-fit the broken parts before opening the glue.
- Apply glue only to the contact edge or inside the crack.
- Use a small amount first; add more only if needed.
- Press the parts together without sliding them around.
- Keep glue away from buttons, screw holes, clips, hinges, and moving joints.
- Use tape, rubber bands, or a small clamp if the part cannot stay still.
| Repair Type | Recommended Glue Amount | Useful Tool | Main Risk |
|---|---|---|---|
| Toy accessory | Tiny drop | Tweezers | Glue spreading into joints |
| Remote-control tab | Small drop | Precision nozzle | Wrong angle after drying |
| Acrylic corner | Very thin edge line | Fine-tip nozzle | Visible glue smear |
| Storage bin crack | Thin line along crack | Tape support | Crack reopening |
| Appliance knob | Thin layer on contact area | Light clamp | Pulling too soon |
| Model part | Micro drop | Tweezers or toothpick | Oversized glue mark |
| Garden planter split | Thin line plus backing | Tape or inner patch | Outdoor stress |
After applying plastic glue, bring the broken pieces together immediately and press them into the correct position. Do not keep adjusting the parts once they touch. Sliding can smear the glue and weaken the bond line. If a little glue squeezes out, avoid wiping it across a visible surface unless the product instructions say it is safe. For clear plastic, one small clean glue line usually looks better than a wide shiny patch.
How Long Does Plastic Glue Set?
Plastic glue may begin to hold within seconds, especially when using a fast-drying formula, but that does not mean the item is ready for full use right away. There is a difference between initial hold and daily-use strength. Initial hold means the parts stay together when lightly touched. Daily-use strength means the repair can handle normal movement, pressure, clipping, pulling, or light impact. Many repairs fail because they are tested too early. A repaired storage bin is filled immediately, a toy is handed back to a child too soon, or a remote cover is snapped into place before the tab has rested long enough. Giving the repair more time is one of the easiest ways to improve results.
Practical setting tips:
- Hold small parts steady for at least several seconds after contact.
- Let decorative items rest before moving them around.
- Give functional parts more time before pulling, bending, or loading.
- Leave stressed repairs overnight when possible.
- Avoid water, heat, outdoor exposure, or heavy use during early setting.
| Repair Item | Initial Hold | Light Handling | Safer Daily Use |
|---|---|---|---|
| Model part | 10–30 seconds | 5–10 minutes | Several hours |
| Toy accessory | 10–30 seconds | 10–20 minutes | Several hours |
| Acrylic ornament | 10–30 seconds | 10–20 minutes | Same day |
| Remote cover tab | 20–60 seconds | 30 minutes | Same day |
| Appliance knob | 30–60 seconds | 1–2 hours | 24 hours if used often |
| Storage bin crack | 30–60 seconds | 1 hour | 24 hours before loading |
| Garden planter | 30–60 seconds | 1–2 hours | 24 hours before outdoor use |
Setting time can change with glue amount, plastic type, temperature, humidity, and repair shape. A tiny toy part may set faster than a long crack on a thick storage box. A thick glue layer also needs more time than a thin line. If the repaired item is used often, a simple habit works well: repair it today and use it tomorrow. Fast-drying plastic glue makes the job easier, but resting time protects the repair.
Do Plastic Glue Repairs Last?
Plastic glue repairs can last well when the broken plastic fits closely, the surface is clean, and the repaired part is not forced too soon after bonding. Small household repairs usually perform better than large structural repairs because the glue line faces less pressure. A remote-control tab, acrylic frame corner, toy part, model piece, or bathroom accessory often has a better chance than a chair leg, step stool, flexible lid, or cracked load-bearing handle.
Durability depends on daily use. A repaired acrylic display stand may stay stable for years because it only sits on a shelf. A repaired storage bin crack may reopen faster if the box is filled, lifted, stacked, or dropped. A garden planter may hold indoors but weaken outdoors if it faces water, heat, cold nights, and soil pressure. The same glue can give different results because the stress on the repair is different.
A strong long-term repair usually comes from five details: clean plastic, tight alignment, thin glue application, steady pressure, and enough rest time. If the part will be pulled, clipped, bent, or used outdoors, the repair should rest longer and may need support. For many household repairs, waiting 24 hours before heavy use is a simple habit that prevents early failure.
| Repair Situation | Lasting Chance | Main Reason | Better Habit |
|---|---|---|---|
| Acrylic frame corner | High | Low movement after repair | Use thin clear glue line |
| Toy accessory | High | Small contact area, light stress | Let rest before play |
| Remote cover tab | Medium to high | Repeated clipping force | Align carefully and avoid early snapping |
| Vacuum attachment | Medium | Handling and vibration | Tape shape while setting |
| Storage bin crack | Medium | Load and bending pressure | Add inside backing |
| Garden planter split | Medium | Moisture and temperature changes | Repair inside and rest 24 hours |
| Flexible lid crack | Low to medium | Constant bending | Test first or replace |
| Step stool crack | Low | Safety and body weight | Replace instead of gluing |
Do Plastic Glue Cracks Hold?
Plastic glue cracks hold best when the crack is narrow, clean, and easy to close with gentle finger pressure. A hairline crack on a hard plastic cover, acrylic frame, model part, toy piece, or household casing can often be repaired neatly because the two sides still meet closely. Wide cracks are harder because the glue has less direct surface contact. If the crack opens again as soon as pressure is released, glue alone may not be enough. The repair may need tape while setting, a hidden plastic strip, or an inner patch to stop the crack from spreading. Long cracks also need more care because stress can travel along the full line after daily use.
Key points for stronger crack repairs:
- Repair cracks early before they spread longer.
- Clean inside the crack, not only the surface around it.
- Use a thin glue line instead of filling the crack with excess glue.
- Hold the crack closed until the first bond forms.
- Add inner support for long cracks, curved parts, or loaded items.
| Crack Type | Glue Result | Support Needed? | Repair Tip |
|---|---|---|---|
| Hairline crack | Usually good | No | Apply a thin line and press closed |
| Small corner crack | Usually good | Sometimes | Align corner before gluing |
| Long straight crack | Medium | Yes | Add tape or inner backing |
| Curved plastic crack | Medium | Yes | Use rubber bands or tape |
| Crack near hinge | Weak risk | Yes | Reinforce or replace |
| Wide open crack | Low | Yes | Patch first, then glue |
| Crack with missing piece | Low | Yes | Use replacement piece or patch |
A crack repair should be judged by movement after repair, not only by how it looks right after bonding. If the item stays still, the glue line has a better chance. If the repaired crack is pulled open during use, support becomes more important than adding more glue.
Do Plastic Glue Joints Stay Clear?
Plastic glue joints can stay clear when the glue dries transparent and is applied in a very controlled amount. Clear repairs are important for acrylic frames, transparent covers, display boxes, ornaments, clear model parts, craft sheets, and visible household décor. The biggest mistake is using too much glue. A large amount may squeeze out, catch dust, leave shiny patches, or create a cloudy-looking edge. Clear glue gives the repair a cleaner finish, but the final appearance depends on careful handling. Fingerprints, lint, dust, and glue smears can all show clearly on acrylic or transparent plastic. A clean repair needs a clean surface, a fine nozzle, steady pressure, and no sliding after the parts touch.
Key points for clear plastic glue repairs:
- Use clear-drying plastic glue for acrylic and visible plastic.
- Apply only the smallest amount needed for the joint.
- Keep fingers away from the clear repair line.
- Do not wipe wet glue across glossy plastic.
- Test first on a hidden edge if appearance is important.
| Clear Item | Main Appearance Risk | Better Repair Habit |
|---|---|---|
| Acrylic picture frame | Thick visible glue line | Use a tiny edge bead |
| Display stand | Smears from sliding | Press straight down |
| Transparent box | Cloudy residue | Clean and dry before gluing |
| Clear ornament | Glue blob near detail | Use one small drop |
| Model window part | Fingerprints | Use tweezers or gloves |
| Acrylic craft sheet | Uneven shine | Keep glue inside the seam |
For clear plastic, less glue usually looks better. The repair should stay inside the joint as much as possible. If glue spreads over the face of the plastic, the bond may still hold, but the repair can look messy. A fine-tip nozzle is useful because it places glue exactly where the broken edges meet.
Do Plastic Glue Fixes Need Support?
Plastic glue fixes need support when the repaired area is long, thin, curved, flexible, or handled often. Support helps keep the broken edges in the correct position while the glue sets and reduces pressure on the bond after repair. A small toy part or acrylic ornament may only need finger pressure. A storage bin crack, garden planter split, appliance part, or curved plastic casing may need tape, rubber bands, a light clamp, or a hidden backing strip. Support is especially useful when the crack wants to open by itself. Instead of forcing the glue to carry all the stress, support spreads the pressure across a wider area and helps the repair survive daily use.
Useful support methods:
- Use masking tape to hold long cracks closed while setting.
- Use rubber bands for curved parts, round lids, or cylindrical plastic.
- Use a light clamp for thicker hard plastic, but avoid over-tightening.
- Use an inner backing strip for storage bins, planters, and wide cracks.
- Let supported repairs rest longer before loading or bending.
| Repair Type | Support Method | Rest Time Before Stress |
|---|---|---|
| Small toy part | Finger pressure or tweezers | Several hours |
| Acrylic corner | Low-tack tape | Same day |
| Remote tab | Hand pressure, careful resting | Same day |
| Storage bin crack | Inner backing strip | 24 hours |
| Garden planter split | Inner patch plus tape | 24 hours |
| Curved plastic cover | Rubber bands | 12–24 hours |
| Appliance knob | Light clamp | 24 hours if used often |
| Long crack | Tape plus backing strip | 24 hours |
Support should hold the correct shape without crushing the plastic or squeezing out all the glue. Too much pressure can push the adhesive away from the joint and weaken the repair. The best support keeps the broken parts touching evenly until the glue has enough time to build a stronger bond.

Is GleamGlee Plastic Glue Good?
GleamGlee Plastic Glue is a practical choice for small household plastic repairs because it focuses on the things users notice most during real use: quick setting, clear drying, strong bonding, and clean application. It is designed for PVC, ABS, acrylic, miniatures, car parts, toys, craft pieces, appliance plastics, and everyday broken plastic items. For common home repairs, it helps users fix cracked, snapped, or loose plastic parts without needing special tools.
The product is especially useful when the repair area is small, detailed, or visible. A broken toy part, acrylic frame corner, remote-control cover tab, model piece, ornament hook, plastic clip, or bathroom accessory does not need a large amount of glue. It needs a controlled glue line that reaches the exact contact point. GleamGlee Plastic Glue includes fine-tip nozzles, which help reduce overflow and make the repair cleaner, especially on narrow cracks and tiny parts.
GleamGlee Plastic Glue works best when used with the right repair habits. The surface should be clean and dry, the broken pieces should fit closely, and the glue should be applied thinly. Fast-drying glue gives quick positioning, but functional parts should still rest before daily use. For storage bins, garden items, appliance knobs, or parts that receive pulling force, adding tape or inner support can improve repair life.
| User Concern | GleamGlee Plastic Glue Feature | Practical Benefit |
|---|---|---|
| “Will it dry fast?” | Fast-drying formula | Helps small parts stay in place quickly |
| “Will the repair look messy?” | Crystal-clear finish | Better for acrylic, décor, clear plastic |
| “Can I control the glue?” | Fine-tip nozzles | Cleaner repair on cracks and tiny parts |
| “Will it work on common plastics?” | Designed for PVC, ABS, acrylic | Useful for many home repair jobs |
| “Can I use it for detailed work?” | Precision application | Better for models, toys, clips, ornaments |
| “Can I keep it for daily fixes?” | Multi-use repair range | Useful in home, hobby, car, and craft repairs |
Is GleamGlee Plastic Glue Fast?
GleamGlee Plastic Glue uses a fast-drying formula made for quick plastic repairs, which is helpful when a small part needs to stay aligned soon after application. Many household repairs fail because the part moves before the glue has started to hold. This can happen with a toy wheel, model part, acrylic stand, remote-control tab, or plastic clip. A faster setting formula helps reduce that problem by giving the repair an early hold in seconds. It is useful for people who want to finish a small fix without holding the item for a long time, but it should still be used with patience. A part may hold quickly, yet the repaired item should rest before being pulled, clipped, bent, washed, or loaded.
Key points:
- Good for quick positioning on small plastic parts.
- Useful for miniatures, toys, acrylic pieces, and daily household fixes.
- Helps reduce movement while the broken pieces are aligned.
- Best results still need cleaning, thin application, pressure, and rest time.
- Functional parts should not be stressed immediately after bonding.
| Repair Item | Why Fast Setting Helps | Better Use Habit |
|---|---|---|
| Toy accessory | Keeps tiny parts from shifting | Let rest before play |
| Model piece | Holds small details in place | Use a micro drop |
| Remote tab | Helps align the broken clip | Avoid snapping it in too soon |
| Acrylic stand | Reduces movement during bonding | Press evenly and leave flat |
| Car plastic trim | Helps small cracks close faster | Avoid pulling after repair |
| Appliance knob | Holds shape during repair | Wait longer before daily use |
Fast drying is most helpful for small, close-fitting repairs. For larger cracks or parts under pressure, the repair should be left longer even if the surface appears dry. A simple habit works well: use the glue to position the repair quickly, then let the item rest before testing it.
Is GleamGlee Plastic Glue Clear?
GleamGlee Plastic Glue dries 100% transparent, making it useful for repairs where appearance matters. Clear plastic and acrylic items can look bad when the glue turns white, yellow, cloudy, or thick after drying. This is a common worry with picture frames, transparent display stands, acrylic boxes, holiday ornaments, craft pieces, model parts, and clear plastic covers. A transparent finish helps the repaired area look cleaner when the glue is applied carefully. The finish is not only about beauty; it also affects whether users feel comfortable keeping the repaired item in visible spaces such as shelves, desks, bathrooms, bedrooms, shops, and hobby displays.
Key points:
- Dries clear for visible plastic and acrylic repairs.
- Suitable for acrylic frames, clear covers, ornaments, crafts, and models.
- Helps reduce obvious glue marks when applied thinly.
- Best results need clean surfaces and careful glue placement.
- Avoid excess glue on glossy or transparent surfaces.
| Clear Repair Scene | Common Worry | How GleamGlee Helps |
|---|---|---|
| Acrylic picture frame | White glue line | Transparent finish keeps repair cleaner |
| Display stand | Cloudy corner | Thin clear bead reduces visible marks |
| Ornament hook | Glue blob | Fine nozzle controls small drops |
| Clear craft sheet | Uneven shine | Narrow glue line keeps finish neater |
| Model window part | Smears and fingerprints | Precise application helps protect detail |
| Transparent plastic cover | Messy repair edge | Clear drying improves appearance |
Clear glue still needs careful handling. Too much glue can squeeze out and become visible, even if the formula dries transparent. For the cleanest result, apply a small amount only to the contact edge, press without sliding, and keep fingers away from the bond line. On high-visibility acrylic, testing on a hidden edge is a smart step.
Is GleamGlee Plastic Glue Precise?
GleamGlee Plastic Glue is precise because each tube includes 4 fine-tip nozzles, while a 2-pack includes 8 nozzles. Precision matters more than many people expect. Most household plastic repairs are not large flat surfaces. They are small tabs, thin cracks, narrow corners, tiny toy parts, model details, acrylic edges, appliance clips, and decorative pieces. If the glue comes out too heavily, it can block a snap-fit part, stain the surface, cover a screw hole, or make the repair look bulky. A fine nozzle helps users place glue only where the plastic touches, which improves both appearance and control.
Key points:
- Fine-tip nozzles help place glue into small cracks and narrow seams.
- Better control reduces overflow, waste, and visible residue.
- Useful for toy parts, model making, acrylic edges, and plastic clips.
- Helps avoid blocking buttons, joints, screw holes, and snap-fit areas.
- Easier for home users who need clean results without repair tools.
| Repair Detail | Why Precision Matters | Common Mistake Avoided |
|---|---|---|
| Remote-control tab | Glue must stay on the small contact point | Blocking the locking slot |
| Toy figure arm | Joint area is tiny | Glue spreading into moving parts |
| Model car mirror | Part is very small | Oversized glue mark |
| Acrylic frame corner | Repair is visible | Smearing across clear plastic |
| Appliance clip | Fit must stay exact | Thick glue changing the shape |
| Ornament hook | Small decorative area | Large visible glue blob |
Precision also helps people use less glue. A thin line often creates a better-looking repair than a large amount spread across the surface. For small plastic repairs, control is usually more valuable than quantity.
Is GleamGlee Plastic Glue Strong?
GleamGlee Plastic Glue is designed to create a strong, long-lasting bond on common plastics such as PVC, ABS, acrylic, and similar materials. Strength matters because household plastic parts are often handled every day. A repaired remote cover may be opened again. A toy may be pulled during play. A vacuum attachment may face pressure and vibration. A storage bin may be lifted and stacked. A strong repair needs more than adhesive power alone. The item must be cleaned, aligned, pressed, and allowed to rest before it returns to regular use. When the broken parts fit closely and the repair is not overloaded too soon, plastic glue can restore many useful items instead of sending them to the trash.
Key points:
- Suitable for PVC, ABS, acrylic, and many hard plastic repairs.
- Better on clean, dry, close-fitting broken surfaces.
- Stronger results come from thin application and firm pressure.
- Long cracks or stressed parts may need tape, a patch, or backing support.
- Not recommended for unsafe load-bearing, high-heat, or food-contact repairs.
| Plastic Material | Common Item | Repair Suitability | User Tip |
|---|---|---|---|
| PVC | Organizer, bathroom rack, planter | Good | Clean soap film and moisture first |
| ABS | Remote cover, toy, appliance casing | Good | Align clips and tabs carefully |
| Acrylic | Frame, display stand, clear box | Good | Use very little glue for neat finish |
| Polystyrene | Model part, craft piece | Good | Apply micro drops |
| Flexible plastic | Soft lid, bendable bin | Limited | Test first; may need another repair method |
| Load-bearing plastic | Chair leg, step stool | Poor | Replace for safety |
A strong plastic repair should feel stable, but it should also be realistic. The glue is useful for daily household fixes, small broken parts, models, crafts, and visible plastic repairs. For parts that protect safety or carry body weight, replacement is the safer choice.
Conclusion
Plastic glue is one of the simplest ways to extend the life of everyday plastic items, but the best repair starts with the right judgment. A clean crack on PVC, ABS, acrylic, toys, models, appliance parts, storage bins, or clear décor can often be repaired neatly when the surface is cleaned, dried, aligned, glued in a thin layer, and left to rest before use. Small details matter: too much glue can weaken the joint, dirty plastic can stop adhesion, and stressed cracks may need tape, a backing strip, or extra curing time. When the damaged part is load-bearing, high-heat, food-contact, or safety-related, replacement is usually the smarter choice.
GleamGlee Plastic Glue is made for practical household repairs where speed, clarity, strength, and control all matter. Its fast-drying formula helps small parts stay in place quickly, its crystal-clear finish suits visible acrylic and décor repairs, and its fine-tip nozzles make it easier to fix tiny cracks, tabs, clips, toys, models, and detailed plastic pieces without messy overflow. For ready-to-order GleamGlee branded plastic glue, wholesale supply, or custom plastic glue products with private-label packaging, contact GleamGlee with your target market, order quantity, packaging style, and label requirements to request samples or a quotation.





















