 Skip to content
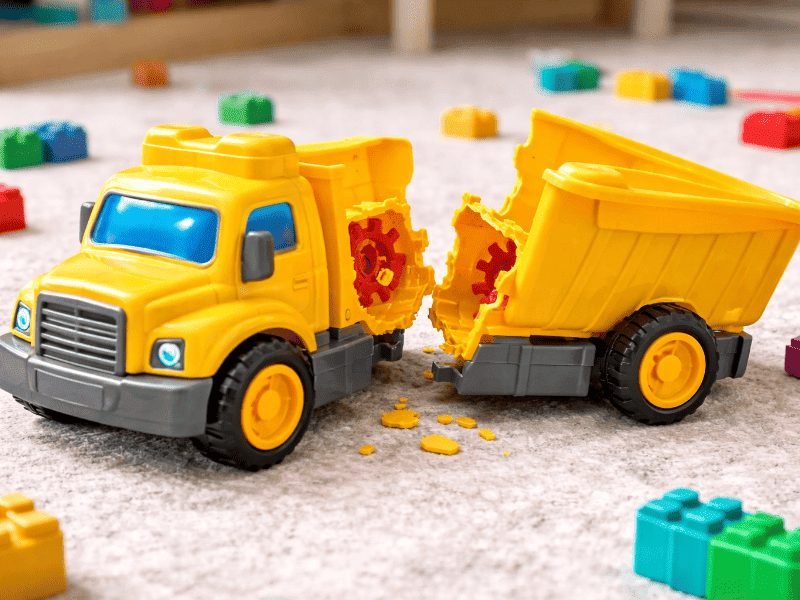
A small plastic crack can quickly turn into a daily annoyance. A storage box no longer closes tightly, a remote-control battery cover keeps sliding off, a toy part breaks again and again, or a bathroom organizer starts splitting at the corner. Many people replace these items too soon because plastic feels difficult to repair neatly. In many cases, the item is not truly useless—it simply needs the right plastic glue, clean surface preparation, and enough curing time.
Plastic household items can often be repaired by cleaning and drying the broken area, checking that the pieces fit tightly, applying a thin layer of plastic glue, pressing the parts together firmly, and letting the bond cure before use. A plastic-specific glue works well for common materials such as PVC, ABS, acrylic, and hard plastic, especially on small cracks, covers, boxes, toys, craft pieces, and appliance parts.
The strongest plastic repairs usually come from control, not from using more glue. Too much adhesive can overflow, leave visible marks, or block moving parts. A fine nozzle, a small drop, steady pressure, and patient curing can make a cracked household item useful again. From a broken remote cover to a clear acrylic frame, the right repair method helps save money, reduce waste, and keep everyday items working longer.
What Can Plastic Glue Fix?
Plastic glue can fix many rigid plastic household items when the broken surfaces still match closely. Good repair targets include storage boxes, toys, bathroom accessories, remote-control covers, appliance parts, acrylic frames, garden items, craft pieces, and light plastic furniture details. It works best on hard plastic materials such as PVC, ABS, acrylic, and similar rigid plastics.
The easiest way to judge a repair is to look at the damage, not only the item. If the broken edges can touch each other tightly, the repair has a much higher chance of lasting. If the crack is wide, a piece is missing, the plastic bends every day, or the part supports heavy weight, glue may need help from a backing patch, reinforcement strip, screw support, or replacement part.
Plastic glue is especially useful for daily items that are still functional but annoying to use: a cracked storage lid, a toy wheel, a split remote cover, a loose appliance button, or a chipped acrylic organizer. These small repairs often take only a few minutes to apply, but they can save the cost and trouble of replacing the whole item.
| Plastic Item | Repair Difficulty | Good Repair Area | Caution |
|---|---|---|---|
| Storage box | Easy | Lid, corner, side crack | Avoid heavy stacking too soon |
| Toy part | Easy to medium | Wheels, arms, stands, accessories | Avoid small parts for toddlers |
| Plastic furniture | Medium | Trim, handle, edge, cap | Avoid weight-bearing legs |
| Remote cover | Easy | Battery tab, casing crack | Keep glue away from contacts |
| Appliance cover | Medium | Knob, lid, plastic clip | Do not twist before curing |
| Acrylic frame | Easy | Stand, corner, clear edge | Use very little glue |
Plastic Glue for Boxes
Plastic storage boxes often crack at corners, lids, snap locks, handles, hinges, and bottom edges because these areas take repeated pressure. A box may be pulled from a shelf hundreds of times, stacked under other containers, dragged across a garage floor, or filled beyond its ideal load. Once a small crack appears, it often spreads because the plastic flexes whenever the box is lifted or closed. Plastic glue can help stop the crack early, restore the box shape, and keep the container usable for clothing, toys, seasonal decorations, craft supplies, office files, or light garage storage.
For the best result, the box should be empty before repair. Press the cracked area back into its original shape and check whether both sides meet cleanly. If the plastic is dusty, oily, or stored in a garage, clean the crack first and dry it fully. Apply a thin line of glue instead of a thick bead. For cracks longer than 2 inches, work in short sections so the repair stays neat and controlled.
| Box Area | Common Problem | Repair Method | Rest Time |
|---|---|---|---|
| Lid corner | Split from stacking | Thin glue line, press flat | 12–24 hours |
| Side wall | Straight crack | Glue in small sections | 24 hours |
| Handle slot | Stress tear | Glue plus inner support | 24–48 hours |
| Snap lock | Broken tab | Small drop, tight pressure | 24 hours |
| Bottom edge | Impact crack | Glue, then reduce load | 24 hours |
Useful tips:
- Repair small cracks before they spread across the whole lid.
- Do not overfill the box immediately after repair.
- Add an inner plastic patch for handle cracks.
- Let clear storage boxes cure fully to avoid visible stress marks.
Plastic Glue for Toys
Plastic toy repair needs more control than many other household repairs because toy parts are often small, detailed, and handled often. Plastic glue can repair action figures, dolls, toy cars, board-game pieces, building-block specialty parts, model kits, dollhouse furniture, playset doors, robot parts, and display accessories. These repairs work best when the toy is made from rigid plastic and the broken part is not constantly bent, chewed, or pulled with strong force. A fine nozzle is important because toy joints are usually small, and too much glue can block movement or leave hard raised marks.
Before gluing, test the broken piece in place. Check the angle, direction, and movement. A toy car wheel must sit straight. A figure arm must face the correct way. A board-game piece must stand flat. Use only a tiny amount of glue, then hold the part still until it grips. If the toy has painted details, keep glue away from the visible surface because overflow can damage the look.
| Toy Type | Repair Chance | Best Repair Area | Caution |
|---|---|---|---|
| Action figure | High | Arm, base, accessory | Avoid moving joints if possible |
| Toy car | High | Mirror, bumper, spoiler | Keep wheels free |
| Board game piece | High | Token, tower, clip | Use very small drops |
| Model kit | High | Small plastic parts | Alignment must be exact |
| Ride-on toy | Medium | Trim, cover, small crack | Avoid load-bearing wheels |
| Toddler toy | Low | Decorative hard parts only | Avoid chewable small parts |
Useful tips:
- Do not return repaired toys to rough play too soon.
- Avoid repairing parts that may become choking hazards.
- Use tweezers for tiny model or figure parts.
- Let toy repairs cure for 24 hours when the part will be handled often.
Plastic Glue for Furniture
Plastic furniture repairs should be judged by pressure and safety. Plastic glue can work well on drawer handles, cabinet pulls, table edge chips, patio table trim, chair arm covers, plastic caps, caster covers, decorative panels, and other non-load-bearing parts. It is not the best glue-only solution for chair legs, stool bases, folding joints, ladder parts, or any plastic area that supports body weight. A repaired decorative edge may last a long time, while a repaired chair leg can fail suddenly if it carries weight.
The repair area should be cleaned carefully because furniture collects hand oil, dust, food residue, sunscreen, cleaning spray, and outdoor dirt. Glossy plastic should be lightly roughened on the bonding area so the glue can grip better. For medium-stress parts such as handles or chair arm covers, allow longer curing time and avoid forceful use during the first 24–48 hours. If the part is pulled often, a backing patch or hidden reinforcement can make the repair more reliable.
| Furniture Part | Repair Chance | Better Use After Repair | Warning |
|---|---|---|---|
| Drawer handle | High | Light to normal pulling | Do not overload drawer |
| Cabinet trim | High | Decorative use | Press flat while curing |
| Table edge chip | High | Shape and appearance repair | Avoid impact first day |
| Chair arm cover | Medium | Gentle daily use | Reinforce if cracked deeply |
| Caster cover | Medium | Light movement | Check wheel pressure |
| Chair leg | Low | Not recommended glue-only | Replace or reinforce |
Useful tips:
- Repair furniture only after checking whether the part carries weight.
- Use clamps or tape to hold curved furniture pieces in place.
- Outdoor furniture should cure longer before rain or sunlight exposure.
- For handles, reduce pulling force after repair to prevent repeat cracking.
Plastic Glue for Covers
Plastic covers are some of the best repair targets because they are usually light, rigid, and easy to align. Remote-control battery covers, electronic housings, mouse casings, keyboard feet, headphone frames, fan knobs, vacuum cleaner attachments, coffee-maker lids, blender buttons, washing-machine dispenser parts, and appliance covers often break while the main product still works. Repairing the cover can make the whole item useful again without replacing the device.
The main repair risk is glue entering the wrong place. Keep adhesive away from battery contacts, sliding tracks, ports, vents, switches, buttons, screw holes, speaker openings, and moving clips. Use a small drop and apply it only to the broken plastic edge. Before gluing, test the cover by placing it back into position. If the broken tab is slightly crooked, fix the alignment before adding glue. Once glue is applied, avoid sliding the part around because that can smear adhesive into moving areas.
| Cover Type | Common Damage | Repair Method | Caution |
|---|---|---|---|
| Remote cover | Broken battery tab | Tiny drop, press straight | Avoid battery contacts |
| Mouse casing | Edge crack | Thin glue line | Avoid buttons and sensor |
| Fan knob | Split center | Small glue amount | Do not twist too soon |
| Vacuum clip | Cracked latch | Firm pressure, cure fully | Avoid forced snapping |
| Coffee-maker lid | Hinge crack | Glue and rest flat | Avoid heat and washing early |
| Headphone frame | Split plastic band | Thin glue, hold curve | May need reinforcement |
Useful tips:
- Reinstall covers only after the glue has cured.
- Do not use thick glue near sliding parts.
- For appliance lids, avoid washing or heat exposure too soon.
- For electronics, repair only the plastic shell, not internal components.
Which Plastic Glue Works?
The plastic glue that works best is the one matched to the plastic type and the repair pressure. For most household fixes, choose a plastic-specific glue that bonds PVC, ABS, acrylic, and hard plastic. These materials appear in storage boxes, appliance covers, toys, remote shells, garden accessories, model parts, and clear display items.
A good plastic glue should do more than “stick fast.” It should apply cleanly, dry clear on visible parts, cure strong enough for daily handling, and fit into tiny cracks without making a mess. A precision nozzle matters because many household plastic repairs involve tabs, clips, thin corners, and narrow crack lines.
Do not judge glue only by drying speed. Fast grab helps during application, but the repair still needs curing time before twisting, pulling, washing, or loading. A strong repair comes from the right glue, thin application, tight contact, and enough rest time.
Plastic Glue for PVC
PVC is common in household organizers, garden accessories, plastic fittings, repair patches, storage items, and some bathroom parts. It can bond well with plastic glue, but the surface must be clean because PVC items often carry soap film, dust, outdoor dirt, water minerals, or hand oil. If the surface feels slippery, greasy, or chalky, the glue may attach to the residue instead of the plastic.
For PVC repair, a fast-drying plastic glue is useful when repairing small cracks, tabs, corners, and rigid fittings. Before applying glue, wash the repair area, dry it fully, and lightly roughen glossy surfaces if the bond area is hidden or not decorative.
A practical PVC repair check:
| PVC Item | Repair Fit | Glue Advice |
|---|---|---|
| Storage lid corner | Good | Thin line, press flat |
| Bathroom holder | Good | Clean soap film first |
| Garden plastic fitting | Medium | Dry fully before gluing |
| Cracked handle | Medium | Add support if pulled often |
| Flexible PVC part | Low | Glue may fail under bending |
For PVC cracks longer than 2 inches, apply glue in short sections. This keeps the crack aligned and prevents thick overflow.
Plastic Glue for ABS
ABS is often used in remote controls, appliance shells, dashboard trim, computer accessories, tool cases, toy bodies, and plastic clips. It is strong and impact-resistant, but many ABS repairs involve small snap-fit areas. That means glue amount matters a lot. Too much glue can block a sliding cover, fill a screw hole, or stop a clip from fitting back into place.
A good ABS glue should apply in tiny controlled drops and hold rigid plastic firmly after curing. GleamGlee Plastic Glue is suitable for ABS repairs because it includes fine-tip nozzles that help place glue along narrow edges and small tabs.
When repairing ABS parts, pay attention to movement points:
- Keep glue away from buttons, vents, ports, and battery contacts.
- Do not force clips back into place before curing.
- Use a thin layer on snap-fit tabs.
- Let appliance knobs and covers rest longer before twisting.
| ABS Part | Common Damage | Repair Risk |
|---|---|---|
| Remote cover | Broken tab | Glue blocking slide track |
| Fan knob | Split center | Twisting too soon |
| Dashboard trim | Cracked clip | Pressure during reinstall |
| Toy shell | Open seam | Misalignment |
| Mouse casing | Edge crack | Glue near buttons |
ABS repairs usually look simple, but they fail quickly when the part is rushed back into use. A 24-hour rest is safer for covers, knobs, clips, and parts that snap into place.
Plastic Glue for Acrylic
Acrylic is used in clear photo frames, display stands, transparent trays, desk organizers, signs, craft sheets, and decorative pieces. It needs a glue that dries clean because every mark is easier to see on clear plastic. Strength matters, but appearance matters just as much.
For acrylic, choose a clear-drying plastic glue and apply it in a very thin layer. GleamGlee Plastic Glue dries 100% transparent, which helps keep repairs cleaner on clear or light-colored plastic. Still, the final look depends on careful handling. Too much glue can leave raised shine, trapped bubbles, or cloudy smears even when the glue itself is clear.
For better acrylic repairs, place the item on a clean flat surface and plan the pressure method before applying glue. Tape can help hold light pieces, but it should not touch wet glue. Avoid touching the repair line with fingers because fingerprints can become visible.
| Acrylic Item | Best Repair Area | Appearance Tip |
|---|---|---|
| Photo frame | Corner or stand | Use a tiny glue amount |
| Display riser | Edge crack | Keep pressure even |
| Clear tray | Small split | Avoid smearing overflow |
| Desk sign holder | Base joint | Cure upright and stable |
| Ornament | Hook or detail | Hold with tweezers |
Acrylic cracks with white stress marks may still show after repair. Glue can bond the part, but it cannot always remove damage inside the plastic.
Plastic Glue for Hard Plastic
Hard plastic appears across the home: storage bins, appliance covers, drawer handles, toy parts, garden tools, luggage pieces, sports gear, office supplies, and craft materials. The best glue for hard plastic should bond quickly, dry cleanly, and stay strong under normal handling. It should also allow precise application because hard plastic breaks often happen at corners, tabs, clips, and narrow edges.
GleamGlee Plastic Glue is designed for PVC, ABS, acrylic, and more, making it useful for many hard plastic household repairs. Its fast-drying formula helps small parts stay in place quickly, while the clear finish keeps visible repairs cleaner. The precision nozzles make it easier to repair tiny cracks without covering the surrounding surface.
A simple decision guide:
| Repair Condition | Plastic Glue Works Well? | Better Action |
|---|---|---|
| Edges fit tightly | Yes | Glue and press firmly |
| Surface is clean and dry | Yes | Apply thin layer |
| Part is rigid | Yes | Allow full cure |
| Wide gap exists | Medium | Add patch or filler |
| Part bends often | Low | Use flexible repair method |
| Part carries body weight | Low | Replace or reinforce |
Hard plastic repair works best when the item is still mostly intact. The glue restores the break, but it should not be asked to replace missing material or carry unsafe weight.

How to Prep Plastic Glue?
Plastic glue repairs often fail before the glue is even opened. Dust, grease, moisture, soap residue, hand oil, and poor alignment can weaken the bond long before curing begins. Good preparation gives the glue direct contact with the plastic surface and helps the repaired part stay aligned while pressure is applied.
Most household plastic items are touched constantly, so even clean-looking surfaces may still carry invisible residue. Storage boxes collect dust, appliance covers collect hand oil, bathroom accessories collect soap film, and outdoor items collect moisture and dirt. Cleaning and drying the repair area carefully usually improves the repair more than simply adding extra glue.
Preparation also helps the repair look cleaner. A properly aligned crack needs less glue, creates less overflow, and leaves fewer visible marks after curing. For acrylic, appliance covers, remote shells, and decorative plastic items, this makes a noticeable difference in the final appearance.
Plastic Glue Needs Clean Plastic
Plastic glue bonds directly to the surface of the plastic, not to the dirt sitting on top of it. Many failed repairs happen because the item looked clean but still carried oil, soap residue, cleaning spray, dust, sunscreen, food grease, or moisture around the crack. Even a thin invisible layer can reduce grip strength, especially on smooth plastic.
Before applying glue, inspect the damaged area closely. Bathroom accessories often feel slippery because of soap buildup. Kitchen appliance lids may carry cooking oil. Remote covers and tool handles collect skin oil from repeated touching. Outdoor storage boxes and garden parts may look dry but still hold fine dust inside the crack.
For most household repairs, mild soap and warm water are enough. Wipe carefully around the crack, then dry the area completely. If grease remains, clean the area again instead of applying more glue later.
| Plastic Item | Common Residue | Cleaning Method |
|---|---|---|
| Bathroom holder | Soap film, water spots | Warm water and mild soap |
| Storage box | Dust, hand oil | Wipe crack carefully |
| Appliance cover | Grease, fingerprints | Soft cloth and gentle cleaning |
| Garden item | Soil, moisture | Brush dirt from crack first |
| Toy part | Food residue, dust | Small brush or cotton swab |
During cleaning, avoid soaking electronics or appliance parts in water. Clean only the plastic shell area and keep liquid away from internal components.
A useful habit is to clean slightly beyond the crack itself. Glue spread is easier to control on a fully clean surface than on a half-clean edge.
Plastic Glue Needs Dry Surfaces
Drying is one of the most ignored parts of plastic repair. Plastic does not absorb water like fabric or wood, but moisture can remain trapped inside cracks, seams, screw holes, hinge points, and textured surfaces. A repair may feel dry on the outside while still holding water inside the damaged edge.
After washing, wipe the area with a dry cloth and leave it in open air for additional drying time. Small smooth parts may dry quickly, but deeper cracks and outdoor items often need longer. Garden tools, watering cans, bathroom accessories, and storage bins usually hold hidden moisture longer than expected.
A good surface should feel dry, stable, and slightly grippy before glue is applied. If the crack still feels cool, slippery, or damp, wait longer. Moisture inside the repair area can create weak bonding and visible cloudy lines.
| Item Type | Suggested Drying Time |
|---|---|
| Small remote cover | 10–20 minutes |
| Toy accessory | 15–30 minutes |
| Bathroom organizer | 30–60 minutes |
| Outdoor storage box | 1–2 hours |
| Garden fitting | Several hours if washed deeply |
High heat is not always helpful. A hair dryer held too close can warp thin plastic, especially acrylic, toy parts, and appliance covers. Gentle airflow is safer than intense heat. If faster drying is needed, a fan or warm room works better than direct hot air.
When repairing clear acrylic or visible plastic, trapped moisture becomes easier to notice after curing. Taking extra drying time usually leads to a cleaner-looking repair.
Plastic Glue Needs Rough Edges
Many household plastics are glossy and smooth. While that finish looks clean, it also gives glue less texture to grip. Light surface roughening can improve bonding strength on hard plastic, especially on storage boxes, furniture trim, appliance covers, tool housings, and outdoor items that take repeated handling.
The goal is not to deeply scratch the plastic. The goal is to remove surface shine only in the bonding area. Fine sandpaper works well for this. Sand gently and keep the roughened area narrow so the visible surface still looks clean after repair.
Light roughening is especially useful when:
- the plastic surface feels very slick,
- the item already failed after an earlier glue attempt,
- the crack sits near a handle or hinge,
- the repaired area will receive repeated pressure.
After sanding, remove all plastic dust before gluing. Dust left inside the crack can weaken the bond just like dirt or grease.
| Surface Type | Roughening Advice |
|---|---|
| Storage box corner | Light sanding helps |
| Appliance cover | Sand hidden edge only |
| Acrylic frame | Avoid visible sanding |
| Furniture trim | Roughen bonding side |
| Toy part | Often unnecessary if break is rough already |
Acrylic needs extra care because scratches remain visible. For clear acrylic, roughen only hidden edges when possible. If the crack already has texture from the break itself, additional sanding may not be necessary.
Roughening also helps reduce repair failure on older plastic. Over time, some household plastics become smoother, harder, or slightly brittle on the surface. Light texture gives the glue a better grip point.
Plastic Glue Needs a Test Fit
A test fit means placing the broken parts together before applying glue. This simple step prevents crooked repairs, blocked sliding tracks, uneven pressure, and excess glue squeeze-out. Many messy repairs happen because glue is applied before checking alignment.
During the test fit, check whether the broken edges meet naturally. A remote cover should slide correctly. A toy wheel should sit straight. An acrylic stand should balance evenly. A storage box lid should close flat. If the part already sits crooked before glue is added, the repair usually becomes harder once adhesive is involved.
A test fit also helps estimate glue amount. Tight cracks need very little glue, while larger gaps may need support instead of simply more adhesive.
| Repair Type | What to Check |
|---|---|
| Remote cover | Sliding alignment |
| Toy figure | Arm or wheel angle |
| Storage box | Lid closes flat |
| Appliance knob | Rotation position |
| Acrylic stand | Stable upright balance |
Before gluing, prepare the holding method:
- painter’s tape for lightweight parts,
- rubber bands for curved pieces,
- soft clamps for furniture trim,
- tweezers for tiny toy parts,
- books or flat weights for acrylic panels.
Once glue is applied, there is less time to adjust. Preparing alignment and pressure first usually creates a cleaner repair with less overflow and fewer visible marks.
How to Use Plastic Glue?
Using plastic glue correctly is more important than using a large amount of glue. Most strong repairs come from careful preparation, controlled application, stable pressure, and enough curing time. A thin, accurate glue layer usually lasts longer and looks cleaner than a thick overflowing repair.
Plastic household items often break at narrow corners, thin tabs, clips, hinges, and small contact points. These areas do not need excessive glue. They need the broken surfaces to meet tightly while the adhesive bonds the plastic together. Good alignment also helps reduce visible glue marks, especially on clear acrylic, appliance covers, remote-control shells, and decorative plastic items.
The repair process should stay calm and organized. Before opening the glue, prepare the item, clean the area, check the fit, and arrange any tape, clamp, or support that may be needed. Once glue is applied, quick movement and repeated touching usually create messy repairs and weaker bonding.
Plastic Glue in Small Drops
Many people believe more glue creates a stronger repair, but plastic glue usually works better in thin controlled layers. Thick glue beads can squeeze out, leave shiny marks, block moving parts, or weaken the repair because the surfaces are no longer sitting tightly together. Small drops allow the glue to stay where it is needed and help the broken plastic edges reconnect more naturally.
Step 1: Clean and dry the damaged area completely.
Any grease, dust, or moisture around the crack can weaken the bond.
Step 2: Test the fit before opening the glue.
Press the broken pieces together and check whether they align correctly. If the edges do not sit naturally, forcing them later may create a crooked repair.
Step 3: Apply a small amount of glue directly onto one side.
For a tiny toy part, a pin-sized drop is often enough. For longer cracks, use a thin line instead of flooding the entire break.
| Repair Area | Recommended Glue Amount |
|---|---|
| Small toy accessory | Pin-sized drop |
| Remote cover tab | Tiny dot |
| Acrylic edge crack | Very thin line |
| Storage box crack | Thin controlled bead |
| Appliance knob split | Small ring around crack |
Step 4: Press the surfaces together slowly and evenly.
Do not slide the parts around after contact because this spreads glue onto visible areas.
Step 5: Remove excess glue carefully if needed.
A cotton swab or clean cloth edge can help, but avoid wiping aggressively because that can smear the adhesive further.
Small controlled application is especially important for:
- clear acrylic,
- remote-control covers,
- appliance buttons,
- toy parts,
- plastic clips,
- decorative plastic items.
Plastic Glue with Fine Tips
Precision nozzles make household plastic repair easier because many cracks are narrow and difficult to reach. A large glue opening can release too much adhesive at once, especially around clips, tabs, toy accessories, appliance covers, and small decorative parts. Fine-tip nozzles help direct the glue exactly into the damaged area without covering the surrounding surface.
GleamGlee Plastic Glue includes 4 precision nozzles per tube, while the 2-pack includes 8 nozzles. This is useful because household repairs vary in size. A fresh nozzle also helps maintain cleaner glue flow if one tip becomes partially clogged.
Step 1: Attach the fine-tip nozzle securely before use.
Check that the nozzle is straight and tightly connected.
Step 2: Hold the glue bottle at a controlled angle.
A gentle squeeze gives better accuracy than pressing hard. Fast squeezing often causes sudden overflow.
Step 3: Guide the nozzle along the crack slowly.
For long cracks, move in one direction instead of stopping and restarting repeatedly.
| Repair Type | Benefit of Fine Tip |
|---|---|
| Toy figure arm | Cleaner small-joint repair |
| Remote battery cover | Better control near sliding track |
| Acrylic frame | Reduced overflow on visible areas |
| Appliance button | Prevents glue spreading |
| Model kit | More accurate placement |
Step 4: Keep the nozzle clean during use.
If glue starts building around the tip, wipe it gently before continuing.
Step 5: Close the cap tightly after repair.
Good sealing helps prevent drying inside the nozzle.
Fine-tip application becomes especially helpful on:
- model cars and planes,
- headphone frames,
- appliance clips,
- keyboard edges,
- storage-box corners,
- craft and school projects.
Plastic Glue Needs Firm Pressure
Glue alone does not hold a repair together properly unless the broken plastic surfaces stay in close contact. Firm pressure helps spread the glue into a thin bonding layer and prevents gaps from forming inside the repair line. The goal is steady contact, not crushing force.
Step 1: Align the broken parts carefully.
The edges should meet naturally before pressure is added. If the repair already looks twisted or uneven, stop and reposition it first.
Step 2: Press the pieces together firmly.
Hold the repair still for the first bonding period. Small toy parts may only need finger pressure, while storage-box cracks may need tape or clamps.
Step 3: Choose the right support method.
| Repair Item | Recommended Pressure Method |
|---|---|
| Toy accessory | Finger pressure or tweezers |
| Storage box crack | Tape or soft clamp |
| Acrylic stand | Flat weight or tape |
| Appliance cover | Hand pressure then resting support |
| Furniture trim | Rubber band or padded clamp |
Step 4: Avoid excessive pressure.
Pressing too hard can squeeze out too much glue and weaken the repair line. Thin plastic may also bend or deform.
Step 5: Leave the item undisturbed.
Repeatedly checking whether the repair is “already strong” can shift the bond before curing finishes.
For curved items such as headphone frames or appliance covers, pressure should follow the natural shape of the plastic. Flat pressure on a curved surface can pull the crack apart from another angle.
Pressure becomes especially important on:
- hinge cracks,
- snap tabs,
- remote covers,
- appliance handles,
- acrylic edges,
- plastic trim pieces.
Plastic Glue Needs Cure Time
Fast-drying plastic glue may grip quickly, but full repair strength develops over time. Many repairs fail because the item is pulled, twisted, washed, snapped closed, or placed under pressure too early. A repair that feels hard on the outside may still be curing inside the joint.
Step 1: Let the item rest after bonding.
Place it on a stable surface where it will not move or fall.
Step 2: Avoid testing the repair too soon.
Do not bend the crack repeatedly or press on the repaired area immediately after gluing.
Step 3: Follow practical curing times.
| Repair Type | Light Handling | Better Full Use Time |
|---|---|---|
| Small craft piece | 15–30 minutes | 12–24 hours |
| Remote-control cover | 1–2 hours | 24 hours |
| Toy accessory | 30–60 minutes | 24 hours |
| Storage box crack | 2–4 hours | 24 hours |
| Furniture trim | 4–6 hours | 24–48 hours |
| Outdoor item | 4–6 hours | 24–48 hours |
Step 4: Keep repaired items away from water and heat during curing.
Bathroom steam, direct sunlight, dishwashing, and outdoor rain can weaken early bonding.
Step 5: Return the item to normal use gradually.
A repaired storage box should not immediately carry maximum weight. A repaired appliance knob should not be twisted aggressively on the first day.
Temperature and humidity affect curing speed. Cold rooms and damp environments usually slow the process. Thicker glue layers also need longer curing time than thin repairs.
A simple repair habit works well for many household items: glue today, use tomorrow. This gives the repair enough time to become stronger and more stable under daily handling.

Is Plastic Glue Strong?
Plastic glue can be strong enough for many household repairs when it is used on the right plastic, applied in a thin layer, and allowed to cure fully. It works best on rigid plastics such as PVC, ABS, acrylic, and hard plastic parts where the broken edges fit tightly together.
Strength depends on the repair area more than the glue alone. A remote-control cover, acrylic frame corner, plastic storage lid, toy part, appliance knob, or model piece often repairs well because the bond area is small and controlled. A chair leg, luggage wheel mount, folding hinge, or heavily pulled handle needs more caution because those parts face weight, twisting, and repeated force.
A good repair should match real daily use. If the original item broke because it was overloaded, bent, dropped, or forced, the repaired part should be used more gently after bonding. Plastic glue can restore many everyday items, but it should not be treated as a replacement for missing plastic, metal screws, or load-bearing structure.
Plastic Glue for Daily Use
Plastic glue can handle many daily-use repairs when the item is rigid and the repair area is not under heavy pressure. Common examples include remote covers, storage box corners, acrylic frame stands, toy accessories, appliance buttons, plastic clips, garden parts, and office supplies. These items are touched often, but they usually do not carry dangerous weight. A clean bond can make them useful again.
The repair becomes weaker when the part bends repeatedly. A fixed plastic tab that only slides into place may last well. A fixed hinge that flexes every day may fail sooner. A glued storage box lid can work for clothes or craft supplies, but it may crack again if heavy tools are stacked on top.
| Repair Item | Strength Chance | Better Use After Repair |
|---|---|---|
| Remote cover | High | Normal closing and sliding |
| Acrylic frame | High | Display and light handling |
| Toy accessory | Medium to high | Gentle play or display |
| Storage box lid | Medium to high | Light to medium storage |
| Appliance knob | Medium | Normal turning only |
| Chair leg | Low | Replace or reinforce |
| Luggage wheel mount | Low to medium | Needs extra support |
Practical use tips:
- Let repaired parts cure before full use.
- Reduce bending on repaired tabs and clips.
- Avoid heavy loads during the first 24 hours.
- Reinforce cracks around handles, hinges, and screw holes.
Plastic Glue for Clear Repairs
Clear repair strength matters because visible plastic often needs both a firm bond and a clean appearance. Acrylic organizers, picture frames, transparent trays, display stands, ornaments, craft pieces, and appliance covers can look messy if the glue dries cloudy or spreads outside the crack. A strong repair that looks dirty may still feel disappointing.
GleamGlee Plastic Glue dries 100% transparent, which helps visible repairs look cleaner on acrylic, clear plastic, light-colored plastic, and decorative items. The repair still depends on glue control. Too much adhesive can create raised ridges, trapped bubbles, shiny patches, or cloudy smears, even when the glue itself is clear.
For visible repairs, the best method is to use a very small amount and press the parts without sliding them. Clear plastic also shows fingerprints easily, so handle the item from the edges when possible.
| Clear Plastic Item | Repair Focus | Common Mistake |
|---|---|---|
| Acrylic frame | Clean corner bond | Too much glue |
| Display stand | Straight alignment | Moving while curing |
| Clear tray | Thin crack repair | Smearing overflow |
| Ornament | Small detail bonding | Fingerprints near glue |
| Office sign holder | Stable base joint | Uneven pressure |
A clear repair may still show the original crack line if the plastic was already whitened or stress-damaged. Glue can bond the broken surface, but it cannot always remove internal stress marks.
Plastic Glue for Small Cracks
Small cracks are often the best plastic glue repairs because the broken edges are still close enough to bond tightly. Hairline cracks, corner splits, small lid cracks, acrylic edge cracks, toy shell splits, and appliance casing cracks usually respond well when repaired early. The sooner the crack is fixed, the less likely it is to spread.
A narrow crack usually needs only a thin line of glue. Opening the crack too wide can make the damage worse, so the glue should be placed carefully with a precision nozzle. For longer cracks, working in short sections helps keep the plastic aligned. Press each section back into shape before moving to the next area.
| Crack Type | Repair Chance | Best Method |
|---|---|---|
| Hairline crack | High | Thin glue line |
| Corner split | High | Press into original shape |
| Lid crack | Medium to high | Glue and rest flat |
| Screw-hole crack | Medium | Add reinforcement |
| Long crack | Medium | Repair in sections |
| Missing piece gap | Low | Needs patch or filler |
| Flexible bend crack | Low | Glue may not hold long |
For cracks near stress points, glue alone may not be enough. Handles, hinges, screw holes, and snap tabs often need extra support because the same pressure that caused the crack may return during normal use.
Plastic Glue Mistakes
Most weak plastic glue repairs come from small mistakes rather than bad luck. The most common mistake is gluing over dirt, oil, or moisture. Another is using too much glue. A thick glue layer can cure unevenly, squeeze out, or keep the plastic surfaces from touching closely. Using the item too soon is also a major reason repaired parts break again.
The wrong repair target can also cause failure. Plastic glue is not ideal as the only fix for safety-related items, weight-bearing parts, flexible hinges, baby chew toys, or parts exposed to strong heat. Repairing these items without reinforcement can create risk or disappointment.
Common mistakes to avoid:
- Gluing without cleaning the surface.
- Applying glue to damp plastic.
- Using a thick bead on a tight crack.
- Moving the parts while curing.
- Snapping covers or clips back too early.
- Letting glue enter buttons, ports, vents, or tracks.
- Expecting glue to fill large missing gaps.
- Repairing load-bearing parts without reinforcement.
A better repair follows a simple order: clean, dry, test fit, apply a small amount, press firmly, and cure fully. This method gives plastic glue the best chance to create a strong, neat, and useful household repair.
Why Choose GleamGlee Plastic Glue?
GleamGlee Plastic Glue is made for fast, clean, and controlled plastic repair on PVC, ABS, acrylic, and many hard plastic household items. It is suitable for storage boxes, toys, appliance covers, acrylic frames, craft pieces, model parts, plastic clips, and daily home repair tasks where accuracy and a neat finish matter.
Its value comes from four practical details: fast curing, clear drying, strong bonding, and precision application. Many plastic repairs fail because the glue is messy, slow, too thick, or hard to place into small cracks. GleamGlee Plastic Glue is designed to solve these daily repair problems with a quick-setting formula and fine-tip nozzles.
For home repair, a good plastic glue should not only hold the item together. It should also reduce visible glue marks, help small parts stay aligned, and make repair easier for non-professional users. GleamGlee Plastic Glue fits this need for small cracks, thin tabs, visible acrylic pieces, appliance parts, toys, and household plastic accessories.
Fast Plastic Glue
Fast drying matters when repairing small plastic parts because many broken pieces are difficult to hold in place for a long time. A toy accessory, remote battery cover tab, acrylic frame corner, appliance button, plastic clip, or model part can shift easily while the glue is still wet. GleamGlee Plastic Glue uses a quick-curing formula that helps the repair grip in seconds, making it easier to keep parts aligned during the first bonding stage.
Speed is useful, but the repair should still be allowed to rest before full use. A fast initial grip helps during application, while longer curing time improves daily-use strength. For small display parts, light handling may be possible sooner. For covers, knobs, storage boxes, and clips that take pressure, a 24-hour rest is a safer habit.
| Repair Item | Why Fast Glue Helps | Better Use Time |
|---|---|---|
| Toy accessory | Keeps tiny parts aligned | 24 hours |
| Remote cover tab | Reduces slipping during repair | 24 hours |
| Acrylic frame corner | Holds clean angle quickly | 12–24 hours |
| Appliance button | Helps small contact points set | 24 hours |
| Model part | Supports accurate positioning | 12–24 hours |
Good uses include quick repairs for model cars, household accessories, toy parts, plastic covers, and small appliance details. The main point is not to rush the final use. Let the glue grab quickly, then let the repair strengthen quietly.
Clear Plastic Glue
Many household plastic repairs happen on visible surfaces. A cracked acrylic frame, transparent organizer, light-colored appliance lid, decorative ornament, clear plastic tray, or display stand can look worse if the adhesive dries cloudy or leaves yellow marks. GleamGlee Plastic Glue dries 100% transparent, helping visible repairs look cleaner and more natural.
A clear finish is especially helpful on acrylic and light-colored plastics. It also works well for craft projects, holiday decorations, photo frames, office display holders, clear boxes, and model parts. Still, clean application matters. Even transparent glue can leave raised lines or glossy buildup if too much is applied.
For a cleaner clear repair, apply only a thin amount, keep fingers away from the glue line, and avoid sliding the pieces once they touch. On acrylic, use the smallest amount possible because clear plastic shows overflow more easily than colored plastic.
| Visible Repair | Clear Glue Benefit | Application Tip |
|---|---|---|
| Acrylic frame | Cleaner corner repair | Use a tiny line |
| Transparent tray | Less obvious crack repair | Avoid overflow |
| Ornament | Better decorative finish | Hold with tweezers |
| Display stand | Neater visible joint | Keep pressure even |
| Light appliance cover | Less noticeable repair | Wipe surface before use |
Clear glue cannot erase a crack that has already turned white from stress, but it can hold the part neatly without adding a cloudy glue mark.
Precise Plastic Glue
Precision is one of the biggest advantages of GleamGlee Plastic Glue. Many household breaks are not large flat surfaces. They are narrow cracks, tiny tabs, small clips, toy details, model parts, acrylic corners, remote cover tracks, and appliance buttons. These areas need a controlled glue amount. Too much adhesive can block movement, leave visible residue, or make the repair harder to fit back into place.
GleamGlee Plastic Glue includes 4 fine-tip nozzles per tube, and a 2-pack includes 8 fine-tip nozzles. These nozzles help place glue into small cracks and tight areas without flooding the surface. This is useful for repairs that need accuracy, such as model kits, electronic covers, toy accessories, craft pieces, and appliance clips.
Precision nozzles are helpful when repairing:
- thin cracks in storage boxes,
- small toy and model parts,
- remote-control battery cover tabs,
- acrylic frame corners,
- appliance knobs and buttons,
- plastic clips, hinges, and trim pieces.
| Repair Area | Why Precision Matters |
|---|---|
| Remote cover track | Prevents glue from blocking sliding |
| Toy figure joint | Keeps small parts clean |
| Acrylic edge | Reduces visible overflow |
| Appliance clip | Places glue only on the broken edge |
| Model part | Keeps details sharp and aligned |
A fine nozzle also reduces waste. Instead of squeezing out a large bead, the user can apply a small drop exactly where the bond is needed.
Strong Plastic Glue
GleamGlee Plastic Glue is designed for strong bonding on PVC, ABS, acrylic, and many hard plastics. These materials appear throughout the home in storage containers, appliance shells, remote covers, toys, garden items, office supplies, craft pieces, sports equipment, and model parts. A strong glue helps repair items that still have useful life instead of replacing them too early.
Strong bonding works best when the surfaces fit tightly and the repaired item is used sensibly after curing. GleamGlee Plastic Glue is suitable for daily plastic repairs such as small cracks, broken tabs, loose covers, plastic handles, light trim, and craft parts. For load-bearing or flexible areas, reinforcement may still be needed.
| Use Area | Good Repair Examples |
|---|---|
| Household storage | Box lids, side cracks, organizer corners |
| Toys and hobbies | Figures, model cars, board-game pieces |
| Electronics shells | Remote covers, mouse casings, headphone frames |
| Appliances | Knobs, lids, buttons, vacuum attachments |
| Outdoor items | Planters, watering-can parts, garden accessories |
| Office and school | Rulers, folders, desk organizers, calculators |
| Crafts and décor | Acrylic frames, ornaments, display pieces |
GleamGlee also supports reliable product quality through its adhesive R&D, application testing, packaging design, and manufacturing system. The company works with polymer chemistry, surface compatibility testing, precision packaging, multilingual instructions, and controlled production processes. For plastic glue users, these details matter because the product needs to be easy to apply, stable in storage, clear after drying, and dependable during daily repairs.
Conclusion
Plastic household repair is not complicated when the right method is used. Clean the plastic, dry it fully, test the fit, apply a small amount of plastic glue, press the parts together, and allow enough curing time. This process can repair many daily items, including storage boxes, toys, remote covers, appliance parts, acrylic frames, hard plastic clips, garden accessories, and DIY craft pieces.
GleamGlee Plastic Glue is built for customers who want fast, clean, and reliable repairs at home. Its fast-drying formula, crystal-clear finish, strong bond, and precision nozzles make it practical for PVC, ABS, acrylic, and many hard plastic items. For visible repairs, small cracks, and detailed parts, controlled application makes a clear difference.
For individual customers, GleamGlee offers dependable plastic glue for everyday household fixes. For distributors, Amazon sellers, retailers, and private label brands, GleamGlee can also provide product sourcing, packaging customization, label design, formula support, and bulk supply. To order GleamGlee branded plastic glue or request a custom plastic glue product, contact the GleamGlee team for samples, pricing, packaging options, and cooperation details.





















