 Skip to content
A good pair of boots usually does not fail all at once. The leather upper may still look strong, the insole may still feel comfortable, and the tread may still have grip, but one lifted sole edge can make the whole boot feel useless. For work boots, that loose edge may catch dust, oil, or small stones. For hiking boots, it may let water creep in during a wet trail. For rain boots, one small crack can turn a waterproof boot into a wet-sock problem.
To repair boots using strong shoe glue, clean the damaged area, dry it completely, lightly sand smooth surfaces, apply a thin layer of waterproof flexible shoe glue, press the parts tightly together, secure the repair with rubber bands or clamps, and allow at least 24 hours of curing before heavy wear or water exposure.
The mistake many people make is thinking boot repair is only about “adding more glue.” In reality, a strong repair depends on cleaning, surface grip, glue thickness, pressure, curing time, and the right formula. Boots bend thousands of times during normal walking, so the glue must stay strong without turning hard and brittle. A careful repair can often save work boots, hiking boots, rain boots, leather boots, and daily boots at a much lower cost than replacement.
What Boots Can Shoe Glue Fix?
Strong shoe glue can fix boots with peeling soles, loose heel edges, lifted toe areas, small cracks, and light separation between the boot upper and outsole. It works best when the damaged part is still complete, cleanable, and able to be pressed back into place.
Boots are often worth repairing when the upper is still comfortable, the tread still has grip, and only one area has started to open. A small 2–5 cm sole gap, a loose heel corner, or a lifted toe edge can often be repaired at home. But if the sole is broken into pieces, the midsole foam is crumbling, or the boot has lost its shape, glue can only give limited help.
For better results, repair the boot early. Once mud, water, sand, and old glue build up inside the gap, the repair becomes harder. A clean early repair usually holds better than waiting until half the sole is hanging loose.
Shoe Glue for Soles
Boot sole separation usually starts small. Many people first notice a clicking sound, a flapping toe edge, or a thin dark line between the sole and upper. If the boot still sits flat and the sole can be pressed back into position, shoe glue is often a practical fix.
Shoe glue can help with:
- Peeling outsole edges
- Small toe-side sole gaps
- Sidewall separation
- Loose rubber sole layers
- Minor midsole-to-outsole gaps
The best time to repair is when the gap is still narrow. A 2–5 cm opening is usually much easier to fix than a sole that has peeled halfway around the boot. Early repair also helps stop water, grit, and road dust from spreading deeper into the shoe.
| Sole Problem | Repair Difficulty | Shoe Glue Result |
|---|---|---|
| 2–5 cm toe gap | Easy | Usually strong |
| Small side gap | Easy to medium | Good with pressure |
| Heel-side sole lift | Medium | Needs firm holding |
| Half sole detached | Hard | May need longer curing |
| Missing sole rubber | Not ideal | Glue cannot rebuild missing parts |
Use a thin glue layer inside the gap, not a thick bead only on the outside. Press the sole tightly for curing, because pressure is what helps the glue grip both surfaces evenly.
Shoe Glue for Heels
Heel damage is common on work boots, leather boots, hiking boots, and daily walking boots. The heel receives repeated impact with every step, so even a small loose corner can grow quickly. If the heel starts wobbling, making noise, or opening at the back edge, it should be repaired before dirt fills the gap.
Shoe glue can help with:
- Loose heel edges
- Lifting rubber heel caps
- Small gaps behind the heel
- Heel-to-sole separation
- Slightly detached heel layers
Heel repairs need stronger pressure than toe repairs because the heel area is thicker and harder. After applying shoe glue, use rubber bands, tape, or padded clamps to hold the heel tightly in place. A heel that moves during curing may reopen after a few wears.
A good heel repair should feel flat when pressed. If the heel has shifted sideways, collapsed, or lost a large rubber section, shoe glue alone may not restore comfort or balance. In that case, the boot may need professional repair or replacement.
For daily boots, allow at least 24 hours of curing. For heavy work boots or hiking boots, 36–48 hours before hard use is safer, especially if the boot will face mud, stairs, gravel, or long walking.
Shoe Glue for Toes
The toe area is one of the first places boots start to fail. It bends during walking, scrapes against stairs, hits rocks, and often touches water first. A small lifted toe edge may look harmless, but it can quickly become a larger sole problem if left open.
Shoe glue can help with:
- Lifted toe caps
- Peeling front sole edges
- Small cracks near the toe
- Loose rubber toe guards
- Front outsole separation
Toe repairs should be neat because this area is easy to see. Clear-drying shoe glue is useful for leather boots, casual boots, and outdoor boots where visible white residue would make the repair look messy. A precision nozzle also helps place glue deep inside the small front gap.
For toe repairs, avoid overfilling the gap. Too much glue can squeeze out, dry into a hard lump, or collect dirt during walking. Apply a thin layer, press the toe down firmly, wipe excess glue before it dries, and keep the boot from bending during curing.
| Toe Damage | Best Repair Step |
|---|---|
| Small lifted edge | Glue thinly and press flat |
| Dirty front gap | Clean before applying glue |
| Rubber toe guard lifting | Glue inside the lifted area |
| Toe crack on rain boot | Seal and cure before water use |
| Large torn toe area | Glue may help only as temporary repair |
Which Shoe Glue Is Best?
The best shoe glue for boots should be strong, waterproof, flexible, and suitable for common boot materials such as rubber, leather, vinyl, canvas, PU, and synthetic soles. Boots are not repaired like hard plastic or wood. They bend, twist, rub against the ground, and often face water, dust, heat, and cold.
A good boot glue should hold the sole in place without turning stiff. If the glue dries too hard, the repaired area may crack at the toe or peel again at the heel. If the glue is too soft, it may not resist walking pressure. The better choice is a balanced adhesive: strong enough to hold, flexible enough to move.
For most home boot repairs, choose shoe glue with a precision nozzle, clear drying finish, and at least 24-hour curing strength. This is especially important for work boots, hiking boots, rain boots, leather boots, and daily boots that need to keep looking neat while staying wearable.
Strong Shoe Glue
Strong shoe glue should hold under real walking pressure, not just pass a quick hand test. A boot sole carries body weight, bends at the toe, receives heel impact, and rubs against rough surfaces. This means the glue must bond tightly to both the outsole and the boot upper.
Look for strong shoe glue when repairing:
- Peeling boot soles
- Loose heel caps
- Open side gaps
- Detached insoles
- Rubber-to-leather areas
A strong repair depends on both the glue and the repair method. Even a powerful adhesive can fail if the gap is dirty, wet, oily, or not pressed firmly during curing. For a small sole gap, a thin glue layer with strong pressure usually performs better than a thick glue blob.
| What Affects Strength | Better Repair Choice |
|---|---|
| Dirty sole gap | Clean before gluing |
| Smooth rubber | Lightly sand first |
| Large open gap | Press tightly during curing |
| Heavy work use | Cure 36–48 hours if possible |
| Outdoor wear | Use waterproof flexible glue |
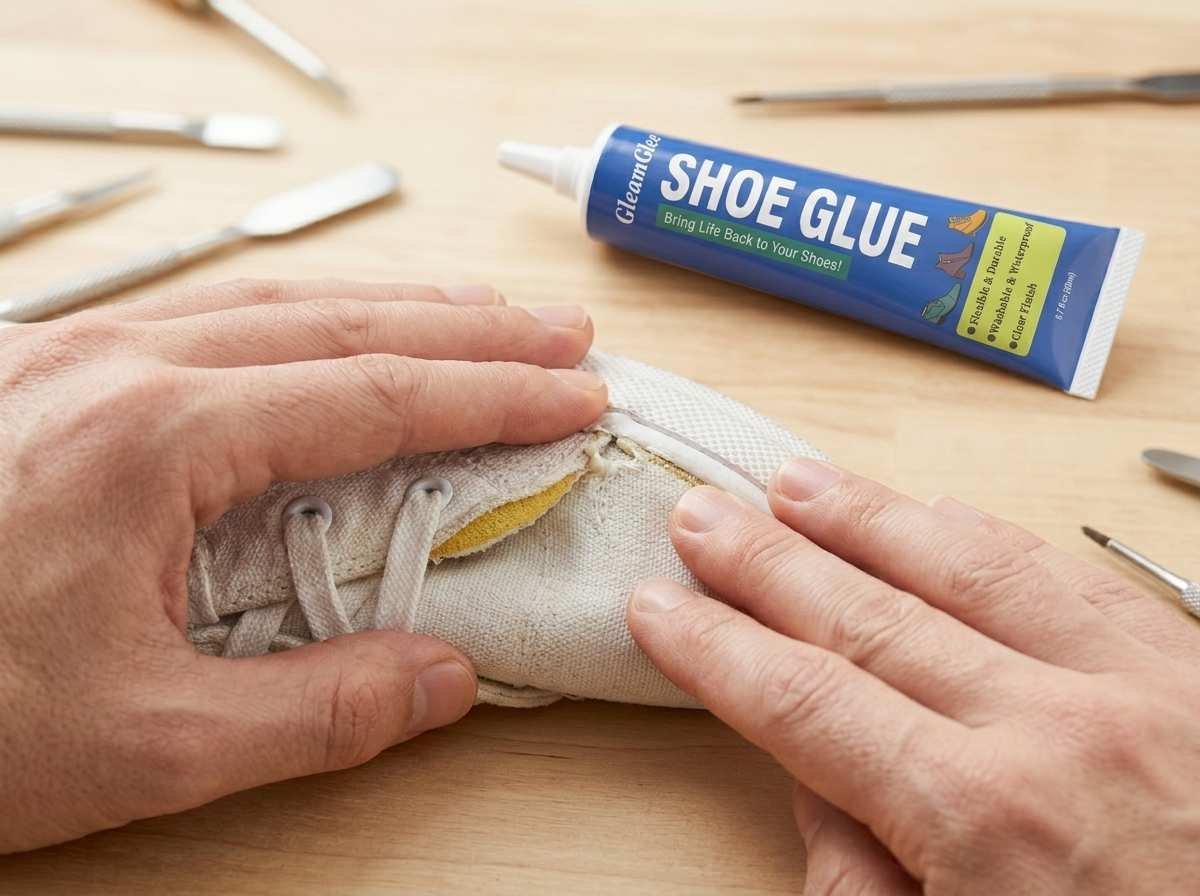
GleamGlee shoe glue is made for soles, heels, insoles, and mixed shoe materials. It bonds leather, rubber, vinyl, canvas, and other common boot surfaces, making it practical for daily repairs and outdoor footwear.
Waterproof Shoe Glue
Waterproof shoe glue is important because boots often meet rain, mud, snow, wet grass, kitchen floors, workshop floors, and outdoor trails. A repair that works indoors may fail quickly if the glue softens or lifts after water exposure.
Waterproof shoe glue is best for:
- Rain boots
- Hiking boots
- Work boots
- Garden boots
- Snow boots
- Hunting boots
Waterproof glue helps seal the gap between the sole and upper. This can reduce water entry and help stop the separation from spreading. Once water gets inside a loose sole, it may soften old adhesive, trap odor, and make the boot uncomfortable.
However, waterproof does not mean “wear immediately in water.” The repair must cure first. For most boot repairs, allow at least 24 hours before normal wear. For rain boots, hiking boots, or thick work boot soles, 36–48 hours before wet use is safer.
| Boot Use | Water Risk | Glue Needed |
|---|---|---|
| Indoor daily boots | Low | Strong clear glue |
| Leather boots in rain | Medium | Waterproof flexible glue |
| Work boots outdoors | High | Waterproof strong glue |
| Hiking boots | High | Waterproof flexible glue |
| Rain boots | Very high | Waterproof sealing glue |
A waterproof repair is most useful when done early. If the sole gap has already been soaked many times, clean and dry it fully before gluing. Hidden moisture is one of the main reasons boot repairs fail too soon.
Flexible Shoe Glue
Flexible shoe glue is usually better for boots than hard glue. Every step bends the toe, compresses the heel, and twists the sole slightly. If the glue dries hard like plastic, it may crack or pull away from the boot after repeated walking.
Flexible shoe glue is important for:
- Toe sole repair
- Heel edge repair
- Side sole gaps
- Rubber boot cracks
- Hiking and work boots
A flexible bond moves with the boot instead of fighting against it. This is especially useful at the front sole edge, where the boot bends the most. It also helps reduce stiff lumps that can make the boot feel uncomfortable after repair.
| Glue Type | Boot Repair Result |
|---|---|
| Hard fast glue | May crack on bending areas |
| Soft weak glue | May peel under pressure |
| Flexible shoe glue | Better for soles and heels |
| Clear flexible glue | Better for visible repairs |
| Waterproof flexible glue | Better for outdoor boots |
GleamGlee shoe glue dries with an elastic finish, helping the repair stay strong without becoming brittle. It is also clear after drying, so it works well for boots where the repaired edge is visible. For a cleaner result, apply a thin layer, press firmly, and let the boots cure fully before wearing.

How to Prep Boots?
Preparing boots correctly before using shoe glue is one of the biggest differences between a repair that lasts a few days and one that stays strong for months. Many failed repairs happen because the gap still contains dirt, hidden moisture, loose old glue, or smooth surfaces that reduce grip.
Boots should be cleaned, dried, and lightly sanded before glue is applied. The repair area also needs to sit naturally when pressed together. If the sole twists or the gap cannot close flat, the glue will struggle to hold under walking pressure.
Good preparation usually takes more time than the actual gluing process. But this step matters because boot soles flex thousands of times during daily use. A clean and stable repair surface gives the glue better contact and helps reduce future peeling.
Clean Boots First
Cleaning the damaged area is the first step because shoe glue needs direct contact with the real boot material. Dust, mud, sand, oil, and loose old adhesive can weaken the bond and cause the repair to reopen quickly.
Before using shoe glue:
- Remove loose dirt from the sole gap
- Brush away sand and small stones
- Wipe away mud or oily residue
- Pull out loose old glue flakes
- Open the gap gently for deeper cleaning
For work boots and hiking boots, dirt often gets pushed deep inside the sole gap before the user notices the damage. If glue is applied over trapped debris, the adhesive may stick to the dirt instead of the rubber or leather itself.
| Dirt Inside Boot Gap | What Happens If Not Cleaned |
|---|---|
| Sand | Weak bonding surface |
| Mud | Moisture trapped under glue |
| Oil | Glue may not grip properly |
| Loose old glue | New glue bonds unevenly |
| Small stones | Creates pressure gaps |
A dry toothbrush, cloth, cotton swab, or small scraper usually works well for cleaning. Avoid forcing sharp tools too deeply into leather or foam areas because this can enlarge the separation.
For leather boots, avoid soaking the repair area with water. Too much moisture can swell the leather and slow curing later. For rain boots and rubber boots, make sure cleaner residue is wiped away completely before drying.
Dry Boots Fully
Boots must be fully dry before shoe glue is applied. Even if the outside feels dry, hidden moisture inside the sole gap or lining can weaken the repair. This is especially common with hiking boots, rain boots, snow boots, and outdoor work boots.
Boots often trap moisture in:
- Sole gaps
- Foam midsoles
- Fabric lining
- Toe edges
- Heel corners
A damp repair area may cause:
- Weak bonding
- Slower curing
- Glue lifting early
- Water trapped under the repair
- Sole separation returning faster
The safest method is air drying at room temperature. High heat from heaters, ovens, or hair dryers can damage boot materials. Leather may stiffen, rubber may warp, and synthetic soles may lose shape if overheated.
| Boot Condition | Suggested Drying Time |
|---|---|
| Slight dampness | Several hours |
| Wet sole gap | Overnight |
| Rain-soaked boots | 24+ hours |
| Thick work boots | Longer drying recommended |
| Leather hiking boots | Slow room-temperature drying |
If the boot smells damp or feels cool inside the gap, wait longer before gluing. A few extra hours of drying can improve repair strength significantly.
For faster airflow:
- Remove insoles if possible
- Loosen laces fully
- Keep the sole gap slightly open
- Place boots in a ventilated room
Drying is especially important for waterproof repairs because trapped moisture inside the gap can later weaken the adhesive from underneath.
Sand Boot Soles
Light sanding helps shoe glue grip smooth boot surfaces better. Many boot soles are made from rubber, vinyl, PU, or treated synthetic materials that feel slippery or glossy. Sanding creates a rougher surface so the glue can hold more securely.
Sanding works best on:
- Rubber outsole edges
- Smooth heel caps
- Vinyl rain boot surfaces
- Plastic-like sole materials
- Glossy old glue areas
The goal is not to remove large amounts of material. Light sanding is enough. The surface should feel slightly rough instead of shiny.
| Surface Condition | Before Sanding | After Sanding |
|---|---|---|
| Smooth rubber | Slippery | Better glue grip |
| Glossy plastic | Hard to bond | Improved contact |
| Old dried glue | Uneven | More stable surface |
| Leather edge finish | Sealed | Better adhesive hold |
After sanding, wipe away the dust completely. Sanding dust left inside the repair area can weaken bonding just like dirt or mud.
A few sanding tips:
- Use light pressure
- Sand both contact surfaces if possible
- Avoid deep scratches on visible leather
- Do not over-sand soft foam areas
- Clean again after sanding
For work boots and hiking boots, sanding is especially useful because outdoor wear often smooths the sole edges over time. A lightly roughened surface usually gives flexible shoe glue a stronger hold during repeated walking and bending.
How to Glue Boots?
To glue boots correctly, apply a thin layer of strong shoe glue inside the damaged area, press the boot parts tightly together, hold the repair firmly in place, and allow enough curing time before wearing the boots again. Good pressure and patience are usually more important than using large amounts of glue.
Many failed boot repairs happen because the glue layer was too thick, the sole shifted during drying, or the boots were worn too early. A proper repair should look clean, sit flat, and feel stable after curing. The goal is not to make the boot rigid. The goal is to restore strong flexible bonding while keeping the boot comfortable for walking.
For best results, repair boots indoors at room temperature. Extremely cold or humid environments can slow curing and weaken bonding strength during the first hours after application.
Apply Shoe Glue
Applying shoe glue correctly is more important than simply adding more adhesive. Many people overfill the sole gap, thinking extra glue creates extra strength. In reality, thick glue layers can cure unevenly, squeeze out messily, and leave weak soft spots inside the repair.
Better shoe glue application:
- Apply a thin even layer
- Place glue inside the gap, not only outside
- Cover the contact surface fully
- Avoid flooding the sole edge
- Wipe excess glue before drying
For small toe gaps, a precision metal nozzle helps place glue deep into the damaged area without spreading glue across the visible boot surface. For heel repairs, slowly move the nozzle through the gap so the adhesive reaches the deeper contact points.
| Glue Application Problem | Result |
|---|---|
| Too much glue | Uneven curing and messy edges |
| Too little glue | Weak bonding spots |
| Glue only on outer edge | Inner gap may reopen |
| Dirty application area | Poor adhesion |
| Thick glue blobs | Hard uncomfortable lumps |
A thin glue layer usually bonds better because both surfaces can press together more tightly. This matters most for work boots, hiking boots, and rain boots where constant walking pressure stresses the repair line every day.
Clear-drying shoe glue is especially useful for leather boots and casual boots because visible white residue around the toe or sidewall can make the repair look rough even if the bond itself is strong.
Press Boots Tight
Pressure is what helps shoe glue turn into a durable repair. After glue is applied, both boot surfaces must stay tightly connected during curing. If the sole lifts slightly or shifts position while drying, the repair can weaken quickly.
Common ways to hold pressure:
- Rubber bands
- Strong tape
- Padded clamps
- Weighted flat objects
- Tight wrapping straps
The repair should sit in its natural shape before pressure is added. Do not twist the sole or force the boot into an unnatural angle just to close the gap. A poorly aligned repair may feel uncomfortable during walking and may reopen faster under stress.
| Repair Area | Best Pressure Method |
|---|---|
| Toe edge | Rubber bands or tape |
| Side sole gap | Tape with firm wrapping |
| Heel edge | Padded clamp or strong tape |
| Rain boot crack | Gentle even pressure |
| Large outsole section | Combination of bands and clamps |
For heel repairs, stronger pressure is usually needed because the heel area is thicker and harder than the toe. For toe repairs, lighter but steady pressure is often enough.
A common mistake is removing the pressure too early. Even if the glue feels dry on the outside, the inner adhesive layer may still be curing. Leaving the repair secured longer often improves long-term durability.
To protect leather or suede surfaces:
- Place cloth between clamp and boot
- Avoid metal touching visible leather directly
- Do not overtighten soft boot materials
The goal is firm contact, not crushing the boot.
Cure Boots Long
Curing time is one of the biggest reasons some boot repairs last while others fail after only a few days. Shoe glue needs time to develop full bonding strength inside the repair area, especially for thick work boots, hiking boots, and heavy outdoor soles.
During curing:
- Do not walk in the boots
- Do not bend the toe repeatedly
- Do not expose the boots to water
- Do not leave them in extreme heat
- Do not test the repair aggressively too early
Many users touch the glue after several hours and assume the repair is finished because the outer edge feels dry. However, the inner glue layer may still be soft. Wearing the boots too early can separate the repair before the adhesive fully stabilizes.
| Boot Repair Type | Minimum Cure Time | Better Before Heavy Use |
|---|---|---|
| Small toe repair | 12–24 hours | 24 hours |
| Side sole repair | 24 hours | 24–36 hours |
| Heel repair | 24 hours | 36–48 hours |
| Work boots | 24 hours | 48 hours |
| Hiking boots | 24 hours | 48 hours before trails |
| Rain boots | 24 hours | 48 hours before water exposure |
Temperature also affects curing. Cold rooms may slow the process, while humid conditions may keep the repair softer longer. Room-temperature indoor curing is usually safest.
After curing, test the repair gently:
- Press the repaired edge lightly
- Walk indoors first
- Check for lifting at corners
- Avoid heavy outdoor use immediately
A careful curing process can greatly improve repair life. Many strong boot repairs fail simply because the boots returned to daily use too quickly.
Are Glue Repairs Strong?
A properly repaired boot using strong shoe glue can stay usable for months or even years, depending on the boot condition, walking pressure, weather exposure, and repair method. Most successful repairs come from good preparation, thin glue application, strong pressure, and full curing time.
Boot glue repairs are strongest when the damage is repaired early. A small sole gap or loose heel edge is usually much easier to repair than a boot that has already collected water, mud, and dirt deep inside the separation. Flexible waterproof shoe glue also performs better on boots because boots bend constantly during walking.
Shoe glue works best for localized damage such as peeling soles, loose toe edges, small heel gaps, detached insoles, and cracked rain boot areas. It is less effective when the sole is heavily broken, the foam midsole is crumbling, or large material sections are missing.
Shoe Glue Strength
Strong shoe glue should hold under real walking conditions, not only during a quick indoor test. Boots experience repeated pressure every day from bending, body weight, stairs, gravel, pavement, mud, ladders, and uneven outdoor surfaces.
A strong boot repair should resist:
- Toe bending
- Heel impact
- Side twisting
- Outdoor moisture
- Daily walking pressure
The glue itself matters, but repair quality matters just as much. Even expensive adhesive may fail if:
- The surface is dirty
- Moisture stays inside the gap
- The glue layer is too thick
- The boot moves during curing
- The repair is worn too early
| Repair Condition | Repair Strength Result |
|---|---|
| Clean + dry + pressed well | Usually strong |
| Dirty or wet gap | Weak bonding |
| Thick glue blobs | Uneven curing |
| No pressure during curing | Higher chance of reopening |
| Full 24–48 hour cure | Better durability |
For work boots and hiking boots, flexibility is just as important as raw strength. A glue that dries extremely hard may crack once the sole bends repeatedly. Flexible shoe glue handles movement better because it bends with the boot instead of resisting it.
GleamGlee shoe glue is designed to stay elastic after curing while still forming a durable bond on leather, rubber, vinyl, canvas, and mixed boot materials. This helps the repair remain stable during daily use instead of becoming brittle over time.
Boot Repair Life
Boot repair life depends heavily on how the boots are used after repair. Casual walking boots often place less stress on the repair than construction boots, hiking boots, or outdoor work boots used on rough ground every day.
Repairs usually last longer when:
- The gap was repaired early
- The boot structure is still healthy
- The repair cured fully
- The boot is cleaned regularly
- Water exposure is limited during early use
A small toe repair on casual leather boots may hold for a very long time because the repair area experiences moderate movement only. A work boot used on ladders, gravel, concrete, and wet surfaces every day faces much heavier stress.
| Boot Type | Stress Level | Typical Repair Durability |
|---|---|---|
| Casual boots | Low to medium | Often long-lasting |
| Leather fashion boots | Medium | Good with careful use |
| Work boots | High | Depends on daily workload |
| Hiking boots | High | Strong if fully cured |
| Rain boots | Medium | Good when cracks repaired early |
| Children’s boots | Medium | Often repairs well |
One important detail is timing. Many users continue wearing boots after noticing the sole lifting slightly. During this period, dirt and moisture slowly spread inside the gap. By the time the repair is attempted, the inside surfaces may already be contaminated or weakened.
Repairing early usually gives:
- Cleaner bonding surfaces
- Better sole alignment
- Less trapped dirt
- Stronger contact area
- Longer repair life
For outdoor boots, checking the sole edges every few weeks can help catch small lifting areas before they become larger repairs.
Waterproof Repair
Waterproof performance is one of the biggest concerns in boot repair because many boots are used outdoors. Rain, wet grass, snow, mud, garage floors, and puddles constantly stress the repair line. If the glue softens after water exposure, the sole may begin peeling again quickly.
Waterproof shoe glue is especially important for:
- Hiking boots
- Rain boots
- Work boots
- Hunting boots
- Garden boots
- Snow boots
A waterproof repair helps seal the gap between the sole and upper, reducing water entry into the boot. This not only protects comfort but also helps prevent odor, foam softening, and further sole separation.
However, waterproof repairs still need proper curing. A common mistake is using the boots outdoors too soon after gluing. Even waterproof adhesive can weaken if exposed to water before the bond fully develops.
| Waterproof Repair Mistake | Possible Result |
|---|---|
| Wearing boots too early | Sole may reopen |
| Water exposure during curing | Weak bonding |
| Trapped moisture inside gap | Repair may fail later |
| Dirty wet repair area | Poor seal quality |
| Rigid glue on flexible sole | Cracking during walking |
For rain boots and hiking boots, flexibility is especially important because the boot bends while moving through wet environments. A rigid repair may crack at the edge, allowing water to enter again.
GleamGlee shoe glue forms a waterproof flexible bond designed for real walking movement. After proper curing, the repair stays elastic instead of becoming stiff and brittle. This helps outdoor boots continue performing in rain, mud, and daily wear conditions.
For best waterproof performance:
- Dry the boot fully before repair
- Apply glue evenly inside the gap
- Keep strong pressure during curing
- Wait at least 24–48 hours before water exposure
- Check repaired edges after heavy outdoor use

Why Use GleamGlee Shoe Glue?
GleamGlee shoe glue is made for practical boot repair, especially when boots need a strong, waterproof, flexible, and neat-looking bond. It can be used on common boot materials such as leather, rubber, vinyl, canvas, PU, and mixed synthetic parts.
For many users, the goal is simple: fix the boots without making the repair look messy, stiff, or uncomfortable. GleamGlee shoe glue dries clear, stays elastic after curing, and helps repair peeling soles, loose heels, lifted toe edges, cracked rain boot areas, and loose insoles.
The repair kit is also designed for easier home use. With two 20ml glue tubes, an applicator, sandpaper, and rubber bands, users can clean, roughen, glue, press, and hold the repair more easily instead of buying extra tools separately.
Clear Shoe Glue
Clear shoe glue is important because many boot repairs are visible. A white glue mark around the toe, sidewall, or heel can make the boot look rough even if the bond is strong. This matters for leather boots, fashion boots, casual boots, school boots, and outdoor boots that are still worn in public.
Clear shoe glue is useful for:
- Leather boot sole edges
- Black rubber outsole repairs
- Brown boot heel gaps
- White or light-colored midsoles
- Visible toe repairs
GleamGlee shoe glue dries transparent, helping the repair blend into the boot instead of leaving obvious residue. This is especially helpful around toe caps and side sole lines, where excess glue is easy to notice.
| Repair Area | Why Clear Glue Helps |
|---|---|
| Toe edge | Reduces visible glue marks |
| Heel seam | Keeps repair cleaner |
| Side sole line | Looks less bulky |
| Leather boot edge | Avoids white residue |
| Casual boots | Keeps daily-wear appearance |
For best results, apply a thin layer and wipe away extra glue before it dries. Clear glue looks neat, but too much glue can still create a raised edge. A controlled thin repair usually looks better and holds more evenly.
Precise Shoe Glue
Precision matters because boot damage often starts in narrow spaces. A peeling toe edge, heel gap, or side sole opening may only be a few millimeters wide. If glue is squeezed carelessly over the outside, the inner bonding area may still stay dry and weak.
Precise shoe glue helps with:
- Small sole gaps
- Tight heel corners
- Narrow toe openings
- Loose insole edges
- Rain boot cracks
GleamGlee shoe glue uses a metal nozzle for controlled application. The nozzle helps place glue directly inside the gap, not just on the surface. This makes the repair cleaner and helps the adhesive reach the area that actually needs bonding.
| Application Problem | Precision Nozzle Advantage |
|---|---|
| Glue only sits outside | Sends glue deeper into gap |
| Too much overflow | Better control |
| Narrow toe opening | Easier placement |
| Heel corner gap | More accurate filling |
| Repeated use | Helps reduce clogging |
This is helpful for users who do not have repair experience. Instead of spreading glue everywhere, they can apply a small amount where it is needed, press the boot together, and keep the repair cleaner.
A precise application also saves glue. Since one GleamGlee kit includes two 20ml tubes, careful use can handle many small repairs, including boot soles, heels, insoles, and other footwear problems.
Boot Repair Kit
A good boot repair does not rely on glue alone. The boot needs cleaning, surface grip, pressure, and curing time. That is why a repair kit is more practical than a single glue tube for many home users.
GleamGlee shoe glue kit includes:
- 2 × 20ml shoe glue tubes
- 1 applicator
- 2 sandpaper sheets
- 2 rubber bands
Each part has a clear purpose. Sandpaper helps roughen smooth rubber or sole surfaces. The applicator helps spread glue in a controlled way. Rubber bands help hold the repair tightly while the glue cures.
| Kit Item | What It Helps With |
|---|---|
| 2 × 20ml glue | Repairs multiple pairs |
| Applicator | Spreads glue evenly |
| Sandpaper | Improves surface grip |
| Rubber bands | Holds pressure during curing |
The kit can be used for many boot and shoe problems:
- Peeling work boot soles
- Hiking boot toe gaps
- Loose leather boot heels
- Cracked rain boot areas
- Detached insoles
- Children’s boot repairs
- Casual shoe sole lifting
For families, outdoor users, and people who wear boots often, keeping a repair kit at home can save time and replacement cost. A small repair done early may prevent a larger sole separation later.
Conclusion
A loose sole, lifted toe edge, or cracked heel does not always mean a pair of boots needs to be replaced. In many cases, early repair with strong waterproof shoe glue can extend the life of work boots, hiking boots, rain boots, leather boots, and daily footwear for months or even years. The key is proper preparation: clean the damaged area carefully, dry the boots fully, apply a thin even layer of glue, press the repair tightly, and allow enough curing time before wearing the boots again. Small repairs done early are usually stronger, cleaner, and more cost-effective than waiting until the damage spreads across the entire sole.
GleamGlee shoe glue is designed for real boot repair conditions, combining strong bonding, waterproof protection, flexible curing, clear drying, and precise application for different boot materials. Whether you need to repair personal boots at home, stock reliable repair products for your online store, or develop your own branded shoe glue line, GleamGlee can support you with finished products, custom packaging, private label solutions, and large-volume supply. With experienced formulation teams, fast production, and global shipping support, GleamGlee helps customers repair, restore, and extend the life of footwear more efficiently and affordably.





















