 Skip to content
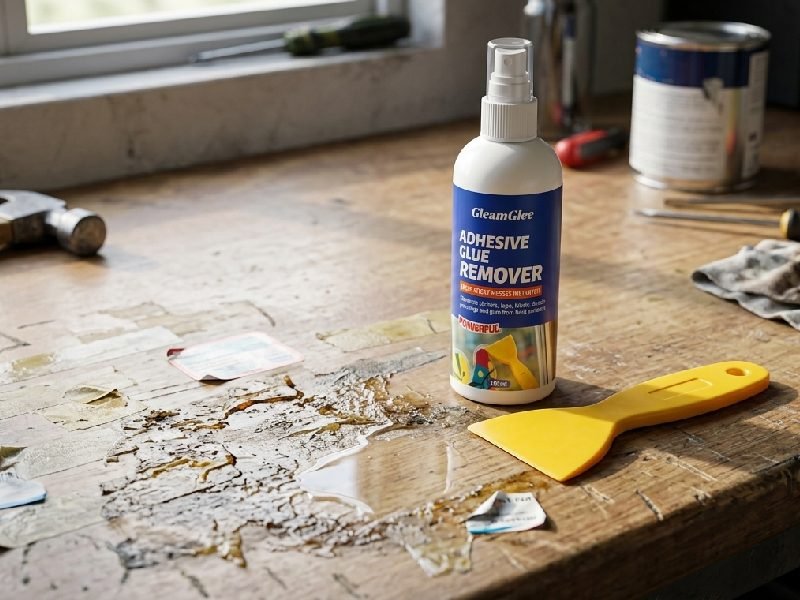
A lot of wall damage starts with something small and ordinary. A child’s sticker stays on the bedroom wall for six months. A double-sided tape square holds up a holiday decoration. A wall decal looks great at first, then leaves behind a dull sticky patch when it comes off. A strip hook seems harmless until the tab snaps. In many homes, the real problem is not the glue itself. It is what happens next. People rub too hard, use too much liquid, scrape with the wrong tool, or jump straight to a strong solvent. What began as a two-inch sticky mark turns into a paint repair job.
The safest way to remove glue from walls is to start with the mildest method that can actually work, then move up only if needed. For light residue, that often means a soft cloth, warm water, and a small amount of dish soap. For tape, decals, or thicker adhesive, gentle heat usually helps more than force. For old or greasy buildup, a carefully tested adhesive remover may be the better choice. The goal is not just to get the glue off. The goal is to keep the paint smooth, the drywall dry, and the wall looking even after the cleaning is done.
That difference matters in real homes. One person gets impatient, scrubs for three minutes, and ends up with a shiny patch that catches light every evening. Another slows down, softens the residue first, and finishes with a wall that looks untouched. The second result is what most people want, especially when the wall is in a living room, nursery, hallway, rental property, office, or retail space where marks are easy to notice.
What Should You Know Before You Remove Glue from Walls?
Before you try to remove glue from walls, you need to judge the job correctly. Most wall damage does not happen because the glue is “too strong.” It happens because the wall, the paint finish, and the cleaning method do not match. In real homes, three things decide the result: what type of adhesive is on the wall, what type of wall finish is underneath it, and how long the glue has been sitting there. If you get those three points right, the cleanup is usually much easier, faster, and less risky.
A small sticker mark on a satin-painted hallway wall and a thick square of old double-sided foam tape on a flat-painted bedroom wall are not the same job. One may take 2 to 4 minutes with warm water and a soft cloth. The other may take 10 to 20 minutes, plus heat, plus careful lifting, plus a finishing wipe. That difference matters because many people use the wrong method simply because the sticky mark looks small.
The table below gives a practical way to judge the job before you touch the wall.
| What you find on the wall | Difficulty | Main risk | Better starting point |
|---|---|---|---|
| fresh sticker residue | Low | light smearing | warm water + mild soap |
| old sticker residue | Medium | shiny glue film | heat, then wipe |
| clear tape residue | Medium | spreading glue wider | heat + microfiber cloth |
| double-sided foam tape | High | paint lift, rough cleanup | heat + plastic card |
| wall decal residue | Medium | sticky outline remains | heat + slow peel |
| wallpaper paste | High | over-wetting drywall | controlled section cleaning |
| snapped hanging strip residue | High | digging into paint | soften first, then lift |
A good cleanup starts with a realistic reading of the wall. If the glue is old, thick, sun-exposed, or attached to a delicate paint finish, plan for a slower and more careful process. That usually gives a better-looking wall and saves much more time than rushing into an aggressive cleanup.
What Glue Is Hardest to Remove Glue from Walls?
The hardest glue to remove from walls is usually old, compressed, or heat-aged adhesive. In practical terms, that means the glue has been stuck to the wall long enough to flatten, harden, or partly melt into the surface texture of the paint. The most difficult cases are usually these:
- double-sided foam tape
- mounting squares
- old wall decal adhesive
- hanging strip residue after the tab breaks
- sticker glue left on the wall for months
- wallpaper paste that dried unevenly
These adhesives are harder for a simple reason: they do not sit on the wall like a loose sticky layer anymore. They settle down, collect dust, and bond more tightly to small texture points in the paint. On flat or matte walls, this can make the glue feel almost “stamped” into the finish. That is why wiping alone often does very little at first.
Customers usually notice one of these warning signs when the job will be harder:
| Warning sign | What it often means | Cleanup impact |
|---|---|---|
| glue looks shiny but very thin | old adhesive film | may smear before it lifts |
| glue feels rubbery | softened but dense adhesive | needs heat and slow lifting |
| foam tears but leaves a square behind | mounting tape residue | needs bulk removal first |
| wall looks clean from front but sticky from side | thin glue haze remains | needs detail cleanup |
| residue is dusty and gray | glue has aged on wall | takes longer than fresh glue |
In real use, fresh sticker residue may clean up in 3 minutes or less. Aged double-sided tape can easily take 10 to 15 minutes per patch if the goal is to protect the paint. Thick foam squares or snapped strip pads may take even longer because the job happens in stages: soften, lift bulk, clean the film, then blend the area.
Another thing people care about is whether the glue is actually “too strong” or whether they are using the wrong method. In many homes, the second issue is the real one. A strong adhesive usually becomes easier once it is softened. That is why heat often matters more than extra force. If the glue is old and dense, trying to scrape it off dry is usually where wall damage begins.
A useful rule is this: the harder the glue feels, the more important it is to soften it before trying to remove it. Strong rubbing on old adhesive often damages the wall faster than it removes the residue.
Which Wall Types Change How You Remove Glue from Walls?
Wall type changes the whole cleanup plan. The same adhesive can come off cleanly on one wall and leave a visible repair mark on another. That is because different wall finishes respond very differently to rubbing, heat, moisture, and cleaner.
The most important wall types to think about are:
| Wall type | Risk level | What usually goes wrong | Safer approach |
|---|---|---|---|
| flat paint | High | shiny spots, burnishing, color change | very light pressure, low moisture |
| matte paint | High | visible wipe marks | soft cloth, short passes |
| eggshell paint | Medium | patchy sheen if over-cleaned | damp cloth, controlled wiping |
| satin paint | Lower | streaks if cleaner is not removed | wipe clean, dry fully |
| semi-gloss paint | Lower | product film shows more easily | final water wipe is important |
| fresh paint | Very high | paint softens or lifts | delay aggressive cleaning |
| patched drywall areas | Very high | paper fuzz, rough spots | soften first, limit moisture |
| wallpapered walls | Medium to high | edge lift, paste spread | work in small sections |
Flat and matte walls are where most people get frustrated. These finishes look great when clean, but they are less forgiving when rubbed. Even if the glue comes off, the area may look shinier than the rest of the wall if it was cleaned too aggressively. This is one of the biggest reasons people think the glue “stained” the wall, when the real issue is finish change.
Fresh paint is another common concern. A wall may feel dry within a day or two, but that does not always mean it is ready for aggressive cleaning. If a sticker, tape strip, or hook pad was applied too soon after painting, removal can be riskier because the paint film may not be fully hardened yet. In those cases, even mild glue can pull paint more easily than expected.
Patched drywall areas also deserve extra care. If the wall already has:
- old filler spots
- previous nail-hole repairs
- soft areas from past moisture
- a thin repaint over older damage
then glue removal is more delicate. These sections often fail sooner under rubbing and moisture than the rest of the wall.
For customers cleaning walls in rental homes, children’s bedrooms, offices, or stores, the smartest approach is to treat the wall finish as part of the job—not just the glue. If the paint is delicate, the method has to be more delicate too.
Do You Need to Test Before You Remove Glue from Walls?
Yes, and this step is much more important than it sounds. Testing takes 2 to 5 minutes, but it can prevent 30 to 90 minutes of extra repair work later. A small hidden test tells you whether the wall can handle the product and the method before you commit to a visible area.
The reason this matters is simple: walls do not always react evenly. Even on the same wall, one area may behave differently because of:
- older touch-up paint
- sunlight exposure
- grease or dust buildup
- weaker paint adhesion
- a previous patch underneath
- differences in paint thickness
A proper test should answer three questions:
- Does the cleaner soften the glue?
- Does the wall finish stay stable?
- Does the paint color or sheen change?
A simple test process looks like this:
| Step | What to do | What to check |
|---|---|---|
| 1 | choose a hidden area | behind furniture, near baseboard, low corner |
| 2 | apply a very small amount | use cloth edge or cotton swab |
| 3 | wait briefly | usually 30 seconds to 2 minutes |
| 4 | wipe gently | do not scrub |
| 5 | dry the spot | use a clean microfiber towel |
| 6 | inspect from 2 angles | front view and side light |
What you are looking for after the test:
- no paint color on the cloth
- no dull or shiny patch
- no softened wall texture
- no raised edges
- glue responds without heavy rubbing
If the test area shows any of these, stop and change the method:
| Bad test result | What it usually means | Better next move |
|---|---|---|
| wall color transfers to cloth | paint film is weak | reduce chemical strength, reduce friction |
| patch looks shinier after drying | finish is sensitive | use less pressure, less wiping |
| wall feels soft | too much liquid or weak wall surface | dry fully, use less moisture |
| glue does not change at all | wrong starting method | try heat before stronger cleaner |
| edge starts lifting | paint bond is weak | go slower, smaller area, softer method |
A lot of people skip testing because the glue mark is small. But small marks can still sit on delicate finishes. On darker paint, even a coin-sized gloss change can be easy to see. On light-colored flat walls, a tiny polished patch can show up every time sunlight hits it.
In real wall care, a test is not extra work. It is one of the cheapest ways to protect the final look of the wall. If the wall passes the test, you can move forward with much more confidence. If it fails, you find out on a hidden spot instead of the middle of the room.

How Do You Prep to Remove Glue from Walls?
Good preparation is what keeps a glue-removal job small. In most homes, the wall gets damaged before the real cleaning even begins, usually because the area was not checked carefully, the wrong tools were used, or too much water and pressure were applied too early. A well-prepared job is easier to control, easier to stop if something looks wrong, and much more likely to end with a wall that still looks even under normal room lighting.
In practical terms, prep is not only about gathering supplies. It is about lowering risk. You want to know how large the glue area really is, how old it feels, whether the paint looks delicate, whether the wall has been patched before, and whether the residue is thin and shiny or thick and rubbery. Those details change the whole plan. A thin tape line on satin paint may take 3 to 5 minutes with heat and a cloth. A dry square of foam tape on flat paint can take 10 to 15 minutes because it needs to be softened, lifted in layers, and blended carefully afterward.
The goal of prep is simple: make sure the glue softens before the wall starts suffering.
A useful way to think about preparation is to divide it into four parts:
| Prep step | Why it matters | What it prevents |
|---|---|---|
| choose the right tools | keeps the work controlled | scratches, over-rubbing |
| protect the paint finish | reduces visible wall change | shiny spots, dull patches |
| decide whether heat is needed | softens old adhesive first | paint lift from forced scraping |
| set up the area correctly | helps you work in small sections | over-wetting, uneven cleanup |
Many people underestimate how much time this saves. In real wall cleanup, 5 minutes of good prep can easily save 20 to 40 minutes of repair, repainting, or second cleaning later.
What Tools Help You Remove Glue from Walls?
The best tools for removing glue from walls are not the sharpest or strongest ones. They are the ones that give you the most control with the least damage risk. On painted walls, especially flat or matte finishes, control matters much more than force. A strong tool can remove glue quickly, but it can also leave a visible line, a shine change, or a damaged patch that takes much longer to fix.
A practical tool set for most wall jobs looks like this:
| Tool | Best use | Why it works |
|---|---|---|
| microfiber cloth | wiping softened glue | soft enough for paint, good pickup |
| dry microfiber towel | drying after each pass | prevents moisture rings and finish marks |
| small bowl of warm water | mild first-step cleaning | helps soften light residue |
| dish soap | mixed with warm water | helps break surface stickiness |
| hair dryer | softening tape, decals, foam pads | reduces need for force |
| plastic scraper or old card | lifting softened thick glue | safer than metal on paint |
| cotton swabs | detail work on corners and edges | good for narrow sticky lines |
| adhesive remover | old, greasy, stubborn residue | helps when soap and heat stop working |
The microfiber cloth is one of the most important items, and many people do not realize it. A rough towel, paper towel, or dirty rag can drag grit across the paint and create a polished-looking patch. A clean microfiber cloth gives better grip on softened glue without needing as much pressure.
The dry towel matters just as much. A lot of walls are not damaged by the cleaner itself, but by leaving the surface damp too long. Drying between steps lets you see what is really happening. A spot that looks dark or uneven while wet may look perfectly fine once dried. Without the dry towel, people often keep scrubbing a wall that only needed a minute to dry.
The plastic scraper is for thick residue only. It is especially helpful when dealing with:
- double-sided foam tape
- mounting squares
- hook pad residue
- rubbery old adhesive patches
But even with a plastic edge, the glue should be softened first. Dry scraping is where many wall marks begin.
A good rule for tool choice is this:
| If the glue feels like… | Start with… |
|---|---|
| light and tacky | damp microfiber cloth |
| thin and shiny | heat, then cloth |
| thick and soft | heat, then plastic edge |
| old and greasy | heat or remover after testing |
| broad and paste-like | sponge or cloth in sections |
What should usually stay out of the first attempt:
- razor blades
- metal putty knives
- steel wool
- rough scrub pads
- heavily soaked sponges
- large sprays directly onto the wall
These tools may feel faster, but they often raise the total cleanup time because they increase the chance of paint damage.
How Do You Protect Paint When You Remove Glue from Walls?
Protecting paint is the most important part of wall prep. On many walls, the paint is more delicate than the glue. That is why the wrong method can remove the residue and still leave the wall looking worse than before.
The three biggest threats to paint during glue cleanup are:
- too much pressure
- too much moisture
- too much repetition in one small area
These problems show up in very practical ways. On flat paint, rubbing too hard can create a shiny patch that catches side light. On eggshell walls, too much wiping can make one cleaned area look duller than the surrounding finish. On fresh paint, even moderate friction can sometimes soften or mark the film more easily than people expect.
Here is what usually causes visible paint change:
| Paint damage cause | What it looks like later |
|---|---|
| rubbing in tight circles | polished or shiny spot |
| wiping too long in one area | uneven sheen |
| using too much liquid | softened edges, dark damp patches |
| wiping before glue softens | scuff marks, drag lines |
| using dirty cloths | gray smears or haze |
The safest way to protect paint is to work in short, controlled cycles.
A better wall-cleaning rhythm looks like this:
- soften the glue
- wipe lightly
- dry the area
- check the wall
- repeat only if needed
That pause in the middle is where a lot of good results come from. If you skip drying and checking, you may think the glue is still there and keep rubbing a spot that is already clean.
Paint protection also depends on how much of the wall you treat at once. For small glue marks, keep the work zone small at first.
| Glue area size | Safer working size |
|---|---|
| coin size | clean only that spot |
| palm size | clean in halves |
| larger than a hand | divide into smaller sections |
| broad paste area | line-by-line or panel-by-panel |
Another important point is how you hold the cloth. A flat cloth with even pressure is much safer than using a fingertip through the cloth to “dig” at a spot. Fingertip pressure concentrates force and often creates visible shine change, especially on dark or flat-painted walls.
If the wall already has:
- touch-up paint
- previous patches
- old flaking edges
- repaired nail holes
- slightly raised drywall paper
then protect it even more carefully. These areas usually fail faster than the rest of the wall.
Should You Use Heat Before You Remove Glue from Walls?
In many cases, yes. Heat is often the safest way to prepare glue for removal because it changes the adhesive before you start wiping or lifting it. Instead of forcing the wall to release dry glue, you make the glue softer and less stubborn first. This usually means less pressure, less rubbing, and less risk to the paint.
Heat is especially helpful for:
- tape residue
- double-sided foam tape
- wall decals
- mounting squares
- hook pads
- snapped strip residue
- older sticker glue
A hair dryer is usually enough. You do not need high heat. Low or medium is safer on painted walls. The best method is short and controlled:
- hold the dryer a few inches away
- keep it moving
- warm the area for about 20 to 60 seconds
- test the edge gently
- repeat if needed
The reason heat works so well is that many adhesives become easier to lift when warmed, even if they look dry. Instead of breaking into rough fragments or smearing immediately, they often loosen and release in a more controlled way.
A practical comparison:
| Without heat | With heat |
|---|---|
| more rubbing needed | less rubbing needed |
| dry scraping temptation | softer lifting |
| glue may smear or tear | glue often releases more evenly |
| higher risk of paint drag | lower risk if heat is controlled |
For example, a thin tape line may need only 30 seconds of heat before it wipes off much more easily. A thick foam square may need two or three short warming cycles before the bulk of it can be lifted with a plastic card.
The biggest mistake with heat is holding the dryer too close or keeping it on one spot too long. The wall should feel warm, not hot. If the paint starts to feel very warm under your hand, stop and let it cool. Controlled heat helps the glue. Excessive heat can stress the wall finish.
A good sign that heat is helping:
- the glue begins to feel softer
- the edge lifts more easily
- the cloth drags less
- the residue rolls instead of staying flat
A bad sign:
- the wall gets too hot
- the paint looks soft or shiny while warm
- the adhesive spreads wider from overheating
For most wall jobs, heat is not the whole solution, but it is often the best preparation step before any real cleaning begins.
How Should You Set Up the Area Before You Remove Glue from Walls?
Setting up the area properly makes the cleaning more accurate and prevents common mistakes. This sounds simple, but it matters more than people expect. Poor setup leads to missed residue, over-wetting, and repeated rubbing because the glue was not visible enough in the first place.
The work area should be prepared in these ways:
- move nearby furniture back a little
- place a towel below the wall if using moisture or remover
- bring in side lighting if possible
- wipe off loose dust first with a dry cloth
- prepare a clean area on the cloth before starting
- keep a dry towel within reach
Lighting is a big part of prep. Glue residue often shows far better from the side than from the front. A wall may look fine when you stand directly in front of it, but the residue becomes obvious when light hits across the surface. This is especially true for:
- decal outlines
- old sticker haze
- thin tape film
- greasy adhesive marks
A simple lamp placed to the side can help a lot. It lets you see the true edges of the residue and prevents over-cleaning a wall that is already done.
Dust removal also helps. A dry wipe before cleaning removes loose dirt that would otherwise mix with softened glue and spread. That makes the job neater and helps you see whether you are dealing with actual adhesive or just dirt contrast.
The setup below works well for most wall jobs:
| Item | Where to place it |
|---|---|
| warm water bowl | nearby table, not on the floor if avoidable |
| microfiber cloth | folded into sections for clean turning |
| dry towel | immediate reach |
| hair dryer | plugged in before starting |
| plastic card | beside the cloth, ready but not used too early |
| remover | nearby, but only if the mild method fails |
Many people waste time because they stop halfway through to find another cloth, another towel, or a dryer. That interruption often leads to overworking the same spot when they come back. A complete setup keeps the pace calm and controlled.
Another useful habit is deciding the work boundary before you start. For example:
- on a small tape mark, you may clean only a 2-inch zone first
- on a palm-sized sticky patch, you may divide it into left and right halves
- on wallpaper glue, you may work a 2-by-2-foot section at a time
That kind of structure helps prevent one of the most common prep mistakes: treating the whole wall before understanding how the first small section reacts.
How Do You Know If the Wall Is Ready for the First Cleaning Pass?
A wall is ready for the first real cleaning pass when three things are in place:
- the glue area has been identified clearly
- the right tools are ready
- you know whether you are starting with moisture or heat
That may sound basic, but in real homes, most poor results come from starting before those points are settled.
A useful pre-cleaning checklist:
| Question | Better answer before starting |
|---|---|
| Do I know what type of glue this is? | yes, or at least whether it is thin, thick, or paste-like |
| Do I know what finish is on the wall? | flat, matte, eggshell, satin, or unsure |
| Do I have a dry towel ready? | yes |
| Do I know if this wall has been patched or repainted? | yes, or I am working extra gently |
| Do I have side light or a clear view? | yes |
| Have I chosen a small starting section? | yes |
If the answer to most of those is yes, the wall is properly prepared. That does not guarantee the job will be fast, but it makes a clean result much more likely.
In real wall care, preparation is not wasted time. It is what separates a careful cleanup from a visible repair.
Which Methods Remove Glue from Walls Best?
The best method to remove glue from walls is the one that clears the residue fully without changing the wall finish. In most homes, the safest order is to begin with warm water and a little dish soap, move to heat if the glue is dry or stubborn, and use a tested adhesive remover only when the residue is old, greasy, thick, or keeps smearing instead of lifting. This matters because wall cleaning is not only about getting rid of the glue. It is also about keeping the paint smooth, even, and natural-looking after the cleaning is done.
In real use, wall glue usually falls into three groups. Light fresh residue often responds well to mild cleaning. Dry tape or decal glue usually responds better to heat. Thick, older adhesive often needs a stronger but more controlled method. That is why many failed wall cleanups come from using the wrong method too early, not from the glue being impossible to remove.
| Method | Best for | Usual time for a small area | Wall risk |
|---|---|---|---|
| Warm water + dish soap | fresh sticker glue, light residue | 2–5 min | Low |
| Hair dryer + cloth | tape, decals, dry old residue | 3–8 min | Low |
| Vinegar + warm water | wallpaper paste, light old haze | 5–12 min | Medium |
| Isopropyl alcohol | narrow leftover glue lines | 1–3 min | Medium |
| Adhesive remover | thick, old, greasy residue | 4–10 min | Medium |
A useful way to choose the method is to ask three quick questions:
- Is the glue fresh or old?
- Is the residue thin, thick, or greasy?
- Is the wall finish flat, matte, eggshell, or satin?
If the glue is light, start mild. If it is dry and stubborn, warm it first. If it is thick and oily, use a tested remover more carefully instead of rubbing harder.
Does Soap and Water Remove Glue from Walls?
Yes, and for many walls it is still the best first method. Warm water with a small amount of dish soap works especially well on fresh sticker residue, light sticky film, and glue that has not fully hardened. It is also one of the safest choices for painted walls because it gives you more control and makes it easier to stop before the finish is overworked.
This method works best when the residue is still close to the surface. In practical terms, that usually means small sticker marks, light tape haze, or glue that still feels slightly tacky rather than rubbery or greasy. A damp microfiber cloth pressed on the area for a short time often softens the glue enough for gentle wiping.
The key points are simple:
- Use a damp cloth, not a wet one.
- Wipe in short, light passes, then dry the wall.
- If the glue does not improve after 2 careful rounds, switch methods instead of rubbing harder.
Soap and water are also very useful as a final step after stronger methods because they help remove leftover cleaner film and make the cleaned area blend better into the rest of the wall.
Does Heat Help Remove Glue from Walls?
Yes. Heat is often the best method for dry adhesive, especially tape residue, wall decals, foam pads, and hanging strip glue. It works because it softens the adhesive before you try to wipe or lift it, which means the wall needs less pressure and the glue is less likely to smear across the paint.
A hair dryer on low or medium is usually enough. For a small patch, about 20 to 60 seconds of controlled warming is often all you need before testing the residue with a cloth or plastic card. Thick foam tape may need more than one short warming cycle, but the wall should feel warm, not hot.
Heat is especially useful when the glue is:
- dry and shiny
- rubbery around the edges
- packed into a tape line or foam square
The biggest mistake is overheating one spot. Keep the dryer moving, warm the glue gradually, and test often. In many homes, heat saves more paint than any other method because it reduces the temptation to scrape too early.
Does Vinegar Remove Glue from Walls?
Yes, but vinegar works best in more specific situations. It is usually more helpful for wallpaper paste, thin old residue, or broad adhesive haze than for thick tape glue or foam mounting pads. If the wall problem feels more like a dried film than a sticky lump, vinegar can be a useful middle step between soap and a commercial remover.
A common mix is equal parts warm water and white vinegar. Used lightly on a cloth or sponge, it can soften older wall residue without the oily feel that some removers leave behind. On wallpaper glue, it is often more useful than plain soapy water because it helps break down dried paste more effectively.
Vinegar tends to work best when:
- the residue is spread out, not thick
- the glue feels flat or cloudy
- the wall needs section-by-section cleaning
The main caution is moisture. On painted drywall, too much liquid can create a new problem. That is why vinegar should be used in small areas, followed by drying, not as a heavy soak over the entire wall.
Does Alcohol Remove Glue from Walls?
Yes, but alcohol is better for small leftover traces than for full wall cleanup. It can work well on narrow tape lines, decal edges, or tiny sticky marks that remain after the main residue is already gone. Used carefully, it can solve the last 10% of the job. Used too broadly, it can create a finish problem that is more noticeable than the glue.
Alcohol is most useful when the wall is almost clean and only a thin glue line remains. In that situation, a cotton swab or the corner of a cloth can target the adhesive without wetting a large painted area. This makes it more precise than soap or vinegar, but also riskier if used without testing.
A safe way to use it is to:
- test a hidden spot first
- use only a small amount
- wipe the area dry immediately after
Alcohol is usually not the best choice for thick residue, broad sticky patches, or delicate flat paint. It works best as a detail method, not a full-surface method.
Which Remover Helps Remove Glue from Walls Safely?
A tested adhesive remover is usually the best choice when the glue is old, greasy, thick, or repeatedly spreads instead of lifting. This often happens with double-sided tape, foam squares, hook pads, or sticker residue that has been sitting on the wall for a long time. In these cases, warm water may only clean the surface, and heat may soften the glue without fully breaking it down.
The best remover for walls is one that removes glue quickly but still feels controllable on painted surfaces. That balance matters because wall cleanup is not like cleaning glass or metal. A remover that is too aggressive may shorten the glue-removal time but increase the risk of dullness, gloss change, or patchy paint.
A good remover should help with three things:
- soften old adhesive fast
- keep the cleanup area controlled
- wipe off without leaving a heavy film
This is where GleamGlee Adhesive Remover fits well. For wall cleanup, its practical value is not only strong glue breakdown, but also easier control for home, office, retail, and maintenance use. For many users, that matters more than raw strength alone, because the real goal is not just removing glue fast. It is removing glue cleanly.

How Do You Remove Glue from Walls in Different Cases?
The right way to remove glue from walls depends on what caused the residue. Sticker glue, tape residue, wall decal adhesive, and wallpaper paste may all look similar from a distance, but they behave very differently once you start cleaning. This is why many wall-cleaning jobs go wrong: the method does not match the residue. In real homes, the safest results usually come from identifying the glue type first, then choosing the cleaning order that fits it. For example, fresh sticker glue often responds to a damp cloth in a few minutes, while old foam tape may need heat, lifting, and a finishing wipe before the wall looks even again.
A practical difference can be seen in working time. A small sticker mark may take 2 to 5 minutes. A line of dried tape residue may take 5 to 8 minutes. A foam mounting square or snapped hook pad can easily take 10 to 15 minutes if the goal is to protect the paint. Wallpaper glue is broader and slower, often taking 20 to 40 minutes for one medium wall section. These time differences matter because they help set realistic expectations. If a thicker residue does not come off in the first minute, that does not mean the method is failing. It usually means the glue needs a different sequence, not more force.
| Glue problem | Typical size | Average cleanup time | Main risk | Better first move |
|---|---|---|---|---|
| Sticker residue | 1–3 inches | 2–5 min | smearing or polishing the paint | warm water + mild soap |
| Tape residue | 2–8 inches | 4–8 min | spreading glue wider | heat first |
| Foam tape square | 1–2 inches | 8–15 min | paint lift from forced scraping | heat + lift bulk |
| Wall decal residue | 4–20 inches | 5–12 min | glue outline remains | heat + slow peel |
| Wallpaper glue | large area | 20–40 min per section | over-wetting drywall | section cleaning |
What people usually want is not only to remove the glue, but to avoid three common problems: a shiny patch, a dull patch, or a visible cleaned area that still stands out under side light. That is why the process below focuses on both glue removal and wall appearance after cleanup.
How Do You Remove Glue from Walls After Stickers?
Sticker residue is usually the easiest wall glue to remove, especially if it is fresh and limited to a small area. The best approach is to soften the residue gently with a damp microfiber cloth and mild soapy water, then wipe in short passes instead of rubbing hard. On most painted walls, this gives the cleanest result because the glue breaks down before the paint finish is stressed.
Start by peeling away any remaining sticker layer slowly. If the paper tears or feels stuck, warm it lightly with a hair dryer for about 20 to 30 seconds first. Once the visible sticker layer is gone, use a cloth dampened with warm water and 1 or 2 drops of dish soap. Press it against the residue for around 30 seconds, then wipe in one direction with light pressure. Dry the area immediately and check it before doing another round.
Fresh sticker glue often comes off in 2 to 4 minutes. Older sticker glue may take 5 to 7 minutes because it tends to dry flatter and collect more dust. The biggest mistake is scratching the center with a fingernail or rubbing the same spot too hard in a small circle. That often leaves a polished patch on flat paint. If the residue is almost gone but still leaves a slight outline, wipe a slightly larger area around it. In many rooms, the “mark” people still see is not glue at that point. It is the contrast between a freshly cleaned spot and the surrounding wall dust.
How Do You Remove Glue from Walls After Tape?
Tape residue usually needs heat before it needs liquid. That is because tape adhesive tends to dry into a thin, stubborn film that resists wiping and often spreads wider if you attack it cold. A hair dryer on low or medium for 30 to 60 seconds usually softens the glue enough that a microfiber cloth can lift it more cleanly.
After warming the residue, wipe it while it is still soft. If it is ordinary clear tape, office tape, or decorative tape, one or two heating rounds are often enough. If it is painter’s tape that stayed too long, the residue may be thinner but more tightly stuck to the wall. In that case, heat still helps, but the wiping needs to stay light and controlled. If the glue begins to smear instead of roll or lift, stop, dry the wall, and warm it again before the next pass.
Double-sided tape is harder because it often leaves a denser adhesive bed. If there is still a visible pad shape, remove the thickest part first with a plastic card after warming it. Only then move to the cloth. This saves time because wiping thick tape glue too early usually turns one small square into a larger shiny patch. A small tape line may take 4 to 6 minutes to clean. A thick double-sided square may take 10 to 15 minutes if the wall finish is delicate and the job is done carefully.
| Tape type | Better method | Usual time | Main caution |
|---|---|---|---|
| clear office tape | heat + cloth | 3–5 min | do not over-wet |
| painter’s tape left too long | heat + gentle wipe | 4–7 min | avoid pulling at dry edges |
| double-sided tape | heat + plastic lift + cloth | 8–12 min | do not rub thick glue first |
| foam mounting tape | heat + lift bulk + remover if needed | 10–15 min | do not scrape dry |
How Do You Remove Glue from Walls After Decals?
Wall decal residue comes off best when the decal and the adhesive are treated as two separate stages. First, remove the design layer slowly with gentle heat. Then clean the leftover adhesive film. If you try to rush the peeling stage, the vinyl often tears and leaves behind more glue than necessary.
Warm one corner of the decal with a hair dryer for 20 to 40 seconds, then lift it slowly. Keep the heat moving slightly ahead of the section you are peeling. This helps the adhesive release more evenly. If the decal tears, stop pulling and rewarm the edge rather than forcing it. Once the decal is fully removed, inspect the wall from the side, not just from the front. Many decal jobs leave a thin glue outline that is hard to see straight on but very visible under side light.
For the leftover residue, start with a damp microfiber cloth and mild soapy water. On many walls, this is enough once the decal has been removed slowly and with heat. If a slight sticky haze remains, a second short warming pass often helps more than stronger rubbing. For thin leftover lines at the edge, a cotton swab with a very small amount of cleaner can help after a hidden test. Most decal jobs take 5 to 12 minutes depending on size. The final look matters a lot here because decals are often used in children’s rooms, bedrooms, and feature walls where side light makes any glue shadow easy to notice.
How Do You Remove Glue from Walls After Wallpaper?
Wallpaper glue is a larger and slower job because the adhesive is spread across the wall instead of concentrated in one small patch. The best way to remove it is to work in sections and keep moisture controlled. The goal is to soften the paste enough to wipe it away without soaking the drywall underneath.
A good starting section is about 2 by 2 feet. Use warm water with a little dish soap, or warm water mixed with white vinegar if the paste feels older or more stubborn. Dampen the section, let it sit briefly, then wipe or gently lift the softened glue. Dry that section before moving too far into the next one. This section-by-section rhythm helps keep the wall stable and makes it easier to see whether the paste is really gone.
Wallpaper glue often changes texture during cleaning. At first it may feel slick. Then it turns cloudy or milky. Finally it starts to release and the wall begins to feel cleaner. The main mistake people make is wetting too much of the wall at once. That saves no real time because broad wetting usually leads to uneven drying, softened paint edges, or stressed drywall paper. A medium wall section may take 20 to 40 minutes if the paste is heavy. On older walls, it may take longer. That is normal. Wallpaper glue is not usually removed by force. It is removed by steady softening, wiping, and drying.
| Wallpaper glue condition | What it feels like | Better response |
|---|---|---|
| fresh after stripping | slick and obvious | wipe with controlled moisture |
| partly dried | cloudy and patchy | re-dampen the small section |
| older residue | chalky or rough | longer softening time |
| over-wet wall | soft or darkened | stop and let it dry fully |
The best-looking result after wallpaper cleanup often comes from a final plain-water wipe and full drying before inspection. A wall that still looks uneven while damp may look much better once it dries completely.

What Should You Avoid When You Remove Glue from Walls?
The biggest thing to avoid when you remove glue from walls is doing too much too fast. Most wall damage does not come from the glue itself. It comes from rushing the cleanup. A small sticky mark becomes a bigger problem when the wall is scrubbed too hard, soaked too long, scraped dry, or treated with a product that is stronger than the paint can handle. In real homes, the safest cleanup is usually the one that looks a little slower at the start but leaves the wall looking normal when the job is done.
A useful way to judge the process is simple: the glue should start changing before the wall does. If the residue softens, rolls, or loosens while the paint still looks calm, the method is probably right. If the wall starts looking shiny, dull, fuzzy, or uneven before the glue moves, the method is too aggressive. That is the point where people should stop, dry the area, and change the approach instead of pushing harder.
| What to avoid | What usually happens | How serious it gets |
|---|---|---|
| scraping dry glue | scratches, paint lift, rough spots | High |
| rubbing too hard | shiny or dull patch | Medium to high |
| using too much water | softened paint, uneven drying | Medium |
| using strong remover too early | finish change, color shift | Medium to high |
| cleaning too large an area at once | blotchy wall appearance | Medium |
| skipping drying between passes | over-cleaning and wrong judgment | Medium |
Can Scraping Damage Walls When You Remove Glue from Walls?
Yes, and dry scraping is one of the fastest ways to damage a painted wall. On drywall, the surface is softer than it looks. There is paint on top, but underneath that paint is primer and paper-faced drywall. Once a hard edge cuts or lifts that surface, the problem is no longer glue removal. It becomes wall repair.
This usually happens when people try to remove:
- thick foam tape
- old mounting squares
- hook-pad residue
- dried tape edges
- stubborn decal glue
The instinct is understandable. The glue looks solid, so people reach for a fingernail, knife edge, or hard scraper. The problem is that dry adhesive often holds tighter than the paint finish can tolerate. The glue may come off, but it often takes part of the wall surface with it.
A safer approach is to soften first, then lift. If the residue still feels hard enough that you need pressure, it is usually not ready yet. Heat, a damp cloth, or a short extra wait often reduce risk more effectively than a sharper tool. A plastic card used after softening is usually far safer than any metal edge used too early.
| Tool choice | Effect on glue | Effect on wall |
|---|---|---|
| plastic card after softening | lifts bulk gradually | lower risk |
| fingernail picking | breaks residue unevenly | medium risk |
| metal scraper dry | removes fast if it works | very high risk |
Can Strong Solvents Harm Paint When You Remove Glue from Walls?
Yes. Strong solvents can remove glue, but they can also change how the wall looks even when they do not visibly peel the paint. In many homes, the more common problem is not dramatic paint loss. It is a finish mismatch. The cleaned area dries lighter, shinier, flatter, or duller than the rest of the wall.
This matters most on:
- flat paint
- matte paint
- dark wall colors
- fresh paint
- older touch-up areas
That is why stronger is not always better. A solvent may save a few minutes on the glue but create a patch that stays visible every day after that. For most painted walls, stronger products should come later in the process, not at the beginning.
The safer habit is to use the least aggressive method that is still making real progress. If a remover is needed, it should be tested first, used in a small area, and wiped off fully after the residue loosens. That keeps the cleaning focused on the glue instead of spreading chemical stress across the wall.
| Product strength | Glue removal speed | Paint safety |
|---|---|---|
| mild soap solution | slower | high |
| vinegar mix | medium | medium |
| alcohol | medium-fast | medium to low |
| strong remover | fast | medium |
Can Too Much Water Ruin Walls When You Remove Glue from Walls?
Yes, especially on painted drywall. A small amount of moisture can help soften glue, but too much water creates a different problem. Instead of helping the adhesive release, it starts affecting the wall itself. Paint can soften, repaired areas can swell slightly, and the wall may dry with uneven patches that look worse than the original residue.
This risk gets higher on walls with:
- flat paint
- previous patching
- old touch-up work
- fresh repainting
- earlier water damage
A lot of people assume more water means faster cleanup. On walls, that is usually not true. A damp cloth is useful. A wet cloth is often risky. If the wall looks glossy-wet or moisture begins spreading outside the residue area, there is probably too much liquid involved.
The better pattern is short contact, light wiping, and immediate drying. That makes the wall easier to read. It also prevents a common mistake: mistaking a damp patch for leftover glue and then scrubbing a wall that actually needed time to dry.
| Moisture level | Wall effect | Better or worse |
|---|---|---|
| lightly damp cloth | controlled softening | better |
| wet cloth | wider damp patch | worse |
| soaking a section | wall stress and uneven drying | much worse |
What Other Mistakes Should You Avoid When You Remove Glue from Walls?
Beyond scraping, solvents, and excess water, a few smaller mistakes cause a lot of unnecessary trouble. One of the most common is rubbing the same spot for too long without stopping to dry and inspect it. Another is using a dirty cloth section again and again, which spreads softened glue instead of removing it. A third is widening the work area too early, so a tiny cleanup becomes a much larger visible patch.
These mistakes matter because they confuse the result. People often think the glue is still there when what they are really seeing is cleaner film, moisture, dust contrast, or a slight sheen change. Then they keep rubbing, and the wall gets worse.
A better habit is to clean in short cycles:
- soften the residue
- wipe lightly
- dry the wall
- inspect it from the front and from the side
- only repeat if the glue is still clearly there
This keeps the job focused and prevents over-cleaning. In real wall care, the best stopping point is not when the wall has been cleaned “a lot.” It is when the glue is gone and the finish still looks calm.
How Do You Finish After You Remove Glue from Walls?
Finishing the wall properly is what separates a good cleanup from a cleanup that still looks obvious the next day. In many homes, the glue is removed successfully, but the wall still ends up with a visible patch because cleaner residue was left behind, the area was not dried correctly, or the cleaned spot was not blended into the surrounding wall. In practical terms, the last 10% of the job often decides 50% of the final appearance.
Most people care about three things at this stage:
- whether the wall still feels sticky
- whether the cleaned area looks different from the rest of the wall
- whether touch-up paint is actually needed or not
That is why finishing should not be rushed. A wall that looks slightly dull or shiny while damp may look normal once fully dry. On the other hand, a wall that feels dry but still has cleaner film on it may look worse under evening light than it did right after cleaning.
A good finishing process usually includes four steps:
- remove any leftover cleaner or oily film
- dry the wall fully
- inspect the area from more than one angle
- decide whether the wall is done, needs blending, or needs touch-up
| Final wall condition | What it usually means | Best next step |
|---|---|---|
| smooth, dry, even-looking | job is finished | leave it alone |
| smooth but slightly shiny | cleaner film remains | wipe once more with plain water |
| no stickiness but patch looks lighter | finish contrast or over-cleaned spot | inspect after full drying |
| rough or papery texture | wall surface was disturbed | prepare for light repair |
| faint sticky drag remains | some adhesive still left | targeted second cleanup |
A lot of unnecessary wall damage happens in the finishing stage because people keep rubbing after the glue is already gone. The safer habit is to clean, dry, inspect, and only then decide whether more work is really needed.
How Do You Clean the Surface After You Remove Glue from Walls?
The surface should be cleaned one last time with a fresh cloth and a small amount of plain water, then dried completely. This final pass removes leftover soap, vinegar, adhesive remover, or loosened glue film that may still be sitting on the paint. In many cases, the wall already looks much better after this step because what seems like “remaining glue” is often just cleaning residue.
This matters more than people expect. Many wall-safe methods work well at breaking down glue, but they also leave behind something the eye can catch later:
- a slightly oily sheen
- a dull wipe mark
- a darker damp patch
- a faint outline around the cleaned area
That is why the last wipe should be simple and controlled. Use a clean microfiber cloth lightly dampened with plain water. Not wet, not dripping. Wipe the area in one or two broad passes, then dry it immediately with a second clean cloth. This removes leftover product without putting the wall through another heavy cleaning cycle.
A good finishing wipe usually works best when it is slightly wider than the original glue mark. For example, if the sticky spot was 2 inches across, your final wipe may cover 4 to 6 inches. That helps blend the cleaned zone into the surrounding wall and reduces the chance of a visible “clean patch.”
Here is a practical guide:
| What was used earlier | Final surface wipe needed? | Why |
|---|---|---|
| dish soap and water | Yes | removes light soap film |
| vinegar mix | Yes | prevents dull or cloudy drying |
| alcohol | Yes, lightly | reduces edge marks |
| adhesive remover | Definitely | removes oily residue |
| heat only | Usually helpful | removes loosened film and dust |
A few warning signs tell you the wall needs one more finishing wipe:
- the cloth glides unevenly
- the wall looks slick under side light
- the cleaned patch looks darker or shinier than the area around it
- the wall feels smooth but still looks “coated”
Another mistake people make is reusing the same cloth section for too long. Once the cloth has picked up dissolved glue or cleaner film, it can start spreading that residue back onto the wall. Turning the cloth to a fresh section often improves the finish more than stronger rubbing does.
A small wall spot may only need 30 to 60 seconds for the final wipe and dry step. A larger cleaned section, such as after wallpaper glue removal, may need a few minutes more because it helps to wipe, dry, then inspect twice.
Do You Need Touch-Up Paint After You Remove Glue from Walls?
Not always. In many cases, the wall only needs full drying time before it looks normal again. Touch-up paint is only worth doing when the paint film or wall surface has actually been disturbed. That means the decision should be made after the wall is dry, not while it is still damp or recently cleaned.
A lot of people think they need touch-up paint too early. Right after cleaning, the wall can look:
- darker because it is still damp
- lighter because the surrounding wall is dustier
- shinier because cleaner film is still present
- patchy because the light is hitting the wet area differently
Those temporary effects often settle down after drying. On a small cleaned patch, waiting 20 to 60 minutes may be enough. On a larger wallpaper-cleaned section or a heavily dampened area, it is smarter to wait several hours before making a final decision.
Touch-up is more likely to be needed when you see these clear signs after the wall is fully dry:
| Dry wall result | What it usually means | Touch-up needed? |
|---|---|---|
| smooth and even | no real surface damage | No |
| slightly different sheen only | finish changed a little | Maybe |
| chipped paint edge | paint film lifted | Yes |
| rough paper texture | drywall face disturbed | Yes |
| pale or rubbed-looking spot | finish has been overworked | Maybe to yes |
| sticky line still remains | glue is still present | No, clean again first |
The most important thing is to separate residue problems from finish problems. If the wall is still sticky, touch-up paint is the wrong next step. The glue has to be removed first. But if the wall is clean and dry and still looks damaged, then the issue is no longer glue—it is the wall finish.
In practical home use, there are three common touch-up situations:
First, a tiny paint chip where tape or a pad lifted a corner. This is usually the easiest to repair and may need only a very small touch-up.
Second, a shiny or dull cleaned patch on flat or matte paint. This is more frustrating because the wall is technically clean, but the finish no longer matches perfectly. Sometimes this is minor enough to ignore. In brighter rooms, it may bother people enough to repaint that small area.
Third, a rough drywall-paper spot where dry scraping or over-wetting damaged the surface. This usually needs more than paint alone. It may need light smoothing and sealing first, otherwise the patched area may stay uneven.
A good decision rule is simple:
- if the wall is clean and looks normal after drying, stop
- if it is clean but visibly chipped or rough, plan a repair
- if it is only slightly different in sheen, inspect it in normal room light before deciding
This matters for customers because touch-up work costs more time than most people expect. A 2-minute sticky patch can easily become a 30-minute repair if the finish was overworked. That is why careful finishing protects both the wall and the time already spent cleaning it.
How Can You Blend the Cleaned Area So It Does Not Stand Out?
The cleaned area should be blended slightly beyond the original glue mark so it does not look like one isolated “treated” patch. This is especially important on flat-painted walls, darker colors, and walls with normal household dust, because a freshly cleaned spot can look too bright or too sharp compared with the area around it.
This is a very common issue in real homes. The glue is gone, but the person still sees a square, circle, or shadow. In many cases, that shape is not remaining adhesive. It is simply the outline of a cleaner patch sitting inside a slightly dustier wall. That is why spot cleaning sometimes needs a light blending wipe.
A practical blending method is simple. After the main glue mark is removed:
- use a clean damp microfiber cloth
- widen the wipe area slightly around the cleaned spot
- dry it with a second cloth
- check from the side and from straight ahead
The wider area does not need heavy cleaning. It just needs enough wiping to reduce contrast.
A useful guide looks like this:
| Size of original glue mark | Better blending area |
|---|---|
| coin-sized | 2–3 times the size of the spot |
| palm-sized | widen by 1–2 inches around edges |
| tape line | blend slightly above and below the line |
| decal area | blend across the whole previous shape |
| wallpaper section | blend section by section |
Blending matters most in these situations:
- the wall color is dark
- the paint finish is flat or matte
- the room has strong side lighting
- the area around the glue had not been cleaned in a while
- the cleaner used left a slight sheen change
A common mistake is over-blending. People keep wiping farther and farther out because they are chasing a slight contrast. That can create a much larger cleaned patch. The better habit is to widen the area a little, dry it, and check it before doing more.
In many rooms, the wall looks more even after one controlled blending pass than after five extra spot-cleaning passes.
Conclusion
Removing glue from walls safely is really about choosing the right level of force for the right kind of residue. Light sticker marks usually need only a damp cloth and patience. Dry tape and decal glue often come off better with gentle heat than with harder rubbing. Thick, older adhesive may need a tested remover and a slower, more controlled approach. When the wall is handled carefully, most glue problems can be solved without turning into paint damage, drywall fuzz, or a larger repair job. The best results usually come from the same habits: work in small sections, dry the wall between passes, check the surface from more than one angle, and stop as soon as the glue is gone.
For everyday wall-cleaning needs, GleamGlee can support customers with adhesive remover solutions designed for practical home, office, retail, and maintenance use. For larger opportunities, GleamGlee also supports private label, OEM, ODM, and custom packaging projects for customers who want to build or expand their own adhesive remover line. If you are looking to order branded products or request a quotation for a custom formula, packaging style, or market-specific project, send GleamGlee your quantity, target market, and product requirements to get started with a more suitable solution.


