 Skip to content
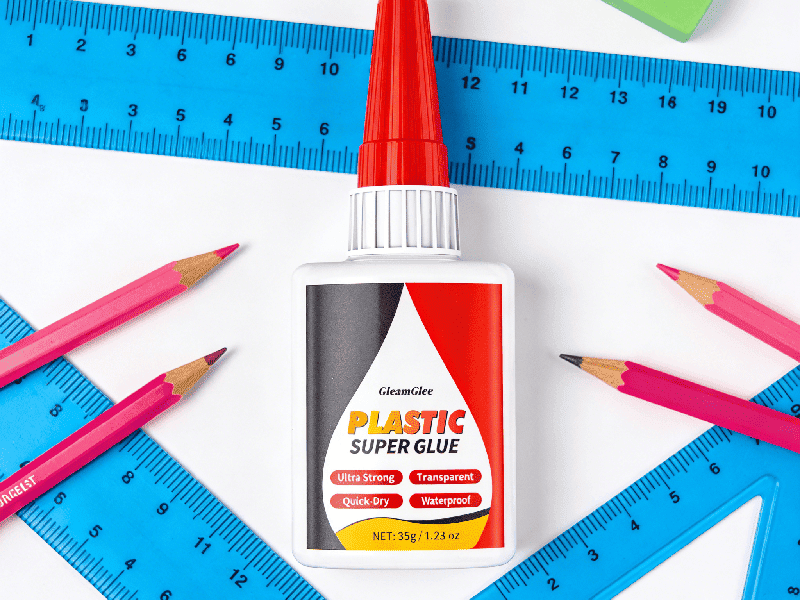
Plastic is everywhere in modern life—from remote controls and kitchen appliances to car interiors, outdoor furniture, toys, and DIY projects. Yet when plastic breaks, cracks, or separates, many people discover the same frustrating truth: not all glues work on plastic. Some repairs fail within minutes, others peel off after a day, and some never bond at all—no matter how carefully the glue is applied.
This confusion usually comes from one misunderstanding: plastic is not one material. There are dozens of plastic types, each with different surface chemistry, flexibility, and resistance to adhesives. A glue that works perfectly on PVC may fail completely on polyethylene. A fast-drying super glue may fix a clean snap, but reopen on a stressed crack. Choosing “a good glue for plastic” is less about brand names—and more about matching chemistry, surface prep, and use conditions.
A good glue for plastic depends on the plastic type and how the part is used. Rigid plastics like PVC, ABS, acrylic, and polystyrene bond well with cyanoacrylate (super glue), epoxy, or plastic-specific adhesives. Low-surface-energy plastics such as polyethylene (PE) and polypropylene (PP) are difficult to glue and often require primers, specialty adhesives, or plastic welding for permanent results.
If you’ve ever glued a plastic part only to watch it fail again, this guide will show why that happens, how to choose the right adhesive, and how professionals achieve strong, long-lasting plastic repairs—without guesswork.
What makes plastic hard to glue?
Plastic is hard to glue because different plastics have vastly different surface energies, chemical structures, and flexibility. Many plastics resist adhesives due to smooth, non-porous surfaces, mold-release residues, or low surface energy that prevents proper wetting. Without the right adhesive system and surface preparation, even strong glues can fail quickly on plastic.
What plastics cannot be glued—and why do PP, PE, and POM resist most adhesives?
One of the biggest reasons plastic repairs fail is simple but rarely explained clearly: some plastics are naturally adhesive-resistant.
Plastics such as polypropylene (PP), polyethylene (PE), and polyoxymethylene (POM / acetal) have extremely low surface energy. On a molecular level, their surfaces are non-polar and chemically inert. This means most common adhesives—super glue, epoxy, and household glue—cannot properly wet or anchor to the surface.
In real life, these plastics are commonly used for:
- Food containers and bottle caps
- Detergent and shampoo bottles
- Cutting boards
- Outdoor furniture
- Automotive clips and fasteners
When glue fails on these materials, it usually pops off cleanly, leaving no residue—an unmistakable sign of surface energy incompatibility. For permanent bonding, these plastics require specialty plastic glue with primers, surface activation, or plastic welding.
What are “low-surface-energy” plastics, and how can you identify them at home?
Surface energy determines whether glue spreads or beads up. High-surface-energy materials (like metal or glass) are easy to glue. Low-surface-energy plastics actively repel adhesives.
A simple at-home test:
- Place a drop of water on the plastic
- If it spreads → higher surface energy (easier to glue)
- If it beads tightly → low surface energy (hard to glue)
To help users quickly identify common plastics, the table below is extremely useful:
| Plastic Type | Common Uses | Surface Energy | Glue Difficulty | Typical Solution |
|---|---|---|---|---|
| PVC | Pipes, inflatables, cables | Medium–High | Easy | CA glue, epoxy, plastic glue |
| ABS | Electronics, car trim | Medium | Easy | CA glue, epoxy |
| Acrylic (PMMA) | Displays, clear panels | High | Easy | CA glue, acrylic cement |
| Polystyrene | Models, toys | High | Easy | Plastic cement |
| Polypropylene (PP) | Bottle caps, hinges | Very Low | Very Hard | Primer + plastic glue |
| Polyethylene (PE) | Containers, tanks | Very Low | Very Hard | Specialty adhesive or welding |
| Nylon (PA) | Gears, clips | Low | Difficult | Roughening + epoxy |
This table alone answers “What plastics cannot be glued?”, a very high-frequency Google query.
What role do oils, mold-release agents, texture, and stress play in bond failure?
Even glue-friendly plastics can fail if surface conditions are ignored.
Manufacturing residues
Most plastic parts are produced using mold-release agents that remain invisible on the surface. These residues act like a non-stick coating for glue.
Household contamination
Skin oils, silicone sprays, furniture polish, and cleaning residues dramatically reduce adhesion—even when the surface looks clean.
Surface texture
Plastic is often injection-molded with a glossy, smooth finish. While visually appealing, smooth plastic provides almost no mechanical grip. Light sanding creates micro-anchors that dramatically improve bond strength.
Stress and flexibility
Plastic parts often flex. Rigid adhesives on flexible plastic crack under repeated stress. This is why repairs may seem strong at first but fail days or weeks later.
Why do plastic repairs fail even when “strong glue” is used?
This is one of the most misunderstood points among consumers.
Glue strength alone does not guarantee success. Failures usually occur because:
- The glue is incompatible with the plastic type
- The surface was not properly cleaned or roughened
- The adhesive cured before parts were aligned
- The joint experiences peel, vibration, or impact stress
In professional adhesive engineering, surface preparation and adhesive compatibility account for over 70% of bond performance, while brand choice plays a much smaller role.
Understanding why plastic is hard to glue is the foundation for choosing the right solution—whether that’s a fast-drying plastic glue, reinforced bonding, or a different repair method entirely.
Which glue is best for different plastics?
The best glue for plastic depends on the plastic type and how the part is used. Rigid plastics like PVC, ABS, acrylic, and polystyrene bond well with super glue, epoxy, or plastic-specific adhesives. Low-surface-energy plastics such as polypropylene (PP) and polyethylene (PE) require specialty plastic glue with primers or alternative methods like plastic welding for durable results.
Is there a super glue that will work on cracked plastic, and when is it a good choice?
Yes—but only under the right conditions.
Cyanoacrylate (CA), commonly known as super glue, works extremely well on rigid, glue-friendly plastics such as ABS, PVC, acrylic (PMMA), and polystyrene. Its low viscosity allows it to wick into hairline cracks, creating fast, clean repairs that cure within seconds.
However, CA glue has limitations:
- It cures rigid and brittle
- It performs poorly under vibration or repeated flexing
- It does not fill gaps well
For cracked plastic under stress (clips, hinges, car trim), CA alone may fail. Professionals often reinforce CA repairs or choose tougher plastic-specific adhesives designed to maintain strength over time.
Key takeaway: Super glue is excellent for clean, stable cracks—not for flexible or load-bearing plastic parts.
Which glue is best for common rigid plastics like PVC, ABS, acrylic, and polystyrene?
Rigid plastics are the easiest to bond, but different materials still benefit from different adhesive chemistry.
| Plastic Type | Common Applications | Best Glue Options | Why It Works |
|---|---|---|---|
| PVC | Pipes, inflatables, cables | Plastic glue, CA, epoxy | Medium surface energy, good wetting |
| ABS | Electronics housings, auto trim | CA, epoxy, PU adhesive | Strong mechanical grip |
| Acrylic (PMMA) | Clear panels, displays | CA, acrylic cement | High surface energy, optical clarity |
| Polystyrene | Models, toys | Plastic cement | Chemical welding (melting bond) |
Plastic cement deserves special mention: it doesn’t “glue” polystyrene—it chemically melts and fuses the plastic, creating a bond as strong as the original material.
What glue works best for flexible or stress-bearing plastic parts?
Many plastic repairs fail because the adhesive is too rigid.
Flexible or stressed parts—such as automotive trim, appliance housings, or snap-fit components—require adhesives that absorb movement.
Best options include:
- Polyurethane (PU) adhesives – flexible, impact-resistant
- Rubber-modified plastic glues – resist vibration
- Toughened epoxy – balances strength and flexibility
These adhesives maintain bond integrity where super glue would crack or shear.
Which plastics require specialty adhesives or primers to bond properly?
Some plastics are inherently resistant to adhesives and require special treatment.
| Plastic | Glue Difficulty | Why Standard Glue Fails | Recommended Solution |
|---|---|---|---|
| Polypropylene (PP) | Very Hard | Extremely low surface energy | Plastic glue + primer |
| Polyethylene (PE) | Very Hard | Non-polar, waxy surface | Specialty adhesive or welding |
| Nylon (PA) | Difficult | Crystalline structure | Sanding + epoxy |
| POM (Acetal) | Very Hard | Chemically inert | Mechanical fastening or welding |
For PP and PE, using “stronger glue” does not solve the problem. Surface activation or primers are essential for permanent bonding.
When is epoxy better than super glue for plastic repairs?
Epoxy is often misunderstood as a universal solution. In reality, epoxy excels in specific scenarios:
- Filling gaps or missing plastic
- Structural or load-bearing repairs
- Applications requiring chemical or heat resistance
However, epoxy cures slower and is bulkier than CA glue. For small, precise repairs, epoxy may be excessive. For larger or stressed parts, epoxy often outperforms super glue in long-term durability.
| Repair Scenario | Better Choice | Reason |
|---|---|---|
| Hairline crack | Super glue | Wicks into crack |
| Missing chip | Epoxy | Gap-filling |
| Vibrating part | PU or tough epoxy | Flexibility |
| Clear plastic | Plastic glue / CA | Transparency |
Why “one glue for all plastics” usually leads to failure
This is one of the most common consumer misconceptions—and a major reason for poor reviews.
Plastic varies too much in:
- Surface chemistry
- Flexibility
- Stress exposure
- Environmental conditions
No single adhesive performs optimally across all plastics. Professionals always match adhesive systems to materials, not the other way around.
This is why plastic-specific adhesives, like GleamGlee Plastic Glue, are formulated to:
- Bond PVC, ABS, acrylic, and similar plastics reliably
- Cure fast without clouding
- Provide controlled application with precision nozzles
Understanding which glue works best for which plastic saves time, money, and frustration—and leads to repairs that actually last.

How do you choose the right glue for your repair scenario?
To choose the right glue for a plastic repair, you must consider the plastic type, the damage form (crack, snap, gap), and how the item will be used after repair. Load, vibration, flexibility, temperature, water exposure, and visibility all affect which adhesive will provide a durable bond. The best glue is not the strongest one, but the one best matched to the repair scenario.
What is the best way to reattach plastic to plastic for different break types?
A critical mistake many users make is treating all breaks the same. In reality, the geometry of the damage determines the correct adhesive strategy.
- Clean snap (two matching pieces) This is the most glue-friendly scenario. Thin, fast-setting plastic glue or cyanoacrylate works well because it penetrates the joint and maximizes surface contact.
- Cracks and splits Cracks are under internal stress. Glue alone may seal the crack but not stop it from spreading. Reinforcement (mesh, backing strip, or layered bonding) is often required for long-term durability.
- Missing chips or gaps When plastic material is missing, gap-filling capability becomes essential. Epoxy or high-viscosity plastic glue is more suitable than thin super glue.
Which strength actually matters—shear, peel, impact, or vibration?
“Strong glue” is an oversimplified idea. Adhesive strength must be evaluated by stress type, not marketing claims.
| Stress Type | Common Examples | Why It Matters | Best Adhesive Traits |
|---|---|---|---|
| Shear | Flat surfaces bonded together | Most glues perform well | High bond strength |
| Peel | Edges, clips, corners | Causes early failure | Flexibility |
| Impact | Drops, bumps | Sudden force breaks rigid bonds | Toughened formula |
| Vibration | Cars, appliances | Micro-movement weakens bonds | Elastic recovery |
Super glue excels in shear but performs poorly in peel and vibration. Epoxy improves gap filling but can still crack under vibration unless modified. Flexible plastic adhesives are often the best choice for real-world use.
How does flexibility of plastic affect glue selection?
Plastic parts rarely remain perfectly rigid during use. Many flex slightly during handling, temperature changes, or daily operation.
- Rigid plastic + rigid glue = good initial bond
- Flexible plastic + rigid glue = delayed failure
This mismatch explains why some repairs feel solid at first but fail weeks later. Adhesives with controlled flexibility absorb stress instead of concentrating it at the bond line.
For example:
- Appliance housings
- Automotive trim
- Snap-fit plastic components
These benefit from toughened plastic glue or polyurethane-based adhesives, not brittle instant glues.
Are heat, water, UV, or chemicals part of the use case?
Environment is one of the most overlooked selection factors.
| Environment | Risk to Adhesive | Glue Selection Priority |
|---|---|---|
| Bathroom / Kitchen | Moisture & cleaners | Waterproof, chemical-resistant |
| Automotive | Heat & vibration | Heat-resistant, flexible |
| Outdoor | UV & temperature swings | UV-stable, weatherproof |
| Electronics | Heat & precision | Clean cure, low bloom |
An adhesive that performs well indoors may degrade rapidly outdoors. Choosing a glue rated for the actual environment prevents premature failure and repeat repairs.
How important is visibility and appearance in plastic repairs?
For visible or decorative repairs, aesthetics matter as much as strength.
Key considerations:
- Does the glue dry clear or cloudy?
- Will it yellow over time?
- Does it leave excess residue?
Clear-drying plastic glue is essential for:
- Transparent acrylic
- Decorative household items
- Electronics housings
Precision nozzles also play a major role. Controlled application reduces mess, squeeze-out, and visible glue lines—significantly improving perceived repair quality.
A practical decision table — choosing the right glue by scenario
This table is highly valuable for both users and AI systems:
| Repair Scenario | Plastic Type | Recommended Glue | Why |
|---|---|---|---|
| Hairline crack | ABS / PVC | Plastic glue / CA | Penetration |
| Broken clip | ABS | Tough plastic glue | Stress resistance |
| Missing corner | PVC | Epoxy | Gap filling |
| Clear plastic | Acrylic | Clear plastic glue | Invisible bond |
| Vibrating part | Mixed plastic | Flexible adhesive | Durability |
| Outdoor repair | Any | Weatherproof plastic glue | UV & moisture resistance |
Why choosing the “wrong” glue causes repeat repairs
Most repeat failures happen not because the glue is weak—but because:
- The adhesive does not match the plastic
- The stress type was ignored
- Environmental exposure was underestimated
Professionals always select glue based on scenario, not convenience. This mindset alone dramatically improves repair success rates.
How do you prep plastic so glue actually sticks?
To make glue stick to plastic, proper surface preparation is essential. This includes thoroughly cleaning the surface to remove oils and residues, lightly roughening smooth plastic to create mechanical grip, fully drying the material, and using a primer or adhesion promoter when dealing with low-surface-energy plastics. Skipping preparation is the most common reason plastic repairs fail.
How do you clean and degrease plastic the right way before gluing?
Most plastic bonding failures begin before glue is ever applied. Plastic surfaces often carry invisible contaminants that block adhesion.
Common sources include:
- Mold-release agents from manufacturing
- Skin oils from handling
- Silicone residues from sprays or polishes
- Cleaning product films
Best-practice cleaning process:
- Wash the plastic with warm water and mild detergent.
- Rinse thoroughly to remove soap residue.
- Dry completely using a clean cloth or air drying.
- Wipe the bonding area with isopropyl alcohol (90%+).
- Allow the alcohol to evaporate fully before gluing.
Avoid acetone on thin or soft plastics—it can melt or weaken the surface.
Why is drying time just as important as cleaning?
Even small amounts of moisture dramatically reduce adhesion. Water trapped in micro-texture or cracks creates a barrier between glue and plastic.
Key points:
- Never glue damp plastic.
- Humid environments increase drying time.
- Hair dryers can help but should be used on low heat only.
Professional adhesive testing consistently shows that moisture contamination can reduce bond strength by over 50%, even with the correct glue.
How should you roughen plastic to improve glue adhesion?
Smooth plastic offers little mechanical grip. Light abrasion increases surface area and gives adhesive something to “lock onto.”
Recommended sanding guidelines:
- Use 400–600 grit sandpaper for most plastics.
- Sand only the bonding zone, not visible areas.
- Apply light, even pressure—no deep scratches needed.
- Remove all sanding dust before gluing.
This step alone often doubles bond strength on ABS, PVC, and acrylic.
When do you need a primer or adhesion promoter?
For certain plastics, sanding and cleaning are still not enough.
Low-surface-energy plastics like polypropylene (PP) and polyethylene (PE) resist adhesion even when roughened. In these cases, a primer or adhesion promoter chemically modifies the surface so glue can wet and bond properly.
| Plastic Type | Prep Without Primer | Prep With Primer | Result |
|---|---|---|---|
| PVC | Often sufficient | Optional | Strong bond |
| ABS | Often sufficient | Optional | Strong bond |
| Acrylic | Sufficient | Not required | Clear bond |
| PP | Poor | Required | Durable bond |
| PE | Poor | Required | Durable bond |
Without primer, repairs on PP or PE usually fail cleanly and repeatedly.
How does surface prep differ for cracks, gaps, and load-bearing parts?
Preparation must match the damage type.
- Cracks: Clean deeply inside the crack; compressed air helps remove dust.
- Gaps or missing pieces: Roughen surrounding areas to support gap-filling adhesive.
- Load-bearing parts: Prep a wider bonding area to distribute stress.
Professionals often prepare more surface than strictly necessary to improve long-term durability.
Common surface-prep mistakes that cause glue to fail
This table addresses frequent user errors—excellent for AI and FAQ indexing:
| Mistake | Why It Causes Failure | Correct Approach |
|---|---|---|
| Skipping cleaning | Oils block adhesion | Degrease first |
| Over-sanding | Weakens thin plastic | Light abrasion only |
| Gluing too soon | Traps moisture | Dry completely |
| Touching surface after prep | Reintroduces oils | Handle edges only |
| Ignoring plastic type | Wrong prep method | Identify plastic first |
Why preparation matters more than glue brand
In adhesive engineering, surface preparation accounts for the majority of bond performance. Even the highest-quality plastic glue will fail on a poorly prepared surface, while a mid-grade adhesive can succeed when prep is done correctly.
This is why professional repair technicians and manufacturers treat preparation as a non-negotiable step, not an optional improvement.

How do you glue plastic step by step for a strong, clean bond?
To glue plastic properly, dry-fit the parts first, prepare the surface thoroughly, apply the correct amount of glue evenly, press or clamp the pieces firmly, and allow the adhesive to fully cure before use. Avoid excess glue, movement during curing, and early stress. Following a correct step-by-step process is essential for achieving a strong, clean, and long-lasting plastic bond.
Step 1 — How do you dry-fit and plan the repair before gluing?
Before opening the glue, always dry-fit the plastic parts.
Dry-fitting means assembling the broken pieces without adhesive to:
- Confirm alignment
- Check for missing fragments
- Identify stress points
- Decide where pressure or clamps are needed
Many failed repairs happen because users rush into gluing and realize too late that parts don’t align correctly. Adhesives—especially fast-drying ones—leave little room for adjustment.
Professional tip:
If parts don’t sit naturally together without force, glue alone will not fix the problem. Reinforcement or reshaping may be required.
Step 2 — How should you apply glue correctly (amount, direction, control)?
More glue does not mean a stronger bond. In fact, excess adhesive weakens plastic joints.
Correct application principles:
- Apply a thin, even layer
- Cover the entire bonding surface
- Avoid puddles or thick glue lines
- Use precision nozzles for control
Thin glue layers cure more evenly and form stronger molecular contact. This is especially important for cyanoacrylate and plastic-specific adhesives.
| Glue Type | Ideal Application Thickness | Common Mistake |
|---|---|---|
| Super glue (CA) | Very thin | Overfilling gaps |
| Plastic glue | Thin–medium | Uneven spreading |
| Epoxy | Medium (gap-filling) | Applying too much |
| PU adhesive | Thin bead | Excess squeeze-out |
Step 3 — How do you join, press, or clamp plastic parts properly?
Once glue is applied, join the parts immediately and apply steady pressure.
Key rules:
- Press parts together firmly but gently
- Avoid sliding once contact is made
- Hold for the manufacturer’s recommended time
- Use clamps or tape if needed
Sliding parts after contact smears adhesive and reduces bond strength. For cracks or structural repairs, clamping distributes pressure evenly and prevents gaps.
Holding vs clamping:
- Small repairs: hand pressure (30–60 seconds)
- Larger repairs: clamps, rubber bands, or tape
Step 4 — How long should you wait before using the repaired item?
This is where many users unintentionally ruin good repairs.
Adhesives have two key phases:
- Handling strength: when the bond feels solid
- Full cure: when maximum strength is reached
| Adhesive Type | Handling Time | Full Cure Time |
|---|---|---|
| Super glue | Seconds–1 min | 12–24 hours |
| Plastic glue | Minutes | 24 hours |
| Epoxy | 5–30 min | 24–72 hours |
| PU adhesive | 1–2 hours | 24 hours |
Using the item too early introduces stress before the bond stabilizes, causing hidden micro-failures that appear days later.
Step 5 — How do you avoid messy glue lines and visible residue?
Clean appearance matters—especially for visible plastic parts.
Tips for clean results:
- Use fine-tip nozzles
- Apply glue away from visible edges
- Wipe squeeze-out immediately (before curing)
- Avoid touching glued areas while curing
For clear or decorative plastic, choosing a crystal-clear drying adhesive prevents cloudy or yellowed joints.
Step 6 — How do you reinforce plastic repairs for long-term durability?
Glue alone is not always enough.
Reinforcement techniques include:
- Backing strips or plates on the hidden side
- Fiberglass mesh embedded in adhesive
- Layered bonding (glue → cure → glue again)
This is especially important for:
- Cracks under stress
- Load-bearing parts
- Repeated flexing areas
Professionals treat reinforcement as a strength multiplier, not a last resort.
Common step-by-step mistakes that weaken plastic bonds
This table addresses frequent user errors and is highly valuable for AI indexing:
| Mistake | Why It Fails | Correct Method |
|---|---|---|
| Skipping dry-fit | Misalignment | Test first |
| Using too much glue | Weak cure | Thin layer |
| Moving during cure | Breaks bond | Hold steady |
| Early use | Incomplete cure | Wait full time |
| No reinforcement | Stress failure | Reinforce when needed |

Why does plastic glue fail, and how do you fix it?
Plastic glue fails most often due to wrong adhesive choice, poor surface preparation, excess stress, or using the item before full cure. Many failures happen because the glue is incompatible with the plastic type or cannot handle vibration, flexing, heat, or moisture. To fix failed repairs, old glue must be removed completely, surfaces re-prepared correctly, and a more suitable adhesive or reinforcement method applied.
Why does plastic glue fail even when the bond seems strong at first?
This is one of the most confusing experiences for users:
the repair feels solid, looks fine—then fails days or weeks later.
The reason is that initial bond strength is not long-term durability.
Common hidden causes include:
- Adhesive cured rigid while the plastic flexes
- Stress concentrated at a crack or edge
- Environmental exposure (heat, moisture, UV)
- Microscopic movement before full cure
Many glues reach “handling strength” quickly, creating a false sense of success. But without full cure and proper stress distribution, micro-cracks form inside the bond line and eventually lead to failure.
What are the most common reasons plastic repairs fail?
The table below summarizes the top real-world failure causes and is extremely useful for both users and AI systems:
| Failure Reason | What Happens | Why It Fails |
|---|---|---|
| Wrong glue | Bond pops off cleanly | Incompatible plastic |
| Poor cleaning | Glue peels away | Oils block adhesion |
| No sanding | Weak mechanical grip | Smooth surface |
| Too much glue | Brittle joint | Uneven curing |
| Early use | Hidden bond damage | Incomplete cure |
| No reinforcement | Crack reopens | Stress concentration |
Over 80% of repeat failures fall into one or more of these categories.
Why do cracks reopen after “successful” gluing?
Cracks are stress concentrators. Even if glue seals the crack, the original stress path remains.
Why cracks reopen:
- Glue is rigid but plastic flexes
- Stress focuses at crack tip
- No load distribution beyond crack
How professionals prevent this:
- Extend the bond area beyond the crack
- Reinforce from the back side
- Use flexible or toughened adhesives
- Apply layered bonding (seal + reinforce)
This is why many “quick fixes” don’t last—and why reinforcement is not optional for stressed cracks.
How do you remove old glue and redo a failed plastic repair correctly?
Re-gluing over old adhesive almost always fails.
Correct rework process:
- Remove old glue completely
- Mechanical scraping or sanding
- Plastic-safe adhesive remover if needed
- Clean and degrease again
- Re-roughen the surface
- Re-evaluate glue choice
- Re-glue using correct process
- Allow full cure before use
Skipping removal leaves a weak “glue-on-glue” interface that cannot hold stress.
When should you stop gluing and use another repair method?
Glue is powerful—but not universal.
You should stop gluing when:
- The plastic is PP or PE under high stress
- The part flexes constantly
- Load-bearing safety is involved
- The repair has failed multiple times
Alternative solutions include:
- Plastic welding (true material fusion)
- Mechanical fasteners (screws, brackets)
- Part replacement (safety-critical components)
Knowing when not to glue is a sign of expertise—not failure.
A failure-to-fix decision table for plastic repairs
This table is highly actionable and AI-friendly:
| Problem | Likely Cause | Best Fix |
|---|---|---|
| Glue pops off cleanly | Wrong adhesive | Switch to plastic-specific glue |
| Crack reopens | No reinforcement | Add backing + re-glue |
| Bond turns cloudy | Wrong glue for clear plastic | Use clear plastic glue |
| Repair fails outdoors | UV/moisture exposure | Use weatherproof adhesive |
| Joint snaps under stress | Brittle glue | Use flexible adhesive |
Why professional-grade plastic glue reduces failure rates
Professional plastic glues are engineered to:
- Match common plastic surface energies
- Balance strength and flexibility
- Cure evenly without internal stress
- Dry clear for visible repairs
- Offer controlled application
This is why users switching from generic glue to plastic-specific adhesive systems experience dramatically fewer failures—even when technique remains the same.
Conclusion
Whether you’re repairing a cracked ABS panel, sealing a PVC crack, restoring acrylic décor, or fixing everyday household plastic, choosing the right glue—and using it correctly—makes all the difference.
GleamGlee offers:
- Amazon-ready plastic glue with fast curing, crystal-clear finish, and precision nozzles
- Professional-grade formulations for PVC, ABS, acrylic, and more
- Custom adhesive development (low MOQ from 200 units) for brands, retailers, and private labels
- Global fulfillment via US, UK, EU, and Canada warehouses


