 Skip to content
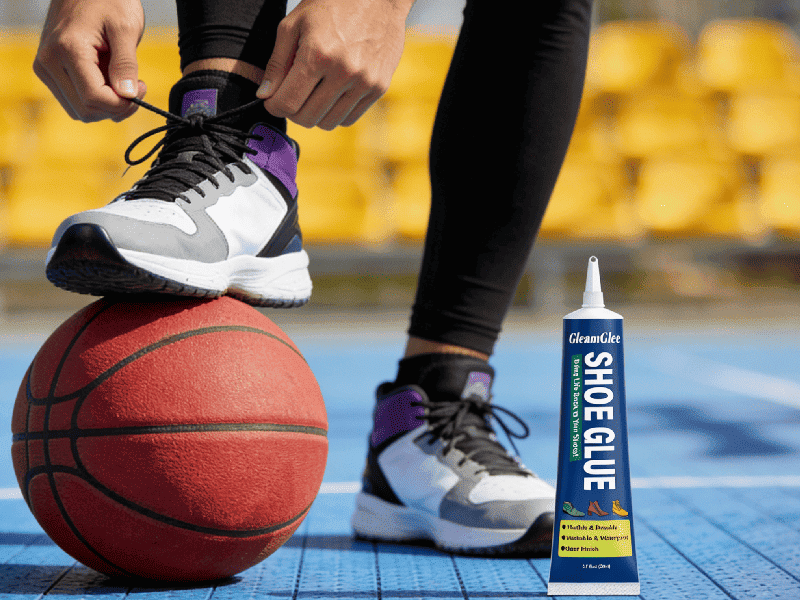
Shoes are one of the most mechanically stressed items we own, yet most people underestimate how demanding they are from an adhesive perspective. Every step creates a complex combination of bending, shear force, compression, and friction. Add moisture from rain or sweat, temperature changes, and mixed materials—and you have one of the toughest bonding challenges in everyday life.
That’s why when shoes start coming apart, quick fixes often fail. A lifted sole might look simple to repair, but without the right adhesive, the bond can crack within days. Many people instinctively reach for super glue or a generic household adhesive, only to discover that “strong” does not mean “durable” when flexibility is involved.
The best glue for shoes is a flexible, waterproof shoe repair adhesive designed for rubber, leather, EVA, PU, vinyl, and fabric. Unlike super glue, shoe glue remains elastic after curing, allowing it to withstand constant movement without cracking. It’s ideal for repairing soles, heels, insoles, and toe caps, especially where durability and flexibility matter more than instant hardness.
Professional cobblers understand this well. They don’t choose adhesives based on how fast they dry, but on how they behave after thousands of flex cycles. At GleamGlee, our R&D teams test shoe adhesives under simulated walking stress, moisture exposure, and repeated bending—because real shoes don’t sit still.
And the good news? With the right glue and the right method, home shoe repairs can be remarkably effective. Many users find their repaired shoes last months—or even years—longer than expected. Let’s start by understanding what truly makes a shoe glue “the best” in real-world wear.
What Makes a Shoe Glue “Best” for Real-World Wear?
The best shoe glue is one that remains flexible, bonds mixed shoe materials reliably, and resists water and repeated stress. Shoes fail under movement, not static load. A proper shoe adhesive cures into an elastic, waterproof layer that moves with the shoe instead of cracking like rigid glues.
What kind of glue is used for shoes, and why does “shoe-specific” matter?
Shoe glue is not simply “strong glue with a different label.” It is formulated specifically for dynamic bonding environments. Most shoe glues are based on urethane or rubberized polymer systems, which cure into a flexible, resilient film rather than a rigid пластик-like layer.
This flexibility is critical. During walking, the sole bends at the toe, twists slightly through the midfoot, and compresses at heel strike. A rigid adhesive resists this motion until it fractures. Shoe glue, on the other hand, accommodates motion by stretching microscopically, distributing stress across the entire bond line.
That’s why shoe-specific adhesives are used not only for repair, but also in original footwear manufacturing and professional cobbling.
What materials are you bonding—rubber, leather, EVA, PU, vinyl, or canvas?
Modern shoes are multi-material systems. A single sneaker may combine:
- Rubber outsoles (low surface energy)
- EVA or PU foam midsoles (compressible)
- Fabric or mesh uppers (porous)
- Leather overlays (organic, absorbent)
Each material interacts differently with adhesives. A glue that works on leather may fail on rubber. Shoe glue is engineered to bridge these differences, bonding both porous and non-porous surfaces while maintaining flexibility at the interface.
This versatility is what makes shoe glue superior to single-material adhesives like wood glue or fabric glue.
What properties matter most—flexibility, waterproofing, gap-filling, or fast set?
For shoes, flexibility and waterproofing outweigh speed. Fast-drying adhesives often cure too rigidly, sacrificing long-term durability. Gap-filling matters when soles are uneven or worn, while waterproofing protects the bond from sweat, rain, and cleaning.
In practice, the best shoe glue balances:
- Elasticity (prevents cracking)
- Moisture resistance (prevents bond creep)
- Controlled cure time (for alignment)
- Clear finish (aesthetic preservation)
Which Types of Glue Work Best for Different Shoe Repairs?
Different shoe repairs require different types of glue. Flexible shoe repair glue works best for soles, heels, and insoles that bend and move. Contact cement is suitable for large-area sole bonding, while super glue is only appropriate for small, rigid spot fixes. Choosing the wrong glue—especially rigid adhesives for flexible areas—is the main reason shoe repairs fail prematurely.
Shoes don’t break in one uniform way, and no single adhesive behaves the same across all repair scenarios. The key to a successful shoe repair is matching the type of glue to the type of damage, materials involved, and movement level of the repaired area.
Below, we break this down clearly and practically.
What is stronger, shoe glue or super glue for real shoe repairs?
This is one of the most searched questions related to shoe repair—and also one of the most misunderstood.
Super glue feels strong because it cures hard. On rigid materials like metal or plastic parts, that hardness can be an advantage. But shoes are not rigid systems. Every step introduces bending, torsion, and compression.
Super glue (cyanoacrylate):
- Cures into a brittle, glass-like polymer
- Has high initial strength but low fatigue resistance
- Cracks internally under repeated flexing
- Often turns white or flakes near the repair zone
Shoe glue, by contrast:
- Cures into a flexible, elastic bond
- Absorbs motion instead of resisting it
- Maintains adhesion under thousands of flex cycles
- Is far more durable for soles, heels, and midsoles
Conclusion for users:
Super glue may seem “stronger” at first touch, but shoe glue is stronger in real-world wear, where flexibility determines longevity.
Which glue works best for sole separation and outsole re-bonding?
Sole separation is the most common shoe failure, especially in sneakers, boots, and casual footwear. This repair involves large surface areas and constant bending, making glue choice critical.
There are two main adhesive options:
| Repair Scenario | Best Glue Type | Why |
|---|---|---|
| Professional cobbler repair | Contact cement | High surface strength, factory-style |
| DIY home repair | Flexible shoe repair glue | Easier, safer, flexible, waterproof |
Contact cement requires precise timing, ventilation, and irreversible bonding once surfaces touch.
Shoe repair glue allows:
- Repositioning during application
- Gap-filling for uneven wear
- Flexible curing suitable for daily walking
For most consumers repairing shoes at home, flexible shoe glue offers the best balance of strength, ease, and durability.
Which glue is best for everyday shoe fixes that must stay elastic?
Not all shoe repairs are dramatic sole separations. Many common issues involve localized flex zones, including:
- Toe caps lifting at the bend point
- Insoles peeling or curling
- Cracked EVA or PU midsoles
- Heel edges loosening
In these cases, elasticity matters more than raw strength.
Flexible shoe glue is specifically designed for:
- Repeated bending at the toe box
- Compression and rebound in midsoles
- Shock absorption during walking or running
Rigid adhesives often create hard spots that feel uncomfortable and fail quickly. Elastic shoe glue maintains comfort and structural integrity at the same time.
Which glue is suitable for tiny spot fixes and non-flex areas?
There are limited cases where super glue can be acceptable:
Appropriate uses for super glue:
- Decorative elements
- Small rigid logos or trims
- Emergency stabilization away from flex zones
Not appropriate for:
- Soles or outsoles
- Heels or heel blocks
- Toe bends
- Any load-bearing or flexible area
Think of super glue as a precision spot adhesive, not a structural shoe repair solution.
What kind of glue is actually used for shoes in manufacturing and repair?
In professional footwear manufacturing and cobbling, the most commonly used adhesives are:
- Urethane-based adhesives
- Rubberized polymer shoe glues
- Industrial contact cements
These adhesives share three core traits:
- Flexibility after curing
- Strong adhesion across mixed materials
- Resistance to moisture and fatigue
This is exactly the performance profile replicated by high-quality consumer shoe repair glues like GleamGlee Shoe Glue, designed to bring professional-level bonding into a home-use format.

How Do You Choose the Best Glue for Your Shoe Material and Use Case?
To choose the best glue for shoes, match the adhesive to your shoe materials (rubber, leather, EVA, PU, vinyl, canvas), the repair type (sole, heel, insole, toe cap), and the environment (water, heat, daily flex). For most wearable repairs, a flexible, waterproof shoe repair glue is the safest choice because it bonds mixed materials and survives repeated bending without cracking.
Choosing shoe glue is less about “the strongest glue” and more about “the right glue for the physics of your shoe.” Shoes are a moving system. Materials expand and compress, outsoles flex at the toe, and moisture sneaks into seams. The best glue choice comes from answering four practical questions:
- What material am I bonding?
- Where is the repair located (flex zone or rigid zone)?
- How will the shoe be used (walking, running, work, outdoor)?
- Will water, heat, or repeated cleaning be involved?
Below is a step-by-step decision framework.
Which glue is best for rubber soles to leather uppers?
Rubber-to-leather is one of the most common and most challenging shoe repairs because it’s a mixed-material bond.
- Rubber is typically non-porous and low surface energy, so many glues don’t “grab” it well.
- Leather is porous and fibrous, meaning it can absorb glue—but also oils, waxes, or conditioners that block bonding.
Best choice: a flexible shoe repair glue that can bond both porous and non-porous surfaces while remaining elastic.
What users should do for best results (high-impact steps):
- Lightly sand rubber and leather bonding surfaces (120–240 grit).
- Remove leather conditioners/oils (clean and fully dry).
- Apply a thin, even layer; press firmly; cure 24–48 hours.
What to avoid:
Rigid adhesives (like typical “super glue”) on rubber-to-leather seams near toe bends—these areas flex constantly and rigid glue cracks.
Which glue is best for sneakers vs. boots vs. dress shoes vs. kids’ shoes?
Different shoe categories fail for different reasons. Use this table to match the glue to the stress profile.
| Shoe Type | Typical Failure | Stress Level | Best Glue Traits |
|---|---|---|---|
| Sneakers / Running shoes | outsole edge lift, midsole cracks, toe bend separation | High flex + impact | Flexible, shock-tolerant, waterproof |
| Work boots | heel separation, sole delamination, toe guard lift | High load + moisture | Waterproof, durable, flexible |
| Hiking boots | sole separation, seam lift, waterproof layer fatigue | High moisture + abrasion | Waterproof, elastic, strong edge hold |
| Dress shoes | heel edge lift, outsole peeling, insole slip | Moderate flex, high aesthetics | Clear-drying, controlled application |
| Kids’ shoes | sole peel, strap detachment, toe cap splits | Rough use + frequent flex | Flexible, forgiving, fast handling |
Practical rule:
If the shoe bends a lot (sneakers, kids’ shoes), prioritize flexibility over instant hardness. If the shoe sees water (boots, hiking shoes), prioritize waterproof performance.
Which glue is best for EVA foam midsoles, PU soles, and modern sneaker materials?
This is a high-search topic because many modern sneakers use foams that don’t behave like rubber.
- EVA foam compresses and rebounds; it can tear internally if bonded with a rigid adhesive.
- PU soles can be smoother and sometimes degrade with age, requiring better surface prep.
- Many “fashion sneakers” use layered materials (rubber + foam + fabric), so glue must handle mixed bonding.
Best choice: a flexible shoe repair glue with good adhesion to foam and rubber, plus gap-filling ability.
User-friendly tip:
If your sneaker has a “spongy” midsole, avoid rigid glues. A flexible shoe glue will move with the foam and reduce bond-line cracking.
Is waterproof shoe glue necessary, and when does it actually matter?
Many people assume waterproof glue only matters for rain boots—but moisture is present in everyday shoes too:
- Sweat migrates into seams and weakens non-waterproof adhesives over time.
- Wet sidewalks and puddles stress the outsole bond.
- Cleaning introduces water and surfactants that may soften weak adhesives.
When waterproof matters most:
- Outdoor shoes and boots
- Work shoes exposed to water or spills
- Kids’ shoes (wet playgrounds, frequent washing)
- Athletic shoes worn in humid conditions
When waterproof still helps (even indoors):
- Daily sneakers worn all day
- Shoes that get cleaned often
- Shoes worn in warm climates (humidity)
Bottom line:
Waterproof isn’t a luxury feature—it’s a durability feature.
How do you choose the best glue based on repair location: flex zones vs. rigid zones?
This is the simplest decision rule for consumers and performs well in AI search results.
| Repair Location | Flex Level | Glue Recommendation |
|---|---|---|
| Toe bend / forefoot edge | Very high | Flexible shoe glue only |
| Midsole cracks | High | Flexible shoe glue with gap fill |
| Heel block / heel edge | Medium | Flexible shoe glue (good edge hold) |
| Insole / footbed | Medium | Flexible shoe glue (low odor preferred) |
| Decorative trim (non-flex) | Low | Small super glue spot may be OK |
Key insight:
The more the area bends, the more you need flexibility—not hardness.
How Do You Glue a Shoe Sole Back on Step by Step for a Strong, Clean Bond?
To glue a shoe sole back on, diagnose the separation, remove loose old glue, sand and clean both bonding surfaces, apply a thin even layer of flexible shoe glue (often on both sides), align carefully, press with steady pressure using rubber bands or clamps, and let the repair cure fully for 24–48 hours before wearing. Most failures happen because surfaces weren’t prepared or the shoe was worn too soon.
Shoe sole repair is one of the most searched DIY fixes because it looks simple—but it’s also one of the easiest to mess up if you skip preparation. The strongest shoe glue still needs the right surface prep + pressure + cure time to form a durable bond. Below is a cobbler-style process written for normal home users.
How to fix shoes that are coming apart — what to diagnose before you glue
Before you open the glue, you need to confirm the repair is actually “glue-fixable.” Ask:
- Is the sole still the right shape? If the outsole is warped and won’t sit flush against the upper without force, the bond line will be under constant tension and fail quickly.
- Where is the separation?
- Toe edge lift (high flex)
- Midfoot separation (medium flex)
- Heel separation (high impact) Each zone needs slightly different pressure strategy.
- What caused the failure?
- Old glue dried out (common)
- Water damage (rain, sweat)
- Dirt and oils (especially around toe/heel)
- Foam midsole breakdown (older sneakers)
Rule of thumb: If the shoe parts align naturally when you press them together by hand, a flexible shoe glue repair is usually successful.
What tools and materials do you need for a clean, strong shoe repair?
You don’t need a workshop—but you do need basics:
Minimum tool list (DIY-friendly):
- Sandpaper (120–240 grit)
- Cloth or paper towels
- Small scraper (plastic scraper works)
- Rubber bands / tape / clamp
- Optional: cotton swab or small brush for corners
Why this matters for results:
Most “shoe glue didn’t work” complaints are actually “the surface wasn’t clean or roughened.” Adhesive bonding is chemistry + mechanics, not just liquid sticking.
How do you remove old glue and prep surfaces without damaging the shoe?
This is the step that decides whether the repair lasts 2 days or 2 months.
1) Remove loose, flaky glue
- Scrape off brittle glue layers
- Do NOT try to glue over loose glue; the new glue will bond to the weak layer, not to the shoe
2) Lightly sand both bonding surfaces
- Rubber outsole: sand until the surface looks slightly matte
- Leather: sand lightly; avoid deep gouges
- Foam (EVA/PU): sand gently; foam tears easily
3) Clean and dry completely
- Wipe away dust and oils
- Let it air dry fully before glue
Step vs. User Mistake vs. Correct Action
| Step | Common Mistake | Correct Action |
|---|---|---|
| Removing old glue | Leaving glossy residue | Remove loose layers + sand to matte texture |
| Sanding | Skipping sanding | 120–240 grit on both surfaces |
| Cleaning | Gluing on damp/dirty areas | Clean, then dry fully |
| Application | Applying too thick | Thin, even layers |
| Curing | Wearing too early | Cure 24–48 hours |
How do you apply shoe glue correctly for soles (thin layer, both sides, edges)?
This is where many repairs fail. People use too much glue or glue only one side.
Best practice for most sole repairs:
- Apply a thin, even layer to the outsole bonding area
- Apply a thin layer to the upper bonding area (if accessible)
- Push glue into corners/edges carefully (toe edge is critical)
- Avoid blobs—thick glue cures unevenly and weakens
Why “thin” is stronger:
Adhesives work best in thin films because the cured polymer network is uniform. Thick layers can trap solvent, remain soft inside, or create weak points.
How do you align, press, clamp, and cure for a bond that lasts?
Once you press surfaces together, alignment matters. A misaligned sole creates uneven stress.
Alignment tips:
- Do a “dry test fit” before gluing
- Mark alignment points (tiny pencil marks) if needed
- Start from toe or heel (depending on where the separation is)
Pressing and clamping options:
- Rubber bands (great for toe caps and sneaker edges)
- Strong tape wrap (even pressure around perimeter)
- Clamps (best for flat heel areas; avoid crushing foam)
Curing guidance (most common success timeline):
- Set time: 6–12 hours (don’t move the shoe)
- Wearable strength: ~24 hours
- Full strength: 24–48 hours Cold temperatures slow curing; warm dry rooms speed it up.
Top failure reason:
Wearing the shoe “just to test it” too early. Even one short walk can break an uncured bond and cause permanent weakness.
How do you handle special cases: toe bends, foam midsoles, and wet-weather shoes?
Different scenarios need small adjustments:
Toe bend repairs (highest flex zone):
- Keep glue film thin
- Wrap tightly with rubber bands
- Cure longer (closer to 48 hours)
Foam midsole repairs (EVA/PU):
- Sand gently; don’t shred foam
- Avoid rigid glue; it will crack quickly
- Consider two light coats rather than one thick coat
Wet-weather shoes (boots, hiking, kids shoes):
- Ensure surfaces are fully dry before gluing
- Choose waterproof shoe glue
- Seal edges carefully because water enters from the perimeter

What Mistakes Cause Shoe Repairs to Fail, and How Do You Avoid Them?
Shoe repairs fail when the wrong glue is used, surfaces aren’t prepared, or curing time is rushed. Rigid glues crack under flex, moisture weakens non-waterproof bonds, and poor alignment creates stress points. Most failed repairs can be avoided by using flexible shoe glue, sanding and cleaning properly, applying thin layers, and allowing a full 24–48 hour cure before wearing.
Shoe repair failure is rarely caused by “bad glue alone.”
In most cases, the adhesive fails because the repair ignored how shoes actually move, flex, and absorb stress. Below are the most common—and costly—mistakes users make, explained in plain language with clear fixes.
Why does using the wrong type of glue cause shoe repairs to fail?
This is the single biggest mistake.
Many users choose glue based on:
- “Fastest drying”
- “Hardest when dry”
- “Strongest on the label”
But shoes require flexibility, not rigidity.
What goes wrong:
- Super glue and rigid adhesives cure hard
- Shoes bend thousands of times per day
- The glue cracks internally (even if it looks fine outside)
Result:
The bond fails suddenly, often at the toe bend or heel edge.
How to avoid it:
For any load-bearing or flexing area (sole, heel, midsole, toe cap), always use a flexible shoe repair glue that remains elastic after curing.
Why does skipping surface preparation lead to weak or short-lived repairs?
Adhesive bonds are only as strong as the surface they attach to.
Common user mistakes:
- Gluing over old, brittle adhesive
- Gluing onto dusty or oily surfaces
- Gluing when the shoe is slightly damp
Why this causes failure:
- New glue bonds to dirt or old glue—not to the shoe material
- Moisture prevents proper curing
- Oils (from hands, leather conditioners, sweat) block adhesion
How to avoid it:
- Remove loose old glue completely
- Lightly sand both surfaces (120–240 grit)
- Clean and dry fully before applying glue
Important insight for users:
Proper prep often matters more than the glue brand itself.
Why does using too much glue actually make the bond weaker?
This mistake feels counterintuitive but is extremely common.
What users think:
“More glue = stronger bond”
What actually happens:
- Thick glue layers trap solvent
- Inner layers cure slowly or unevenly
- The bond stays soft inside and cracks under stress
Correct approach:
- Apply thin, even layers
- Cover the entire bonding surface evenly
- Press firmly so excess glue spreads outward, not inward
Thin adhesive films cure more uniformly and flex more predictably.
Why does poor alignment cause the repair to fail even with good glue?
Even the best shoe glue cannot compensate for misalignment.
What goes wrong:
- Sole attached slightly off-position
- One edge bears more stress than others
- Walking amplifies that stress imbalance
Result:
The repair fails at the stressed edge first.
How to avoid it:
- Always do a dry test fit before gluing
- Align toe and heel reference points first
- Apply pressure evenly across the entire bonded area
Alignment reduces stress concentration and dramatically increases repair life.
Why does wearing the shoe too early break an otherwise good repair?
This is the most frustrating mistake because the repair often looks finished.
Key misunderstanding:
“Dry to the touch” ≠ “fully cured”
What happens if worn too early:
- The adhesive film hasn’t fully cross-linked
- Flexing breaks the bond internally
- Damage is often invisible until the repair suddenly fails
Best practice:
- Do not wear the shoe for at least 24 hours
- For high-flex or high-load repairs, wait 48 hours
- Warmer, dry environments improve curing reliability
One early test walk can permanently weaken the bond.
Why do water and humidity cause shoe glue repairs to fail?
Water is a silent enemy of many adhesives.
Failure scenarios:
- Shoes glued while still damp
- Repairs exposed to rain before full cure
- Non-waterproof glue used on outdoor shoes
Why it matters:
- Moisture interferes with curing
- Some glues soften or creep when wet
- Edge sealing fails first, allowing water intrusion
How to avoid it:
- Ensure all surfaces are completely dry
- Use waterproof shoe glue for outdoor or daily-wear shoes
- Seal edges carefully, especially around toe and heel
Mistake → Consequence → Correct Action
| Mistake | Why It Fails | Correct Action |
|---|---|---|
| Using super glue on soles | Cracks under flex | Use flexible shoe glue |
| Skipping sanding | Poor adhesion | Light sanding both surfaces |
| Gluing damp surfaces | Incomplete cure | Dry completely first |
| Applying thick glue | Weak internal cure | Thin, even layers |
| Poor alignment | Stress concentration | Dry fit + careful alignment |
| Wearing too soon | Bond breaks internally | Cure 24–48 hours |
Is GleamGlee Shoe Glue a Good Choice for Modern Shoe Repairs?
Yes — GleamGlee Shoe Glue is designed specifically for modern shoe repairs, including soles, heels, midsoles, and mixed-material footwear. It bonds leather, rubber, EVA, PU, and fabric flexibly and waterproofly, cures clear, and resists repeated flex and moisture. For most DIY repairs and everyday use, GleamGlee delivers professional-grade durability and comfort without requiring specialized tools or experience.
Choosing the right glue is the most important decision in shoe repair. Based on the technical challenges discussed earlier (material types, flex zones, curing, moisture), the ideal shoe glue must:
- Bond a wide range of materials reliably
- Stay flexible after curing
- Resist moisture and repeated bending
- Cure with minimal odor or mess
- Be easy to apply for consumers
GleamGlee Shoe Glue is engineered to satisfy all five, and here’s how.
What types of materials does GleamGlee Shoe Glue bond well?
One of the biggest questions users search is:
“Can shoe glue bond leather + rubber + foam + fabric reliably?”
Yes. GleamGlee Shoe Glue is formulated for mixed materials, including:
- Rubber soles and outsoles
- Leather and synthetic leather
- EVA/PU foams in midsoles
- Canvas and woven fabric uppers
- Vinyl and TPU overlays
- TPR / rubberized trims and edge guards
This broad compatibility is essential because modern footwear often combines multiple material layers—and a glue that only handles one type (like leather or rubber alone) will fail at mixed interfaces.
User tip:
Always lightly sand and clean both surfaces for best adhesion (this applies to GleamGlee or any high-performance adhesive).
How does GleamGlee Shoe Glue handle flexibility and repeated stress?
A common user question is:
“Why do some shoe glues crack after a few wears?”
Many adhesives harden too much when cured — they become brittle and fail quickly under flex. GleamGlee Shoe Glue contains elastic polymers that remain flexible after curing, which means:
- It bends with the shoe, especially at toe flex points
- It absorbs repetitive stress without cracking
- It doesn’t create “hard spots” inside the shoe that feel uncomfortable
Compare typical glue types:
| Glue Type | Flexibility After Curing | Typical Result | Best Use |
|---|---|---|---|
| Super Glue | ❌ Rigid | Cracks under bend | Spot fixes only |
| Contact Cement | ⚠️ Moderate | Strong but less elastic | Full sole bonding |
| Generic Shoe Glue | ✓ Some flexibility | Works short-term | Casual repairs |
| GleamGlee Shoe Glue | ✅ High flexibility | Long-lasting, elastic bond | All flex zone repairs |
This performance makes it suitable for sporty, casual, and even outdoor footwear.
Does GleamGlee Shoe Glue stay waterproof and durable?
Moisture is a leading cause of adhesive failure — even for indoor shoes, sweat and humidity matter. For outdoor shoes (boots, sneakers, kids’ play shoes), water resistance is essential.
GleamGlee Shoe Glue features:
- Waterproof bond layer
- Cures clear without white residue
- Resists bond creep under moisture
- Stays flexible even when wet
This means repaired shoes maintain:
- Grip strength
- Comfort
- Visual appearance
Example uses where waterproofing matters:
- Running shoes in wet weather
- Hiking boots on trails
- Kids’ school shoes and playground wear
- Everyday rain or snow exposure
How easy is GleamGlee Shoe Glue for DIY users?
DIY shoe repair isn’t just about chemistry — it’s about usability. Many strong professional adhesives are difficult for average users because they:
- Require specialized tools
- Create messy application
- Emit strong odors
GleamGlee Shoe Glue is designed for consumer-friendly use:
- Precision metal needle nozzle — accurate application, no waste
- Clear curing — no cloudy residues
- Included sandpaper + applicator — everything needed in one kit
- Minimal odor, low mess
This makes it ideal for household use — no workshop required.
User tip:
For best results, follow prep and cure steps (clean + sand + dry + pressure + 24–48 hr cure).

How does GleamGlee compare in real user scenarios (case-based insights)?
Many users search phrases like:
- “Does shoe glue really work?”
- “Can I fix sole separation at home?”
- “What glue to use for sneaker toe peeling?”
Here’s how GleamGlee performs in real use cases:
| Repair Scenario | Common Issue | GleamGlee Outcome | Why it Works |
|---|---|---|---|
| Sole Separation | Sole lifts at edge | Durable rebond | Flexible glue + good adhesion |
| Heel Lift | Heel detaches | Long-lasting hold | Waterproof + elastic |
| Midsole Crack | Foam cracks | Flexible but strong fix | Elastic bond absorbs stress |
| Insole Curl | Footbed lifts | Smooth reattachment | Even bond + waterproofing |
| Toe Cap Peel | Separation at front | Invisible repair | Clear-dry adhesive |
These align with common user goals — durability, comfort, and invisibility of the repair.
When might a cobbler or professional be a better option?
GleamGlee Shoe Glue handles nearly all DIY adhesive failures — but there are exceptions:
- Heel counters or skeleton/frame damage
- Severe midsole foam crushing
- Structural deformation of the shoe last
- Luxury/expensive footwear with bespoke materials
In these cases, glue can help but may not restore original factory support — cobblers may use stitching, replacement components, or industrial adhesives not accessible to consumers.
For everyday sole and edge separation, though, GleamGlee is a reliable and cost-effective choice.
Summary: Is GleamGlee a Good Choice?
Yes. GleamGlee Shoe Glue is a strong choice for modern shoe repairs because it:
- Bonds a broad range of materials
- Remains flexible under repeated stress
- Resists moisture and bond creep
- Cures clear and comfortable
- Is easy to use for DIY repairs
Whether you’re fixing sneakers, boots, dress shoes, or kids’ shoes, GleamGlee offers a professional-level adhesive in a consumer-friendly format.
Conclusion:
Shoe repairs succeed or fail for one simple reason: whether the adhesive matches how shoes actually move and wear. As this guide has shown, shoes are not static objects—they bend, flex, absorb impact, and face moisture every day. That’s why rigid, fast-drying glues often fail, and why flexible, waterproof shoe-specific adhesives consistently perform better in real-world use.
By understanding which glue works best for different shoe repairs, how to choose the right glue for your shoe materials and use case, and how to apply it correctly while avoiding common mistakes, you can achieve repairs that are not just temporary fixes, but durable, comfortable, and visually clean solutions. In many cases, a properly repaired pair of shoes can last months—or even years—longer than expected.
For modern footwear made from mixed materials like rubber, leather, EVA, PU, and fabric, GleamGlee Shoe Glue stands out as a practical and reliable option. Its combination of flexibility, waterproof performance, clear curing, and user-friendly application reflects the same principles used by professional cobblers—but in a format designed for everyday users. Whether you’re fixing sneakers, boots, dress shoes, or kids’ footwear, the goal is the same: restore function, comfort, and confidence with a repair that holds up to daily wear.
If you’re ready to repair smarter instead of replacing, GleamGlee Shoe Glue is available with fast Amazon FBA delivery in major markets. And for brands, retailers, or businesses looking for customized shoe repair solutions, GleamGlee also offers low-MOQ customization, private labeling, and global supply support.


