 Skip to content
 Super Glue (Cyanoacrylate) Guide — How to Choose, Use, and Troubleshoot for Strong, Clean Repairs
Super glue is fast, but strong results require the right glue type, surface prep, fit, and curing conditions. This guide explains exactly when cyanoacrylate works, when it fails, how to apply it step by step, and how to prevent whitening, brittleness, and weak bonds across common household materials.
Opening
Super glue is one of the most searched adhesives because it promises “instant” bonding. Yet many users experience the same frustrations: the joint snaps after a day, the surface turns chalky white, the parts slide out of alignment, or the glue bonds skin faster than the material. These failures are rarely random. They usually come from predictable factors: material compatibility (surface energy), joint fit (gap size), contamination (oil/dust), glue viscosity (thin vs gel), and curing environment (humidity/ventilation).
Cyanoacrylate adhesives (CA) are engineered for tight-fitting parts and thin bond lines. The strongest CA bonds happen when surfaces are clean, dry, and closely matched so that only a very thin adhesive layer remains between them. When users apply large puddles, try to fill big gaps, or glue low-surface-energy plastics (like PP/PE) without a primer, the adhesive cannot “wet” the surface properly—so the bond becomes weak or brittle.
Why Super Glue Repairs Fail and Why It Matters
Super glue failures often create extra damage—whitening, surface staining, wasted parts, and repeated breakage. Understanding the “why” behind CA failures helps you pick the correct glue type, prevent cosmetic issues, and achieve a repair that lasts under real-world stress.
Why it matter
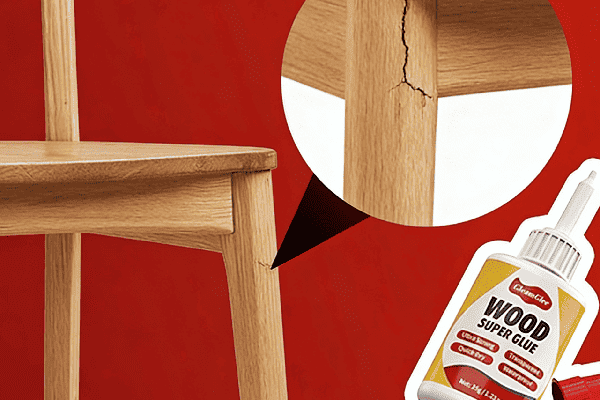
Super glue is frequently used on small but high-value items: plastic clips, appliance tabs, ornaments, phone accessories, craft projects, and household hardware. A failed CA repair can cause:
- Permanent cosmetic damage: “Blooming” (white haze) can dull clear plastic, glossy coatings, and decorative surfaces.
- Weakened future repairs: Excess glue forms a brittle layer that blocks fresh adhesive from contacting the real substrate.
- Increased part loss: Misalignment during instant set can make a repair unusable even if it “sticks.”
- Hidden structural risk: Some CA bonds feel hard quickly but are not fully cured; early stress can create micro-cracks that fail later.

The four common root causes

- Surface contamination: oil, silicone residues, wax, dust, skin lotion, mold-release agents.
- Bad joint geometry: large gaps, poor fit, uneven contact pressure.
- Wrong formulation choice: thin CA used on vertical surfaces; gel used where tight fit needs wicking; brittle CA used on impact/vibration joints.
- Cure environment and handling: high humidity + excess glue causes blooming; moving the joint during set causes micro-failure; load applied too early causes creep/break.
“Failure Mode” table
| Failure Symptom | Likely Cause | What to Change Next Time |
|---|---|---|
| Pops off cleanly | Poor wetting / oily surface / low surface energy plastic | Degrease; roughen; identify plastic; use primer or different adhesive |
| Snaps with brittle fracture | Thick glue line / gap / impact stress | Improve fit; use less glue; consider toughened CA |
| White haze around joint | Excess glue + humidity + poor ventilation | Use minimal glue; ventilate; choose low-bloom CA |
| Joint shifts / bonds crooked | No dry-fit + instant grab | Dry-fit first; use gel or medium; hold steady longer |
| Bonds to fingers | Over-application + rushing alignment | Use tools; apply micro-drops; keep acetone remover available |
What Is Super Glue (CA) and How Does It Work?
Different Substrates, Different Glue Needs
The word “PVC” covers several different products: rigid pressure pipes, soft inflatables, foamed sign boards and vinyl floors. Each behaves differently under load, temperature and chemicals, so each category benefits from its own adhesive strategy.
Definition and mechanism
- Super glue = cyanoacrylate (CA): a family of fast-curing monomers that polymerize into a hard plastic-like solid.
- Why it cures fast: trace moisture on surfaces triggers polymerization.
- Why “thin bonds” are strong: CA is strongest when the adhesive layer is very thin and the joint is supported by close surface contact.
- Why “thick puddles” weaken: thick CA can cure unevenly, trap air, shrink, or form brittle zones that crack under peel/impact.

Key performance characteristics

- Best at: rigid materials, tight fits, small repairs, fast set requirement.
- Weak at: large-gap filling, flexible peel forces, constant vibration unless toughened.
- Typical set time: 10–60 seconds (varies by formula, humidity, surface).
- Full cure: several hours; maximum strength often overnight.
- Bond style: primarily shear strength on well-fitting rigid joints; lower peel resistance unless toughened.
Compatibility notes
- Often works well: metal, ceramic, wood (small repairs), ABS, PVC, acrylic (with care).
- Often problematic without primer: PP, PE, PTFE; some silicone rubbers and very soft elastomers.
- Cosmetic sensitivity: clear plastics, glossy coatings, glass-like surfaces may show blooming if not controlled.
Key Factors for Choosing the Right Super Glue
Choosing super glue is not just about brand. The best results come from matching viscosity, gap tolerance, impact resistance, whitening control, and environment exposure (water/heat/vibration) to your material and joint design.
The “5-factor” selection framework
- Material surface energy and chemistry
- Low surface energy plastics (PP/PE/PTFE) resist wetting; require primer or alternative adhesive.
- Joint fit and gap size
- Tight fit → thin/medium CA (wicking, high strength).
- Micro-gaps/vertical surfaces → gel CA (control, less run).
- Load type
- Shear load on rigid joint → standard CA works.
- Peel/impact/vibration → toughened/impact-resistant CA recommended.
- Appearance requirement
- Clear or decorative work → low-bloom / low-odor CA and minimal application.
- Environment
- Frequent water exposure, heat, outdoor conditions → may require alternative systems or reinforced joint design; CA performance varies widely by use case.
Super glue type comparison table
| CA Type | Typical Viscosity | Best For | Main Benefit | Main Limitation |
|---|---|---|---|---|
| Thin CA | Very low | Tight fits, hairline cracks | Wicks into micro-gaps; clean bond line | Runs easily; less control on vertical joints |
| Medium CA | Moderate | General repairs | Balanced control + penetration | Not true gap filler |
| Gel CA | High | Vertical surfaces, tiny gaps | No-drip control; better positioning time | Can reduce strength on very tight joints if overused |
| Toughened/Impact CA | Varies | Vibration/impact joints | Better peel/impact resistance | May set slower; often higher cost |
| Low-bloom/Low-odor CA | Varies | Clear/decorative surfaces | Reduced whitening | Still needs ventilation + minimal glue |
| CA + Primer System | Any | PP/PE/PTFE | Enables bonding of difficult plastics | Extra step; primer must match substrate |
Material suitability quick table
| Material | CA Suitability | Recommended CA Type | Special Note |
|---|---|---|---|
| Ceramic/Porcelain | High | Thin/Medium | Best with clean, tight fit |
| Metal | High | Medium | Degrease thoroughly |
| Wood (small) | Medium | Medium | Not for structural load joints |
| ABS/PVC | Medium–High | Medium/Gel | Test on hidden area |
| Acrylic | Medium | Medium/Low-bloom | Risk of crazing; use carefully |
| Rubber (non-silicone) | Medium | Toughened/Gel | Keep bond line thin |
| PP/PE/PTFE | Low (without primer) | CA + primer | Identify plastic first |
| Silicone rubber | Low | Usually not CA | Use silicone-specific adhesive |
Step-by-Step Method: How to Use Super Glue Correctly
A strong CA repair is a repeatable process: prepare the surfaces, ensure a tight fit, apply a micro-amount, clamp without movement, and allow full cure. This section provides a precise 7-step workflow plus a mistake-correction table.
The 7-step workflow
Step 1 — Apply minimal glue (micro-dose rule)
- One small drop is often enough.
- Spread thinly by pressing parts together; avoid puddles.
Step 2 — Press and hold without shifting
- Hold 30–60 seconds.
- Do not twist, slide, or reposition during set.
Step 3 — Clean and degrease
- Use isopropyl alcohol (IPA) for most surfaces.
- For metal, remove oils completely; avoid leaving lint or fingerprints.
Step 4 — Create micro-texture (when appropriate)
- Lightly sand glossy surfaces (400–800 grit).
- Wipe away dust; dust left in the joint acts like a weak layer.

Step 5 — Identify the material and joint type
- Ask: Is it rigid or flexible? Is the fit tight or gapped? Will it face vibration, water, or heat?
- If it’s PP/PE/PTFE or soft silicone rubber, plan for primer or alternative adhesive.
Step 6 — Dry-fit alignment (before any glue)
- Confirm the parts meet correctly and stay in place under light pressure.
- If parts rock or there’s a visible gap, CA may fail unless using gel/toughened and reinforcement.
Step 7 — Protect during cure and allow full cure
- Keep undisturbed for 10–30 minutes before handling.
- For maximum strength, wait several hours—overnight is ideal before load, washing, or stress.
Step vs Mistake vs Correct Action
| Step | Common Mistake | Correct Action (What to Do Instead) |
|---|---|---|
| Dry-fit | Gluing without alignment check | Test-fit first; fix fit issues before gluing |
| Cleaning | Wiping once, leaving oil/silicone | Degrease with IPA; air-dry fully |
| Sanding | Skipping on glossy surfaces | Lightly roughen; remove sanding dust |
| Application | Using a puddle “for strength” | Use the smallest drop possible |
| Holding | Repositioning while setting | Hold steady 30–60s, no movement |
| Curing | Loading right after it feels hard | Wait longer; full cure is hours |
| Finishing | Touching wet CA causing bloom | Use minimal glue; ventilate; avoid humidity |
“When to reinforce” guidance
Use reinforcement when:
The joint is thin, receives peel force, or vibrates.
The part is structural or load-bearing.
Reinforcement options: mechanical support, tight clamping, or redesign of the joint (increase contact area). CA alone is often not ideal for high-load structures.
Troubleshooting: Why Super Glue Fails
Most super glue problems can be diagnosed quickly by symptom. Use the sections below to identify the cause and apply a targeted fix—often by changing surface prep, glue amount, viscosity choice, or cure handling rather than switching products blindly.
Whitening / Blooming
What it is: A white residue that appears near the joint.
Common causes:
Excess glue (too much vapor)
High humidity
Poor ventilation / enclosed space
Fixes:
Apply less glue (micro-dose)
Improve ventilation
Consider low-bloom CA for clear/decorative work
Avoid touching or wiping during cure (smears residues)
Weak bond
Common causes:
Oily/dirty surface
Low surface energy plastic (PP/PE/PTFE)
Large gap; insufficient contact pressure
Fixes:
Degrease and dry fully
Identify plastic; use primer or alternate adhesive
Improve fit; use gel only for micro-gaps; clamp firmly

Brittleness / cracks after impact
Common causes:
Thick glue line (brittle layer)
Peel forces rather than shear
Vibration/impact use case
Fixes:
Reduce glue amount; improve fit
Use toughened CA for impact/vibration
Reinforce joint or increase contact area
Cures too fast
Common causes:
Thin CA on warm/humid surfaces
No dry-fit plan
Fixes:
Use medium or gel for better control
Dry-fit and stage tools/clamps before applying
Apply smaller amount; press once, don’t reposition
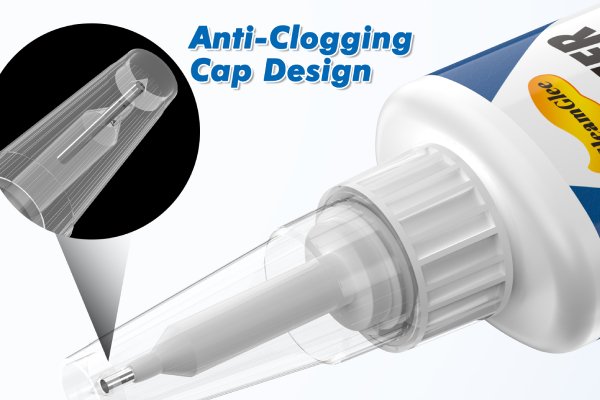
Glue clogs / nozzle hardens
Causes: moisture exposure at tip, residue build-up
Fixes:
- Wipe nozzle clean before closing
- Store sealed, cool, dry
- Avoid leaving cap off during work
Bonds to skin
Safety note: Do not pull forcefully.
Practical steps:
- Soak in warm soapy water
- Gently roll skin apart
- Acetone-based remover can help (use carefully; avoid sensitive skin)

Troubleshooting summary table
| Symptom | Most Likely Cause | Best Next Adjustment |
|---|---|---|
| White haze | Excess glue + humidity | Less glue + ventilation + low-bloom |
| Pops off | Oil/PP/PE/PTFE/poor fit | Degrease + primer/alternative + improve fit |
| Cracks | Thick bond line + peel/impact | Less glue + toughened CA + reinforce |
| Misaligned | No dry-fit + instant set | Dry-fit + gel/medium + steady hold |
| Skin bonding | Rushing + over-application | Tools + micro-drops + safe removal steps |
Our Practical Approach (GleamGlee): R&D + Usability + Consistency
In real repairs, performance depends on formula + packaging + instructions + user behavior. Our approach focuses on repeatable outcomes: clearer selection guidance, stable packaging, and practical “how-to” steps that prevent common CA failures like blooming and weak bonds.
How we think about super glue outcomes
In our product work across adhesives and repair categories, we see a consistent pattern: users want speed, but they keep the repair only if it is also neat, reliable, and predictable. For super glue, that predictability comes from four pillars:
- Clear selection logic
- Users need to know when thin/medium/gel/toughened is appropriate.
- A product without scenario guidance increases failure rates.
- User-proof application design
- Many failures come from over-application. Packaging and tip control matter: the easier it is to dose micro-amounts, the cleaner the bond line.
- Instruction quality (behavior drives performance)
- “Press for 10 seconds” is often not enough instruction. Strong outcomes require: cleaning, dry-fit, minimal glue, steady pressure, full cure.
- Consistency and stability
- CA is moisture-sensitive. Storage guidance and packaging integrity affect product usability and shelf-life.

What this means for buyers and brand owners

If you’re selecting a super glue product (or sourcing one), evaluate it like a system:
- Does it clearly explain what not to glue (PP/PE/PTFE without primer, silicone rubber, etc.)?
- Does it separate set time vs full cure time?
- Does it include a practical troubleshooting guide (blooming, weak bond, brittleness)?
- Does the packaging support micro-dosing and prevent clogging?
This is also why high-quality landing pages and instructions directly improve real-world outcomes: fewer returns, fewer failures, and fewer “it didn’t work” scenarios caused by mismatched use cases.
FAQs
These FAQs cover the most common super glue questions, including curing time, plastic compatibility, water resistance, whitening, storage, removal, and when to use alternatives. Well-structured Q&A improves user success and helps search engines surface direct answers.
Q1. What is super glue made of?
Super glue is typically a cyanoacrylate (CA) adhesive that polymerizes quickly when exposed to trace moisture.
Q2. How fast does super glue set, and how long to fully cure?
It may set in 10–60 seconds, but full cure often takes several hours. Overnight curing usually delivers the best strength.
Q3. Is gel super glue stronger than thin super glue?
Not automatically. Thin/medium can be strongest on tight fits. Gel is best for vertical surfaces and tiny gaps because it provides control.
Q4. Can super glue bond plastic?
Many plastics (ABS, PVC) can bond well if cleaned and lightly roughened. PP/PE/PTFE often require a primer or a different adhesive type.
Q5. Why does super glue turn white?
White haze (“blooming”) often results from excess glue vapor, humidity, and poor ventilation. Use minimal glue and ventilate.
Q6. Is super glue waterproof?
Many CA bonds resist occasional water, but long soaking, heat cycling, and flexing can weaken them. For constant water exposure, consider alternatives or reinforcement.
Q7. Will super glue work on rubber?
Sometimes. For vibration or peel, use toughened CA and keep the bond line thin. Silicone rubber is usually not a good CA target.
Q8. Does super glue work on metal?
Yes, if the metal is fully degreased and lightly roughened. Oil contamination is the most common failure cause.
Q9. Can I use super glue for load-bearing repairs?
CA is often not ideal for heavy structural loads or high peel forces unless the joint design provides large contact area and reinforcement.
Q10. How do I remove super glue from skin?
Soak in warm soapy water and gently roll apart. Acetone can help but must be used carefully.
Q11. How do I remove cured super glue from surfaces?
Mechanical removal (careful scraping) plus an appropriate solvent/remover may help, depending on the substrate. Always test in a hidden area.
Q12. How should I store super glue to prevent clogging?
Keep it sealed, cool, and dry. Wipe the nozzle clean before closing and avoid leaving it open during use.

Buyer Checklist + Decision Tools
These decision tools convert “adhesive choice” into a simple selection process. They help users pick the correct CA type, avoid incompatible plastics, and evaluate products or suppliers based on performance clarity, instructions, and stability—not marketing claims.
Buyer Checklist
Use this checklist before buying or using super glue:
[ ] Identify the material (metal / ceramic / wood / ABS / PVC / acrylic / rubber / PP / PE / PTFE).
[ ] Confirm joint fit: tight fit, hairline gap, or visible gap.
[ ] Decide viscosity: thin/medium for tight fit, gel for vertical or micro-gap.
[ ] Decide toughness need: standard vs impact-toughened for vibration/peel.
[ ] Consider appearance: low-bloom for clear/decorative surfaces.
[ ] Verify set time vs full cure time.
[ ] Confirm storage and nozzle anti-clog instructions.
[ ] Ensure the instructions include surface prep, minimal dosing, and cure handling.
[ ] Confirm exclusions: PP/PE/PTFE without primer; silicone rubber; high heat areas.

“Ask These Questions” table

| Question to Ask (Product/Supplier) | Why It Matters | Good Answer Signals |
|---|---|---|
| Which viscosity fits tight joints vs micro-gaps? | Prevents dripping, misalignment, weak bonds | Clear scenario mapping: thin/medium/gel |
| Is it impact-toughened? | Improves peel/impact resistance | Toughened option explained with use cases |
| Does it control whitening (low-bloom)? | Critical for clear/gloss projects | Blooming guidance + ventilation tips |
| What materials are not recommended? | Avoids mismatches and failures | Explicit list + primer suggestion |
| Set time vs full cure time? | Prevents early-load failures | Times stated separately and clearly |
| What prep steps are required? | Prep is the main strength driver | Cleaning + sanding + dry-fit guidance |
| Packaging: dosing + clog prevention? | User success depends on usability | Micro-dose control + anti-clog tips |
| Storage + shelf life? | CA is moisture-sensitive | Clear storage conditions + shelf-life range |
Material-to-Method Decision Table

| Material | Recommended Method | Best CA Type | Do Not Do |
|---|---|---|---|
| Ceramic/Porcelain | Clean + tight fit + thin bond line + clamp | Thin/Medium | Don’t flood joint; don’t move during set |
| Metal | Degrease + roughen + firm pressure | Medium | Don’t glue oily metal or touch cleaned surface |
| Wood (small repairs) | Sand + remove dust + clamp | Medium | Don’t use as structural wood joinery |
| ABS/PVC | Clean + light sanding + steady hold | Medium/Gel | Don’t skip dry-fit; avoid thick puddles |
| Acrylic | Gentle prep + minimal glue + ventilation | Low-bloom/Medium | Don’t over-apply; test to avoid crazing |
| Rubber (non-silicone) | Roughen + thin application + cure time | Toughened/Gel | Don’t rely on thick glue line for strength |
| PP/PE/PTFE | Use primer or alternative adhesive | CA + primer | Don’t expect standard CA to bond reliably |
| Silicone rubber | Use silicone-specific adhesive | Not standard CA | Don’t use CA as primary solution |
Get a Clear Recommendation for Your Exact Super Glue Scenario
If you want the fastest path to a durable repair, the key is matching the glue type to the material, joint fit, and environment. Share a few details and we can point you to the most practical approach
CTA
If you’re unsure which super glue type to use—or you’re evaluating a product for a specific customer scenario—send the details below. A clear input set leads to a clear recommendation:
1) Material and surface
- Material name (metal, ceramic, wood, ABS, PVC, acrylic, rubber, PP/PE)
- Any coatings (paint, glossy lacquer, silicone residue)
2) Joint geometry
- Tight fit vs visible gap
- Contact area size (small tab vs large surface)
3) Environment and stress
- Water exposure (occasional splash vs soaking)
- Heat exposure (near engine/electronics vs room temperature)
- Vibration/impact (tool parts, moving components)
4) Appearance requirement
- Must be clear / must not haze / must be paintable
A good repair is less about “more glue” and more about a repeatable method. Once the scenario is clear, choosing the right CA type and steps becomes straightforward.


