 Skip to content
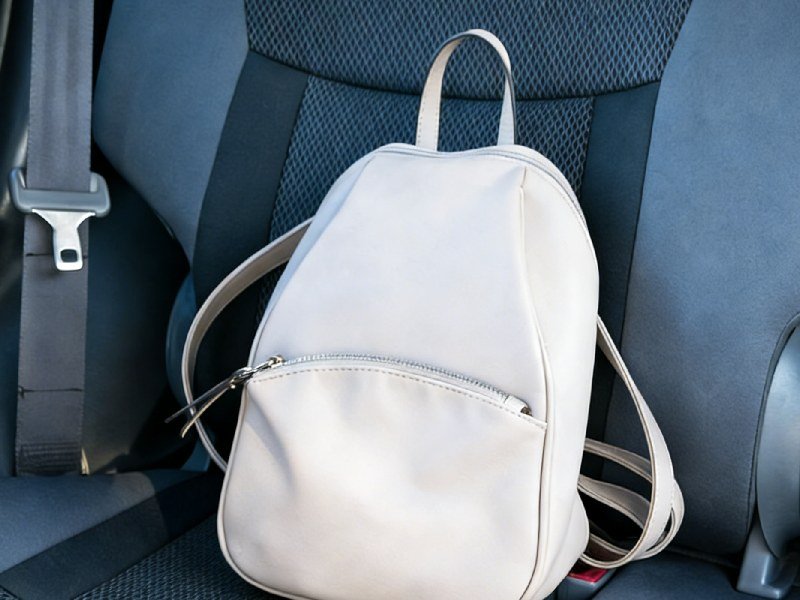
Leather repairs are one of those “looks easy… until it fails” jobs. A sofa edge starts peeling, a car seat seam opens up, or a leather shoe panel lifts. People try a random strong glue, press it for a minute, and feel good—until the bond pops the first time the leather bends. That failure isn’t because leather is “too hard to fix.” It’s usually because leather is too flexible for the wrong adhesive and the wrong prep.
Here’s the real truth: leather-to-leather bonding is more about surface prep and flexibility than raw glue strength. Leather carries oils, conditioners, and wear-polish from daily use. Those invisible residues can cut adhesion dramatically. And if the glue dries rigid, the repair becomes a “hard spot” that cracks under motion.
Direct answer: You can glue leather to leather successfully by using a flexible leather-specific adhesive, cleaning and lightly roughening the bond area when needed, applying a thin controlled layer, pressing firmly, and letting it cure long enough before flexing or loading the repair. Done right, the bond can look clean and last through daily use.
If you’ve ever had a repair fail in 48 hours, don’t blame your hands—blame the process. The next sections break it down in a way you can actually follow at home, even if you’re fixing a high-visibility area like a sofa seat edge or car bolster.
What Is “Glue Leather to Leather” Used For?
Glue leather to leather is mainly used to reattach, seal, or reinforce leather parts that bend, flex, or rub during daily use, when sewing would look messy, cause further damage, or simply isn’t practical. It’s most common in furniture, car interiors, shoes, bags, belts, and leather clothing—especially for edge peeling, seam splits, and layered leather separation.
What people are actually trying to fix
Most users don’t search “glue leather to leather” because they enjoy DIY.
They search because something they use every day is starting to fail, and replacing it is expensive.
The most common real-world use cases fall into three categories:
1) Reattaching leather that has started to peel or lift
This is the #1 reason people use leather glue.
Examples:
- Sofa seat edges peeling upward
- Car seat bolsters lifting near the seam
- Shoe uppers separating from the side panel
- Bag handles where layered leather is coming apart
In these cases, the leather itself is still usable. The failure happens at the bond line, not the material. Glue leather to leather works well here because it can restore contact without adding holes, which stitching would.
2) Closing small splits or seam openings before they grow
Many leather failures start small and get worse fast.
Typical early-stage damage:
- A 1–2 cm split near a seam
- A corner where leather begins to open
- A belt end starting to delaminate
Data from upholstery repair shops shows that small leather splits left untreated often double in length within months due to repeated bending. Glue is often used as a preventive repair, stopping the damage before it becomes structural and expensive.
3) Reinforcing high-flex areas where stitching alone fails
Sewing creates stress points. Every stitch hole weakens leather slightly.
That’s why professionals often combine glue + pressure instead of sewing alone, or use glue when sewing isn’t possible.
High-flex zones where glue performs better than stitching alone:
- Shoe flex lines
- Seat edges and armrests
- Bag straps near hardware
- Jacket elbows and cuffs
A flexible glue spreads stress across the entire bonded area instead of concentrating it at stitch holes.
Where glue leather to leather works best
| Repair Situation | Glue Leather to Leather | Why |
|---|---|---|
| Peeling sofa edge | Very suitable | Large contact area, constant flex |
| Car seat seam opening (small) | Suitable | Clean look, avoids new holes |
| Shoe upper separating | Very suitable | Needs flexibility, not rigid bond |
| Bag strap layers splitting | Suitable | Glue distributes load evenly |
| Large tear under heavy load | Not enough alone | Needs stitching + backing |
| Leather that is crumbling | Not suitable | Material itself is failing |
Simple rule users understand:
If the leather still feels strong when you pinch it, glue can work.
If it flakes, powders, or tears easily, glue won’t save it.
Why many people choose glue instead of sewing
Customers don’t avoid sewing because they’re lazy. They avoid it because:
- Sewing leaves visible holes on finished leather
- Thin or aged leather can tear along stitch lines
- Many repairs are in tight or curved areas where sewing is hard
- Most consumers don’t own leather needles or heavy-duty machines
Glue leather to leather offers:
- No new holes
- Cleaner appearance
- Faster repair
- Less risk of enlarging damage
For visible areas like sofas, car seats, jackets, and bags, appearance matters as much as strength.
How much stress these repairs actually face
To understand why glue choice matters, consider daily stress:
- A sofa seat edge can be compressed 100–300 times per day in an active household
- A shoe flex point may bend 3,000+ times per week
- A bag strap twists and pulls every time it’s lifted
That’s why glue leather to leather is not about “maximum hardness.”
It’s about controlled flexibility over time.
A repair that survives one pull test but cracks after repeated bending is a failure in real life.
What customers usually expect
Most users expect:
- The repair to look clean
- The leather to feel normal
- The fix to last months or years, not days
What glue leather to leather can realistically deliver:
- Long-term durability for small-to-medium damage
- Strong performance in daily-use items
- A repair that blends visually when applied correctly
What it cannot do:
- Rebuild rotten leather
- Replace structural stitching under heavy load
- Fix damage that continues to tear outward
Setting this expectation early builds trust—and prevents misuse.
Which Glue Leather to Leather Works Best?
The best glue for leather to leather is one that stays flexible after curing, grips leather fibers instead of sitting on the surface, and dries clear without leaving stiff or shiny marks. In real use, flexible leather-specific adhesives last far longer than rigid “strong” glues, especially on sofas, shoes, car seats, and bags that bend every day.
Why “strong glue” is the wrong way to choose leather adhesive
Most people pick glue by one word: strong.
That’s exactly why so many leather repairs fail.
Leather rarely fails from straight pulling. It fails from:
- Repeated bending
- Shear force (sliding stress)
- Temperature change
- Daily wear in the same spot
A glue that cures rock-hard can pass a pull test but crack after a few days of sitting, walking, or driving. In leather repair, controlled flexibility beats maximum hardness almost every time.
The four things that actually decide whether a glue works on leather
When professionals choose leather glue, they usually care about these four factors—in this order:
- Flexibility after curing If the glue line turns stiff, the repair will crack.
- Bond stability on smooth or coated leather Many leathers are sealed; the glue must still grip.
- Visual result after drying Shiny edges and dark stains ruin visible repairs.
- Control during application Too much glue causes more failures than too little.
If a glue fails any one of these, it usually fails in real life.
Glue types people actually try and what really happens
| Glue Type | Flex After Cure | Appearance | Real Result on Leather |
|---|---|---|---|
| Super glue (cyanoacrylate) | Very rigid | Clear but glossy | Cracks fast at bend points |
| Epoxy | Rigid | Thick, visible | Hard patch, edge failure |
| Hot glue | Semi-soft | Bulky | Peels with heat and motion |
| General contact cement | Medium | Can stain | Works only on flat areas |
| Fabric glue | Soft | Clear | Often too weak for leather |
| Leather-specific glue | Flexible | Clear, thin | Holds under daily use |
Which glue leather to leather stays flexible?
Flexibility is the single most important trait in leather glue.
Think about how leather is used:
- Shoes flex at the same crease thousands of times
- Sofa edges compress every time someone sits
- Car seat bolsters bend in and out daily
- Bag straps twist under load
A flexible leather glue cures into a rubber-like film that moves with the leather instead of fighting it. This allows the bond to survive repeated bending without cracking.
In contrast, rigid glues create a “hinge point.” The leather bends, the glue doesn’t—and the stress concentrates right at the bond line. That’s why repairs often fail cleanly along the glue edge.
From a practical standpoint, a good test after curing is touch and bend:
- Press the repair with your thumb
- Gently flex it
If it bends smoothly and still feels like leather, the glue choice is right.
If it feels like plastic, the repair is already at risk.
Which glue leather to leather dries clear and looks clean?
Most users care just as much about how the repair looks as how long it lasts.
Clear-drying leather glue matters most for:
- Light-colored leather (white, beige, tan)
- Visible areas (sofas, jackets, car interiors)
- Decorative leather trims and patches
Some glues appear clear when wet but dry cloudy, yellow, or glossy. Others leave a dark “wet edge” around the repair that never fully blends back.
A good leather glue dries:
- Transparent
- Non-glossy
- Thin enough to preserve leather texture
However, appearance isn’t just chemistry—it’s also application. Thick glue layers almost always look bad, even with a good adhesive. Thin, controlled application is what keeps repairs invisible.
Which glue leather to leather works on smooth or coated leather?
Modern leather is often sealed or coated, especially in:
- Car interiors
- Sofas
- Faux leather (PU)
- Fashion accessories
These surfaces resist absorption. Glue can slide instead of anchoring, especially if the surface isn’t cleaned well.
Leather-specific adhesives are designed to grip low-porosity surfaces, not just soak in. They form surface bonds that hold under movement instead of peeling off like tape.
In real repairs, smooth leather failures usually start at the edges. That’s why:
- Light surface prep matters
- Thin glue layers matter
- Pressure during curing matters
Precision application also plays a role. Narrow cracks, seam edges, and lifted corners are easy to over-glue. Fine-tip nozzles help place glue only where it’s needed, reducing stains and edge failure.
How Do You Prep to Glue Leather to Leather?
To prep leather before gluing leather to leather, you need to remove oils and residues, let the surface dry fully, lightly roughen only when needed, and always test the glue on a hidden spot. Good prep improves bond strength far more than using extra glue and is the main reason some repairs last years while others fail in days.
Why prep matters more than glue strength
Most leather glue failures look the same: the glue peels off cleanly, almost like tape. That usually means the glue never bonded to leather—it bonded to oil, conditioner, or polish.
Leather picks up:
- Hand oils from daily contact
- Conditioners and protectants
- Cleaning residues
- Silicone-based sprays (common on car seats and sofas)
Even a thin invisible layer can reduce adhesion dramatically. That’s why prep isn’t optional—it’s the difference between “looks fixed” and “actually fixed.”
Step 1: Clean the leather properly
What customers think cleaning means
“Wipe it quickly.”
What cleaning actually needs to do
Remove oils without damaging the leather.
Best approach that works for most repairs:
- Use a lint-free cloth
- Lightly dampen it with an alcohol-based cleaner or leather-safe degreaser
- Wipe the repair area and 1–2 cm beyond the bond line
- Let it air-dry completely
What to avoid
- Heavy solvents that dry out or crack leather
- Soapy water that leaves residue
- Skipping drying time
Practical test users understand:
After cleaning, touch the area with a clean finger.
If it feels slick, keep cleaning.
If it feels slightly “dry” or squeaky, you’re ready.
Step 2: Decide whether to roughen the surface
Roughening is situational, not mandatory.
Roughen only when:
- The leather is smooth or heavily coated
- The repair area is hidden or low-visibility
- The leather is thick enough to tolerate light abrasion
How to roughen safely:
- Use fine-grit sandpaper (400–600 grit)
- Lightly scuff, not sand
- Stop as soon as the surface loses its shine
Never roughen:
- Thin fashion leather
- Soft lambskin or napa
- Visible grain areas on sofas or jackets
Why this matters:
Over-roughening weakens the leather and creates visible damage that no glue can hide.
Step 3: Dry time is not optional
Leather may look dry on the surface but still hold moisture from cleaning.
Minimum waiting time:
- 5–10 minutes after light cleaning
- Longer in humid or cold environments
Gluing onto damp leather traps moisture, weakens the bond, and can cause clouding or soft spots under the glue.
Step 4: Always test before full application
This step saves expensive mistakes.
How to test properly:
- Apply a tiny drop of glue to a hidden area
- Let it cure fully (not just set)
- Check for:
- Color change
- Stiffness
- Surface reaction
What the test tells you:
- If the glue darkens the leather, you need a thinner layer or different glue
- If it feels hard, it’s not suitable for high-flex areas
- If it stays flexible and clear, proceed
Professionals test even familiar glues when working on new leather types. Consumers should too.
Common prep mistakes that ruin otherwise good repairs
| Mistake | What Happens |
|---|---|
| Skipping cleaning | Glue peels off cleanly |
| Over-cleaning with harsh solvent | Leather dries and cracks |
| Roughening visible leather | Permanent cosmetic damage |
| Gluing while damp | Weak bond, cloudy glue |
| Skipping test | Unexpected stains or stiffness |
How much prep time actually pays off
Most successful leather repairs involve:
- 2–5 minutes of cleaning
- 5–10 minutes of drying
- 1–2 minutes of testing
That small time investment can extend repair life from days to months or years, especially on shoes, seats, and furniture.

How Do You Glue Leather to Leather Step by Step?
To glue leather to leather correctly, apply a thin, even layer of flexible leather glue, align the surfaces carefully, press firmly without sliding, and keep pressure on the repair until the glue sets. Allow full curing time before bending or using the item. Most failures come from rushing this step.
How much glue leather to leather is enough?
More glue does not mean a stronger bond. In leather repairs, excess glue often causes three problems:
- The bond stays soft inside and never fully cures
- The surface stiffens and cracks when flexed
- Glue seeps out and leaves shiny or dark marks
The correct amount is usually less than people expect. A thin, continuous layer that lightly wets both surfaces is ideal. You should still be able to see the leather texture through the glue.
If glue squeezes out when pressed, you’ve applied too much. Wipe it immediately with a clean cloth—don’t let it dry on the surface.
Precision nozzles make a big difference here. Fine-tip applicators allow controlled placement inside cracks, seams, or edges without flooding the area. This is especially important for visible repairs like sofas, bags, and car interiors.
How long should you press glue leather to leather?
Pressure turns glue into a bond. Without pressure, glue can’t fully contact both leather surfaces.
For most leather repairs:
- Apply firm, even pressure for at least 30–60 seconds
- Keep the pieces from sliding during this time
- Use clamps, weights, or tape if the area allows
Flat repairs (sofa panels, bag flaps) benefit from gentle clamping or a weighted object. Curved areas (shoe uppers, seat edges) may require hand pressure followed by tape to hold alignment.
The goal isn’t crushing force—it’s consistent contact.
How long to cure glue leather to leather fully?
This is where patience pays off.
Although many leather glues “grab” quickly, full strength takes longer:
- Initial set: seconds to a few minutes
- Light handling: after 30–60 minutes
- Full cure: typically 12–24 hours, depending on temperature and humidity
Do not bend, stretch, sit on, or wear the item before full cure. Early flexing weakens the bond permanently—even if it feels solid at first.
A simple rule:
If the leather would normally flex during use, wait a full day before using it again.
Is Glue Leather to Leather Strong Long Term?
Yes—when done correctly, glue leather to leather repairs can last for years under normal use. Long-term success depends on using a flexible adhesive, proper surface prep, thin application, and full curing. Glue repairs fail long term mainly when rigid adhesives or rushed curing are involved.
What “long-term” actually means in real use
People often ask if glue repairs are “permanent.” A better question is:
Will it survive how I actually use this item?
For most household, footwear, and automotive repairs, a properly glued leather bond can:
- Withstand daily bending and sitting
- Handle temperature changes
- Resist light moisture and humidity
- Maintain appearance without stiff patches
Is glue leather to leather waterproof enough?
Leather glue is typically water-resistant, not waterproof in the same way as marine adhesives. That’s usually enough for:
- Normal indoor use
- Shoes exposed to light rain
- Car interiors with temperature swings
What it’s not designed for:
- Continuous soaking
- Submersion
- Outdoor leather left in heavy rain for days
For most consumers, water resistance is sufficient—as long as the bond is allowed to cure fully before exposure.
Does glue leather to leather survive bending?
Flexibility is the deciding factor here. A flexible leather glue moves with the leather instead of cracking.
In practice:
- Shoe uppers flex thousands of times
- Sofa edges compress and stretch daily
- Bag straps twist and pull repeatedly
Repairs done with flexible leather adhesive hold up well under these conditions. Repairs done with rigid glue often fail at the first stress point.
A quick test after curing: gently flex the repaired area. It should bend smoothly without visible cracking or sound. If it feels like hard plastic, the glue choice or application was wrong.
When does glue leather to leather fail?
Even good glue has limits.
Glue leather to leather repairs may fail when:
- The leather is dry-rotted or crumbling
- The tear is structural and load-bearing
- The damage keeps spreading under stress
- The surface was heavily waxed and not properly cleaned
In these cases, glue alone can’t stop the damage. Reinforcement (backing patches, stitching, or professional repair) may be necessary.

How Do You Fix a Bad Glue Leather to Leather Job?
You can often fix a bad glue leather to leather job by stopping use early, removing loose or brittle glue safely, re-cleaning the leather to remove oils and residue, and re-gluing with a thin flexible leather adhesive under steady pressure and full cure time. Most “bad repairs” fail because of too much glue, poor cleaning, or bending the leather before it fully cured.
When you should stop and NOT try to “glue over it”
Some jobs are not worth repeated re-gluing because the leather itself is failing.
Do NOT keep re-gluing if:
- The leather is powdery, flaking, or crumbling (dry rot)
- The tear keeps growing even when you press it closed
- The damage is load-bearing (strap tearing near a buckle under heavy weight)
- The surface is heavily coated and you cannot prep without cosmetic damage
In those cases, a better fix is:
- A backing patch + glue
- Stitch + glue
- Professional upholstery/shoe repair
How do you remove glue leather to leather safely?
Most people damage leather during glue removal, not during gluing. The goal is to remove failed adhesive while keeping the leather grain intact.
Step-by-step safe removal:
- Stop using the item (don’t keep flexing it). Flexing drives glue deeper into the surface texture.
- Peel only what is already loose. If it resists, don’t rip—ripping can tear leather fibers.
- Use gentle heat (hair dryer, low setting) for 20–40 seconds to soften adhesive.
- Keep the dryer moving; don’t overheat.
- Roll the softened glue off using a clean cloth or the edge of a plastic card (not metal).
- If glue is brittle and flakes, lift flakes gently—don’t scrape hard.
What to avoid:
- Sharp blades (they cut the grain and leave permanent scars)
- Strong solvent flooding (can discolor and harden leather)
Time reality:
Most small fixes take 10–25 minutes to clean up properly. Rushing removal almost always makes the repair look worse than the original damage.
How do you re-do glue leather to leather cleanly?
Once you remove the failing glue, treat it like a fresh repair—but with extra attention to cleaning, because oils often caused the first failure.
Re-do checklist that works:
- Clean twice, not once:
- First wipe removes dirt and loose residue
- Second wipe removes oils and conditioners
- Let the leather dry fully (usually 5–10 minutes after light cleaning).
- Apply thin glue, not a bead:
- You should not see thick ridges
- A thin wet film bonds better and stays flexible
- Close the surfaces without sliding them around:
- Sliding smears glue and weakens edge contact
- Apply pressure:
- Tape for curved areas, clamp/weight for flat areas
- Wait full cure time before use:
- For high-flex areas, assume 12–24 hours before bending or loading
What changes on the second attempt:
Most people succeed because they stop over-gluing and stop bending too early.
How do you hide marks after glue leather to leather?
Cosmetic damage usually comes from overflow—shiny edges, dark rings, or slight texture changes. You can often reduce the appearance without making the bond weaker.
If you have a shiny glue edge:
- After full cure, gently buff with a clean dry cloth
- Avoid aggressive rubbing (heat can soften some glues)
If you have slight darkening:
- Use a tiny amount of leather conditioner on a cloth and blend outward
- Keep conditioner away from the actual bond line (oils can weaken glue)
If the glue line is raised:
- That usually means too much glue.
- The clean fix is removal + re-glue thin. Trying to “sand it down” often creates a worse-looking patch.
Best prevention tip:
Mask repair edges with painter’s tape before gluing, then remove tape before full set. This reduces edge staining dramatically.
Table: common shortcuts vs results
| Shortcut | Does it work? | Why |
|---|---|---|
| Gluing over old glue | Usually fails | Glue doesn’t bond well to cured glue |
| Adding more glue to a lifting edge | Sometimes | Works only if edge is cleaned first |
| Pressing for 30 seconds then using | Often fails | Full cure not reached |
| Heat curing too aggressively | Risky | Can warp or dry out leather |
| Thin glue + pressure + full cure | Best method | Creates real contact + flexible bond |
Conclusion
Gluing leather to leather isn’t about using the strongest glue you can find—it’s about understanding how leather behaves in real life. Leather bends, stretches, and absorbs oils, which means successful repairs depend on flexibility, surface preparation, and patience more than force. When the right adhesive is applied thinly, on a properly cleaned surface, and allowed to cure fully, even everyday, high-stress items like sofas, shoes, and car seats can be restored in a way that looks clean and feels natural.
What most failed repairs have in common is not bad luck, but rushed steps. Skipping cleaning, applying too much glue, or using the item before the adhesive has fully cured almost always leads to peeling, cracking, or visible glue marks. On the other hand, taking a few extra minutes to prep the leather, control the glue amount, and apply steady pressure can extend the life of a repair from a few days to many months—or even years under normal use.
If you’re repairing leather regularly, or you want results you can rely on, choosing a flexible, leather-specific adhesive makes a real difference. GleamGlee Leather Glue is designed for these exact situations, offering clear drying, controlled application, and long-term flexibility for furniture, footwear, automotive interiors, and accessories. For individual users, it’s a dependable tool for everyday repairs; for brands and businesses, GleamGlee also offers bulk supply and custom formulation options. When leather matters, the right glue—and the right process—turns a temporary fix into a lasting solution.


